Architecture of the California missions facts for kids
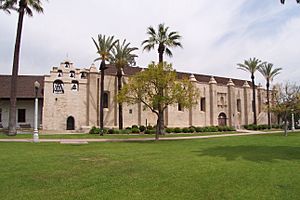
The architecture of the California missions was shaped by a few key things. Builders had limited materials, not many skilled workers, and the priests wanted to make buildings that looked like famous ones back in Spain. Even though no two missions are exactly alike, they all share a similar building style.
Contents
Choosing the Spot and Laying Out the Mission
Even though the Spanish leaders saw missions as temporary, choosing where to build one wasn't just a quick decision. It followed many rules and took months, sometimes years, of planning and paperwork. Once a mission was approved for an area, the priests picked a spot with good water, plenty of wood for fires and building, and large fields for animals and crops.
The priests would bless the site. With help from their soldiers, they built simple shelters from tree branches or stakes, with roofs made of thatch or reeds. These simple huts eventually became the strong stone and adobe buildings we see today.
The first and most important building to start was the church (called iglesia). Most mission churches faced roughly east-west. This helped them get the best sunlight inside. After choosing the church's spot, the rest of the mission was planned around it.
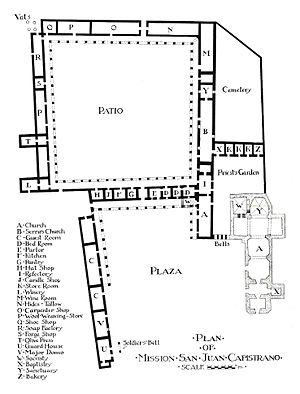
The priests' living areas, dining hall, workshops, kitchens, soldiers' and servants' rooms, storage, and other spaces were usually built around a walled, open courtyard called a patio. This courtyard was often shaped like a square and was used for religious events and celebrations. It wasn't always a perfect square because the Fathers didn't have special tools to measure perfectly; they just measured by foot. If there was an attack, everyone could hide safely inside this courtyard.
All the California missions shared some common design features:
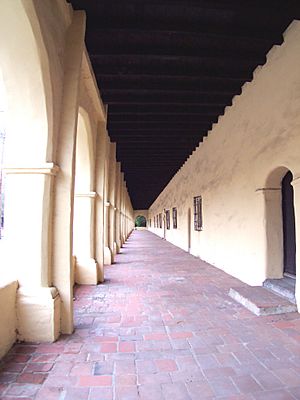
- Arched hallways (corridors).
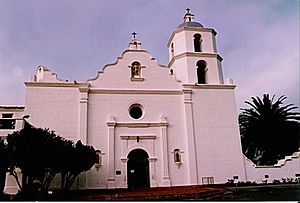
- Curved, decorative gables (the triangular part of a wall at the end of a pitched roof).
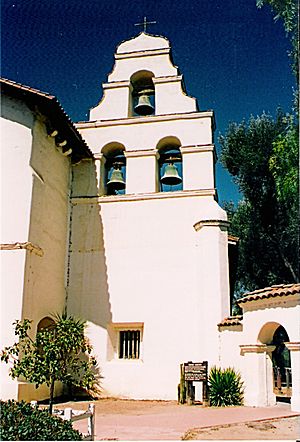
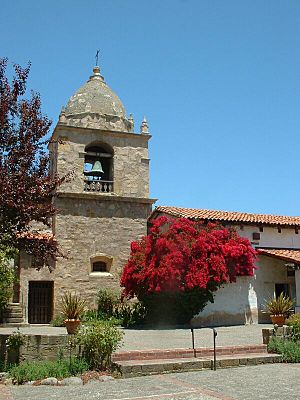
- Bell towers with domes or bell walls (walls with openings for bells).
- Wide, overhanging roofs.
- Large, plain wall surfaces.
- Low, sloping tile roofs.
The California missions don't have as much fancy detail as Spanish buildings in Arizona, Texas, or Mexico from the same time. Still, they are important examples of buildings that fit well with the land where they were built. Some old stories claimed that missions had secret tunnels for escape, but there's no proof of this.
Building Materials
It was hard to get materials from far away, and there weren't many skilled builders. So, the priests had to use simple materials and methods. They gathered what they needed from the land around them. Five main materials were used for the permanent mission buildings: adobe, timber, stone, brick, and tile.
Adobes (mud bricks) were made from earth and water, mixed with straw or animal waste to hold them together. Sometimes, pieces of bricks or shells were added to make them stronger. The soil could be clay, loam, or sandy earth. Making the bricks was simple, using methods from Spain and Mexico. Workers would dig up ground near a water source, soak it, and then stomp the wet earth with their bare legs until it was a smooth mix.
This mixture was pressed into wooden molds. Workers would smooth the top by hand. Sometimes, a worker would leave a handprint or footprint on a wet brick, or even write their name and the date. The bricks were then left in the sun to dry. They were carefully turned to dry evenly and prevent cracks. Once dry, they were stacked. California adobes were about 11 by 22 inches, 2 to 5 inches thick, and weighed 20 to 40 pounds, making them easy to carry and use.
Sawmills were almost non-existent. Workers used stone axes and simple saws to shape wood. Often, they just used logs with the bark stripped off. This gave mission buildings their unique look. Wood was used to strengthen walls, as beams (vigas) to support roofs, and for door and window frames.
Most missions were in valleys or coastal plains that didn't have many large trees. So, the padres mostly used pine, alder, poplar, cypress, and juniper trees. Native Americans used wooden carts pulled by oxen to haul timber from as far as forty miles away. At Mission San Luis Rey, Father Lasuén cleverly had his workers float logs downriver from Palomar Mountain to the mission site.
Because large timber was scarce, mission buildings had to be long and narrow. For example, the widest inside measurement of any mission building was about 29 feet, while the narrowest was about 16 feet. The longest building, at Mission Santa Barbara, stretched about 162 feet.
Stone (piedra) was used whenever possible. Since there weren't many skilled stonemasons, builders used sandstone, which was easier to cut but not as strong against weather. To hold the stones together, priests and Native Americans used mud mortar, a technique from Mexico before Columbus arrived. They couldn't get lime for stronger mortar. Sometimes, colored stones and pebbles were added to the mud, giving it a nice texture.
Ladrillos (regular bricks) were made like adobes, but with one big difference: after forming and initial drying, they were baked in outdoor kilns. This made them much stronger than sun-dried adobes. Common bricks were usually 10 inches square and 2 to 3 inches thick. Many buildings made with these fired bricks lasted much longer than adobe ones.
The earliest mission roofs were made of thatch or earth supported by flat poles. Tejas (roof tiles) started being used around 1790 to replace the flammable thatch. These semicircular tiles were made of clay molded over a log section. According to Father Estévan Tapís of Mission Santa Barbara, it took 32 Native American men to make 500 tiles a day, while women carried sand and straw. The clay mixture was first worked in pits by animals' hooves, then shaped on a board. Clay sheets were placed over logs and cut to size, ranging from 20 to 24 inches long and tapering from 5 to 10 inches wide. After trimming, they were sun-dried, then baked in ovens until reddish-brown. The quality of tiles varied depending on the soil. Legend says the first tiles were made at Mission San Luis Obispo, but historian Maynard Geiger says Mission San Antonio de Padua was first. Tiles were much better than straw roofs because they didn't catch fire easily and protected the adobe walls from rain.
How They Built Them
The first buildings had foundations made of stream stones, on which the adobes were placed. Later, stone and masonry were used for foundations, making the walls much stronger. Not much ground preparation was done before building started.
Some early structures were built by setting wooden posts close together and filling the gaps with clay. These buildings had thatched roofs and were whitewashed to protect the clay. This method is called "wattle and daub" (or jacal by the natives). Eventually, builders switched to adobe, stone, or fired bricks. Even when stone or brick was used, adobe was still a main material because stone wasn't always easy to find.
Adobe bricks were laid in layers and held together with wet clay. Because adobe isn't super strong and there weren't many skilled bricklayers, adobe walls had to be quite thick. The thickness depended on the wall's height: low walls were often two feet thick, while the tallest (up to thirty-five feet) needed as much as six feet of material to support them.
Wood timbers were often placed in the upper parts of walls to make them stiffer. Large supports called buttresses were also used on the outside of walls to make them stronger. When walls became too high for workers on the ground, simple wooden scaffolding was built from available lumber. Sometimes, posts were temporarily set into the walls to support walkways. When the wall was done, these posts were removed, and the holes were filled with adobe.
The Spanish had basic hoists and cranes to lift materials to workers on top of buildings. These machines were made of wood and rope, similar to a ship's rigging. Sailors were often hired to help, using their knowledge of ropes to lift heavy loads.
Adobe walls needed protection from the weather, or they would turn back into mud. Most adobe walls were either whitewashed or stuccoed inside and out. Whitewash was a mix of lime and water, brushed onto interior walls. Stucco was a thicker, longer-lasting mix of sand and whitewash, applied to load-bearing walls with a trowel. Walls often had marks or bits of broken tile pressed into them to help the stucco stick better.
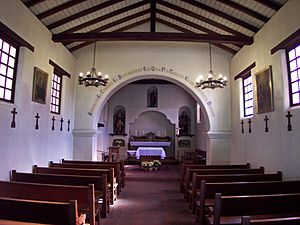
Once the walls were finished, the roof could be built. Flat or sloped roofs were supported by square, evenly spaced wooden beams. In churches, these beams were often decorated with painted designs. Beams rested on wooden supports called corbels, which were built into the walls. Over the rafters, a layer of tules (brush) was woven for insulation, then covered with clay tiles. The tiles were held in place with mortar, clay, or tar. At some missions, skilled stonemasons were hired. For example, in 1797, master mason Isidoro Aguílar came from Mexico to oversee the building of a stone church at Mission San Juan Capistrano. This church, mostly made of sandstone, had a vaulted ceiling and seven domes. Native Americans had to gather thousands of stones from miles away, carrying them by hand or in carts. This church once had a 120-foot-tall bell tower, but it was almost completely destroyed in an earthquake in 1812.
Arched door and window openings, as well as corridor arches, needed temporary wooden supports during construction. Windows were kept small and few, placed high on walls for protection against attacks. A few missions had imported glass panes, but most used oiled animal skins stretched tightly across the openings. Windows were the only light source inside, besides tallow candles made in the mission workshops.
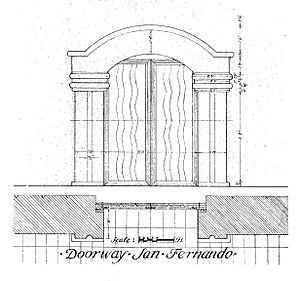
Doors were made of wood planks cut in the carpentry shop. They often had the Spanish "River of Life" pattern or other carved designs. Carpenters used saws to cut logs into thin boards, which were held together by decorative nails made in the mission's blacksmith shop. Nails, especially long ones, were rare in California. So, large pieces of wood like rafters or beams were often tied together with rawhide strips. This type of connection was common in areas like corridors. Besides nails, blacksmiths made iron gates, crosses, tools, kitchen utensils, cannons for defense, and other items the mission needed. Missions relied on cargo ships and trade for iron, as they couldn't mine or process it themselves.
Architectural Features
Since the priests weren't trained architects, they tried to copy buildings they remembered from Spain. The missions show a strong Roman influence in their design and building methods, especially in arches and domes. At Mission Santa Barbara, Father Ripali even looked at the writings of the ancient Roman architect Vitruvius when designing the project.
Besides domes, vaults, and arches, missions also got several architectural features from Spain. One important design element was the church's bell tower. There were four main types:
- The basic belfry: A bell hanging from a beam supported by two posts, usually next to the church's main entrance.
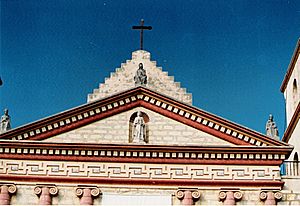
- The espadaña: A raised, often curved and decorated gable at the end of a church. It didn't always hold bells but made the building look more impressive.
- The campanile: A large tower holding one or more bells, usually with a dome and sometimes a lantern on top. This is probably the most famous type of bell support.
- The campanario: A wall with openings for bells. Most were attached to the church, except for the one at Pala Asistencia, which stands alone. The campanario is special because it was unique to California.
Other notable features were the long arched hallways (corridors) along interior and many exterior walls. The arches were Roman (half-round), and the pillars were usually square and made of baked brick, not adobe. The overhang created by these hallways had two uses: it provided a cool, shady place to rest, and it kept rain away from the adobe walls.
The main building of any mission was its capilla (chapel). Chapels generally followed the design of Christian churches in Europe but tended to be long and narrow because of the size of lumber available. Each church had a main section (the nave), a baptistry near the front entrance, a sanctuary (where the altar was), and a sacristy at the back where items for Mass were stored and priests got ready. In most churches, stairs near the main entrance led up to a choir loft.
Decorations were often copied from books and painted by Native American artists. These religious designs show a mix of Spanish style and the unique touch of the Native American artists.
The style of mission architecture has greatly influenced modern buildings in California. Many public, business, and home buildings now feature the tile roofs, arched doors and windows, and stuccoed walls that define the "mission look." This style is often called Mission Revival architecture. When done well, a mission-style building feels simple, strong, and comfortable, staying cool in the heat and warm in the cold.
Infrastructure
Stone aqueducts, sometimes miles long, brought fresh water from rivers or springs to the mission. Baked clay pipes, joined with lime mortar or tar, carried the water into reservoirs and gravity-fed fountains. The water then flowed into waterways, where its force could turn grinding wheels, presses, and other simple machines. Water brought to the mission itself was used for cooking, cleaning, watering crops, and drinking. Drinking water was filtered through layers of sand and charcoal to remove impurities.
Furniture
"Mission oak" furniture, influenced by early mission styles, is similar to the Arts and Crafts style. It uses oak wood, often with its natural golden color that ages to a rich brown. Legs are usually straight, not tapered, and surfaces are flat. This furniture is heavy and solid, giving a feeling of strength and simplicity, focusing on function rather than lots of decoration.
See also
 In Spanish: Arquitectura de las misiones de California para niños
 | Selma Burke |
 | Pauline Powell Burns |
 | Frederick J. Brown |
 | Robert Blackburn |


