Penny Black printing plates facts for kids
The Penny Black was the world's first adhesive postage stamp, released in Great Britain in 1840. The special plates used to print the Penny Black, the two pence blue stamp, and the VR official stamp were all made by a company called Perkins Bacon. They were the official printers for these very first stamps.
Contents
How Stamp Printing Plates Were Made
Making the printing plates for these early stamps was a long and tricky process. This was done on purpose to make it almost impossible for anyone to fake or copy the stamps.
Step 1: Engraving the Background
First, artists started by engraving a special background design onto a piece of soft steel. They used a tool called a rose engine. This machine created a circular, symmetrical pattern. Then, parts of this pattern were carefully removed to leave a square shape. In the middle of this square, an area was cleared out in the shape of Queen Victoria's head. This space was left ready for the next step.
Step 2: Engraving Queen Victoria's Head
Next, the steel piece, now called a 'die', went to expert engravers. They used a sketch given to them by Henry Cole, who helped create the Penny Black. The engravers carefully carved Queen Victoria's head into the center of the die.
Step 3: Adding Text and Stars
After the Queen's head was done, the words like "POSTAGE" and "ONE PENNY" were engraved at the top and bottom of the die. Small squares were also added in the corners. These squares were for the stars and special 'check letters' that appeared on each stamp. Finally, the stars themselves were engraved into the top corner squares.
Step 4: Creating the Transfer Roller
Once the main design was complete, the die was made very hard. Then, many copies of the design were pressed onto a special tool called a transfer roller. As its name suggests, this roller was used to transfer the stamp image from the die onto the much larger printing plate. After all the images were on the roller, it was also hardened.
Step 5: Making the Full Printing Plate
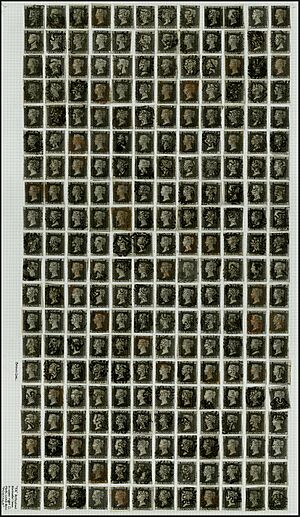
A large sheet of soft steel was prepared. It was big enough to hold 240 stamp images. These images would be arranged in 20 rows, with 12 stamps in each row. Small guide dots were marked on this plate. Some dots were connected by lines to help make sure the stamp images were placed perfectly. You can still see some of these dots and lines on old stamps! They help collectors figure out which printing plate a stamp came from.
Using the hardened transfer roller, the 240 stamp images were pressed onto the large steel plate with a lot of pressure.
Step 6: Adding Check Letters and Finishing Touches
Finally, the unique 'check letters' were added to the bottom corners of each stamp image. These letters were punched in by hand. Because they were added by hand, their exact position is slightly different on each plate. This difference helps stamp collectors identify which plate a stamp was printed from.
Lastly, words like "POSTAGE" and "ONE PENNY" were added to the edges of the whole sheet using a separate roller. The entire printing plate was then hardened and made ready to print thousands of stamps!


