
Slitherlink facts for kids

Slitherlink is a fun logic puzzle created by a company called Nikoli. It's also known by other names like Fences, Loop the Loop, and Dotty Dilemma.
How to Play Slitherlink
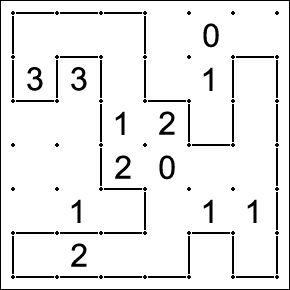
Slitherlink is played on a grid of dots. Imagine a bunch of dots lined up in rows and columns. Some of the squares formed by these dots have numbers inside them.
Your goal is to connect the dots. You can only draw lines horizontally (sideways) or vertically (up and down) between dots that are right next to each other. When you're done, all your lines must form one single, unbroken loop. This loop can't have any loose ends or lines that don't connect to anything.
The numbers inside the squares are clues! A number tells you how many of that square's four sides should be part of your loop. For example, if a square has a "3" in it, three of its sides must have a line. If it has a "0", none of its sides should have a line.
Tips for Solving Slitherlink
When you're solving a Slitherlink puzzle, you'll use logic to figure out where the lines go and where they definitely don't go.
Marking Your Grid
A good way to solve is to mark lines you know are *not* part of the loop. You can put an "X" on these lines. This helps you see what's left.
Sometimes, you might use a small arc (a curved line) between two possible lines. This means that *exactly one* of those two lines must be part of the loop. A double arc means *both or neither* of them must be part of the loop. These arcs aren't strictly needed, but they can help you think through the puzzle.

Every Dot Needs Two or Zero Lines
This is a super important rule! Every single dot on the grid must have either:
- Exactly two lines connected to it (because the loop has to go through it and keep going), OR
- Zero lines connected to it (if the loop doesn't pass through that dot at all).
If you have a dot in the middle of the grid and you've marked three of its possible lines with an "X", then the fourth line must also be an "X". Why? Because if it wasn't, the dot would only have one line, and that's not allowed! The loop can't just stop there. This rule helps you make many deductions.
Corner Clues
- If a 1 is in a corner: The two lines that form the actual corner of the grid (next to the 1) can be marked with an "X". If a line went into that corner, it couldn't leave without breaking the rules for the "1" square.

- If a 3 is in a corner: The two lines that are on the outside edges of that square (not touching the corner of the grid) must be part of the loop. If they weren't, you couldn't get three lines around the "3" square.

- If a 2 is in a corner: Two lines must be drawn away from the "2" along the border of the puzzle.

Rules for Squares with 1
- If a line comes into a corner of a 1: And if one of the three other possible lines from that corner (the one not next to the "1" square) is already an "X", then the two sides of the "1" square opposite that corner can also be marked with an "X".

- If two 1s are diagonal to each other: Look at the eight lines around these two squares. Either the four "inner" lines (closest to the shared point) or the four "outer" lines (further away) must all be "X"s.


- If two 1s are next to each other on the edge of the grid: The line between them can be marked with an "X". If it were part of the loop, it would have nowhere to go when it reached the edge.
A Rule for Squares with 2
If a "2" square has one of its sides marked with an "X", then a line coming into either of the two corners *not* next to the "X" cannot immediately turn away from the "2". This means the incoming line must continue along one of the "2" square's sides. The second line for the "2" must then be on the only remaining open side, next to the "X" line.

Rules for Squares with 3
- If a 3 is next to a 0: All sides of the "3" square can be filled in, except for the side touching the "0". Also, the two lines that are perpendicular (at right angles) to the "3" and "0" can be filled.

- If two 3s are next to each other: The line between them must be filled in. Also, the two outer lines (parallel to the middle line) must be filled. The lines will always form an "S" shape around them. This means the lines directly continuing from the middle line cannot be part of the loop, so mark them with an "X".

- If a 3 is diagonal to a 0: Both sides of the "3" that meet the "0"'s corner must be filled. If they weren't, the line ending at the "0"'s corner would have nowhere to go.

- If a line reaches a corner of a 3: There must be lines on both sides of the "3" that are *not* next to that corner. Also, the line going away from the "3" at that corner must be empty (an "X").

Diagonal Patterns
- Two 3s diagonal to each other: The edges that do not touch the common point between them must be filled in.

- Diagonal 3s with 2s in between: If you have two "3"s in a diagonal line with only "2"s between them, the outside edges of the "3"s must be filled in, just like if they were directly diagonal.

- Diagonal 2s: If a slanted line meets the corner of a "2" at one end of a diagonal line of "2"s, a similar slanted line can be drawn all the way up the series of "2"s.

- Diagonal 2s ending with a 3: If a line reaches the start of a diagonal line that has one or more "2"s and ends with a "3", then both sides of the "3"'s far corner (farthest from where the line started) must be filled.

Diagonal 3 and 1
- If a 1 and a 3 are diagonal, and the outer two sides of the 1 are X'd out: Then the outer two sides of the 3 must be filled in.

- The opposite is also true: If the outer two corners of the 3 are filled in, then the outer two corners of the 1 must be X'd out.

Diagonal Starting with a 2
- If a line reaches a corner of a "2", and it must continue through one of the two sides of the "2", then exactly one of the other two sides of the "2" must be filled. That line then continues through one of the two sides of the square that is diagonal to the "2".


Closed Areas Rule
Imagine a part of your puzzle grid that gets "closed off" by lines you've drawn. If this closed-off area isn't completely empty, it must have an even number of lines crossing into it from the outside. If an odd number of lines entered, they couldn't all connect inside to form part of the loop. This rule can help you decide if a line should be drawn or not.

Shading the Grid
A helpful trick is to "shade" the areas inside and outside your loop. Once you figure out which side of a line is "inside" the loop and which is "outside", you can shade them different colors.
- If two cells next to each other are the same "color" (both inside or both outside), then there is no line between them.
- If an "inside" cell and an "outside" cell are next to each other, there *must* be a line between them. This helps you figure out where lines go!
Slitherlink Video Games
Slitherlink puzzles have been made into video games! You can find them on the Nintendo DS handheld game console.
- Hudson Soft released Puzzle Series Vol. 5: Slitherlink in Japan on November 16, 2006.
- Agetec included Slitherlink in its Nikoli puzzle collection, Brain Buster Puzzle Pak, which came out in North America on June 17, 2007.
