
Whole wheat bread facts for kids
 |
Whole wheat bread is a special kind of bread. It is made using flour that comes from nearly the entire wheat grain. This means it includes parts of the grain that are often removed from white flour. You might also hear it called wholemeal bread in some places, like the UK. It's a type of brown bread because of its color and ingredients. Sometimes, these loaves have whole or cracked wheat grains on top. This is mostly for looks, not for extra nutrition.
Contents
What is Whole Wheat Bread?
Whole wheat bread is made from whole-wheat flour. This flour contains all the important parts of the wheat kernel. These parts are the bran, germ, and endosperm. The bran is the outer layer, full of fiber. The germ is the embryo, packed with nutrients. The endosperm is the starchy middle part. Using all these parts makes the bread more nutritious.
Where Does the Name Come From?
The word "meal" in "wholemeal bread" actually means "flour." It comes from an old English word, melu. This word is related to "mill," which is where grains are ground into flour. So, "wholemeal" simply means flour made from the whole grain.
Understanding Whole Wheat: What's Inside?
The exact recipe for "whole wheat bread" can be different depending on the country. In some places, the flour must have all parts of the wheat grain in their natural amounts. In other places, a small amount of the wheat germ might be taken out. This is done to help the flour last longer. The germ contains oils that can make the flour go bad faster. Even with a little germ removed, it can still be called "whole-wheat bread."
Reading Bread Labels: What to Look For
It's good to know how to read bread labels. In the United States, you might see "wheat bread" on a package. This can be confusing because most white bread is also made from wheat flour. Often, "wheat bread" in the US has very little whole grain. It might be mostly white flour with caramel coloring added. This coloring makes it look like it has more whole wheat.
In the UK, rules are stricter. Bread labeled "wholemeal" must use 100% wholemeal flour. Also, most flour in the UK has added vitamins and minerals. These include calcium, iron, and B vitamins. Wholemeal flour naturally has enough of these. So, it does not need extra added nutrients.
Making Your Whole Wheat Bread
Let's go through the process step-by-step!
Step 1: Activating the Yeast
- Warm the Water: In your large mixing bowl, pour 1 ½ cups of warm water. Remember, it should feel like a warm bath, not hot. If you have a thermometer, aim for 105°F to 115°F (40°C-46°C).
- Add Sweetener and Yeast: Stir in 2 tablespoons of honey (or maple syrup) until dissolved. Then, sprinkle 2 ¼ teaspoons (one standard packet) of active dry yeast over the water.
- Let it Bloom: Let this mixture sit undisturbed for 5-10 minutes. You'll know the yeast is active when it becomes foamy and bubbly on the surface. This "bloom" shows your yeast is alive and ready to work! If it doesn't foam, your yeast might be old or the water was too hot/cold, and you'll need to start again with fresh yeast.
Step 2: Mixing the Dough
- Add Fat and Salt: To the activated yeast mixture, add 2 tablespoons of olive oil (or melted butter) and 1 ½ teaspoons of salt. Give it a quick stir.
- Gradually Add Flour: Start by adding 2 cups of whole wheat flour to the wet ingredients. Stir with a sturdy spoon or spatula until just combined.
- Continue Adding Flour: Gradually add another 2 to 2 ½ cups of whole wheat flour, about ½ cup at a time, mixing after each addition. The dough will become shaggy and sticky at first. You're looking for a dough that pulls away from the sides of the bowl but is still a bit sticky to the touch. You might not need all the flour, or you might need a tiny bit more – whole wheat flour can absorb liquid differently depending on the brand and humidity.
Step 3: Kneading
- Flour Your Surface: Lightly flour a clean countertop or a large cutting board.
- Turn Out the Dough: Scrape the dough out of the bowl onto your floured surface.
- The Kneading Technique:
Push the dough away from you with the heels of your hands.
Fold the dough back towards you.
Rotate the dough a quarter turn.
Repeat this push, fold, and turn motion.
Why Knead? Kneading develops gluten, which is a network of proteins (glutenin and gliadin) found in wheat flour. As you knead, these proteins link together, forming elastic strands that give bread its structure and chewiness. Think of it like building a stretchy, strong balloon that can hold all the carbon dioxide gas produced by the yeast.
How Long to Knead: Knead for 8-10 minutes. The dough should become smooth, elastic, and less sticky. You should be able to stretch a small piece of dough thin enough to see light through it without it tearing easily (this is called the "windowpane test").
Step 4: First Rise (Bulk Fermentation)
Lightly grease your large mixing bowl with a little oil. Place the kneaded dough into the greased bowl, turning it once to coat the top with oil (this prevents it from drying out). Cover the bowl with a clean kitchen towel or plastic wrap. Place the bowl in a warm, draft-free place. A slightly warm oven (turned off, or just warmed for a minute and then turned off) or a sunny spot on your counter works well. Let the dough rise for 1 to 1 ½ hours, or until it has doubled in size. This is the main fermentation period where the yeast is actively producing gas. Gently poke two fingers into the dough. If the indentations remain, it's ready!
Step 5: Shaping the Loaf
Gently "punch down" the risen dough to release the trapped gases. This is called degassing. It helps create a finer, more even texture in the final bread. Lightly flour your work surface again. Pat the dough into a rectangle, roughly the length of your loaf pan. Starting from one of the longer sides, tightly roll the dough into a log. Pinch the seam closed along the bottom and tuck in the ends. Lightly grease your 9x5-inch (23x13 cm) loaf pan. Carefully place the shaped dough seam-side down into the prepared loaf pan.
Step 6: Second Rise (Proofing)
- Cover Again: Cover the loaf pan loosely with a clean kitchen towel or plastic wrap.
- Warm Spot: Return the pan to a warm, draft-free place.
- The Final Rise: Let the dough rise for another 30-45 minutes, or until it has nearly doubled in size and looks puffy. This second rise is called proofing, and it ensures a light and airy texture.
- Preheat Oven: About 15-20 minutes before the second rise is complete, preheat your oven to 375°F (190°C).
Step 7: Baking
Carefully place the loaf pan into the preheated oven. Bake for 30-40 minutes. As the bread bakes, the heat causes a chemical reaction called the Maillard reaction (named after French chemist Louis-Camille Maillard). This reaction is responsible for the delicious browning of the crust and the complex flavors that develop.
The bread is done when the crust is golden brown and, if you tap the bottom of the loaf, it sounds hollow. For a more accurate check, an instant-read thermometer inserted into the center of the loaf should read between 200°F and 210°F (93°C-99°C).
Step 8: Cooling
As soon as the bread comes out of the oven, carefully remove it from the loaf pan and place it on a wire cooling rack.
Why Cool? It's tempting to slice into a warm loaf, but cooling is essential! The bread continues to cook slightly as it cools, and the internal moisture redistributes, resulting in a better texture and flavor. If you cut it too soon, it can be gummy.
Let the bread cool completely for at least 1-2 hours before slicing.
Explore More Breads
- Graham bread – An early type of whole grain wheat bread.
- Horsebread – A very simple bread from medieval times.
- Kneippbrød – A popular bread in Norway.
- Sprouted bread – Made from grains that have started to sprout.
- Unifine Mill – A type of mill used for flour.
Images for kids
-
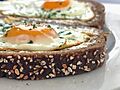
Whole wheat bread served with butter and eggs

