
Battle of Hareira and Sheria facts for kids
Quick facts for kids Battle of Hareira and Sheria |
|||||||
|---|---|---|---|---|---|---|---|
| Part of the Middle Eastern theatre of World War I | |||||||
 Ottoman 10.5-centimetre (4.1 in) howitzer at Hareira |
|||||||
|
|||||||
| Belligerents | |||||||
|
|||||||
| Commanders and leaders | |||||||
| Units involved | |||||||
|
Egyptian Expeditionary Force
|
Yildirim Army Group
|
||||||
The Battle of Hareira and Sheria was a major fight during World War I in the Middle East. It happened on November 6–7, 1917. British-led forces, called the Egyptian Expeditionary Force (EEF), attacked and captured strong defensive positions held by the Ottoman (Turkish) army. These defenses were near Hareira and Sheria, in the middle of the important Gaza to Beersheba line.
For six months, the fighting in this area had been stuck, with neither side gaining much ground. But after the EEF captured Beersheba on October 31, the Ottoman defenses became weak. The EEF was able to attack the Ottoman lines from the side, which was a big surprise.
British infantry divisions, supported by powerful artillery (big guns), fought fiercely. They captured key defensive systems called Kauwukah and Rushdi. As night fell, the British tried to capture Sheria Station. A huge Ottoman ammunition dump exploded, lighting up the night sky. This made it harder for the British to advance.
On November 7, the fighting continued. The British-led forces, including Australian mounted troops, pushed forward. They eventually broke through the Ottoman lines. This victory helped the EEF capture Jaffa a week later and Jerusalem in December 1917.
Contents
Why Were Hareira and Sheria Important?

Before this battle, the main Ottoman army base in the desert was at Hafir el Aujah. But after some earlier battles, Sheria became a very important Ottoman base. It was a major center for supplies and managing troops. Many Ottoman soldiers were kept here as reserves.
Sheria also had a special training center. German and Austrian instructors, along with experienced Ottoman officers, taught new tactics and how to use modern weapons like machine guns. This made the Ottoman defenses very strong.
The Ottoman commander, Erich von Falkenhayn, ordered his armies to set up a strong defensive line north of Beersheba. However, the main British attack on Hareira and Sheria was delayed for two days. This was because of problems getting enough water and transport for the troops.
Getting Ready for Battle

The Ottoman defensive line had been very strong for a long time. After the British captured Beersheba, the Ottoman line was pushed back but not broken. The British needed to capture Hareira and Sheria to create a big enough gap. This gap would allow their mounted troops (like cavalry) to move behind the Ottoman lines and cut off their escape routes.
The British-led forces faced many challenges. One of the biggest was getting enough water for the soldiers and their horses. The area was very dry and dusty. Soldiers described marching through thick clouds of dust, barely able to see their own feet. Horses had to be taken many miles back to Beersheba just to drink.
Despite these difficulties, the British-led forces prepared for a major attack. They carefully studied the Ottoman defenses. During the night of November 5–6, the different divisions moved into their positions, ready to attack.
Ottoman Defenders

The Ottoman forces defending the Gaza to Sheria line had about 33,000 soldiers and 260 big guns. Tel el Sheria was defended by three Ottoman divisions, with about 10,000 infantry soldiers.
The main defenses were two long lines of trenches, about 8 miles (13 km) long. These were called the Kauwukah and Rushdi Systems. They were built across a dry, dusty plain with little cover. The trenches were deep and well hidden. They were designed to stop attacks from the south. However, the wire fences protecting these defenses were not very strong in some places.
The Ottoman forces also had a reserve group called the Zuheilika Group. These soldiers could be sent to reinforce parts of the defense that were under heavy attack.
British Attackers

The British-led EEF gathered four divisions, about 40,000 infantry soldiers, for the main attack. They planned to attack the Kauwukah trench system from the side.
On the morning of November 6, the 74th (Yeomanry) Division was on the right. The 60th (London) Division was in the center, and the 10th (Irish) Division was on the left. These infantry divisions were supported by heavy artillery. Mounted divisions, like the Australian Mounted Division, protected their flanks (sides).
The plan was for the 74th (Yeomanry) Division to first capture the defenses east of the railway. Then, the 60th (London) Division would attack the Kauwukah trenches and move on to capture Sheria.
The Battle Begins
November 6: Attacking the Defenses

The British-led attack on Hareira and Sheria came from the southeast, moving northwest. This meant they could fire along the length of the Ottoman trenches, which were built to resist attacks from the south.
First Attack: Eastern Defenses
The 74th (Yeomanry) Division launched a surprise attack at 4:00 AM. They attacked about 6,000 yards (5.5 km) of trenches east of the railway. There was no warning artillery fire. The soldiers charged across open land. Despite strong resistance, they quickly captured their first objectives. They even captured a circular fort after a fierce fight, taking 70 prisoners. The 74th Division advanced rapidly, capturing several positions by 6:00 AM. By 1:15 PM, they reached the railway, their final goal.
Capturing Kauwukah

At 8:00 AM, the 60th (London) Division and part of the 10th (Irish) Division began their advance. They moved forward in a special formation to reduce casualties from artillery fire. The artillery fired to cut the enemy's wire fences.
The attack on the Kauwukah and Rushdi trench systems began after the 74th (Yeomanry) Division captured the railway. British soldiers advanced through heavy machine gun and artillery fire. They ran across open ground, with bullets kicking up sand like "hailstones." Many soldiers fell, but others kept pushing forward.
The London Regiment battalions quickly drove the enemy out of their defenses. They captured prisoners and guns. By 2:00 PM, the entire Kauwukah system was captured. The attackers suffered about 1,300 casualties, but they captured over 600 prisoners and 12 guns. The large number of British-led forces attacking from the side made the victory "inevitable."
Rushdi Defenses and Sheria Station

After Kauwukah, patrols pushed towards the Rushdi defenses. These were quickly captured by the 179th Brigade and the 31st Brigade (10th Division). The way was now open for an advance to Sheria. Ottoman forces began to retreat to the strong Hareira Redoubt, a fort on the other side of the Wadi esh Sheria (a dry riverbed).

The 60th (London) Division then turned north at 4:30 PM, aiming to cross the Wadi esh Sheria and capture Sheria. They captured Sheria railway station at 5:50 PM. However, they were stopped from crossing the wadi to capture Tel esh Sheria, a large mound with defenses.

Soon after 7:00 PM, as British soldiers advanced, a huge ammunition dump near Sheria station exploded. The entire area lit up, exposing the attacking troops. This made them easy targets for Ottoman machine guns. The attack across the wadi was postponed until the next morning.
November 7: Final Push

During the night, the Ottoman commander ordered his armies to retreat about 6 miles (10 km) to a new defensive line. Most of the Ottoman forces in Gaza were evacuated. Meanwhile, the Ottoman 16th Division at Sheria was reinforced by fresh troops.
Capturing Hareira Redoubt
The 10th (Irish) Division attacked the Hareira Redoubt, a very strong fort on a high mound. It had two lines of deep trenches and many machine guns. The Irish soldiers advanced over open ground, facing heavy fire. They were able to work around the fort, threatening to surround it. When the Ottoman defenders realized this, most of them left the redoubt. The Irish soldiers then stormed the position, capturing prisoners and guns.
Taking Tel esh Sheria

The 60th (London) Division resumed its attack on Tel esh Sheria at daybreak. This was a 250-foot (76 m) high mound with strong defenses. The Ottoman defenders fired machine guns and rifles from the mound. The fighting was "especially fierce."
British soldiers charged up the slope, capturing the Ottoman positions. They crossed the railway and advanced further, capturing nearly 100 prisoners. The 60th (London) Division captured Tel esh Sheria in the early afternoon. However, the Ottoman defenders retreated in good order to another ridge, from which they continued to fire on the British.
Light Horse Charge

The Australian Mounted Division was ordered to attack the strong Ottoman position that was holding up the 60th (London) Division. At about 11:00 AM, two regiments of the 4th Light Horse Brigade moved forward. They faced very heavy fire. One troop (a small group of soldiers) of the 11th Light Horse Regiment, not realizing the attack had been halted, charged up the hill. They rode right through the Ottoman lines but were completely wiped out before they could even get their rifles. The rest of the light horsemen continued their attack on foot, but their advance was stopped.
Sheria Falls

Just before dark, the 179th Brigade (60th Division), which had been in reserve, was ordered to capture the strong Ottoman rearguard. The 4th Light Horse Brigade also supported this final assault. Despite heavy fire, the attacking soldiers and light horsemen crossed the Wadi esh Sheria. They drove the defenders from the northern bank with bayonets after some tough fighting. The Sheria position was finally captured.
One British officer described the sight of the mounted troops advancing as "thrilling." They swept across the land, capturing prisoners, guns, a complete train, a hospital, and even a bakery that was still working!
The British-led forces suffered about 5,500 casualties in these battles. But they captured 2,177 prisoners, 45 guns, and many machine guns.
What Happened Next?

When the British-led forces broke through at Sheria, the Ottoman army did not have enough extra troops to stop them. The Ottoman forces used November 7 to retreat in an organized way. They destroyed supplies and depots as they went. They used well-placed rearguards (small groups of soldiers who stay behind to fight) to slow down the British.
The British-led forces continued their pursuit. On November 8, they captured water sources at Jemmameh and Huj. The Australian Mounted Division and the 60th (London) Division advanced to capture Huj. During this advance, the 5th Mounted Brigade made another successful mounted charge, capturing more guns.
The capture of Hareira and Sheria was a crucial victory. It allowed the British-led forces to break through the Ottoman defenses. This opened the way for further advances, leading to the capture of Jaffa and Jerusalem later in 1917.
Images for kids
-
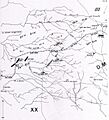
Falls Map 8 deployments in the Tel el Khuweilfe area before the attack on November 6

