Night action at the Battle of Jutland facts for kids
Quick facts for kids Battle of Jutland |
|||||||
|---|---|---|---|---|---|---|---|
| Part of World War I | |||||||
 The Battle of Jutland, 1916 |
|||||||
|
|||||||
| Belligerents | |||||||
|
Grand Fleet of the Royal Navy |
High Seas Fleet of the Kaiserliche Marine |
||||||
| Commanders and leaders | |||||||
| Sir John Jellicoe Sir David Beatty |
Reinhard Scheer Franz Hipper |
||||||
| Strength | |||||||
| 28 battleships 9 battlecruisers 8 armoured cruisers 26 light cruisers 78 destroyers 1 minelayer 1 seaplane carrier |
16 battleships 5 battlecruisers 6 pre-dreadnoughts 11 light cruisers 61 torpedo-boats |
||||||
| Casualties and losses | |||||||
| 6,094 killed 510 wounded 177 captured 3 battlecruisers 3 armoured cruisers 8 destroyers (113,300 tons sunk) |
2,551 killed 507 wounded 1 pre-dreadnought 1 battlecruiser 4 light cruisers 5 destroyers (62,300 tons sunk) |
||||||
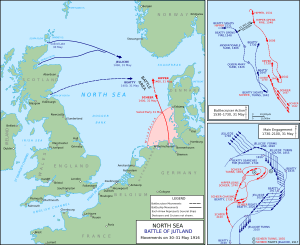
The Battle of Jutland was a huge sea battle during World War I. It happened in the North Sea near Denmark on May 31, 1916, and continued into June 1. It was the only time the main British and German fleets fought directly during the entire war.
For two years, there hadn't been a big naval battle. Many sailors didn't expect this patrol to be different. Both sides made mistakes because they lacked experience in such a large fight.
Contents
The Battle Begins
The battle started when scouting ships from both sides met. This happened around 2:30 PM on the first day.
Chasing and Trapping
First, six British battlecruisers and four fast battleships, led by Sir David Beatty, chased five German battlecruisers. The German ships, led by Franz Hipper, tried to lure the British into a trap. They headed back towards their main fleet. Even though he had fewer ships, Hipper managed to sink two British battlecruisers.
When the main German fleet appeared, the British ships turned around. Now, they tried to lead the Germans back towards the main British fleet.
Main Fleets Meet
Admiral John Jellicoe, leading the British, managed to position his ships well. They cut across the path of the German fleet. The British had some success in a short fight. Then, the Germans, led by Vice-Admiral Reinhard Scheer, turned and pulled back.
Scheer's smaller German force was now cut off from Germany by the British fleet. He tried to approach the British again but was pushed back. He then waited for nightfall to try to escape.
Jellicoe decided not to chase the German fleet as darkness approached. He worried that fighting in the dark would cancel out his advantage in numbers. He was sure his ships would block the Germans from escaping during the night. He planned to restart the battle the next day in better conditions.
Nighttime Strategies
British ships had not practiced fighting at night. German ships, however, had. The Germans had better searchlights and special flares to light up enemy ships. They also used colored lights to recognize their own ships. The British used simple Morse code signals, which the Germans sometimes copied. Scheer decided his best chance was to sneak past the British fleet during the night.
German Escape Routes
Scheer knew of four main ways to escape.
- One route was north-east through the Skagerrak channel. This was the longest way and risky for damaged ships. Jellicoe thought this route was unlikely.
- Another way was through a cleared path in the minefields near Heligoland. But finding the path in the dark was too risky.
- A third choice was around the minefields to the North Frisian coast. This was 180 miles long. Jellicoe thought this was the most likely route for the Germans.
- The shortest route was 100 miles via Horns Reef to the south-east. This meant passing right through the British fleet. Scheer chose this risky route. Jellicoe expected his smaller ships to warn him if the Germans took this path.
British Ship Positions
The British ships got into their night formation around 9:17 PM. The battleships formed four columns, about a mile apart. This was to make it harder for German torpedo attacks.
The battlecruisers, led by Beatty, were about fifteen miles west-south-west of Jellicoe's flagship. They were meant to intercept German ships. Without knowing it, they were actually ahead of the German fleet around 9:30-10:00 PM.
Smaller British ships, like light cruisers and destroyers, were spread out. They were meant to scout and protect the main fleet. Destroyers were placed about five miles behind the main fleet. Jellicoe wanted to keep them away from his big ships to avoid confusion in the dark. However, the destroyers didn't know where other British ships were, which caused problems later.
Around 10:05 PM, the minelayer HMS Abdiel was sent to lay mines near Horns Reef. This was in case German ships tried to escape that way.
German Ship Positions
The German fleet stayed in a single line. Scheer ordered his fleet to head south-east. The older, weaker battleships were moved to the back of the line.
The German battlecruisers, which were badly damaged, were also ordered to the rear. Admiral Hipper had to switch ships because his flagship, SMS Lützow, was too damaged. Lützow eventually sank early the next morning. Some German battlecruisers, like SMS Seydlitz and SMS Moltke, ended up out of position and had to move on their own.
Nighttime Fights and Confusion
Throughout the night, different British and German ships kept bumping into each other. The German fleet was moving from west to east across the back of the British fleet. The fights lasted for hours, but the British never got a clear idea of what was happening. The Germans kept going, but the British were often confused and didn't report what they saw.
German Torpedo Attacks
Scheer ordered his destroyers to make a surprise torpedo attack on the British. Other German destroyer groups also tried to attack.
One German torpedo boat group met the British Second Light Cruiser Squadron and Eleventh Destroyer Flotilla. It was still light enough for the Germans to be seen, so they had to pull back. Another German attack also failed to find its target.
Later, the German ships SMS Frankfurt and SMS Pilau spotted the British Eleventh Flotilla. They fired torpedoes without using lights or guns, so the British didn't even know they were there. The torpedoes missed.
Half an hour later, the Eleventh Flotilla was spotted again. This time, the Germans used searchlights and opened fire. The British ship Castor fired back, and two destroyers launched torpedoes. The fight lasted about five minutes. Castor was hit ten times, killing 12 men. The British commander decided not to chase the Germans.
Cruiser Clash
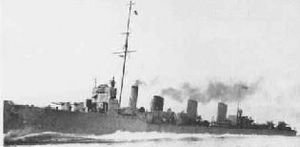
Around 10:15 PM, the British Second Light Cruiser Squadron, led by Goodenough, saw five German ships. After some confusion, both sides opened fire. The British ship HMS Southampton was badly damaged but managed to fire a torpedo. It hit the German light cruiser SMS Frauenlob, which sank with only five survivors.
Destroyer Battles
The British 4th Destroyer Flotilla, led by Captain Charles Wintour, was behind the main British fleet. Around 11:15 PM, they saw three ships approaching. Captain Wintour couldn't tell if they were British or German, so he gave a British signal. The German light cruisers immediately opened fire from only 600 yards away. Behind them, the German battleships SMS Westfalen and SMS Nassau also fired. These were the leading ships of the German fleet, passing behind the British.
The leading British destroyers, including Tipperary and HMS Broke, fired torpedoes before turning away. One torpedo hit the German cruiser Elbing. In the dark, Elbing was then accidentally rammed by the German battleship SMS Posen. Tipperary caught fire and sank around 2:00 AM. Elbing had to be abandoned and sank around 3:40 AM.
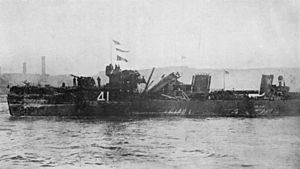
The British destroyer HMS Spitfire tried to help the burning Tipperary. The German battleship Nassau tried to ram Spitfire. Instead, they collided side-to-side. Spitfire lost 60 feet of its side, and Nassau got a hole. Nassau's big guns couldn't aim low enough to hit Spitfire, but their blast blew away Spitfire's mast and funnel. Spitfire still had power and slowly made it back to England.
Around 11:40 PM, the British destroyer Broke saw large ships again. Before it could signal, the German battleship Westfalen turned on its searchlights and opened fire. Broke was hit badly, killing 50 crew and injuring 30. The helmsman was killed, and his body turned the wheel, causing Broke to ram another British destroyer, HMS Sparrowhawk.
Broke and Sparrowhawk were stuck together for about half an hour. Another British destroyer, HMS Contest, then steamed into Sparrowhawk's stern. Contest was mostly fine. Broke and Sparrowhawk eventually separated. Broke could still move, even without its bow, and slowly headed for Britain.
Sparrowhawk could only steam in circles because its rudder was jammed. Around 2:00 AM, a German torpedo boat came very close but then turned away. Later, Sparrowhawk saw the German cruiser Elbing sink. Around 6:10 AM, a raft with 23 men from the sunken Tipperary reached Sparrowhawk. British destroyers arrived later, but because of rough seas and possible German submarines, Sparrowhawk had to be sunk by British fire to prevent it from falling into enemy hands.
Last Torpedo Attack
The British 12th Flotilla, led by Captain Stirling, was behind the main British fleet. Around 1:43 AM, they saw German ships. They attacked, firing 17 torpedoes. The German battleship Pommern was hit by a torpedo and exploded. Stirling tried to report this, but his messages didn't reach Jellicoe. If they had, Jellicoe might have been able to intercept the German ships before they reached their safe minefields.
Why the Battle Matters
The Battle of Jutland has been debated for a long time. Many people felt the British fleet, which was stronger, didn't win a clear victory. Some thought Jellicoe was too careful, both during the day and at night.
However, Jellicoe's actions followed a plan agreed upon beforehand. This plan stated that simply having a strong British fleet stopped Germany from controlling the North Sea. This protected British shipping. Taking big risks could mean losing this protection. Both sides believed in keeping their "fleet in being" – meaning just having their fleet ready was important. The Germans avoided big fleet battles throughout the war. They tried to sink smaller British groups to weaken them. But British shipbuilding meant their fleet actually grew stronger during the war.


