Third Transjordan attack facts for kids
Quick facts for kids Third Transjordan attack |
|||||||
|---|---|---|---|---|---|---|---|
| Part of the Middle Eastern theatre of World War I | |||||||
|
|||||||
| Belligerents | |||||||
|
|||||||
| Commanders and leaders | |||||||
| Units involved | |||||||
|
Seventh Army
Fourth Army
|
||||||
The Third Transjordan attack was a key battle during World War I. It took place from September 19 to 25, 1918. This battle was part of a larger plan called the Battle of Megiddo.
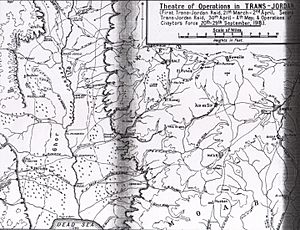
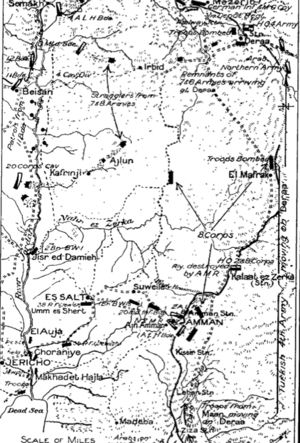
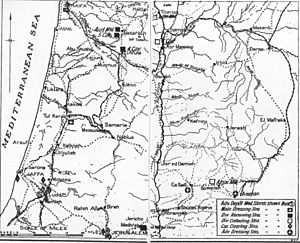
British Empire forces, known as Chaytor's Force, fought against the Ottoman Empire's Fourth Army. The fighting happened in the Jordan Valley and nearby areas. The goal was to cut off the Ottoman army's escape routes and capture important cities like Es Salt and Amman.
The British Empire won this battle. They took control of a lot of land and captured many Ottoman soldiers. This victory helped the British Empire gain control of more territory in the Middle East.
Contents
Why the Battle Happened
After winning battles in Jerusalem and Jericho in 1917 and early 1918, the British Empire's army, called the Egyptian Expeditionary Force (EEF), crossed the Jordan River. They set up bases there.
General Edmund Allenby, who led the EEF, decided to keep control of the Jordan Valley. This was important because it stopped the Ottoman and German forces from feeling too confident. It also helped keep the support of local Arab allies.
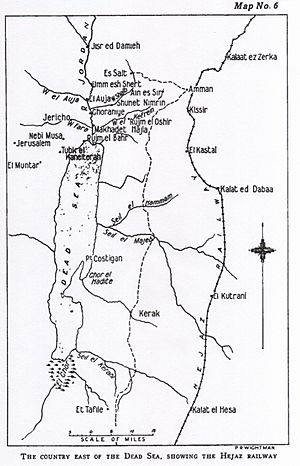
A road from Amman to Shunet Nimrin was a big threat. Ottoman forces could use it to attack the Jordan Valley. Allenby needed to control this road and the bridges over the Jordan River.
He also wanted to capture Tulkarm, Nablus, and the Jisr ed Damieh bridge. Controlling these areas would help his troops and Arab allies.
British Empire's Front Line
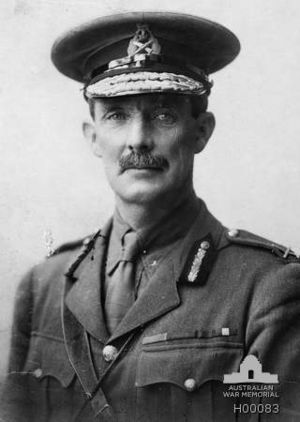
The British Empire's forces, led by Edward Chaytor, held the right side of the battle line. This stretched from the Judean Hills, across the Jordan Valley, and south to the Dead Sea.
This area was watched by Ottoman guns and observation posts. The British Empire made it look like they had more soldiers in the valley than they did. This was to trick the enemy.
Ottoman Empire's Front Line
The Ottoman front line was very strong. It had trenches and barbed wire. They had advanced posts and redoubts (small forts) that were well-defended.
These defenses were especially strong around Shunet Nimrin, a key position. They also had many soldiers in Amman and along the Hejaz railway.
The Battle of Megiddo Begins
The main Battle of Megiddo started on September 19. British Empire infantry broke through the German and Ottoman lines. This allowed their cavalry to ride deep into enemy territory.
The Ottoman armies lost their communication. They couldn't work together against the British Empire. This forced them to retreat north.
Ottoman Commander Escapes
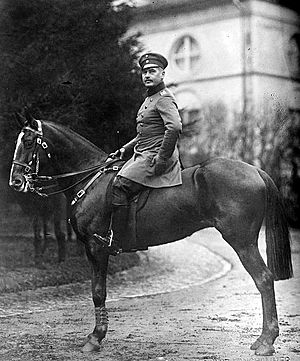
Otto Liman von Sanders, the commander of the Ottoman forces, had to leave his headquarters. He escaped to Deraa. He ordered his Fourth Army to retreat without waiting for other troops.
Getting Ready for Battle
Chaytor's Force Prepares
While other battles were happening, Chaytor's Force protected the right side of the British Empire's army. This force had about 11,000 soldiers. They were a mix of mounted infantry, like the Anzac Mounted Division, and regular infantry.
Air Support
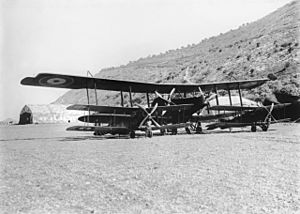
The British Royal Air Force (RAF) provided air support. Planes helped by watching enemy movements and working with artillery. They also bombed enemy targets like railway stations and headquarters.
Large Handley Page bombers dropped bombs on important enemy locations. Other planes patrolled the skies to stop enemy aircraft.
Troops in the Jordan Valley
Chaytor took command of the Jordan Valley area in early September 1918. His force was divided into different sections. Each section had specific units, like light horse brigades and infantry battalions.
Their main job was to advance north and capture the Jisr ed Damieh bridge. This would cut off a major escape route for the Ottoman armies. They also planned to capture Es Salt and Amman.
Early Actions
Chaytor's Force watched the Ottoman lines closely. They sent out patrols day and night. They also made small attacks to test the Ottoman defenses.
On September 17 and 18, they made demonstrations against Ottoman positions. The Ottoman forces fired back with heavy guns.
Ottoman Forces Ready
The Ottoman forces, led by von Sanders, had many infantrymen and machine guns. They were spread out along a long front line.
Fourth Army's Position
The Ottoman Fourth Army had about 6,000 infantry and 2,000 cavalry. They were based in Amman. This army defended both sides of the Jordan River and the road to Es Salt.
They had strong defenses at Shunet Nimrin, which had stopped earlier attacks. They also had forces guarding the Hejaz railway.
Fighting on the Eastern Side (September 19-21)
Chaytor's Force kept up their patrols and attacks on the eastern side. They faced Ottoman units west and east of Baghalat.
On September 19, British West Indies Regiment soldiers captured a ridge south of Bakr Ridge. The next day, they took Bakr Ridge itself.
Aircraft reported that the area was quiet on September 20. But later, they saw many vehicles retreating from Nablus. They also saw fires burning at Nablus railway station.
By September 21, only the Ottoman Fourth Army was still organized. Allenby's next goal was to destroy this army. Chaytor's Force was ordered to advance east to capture Es Salt and Amman.
Capturing Kh Fasail
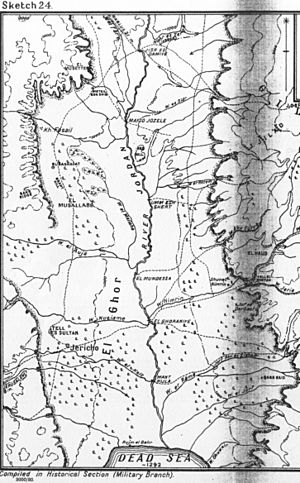
On September 21, the Auckland Mounted Rifles Regiment captured Kh Fasail. This was an important step towards the Jisr ed Damieh bridge. They also found an Ottoman defense line protecting the bridge.
Ottoman soldiers were seen retreating towards the bridge. Chaytor's Force prepared to attack the bridge.
Battle for River Crossings (September 22)
Taking Jisr ed Damieh
Chaytor ordered his troops to cut the road from Nablus to Es Salt and capture the Jisr ed Damieh bridge. This bridge was vital for the Ottoman retreat.
The Auckland and Wellington Mounted Rifles Regiments attacked the bridge. After a tough fight, they forced the Ottoman defenders to retreat. The bridge was captured without being destroyed.
Capturing Other River Crossings
South of the main bridge, other river crossings were also captured. The 38th Battalion Royal Fusiliers took the Umm esh Shert ford.
The 2nd Battalion British West Indies Regiment captured the Mafid Jozel ford. This meant all Ottoman defenses on the western side of the Jordan River, south of the main bridge, were now in British Empire hands.
Air Support on September 22
Aircraft continued to scout the area. They saw that the Ottoman garrison at Shunet Nimrin was still there. But the camp at Rujm el Oshir was gone, and fires were burning near Amman railway station.
By midday, the Ottoman soldiers at Es Salt were quickly packing up. By late afternoon, the entire area east of the Jordan River seemed to be moving towards Amman. British Empire planes bombed and machine-gunned the retreating traffic.
Ottoman Retreat Continues
Liman von Sanders ordered the Fourth Army to retreat towards Deraa. They were to form a new defense line there. Aircraft spotted this retreat from Amman towards Deraa.
Pushing Towards Es Salt (September 23)
Chaytor's Force prepared to attack Shunet Nimrin and other positions. They moved east across the Jordan River towards Shunet Nimrin.
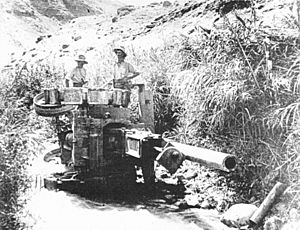
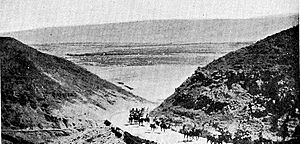
They found a large Ottoman gun, nicknamed "Jericho Jane," abandoned in a gully. This showed the speed of the Ottoman retreat.
Capturing Es Salt
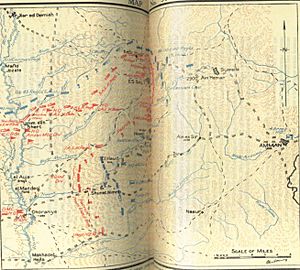
The New Zealand Mounted Rifles Brigade led the advance towards Es Salt. They faced a strong Ottoman defense line outside the town. They attacked and outflanked the defenders.
At 4:20 PM on September 23, Es Salt was captured. Many prisoners, machine guns, and supplies were taken. This was the third time Es Salt had been captured by the British Empire in six months.
Air Support on September 23
At dawn, aircraft saw a long line of Ottoman traffic moving from Es Salt to Amman. They bombed and machine-gunned this column. Eight direct hits on vehicles blocked the road, turning the retreat into a chaotic escape.
Airmen also reported that camps at Samakh and Deraa were burning. They saw trains ready to leave, but the railway lines were cut.
Consolidating at Es Salt
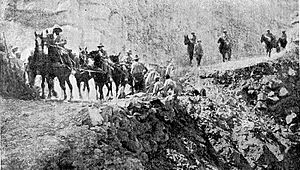
The main road to Es Salt was badly damaged by the retreating Ottoman army. British Empire troops worked to clear it. By the evening of September 24, Chaytor's Force was mostly gathered at Es Salt.
Raid on Hejaz Railway
During the night of September 24-25, a group of soldiers from the Auckland Mounted Rifles Regiment raided the Hejaz railway line north of Amman. They destroyed part of the railway line near Kalaat ez Zerka station. They returned safely without losing any men.
Battle for Amman (September 25)
Amman was a very important city. All Ottoman supplies and reinforcements had passed through it. Now, it was on their main retreat route.
The defenses at Amman were strong. But the ground, which had been muddy before, was now firm. This made it easier for mounted attacks.
Orders were given for the New Zealand Mounted Rifles and 2nd Light Horse Brigades to attack Amman at 6:00 AM on September 25. They were told to attack strongly if the town was lightly defended.
Within two hours, the troops were in sight of Amman and the attack began. They faced heavy fire from Ottoman guns and machine guns. They captured several Ottoman posts and many prisoners.
By 1:30 PM, fighting was happening in the streets of Amman. The Auckland Mounted Rifles Regiment steadily advanced. The 5th Light Horse Regiment entered the southern part of the town.
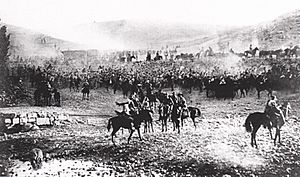
By 4:30 PM on September 25, the Anzac Mounted Division captured Amman. They took between 2,500 and 2,563 prisoners, along with guns and machine guns. The mounted infantry used quick attacks and outflanking moves to overcome the defenses.
Chaytor's Force had 139 casualties in this attack. This included 27 killed and 105 wounded. The Anzac Mounted Division had been a key part of almost every battle in the campaign.
After the Battle
By the evening of September 25, British Empire forces held Amman. They captured a lot of grain and other supplies.
General Allenby planned to keep one cavalry division in Amman. Their job was to cut off enemy troops retreating from the south. Then, they would move to Damascus.
Chasing the Fourth Army North
Only a small part of the Fourth Army was captured at Amman. Most had already started retreating north. Those who escaped by train found the railway line cut by Arab forces.
A large column of retreating Ottoman soldiers was seen at Mafrak. Australian aircraft bombed Mafrak, destroying the railway station and trains. This blocked the railway completely.
The 1st Light Horse Brigade captured the Kalaat ez Zerka railway station. They took prisoners and a gun. They also captured more prisoners and machine guns later.
Only a few thousand Ottoman soldiers managed to escape towards Deraa and Damascus.
Capturing Ottoman Units South of Amman
Chaytor's Force blocked the road and railway at Amman. They prepared to stop the Ottoman II Corps, which was retreating north from Ma'an. This was a large force of about 6,000 soldiers.
The 2nd Light Horse Brigade cut the railway line north of Ziza Station to slow down the Ottoman II Corps. On September 28, aircraft located the Ottoman force at Ziza. They dropped a message telling them to surrender.
Negotiations began on September 29. The Ottoman force at Ziza agreed to surrender. The bombing raid was canceled.
The 2nd Light Horse Brigade arrived at Ziza. Local Arab tribes, called the Beni Sakhr, surrounded the Ottoman force. They wanted the Ottoman soldiers handed over to them, but this was refused.
Chaytor arrived and told the Ottoman commander to be ready to defend his men during the night. The Ottoman commander agreed to be a hostage for his men's cooperation. British Empire troops moved into the Ottoman position to protect them from the Beni Sakhr.
On September 30, the New Zealand Mounted Rifles Brigade arrived to take over. They collected 14 guns, 35 machine guns, and many other supplies. The 5th Light Horse Regiment marched 4,068 prisoners north to Amman.
In total, Chaytor's Force captured over 10,000 prisoners and many guns and supplies during these operations.
Medical Care and Health
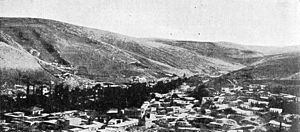
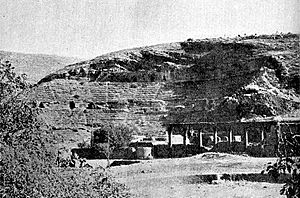
Medical units followed the troops to Es Salt and Amman. A dressing station was set up in the ruins of the Roman amphitheater in Amman. They treated many sick and wounded soldiers.
Two Ottoman hospitals in Amman were found with many patients. These patients and Ottoman medical staff were moved to Jerusalem. Many British and Indian soldiers were also evacuated.
Many soldiers got sick with malaria. This was because they had been in the hot, humid Jordan Valley for months. The change in climate to the colder Amman area caused the disease to appear.
Malaria was very serious. Soldiers had high fevers and sometimes became delirious. Many died or had their health permanently damaged.
Returning Home
The New Zealand Mounted Rifles Brigade returned from Ziza to Amman, then to Ain es Sir. They left the Jordan Valley for the last time.
They rode through Jerusalem and then rested near Richon le Zion. Many soldiers were still sick with malaria, but the campaign was over.


