Battle of Mersa Matruh facts for kids
Quick facts for kids Battle of Mersa Matruh |
|||||||
|---|---|---|---|---|---|---|---|
| Part of the Western Desert Campaign of the Second World War | |||||||
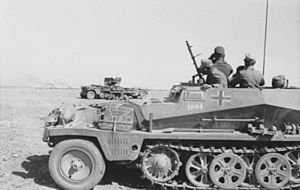
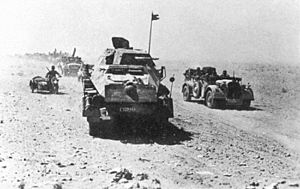 Kampfgruppe Graf of the 21st Panzer Division. |
|||||||
|
|||||||
| Belligerents | |||||||
| Commanders and leaders | |||||||
| Strength | |||||||
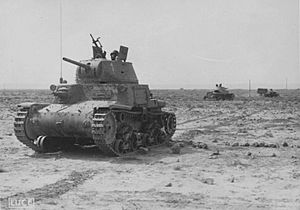
| 200 tanks | German: 60 tanks Italian: 40 tanks |
||||||
| Casualties and losses | |||||||
| 8,000 killed, wounded or captured (c. 6,000 prisoners at Mersa Matruh) 40 tanks |
|||||||
The Battle of Mersa Matruh was a fight during the Second World War. It happened from June 26 to 29, 1942. This battle was part of the Western Desert Campaign in North Africa.
The British Eighth Army had just lost the Battle of Gazala. They were retreating into Egypt. The German-Italian Axis forces, led by Erwin Rommel, chased them. Rommel wanted to defeat the British soldiers one by one before they could get organized again.
During the battle, the Axis forces captured the port of Mersa Matruh. They also took about 6,000 prisoners and a lot of supplies. The Axis managed to cut off the British retreat route. But they were not strong enough to stop the British from breaking out and escaping.
Contents
Why the Battle Happened
After losing the Battle of Gazala, the British Eighth Army had to pull back. They left soldiers in Tobruk, hoping it would hold out. But the Axis capture of Tobruk happened very quickly. This was a big shock for the British. It meant Rommel's army now had a port and plenty of supplies.
The Germans and Italians could now invade Egypt for a second time. Rommel pushed his army hard, right behind the British. He wanted to fight the Eighth Army and defeat them quickly. He knew his forces were tired from Gazala. But he still had speed and clever tactics.
Claude Auchinleck, the British commander, decided to take charge of the Eighth Army himself. He wanted to make the army more mobile. He also made it clear that keeping the army together was most important. The last strong defense line before Alexandria was at El Alamein. Auchinleck started preparing defenses there. But he also planned to fight a moving battle from Mersa Matruh to El Alamein.
The British needed to slow down the Axis advance. They tried to set up a defense at the border between Libya and Egypt. But there wasn't enough time. So, the British decided to fall back to Mersa Matruh. British soldiers tried to destroy their fuel and ammunition at the border. Then they moved back without fighting the Axis army.
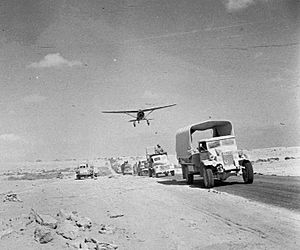
Rommel got permission to chase the British into Egypt. He found more fuel and equipment left behind by the British. He pushed forward without stopping. The British air force started attacking more often. This was because they were closer to their bases. The German and Italian air forces were further away.
Getting Ready for Battle
Mersa Matruh Location
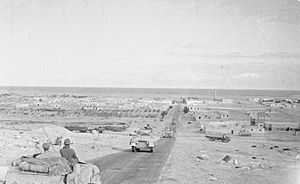
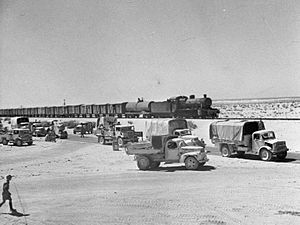
Mersa Matruh was a small port town. It was about 120 miles east of the border. A railway line connected it to Alexandria. The town was on a narrow flat area near the coast. This plain went inland about 10 miles to a steep slope. Further south was another plain. Beyond that was the high desert.
The western side of the town had minefields. These were also put around the southern side. But the eastern side was still open. There was also an airfield nearby. The main road for retreat went right through the town.
Axis Plans
Rommel wanted to defeat the British army piece by piece. He hoped to trap many British soldiers in Mersa Matruh. He thought there were four British infantry divisions (large groups of soldiers) there. He planned to use his German units to push away the British tanks. Then, his 90th Light Division would cut off the British soldiers in Matruh.
German scouting units reached Mersa Matruh on the evening of June 25. Rommel planned to attack the next day. But a supply convoy was destroyed, causing a fuel shortage. This delayed the attack until the afternoon. Rommel didn't have much information about where the British troops were. This was partly because of a lack of air scouting. Also, his radio listening unit had been destroyed earlier.
British Plans
Auchinleck had prepared defenses at Mersa Matruh. These positions were taken by X Corps, with two infantry divisions. The 10th Indian Infantry Division was in Mersa Matruh itself. The 50th (Northumbrian) Infantry Division was east of the town, protecting the rear.
To the south, XIII Corps was on the high ground. Auchinleck told his commanders to fight as hard as possible. If one group was attacked, the other was supposed to attack the Axis from the side.
XIII Corps had the 5th Indian Infantry Division and the 2nd New Zealand Division. The 2nd New Zealand Division had just arrived from Syria. They took positions at the eastern end of the slope. The 1st Armoured Division was further south. The British tank units had lost almost all their tanks at Gazala. But they had received new ones. They now had 159 tanks, including 60 American Grant tanks.
There was a flat area between the two British groups. A thin minefield was laid there. The British commanders were confused by changing orders. They had to fight the Axis and cause as much damage as possible. But they also couldn't risk being surrounded and destroyed. There was not much teamwork between the British forces. Communication was also poor.
The Battle Begins
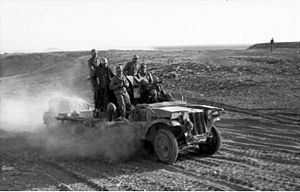
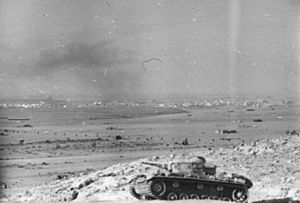
The Axis attack on June 26 started in the afternoon. The 21st Panzer Division moved across the plain. The 90th Light Division was on its left. The 15th Panzer Division moved across the plain above the second slope. The 90th Light and 21st Panzer divisions broke through the minefield. On the high desert plain, the 15th Panzer Division met the 22nd Armoured Brigade and was stopped.
At dawn on June 27, the 90th Light Division attacked again. They destroyed a British battalion south of Matruh. As they moved east, they came under fire from British artillery. To the south, Rommel advanced with the 21st Panzer Division. They moved around the side of the 2nd New Zealand Division. This cut off the New Zealanders' escape route.
Auchinleck sent a message to his commanders. He told them to retreat if they were about to be cut off. Rommel then moved north and joined the 90th Light Division. He ordered them to keep going to cut the coast road. After dark, the 90th Light Division reached the coast road. This blocked the retreat of X Corps.
With the New Zealanders' escape cut off, their commander decided to pull back that night. He told the Eighth Army. The 90th Light Division was in a dangerous spot. It was a narrow group of soldiers, cut off on the coast road. The 21st Panzer Division was 15 miles away. The 15th Panzer Division was blocked by the 1st Armoured Division. The British commander didn't see this chance. He was focused on getting his soldiers out safely.
At 9:20 PM on June 27, Auchinleck ordered the Eighth Army to fall back to Fuka. The New Zealand commander had been wounded. His replacement decided to fight their way through to the east. The attack started at 2:00 AM. The New Zealand soldiers charged directly into the German positions. The Germans didn't know they were coming until they were very close. The New Zealanders fought their way through the German lines.
The fighting was very tough and confusing. Some German wounded were attacked by the New Zealanders. The New Zealanders then regrouped and escaped to the east. The rest of the New Zealand division also managed to get away. Over three days, the New Zealanders had about 800 casualties. But almost 10,000 men escaped.
Auchinleck's order to retreat didn't reach X Corps until the morning of June 28. X Corps counter-attacked to help XIII Corps, not knowing they had already left. X Corps decided to break out to the south that night. They formed small groups and escaped. The main German tank force had moved on. Only the Italians and the 90th Light Division were left to surround Matruh.
Fierce fights happened as the British drove through. One British group even came close to Rommel's command post. Rommel's staff officers had to defend themselves. Rommel then moved his headquarters away from the fighting.
The 29th Indian Infantry Brigade reached Fuka late on June 28. The 21st Panzer Division followed them. The British brigade was quickly attacked and defeated. Early on June 29, the 90th Light Division and the Italian Littorio Armoured Division surrounded Mersa Matruh. The 10th Indian Division tried to break out but was stopped by the Italians.
After more fighting, the soldiers in Mersa Matruh surrendered. On June 29, Italian soldiers entered the stronghold. They accepted the surrender of 6,000 British troops. They also captured a lot of supplies and equipment.
The 90th Light Division was sent after the retreating British army right away. They didn't even get a chance to rest. The 21st Panzer Division caught some British groups near Fuka. They took another 1,600 prisoners. Rommel sent his main tank force inland to try and cut off more of the British army. Small groups from both sides raced across the desert towards El Alamein. Units got mixed up. German groups sometimes drove in front of the retreating British. They sometimes shot at each other. It was hard to tell who was who, as many German trucks were captured British or American vehicles.
What Happened Next
The battle at Matruh showed problems with how the British infantry and tank units worked together. After the war, a British Field Marshal said that XIII Corps just disappeared and left X Corps in trouble. Only about 60 percent of X Corps made it back to El Alamein.
After escaping Matruh, X Corps was scattered and disorganized. They were pulled back and couldn't fight in the early part of the First Battle of El Alamein. The 2nd New Zealand Division went straight to El Alamein. About 8,000 Allied soldiers were captured during the battle. This included 6,000 at Matruh. Forty British tanks were also lost. The Axis captured large amounts of supplies and equipment.
Axis planes could now fly from Matruh airfields. They were only 160 miles from the British naval base at Alexandria. The British navy had to move its ships to other ports. People in Egypt fled east. Cairo was filled with smoke from burning official documents. The British army flooded parts of the Nile Delta. They prepared to destroy important buildings and set up defenses at Alexandria and the Suez Canal.
An intelligence officer for Rommel said that Mersa Matruh was a brilliant German victory. He hoped they could push the British out of the El Alamein line too.
Auchinleck managed to rally the Eighth Army. In a month of fighting, he stopped the German advance at the First Battle of El Alamein. Both sides were tired, but the British still held their positions. The crisis for the Allies passed. The Eighth Army started to get stronger, ready to attack again. The battle also made Rommel's Italian soldiers feel much better. They had done most of the fighting, even though it was under German command.
See also
- List of British military equipment of World War II
- List of German military equipment of World War II
- List of Italian military equipment in World War II


