Bead crochet facts for kids
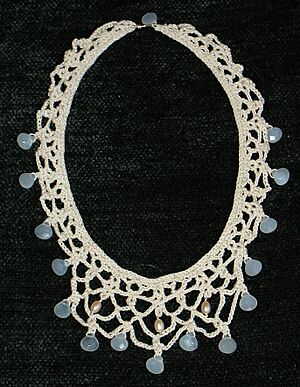
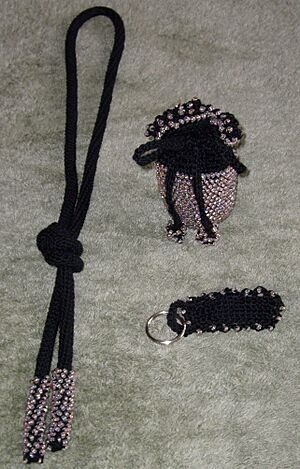
Bead crochet is a fun and creative way to mix two crafts: crochet and beads! Imagine making a fabric, but instead of just yarn, you're also adding colorful or sparkling beads right into your stitches. This special technique is often used to make pretty accessories like necklaces, bracelets, and bags.
The word "crochet" comes from old French words like croche or croc, which mean "to hook." This makes sense because you use a hook to create the stitches! People have been doing bead crochet for a very long time. We have written records about it from around 1824, but it was probably a popular craft even before that. Long ago, some people thought bead crochet was a fancy hobby mostly for wealthy individuals.
Contents
A Look Back: The History of Bead Crochet
Bead crochet has a rich history! Some of the earliest examples we know of are from the 1800s. People used this technique to make small, special bags called "miser's purses." These purses were designed to hold coins safely and were often very decorative.
As time went on, especially by the 1920s, bead crochet became even more popular. Crafters used it to create stylish necklace ropes, bracelets, and fancy beaded handbags. However, during the 1930s, interest in bead crochet slowed down. This was a time when many people had less money and free time for hobbies like decorative needlework. Also, it became easier and cheaper to buy factory-made items.
Luckily, in recent years, many people have rediscovered the joy of bead crochet! It's now a popular hobby for those who love to create unique, handmade items.
How is Bead Crochet Made?
Making bead crochet usually involves a clever trick: you string all your beads onto the crochet thread before you even start crocheting!
Getting Ready: Materials and Planning
First, you need to choose your materials. This includes the type of crochet thread or yarn, and of course, your beads! The size and weight of your yarn and beads are important for how your finished piece will look and feel.
To get the beads onto the thread, many crafters use a special beading needle. If you don't have one, a neat trick is to put a little clear nail polish on the end of your thread. Once it dries, it makes the end stiff, like a tiny needle, which helps you slide the beads on.
Before you begin crocheting, you need to plan out your design. This means deciding the order of your beads and the crochet pattern you'll follow. It's like drawing a map for your project!
Adding Beads to Your Work
Once your beads are strung, you start crocheting as usual. When you reach a specific stitch where you want a bead, you simply slide one bead down the thread and crochet it right into that stitch. This way, the bead becomes a part of the fabric you are creating.
When you crochet in a circle (like making a tube), the beads usually show up on one side of your work, creating a lovely beaded surface. If you crochet in flat rows, you can choose to have beads on both sides of your fabric, or even alternate rows with and without beads for different patterns.
Sometimes, people also add beads to a finished crochet piece using other methods, like off-loom stitches or by adding fringe with beads. This allows for even more creative designs!
 | Emma Amos |
 | Edward Mitchell Bannister |
 | Larry D. Alexander |
 | Ernie Barnes |


