Hawthorn Ridge Redoubt facts for kids
Quick facts for kids Hawthorn Ridge Redoubt |
|||||||
|---|---|---|---|---|---|---|---|
| Part of The Battle of the Somme, in the First World War | |||||||
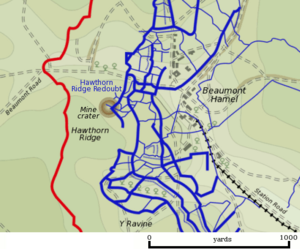
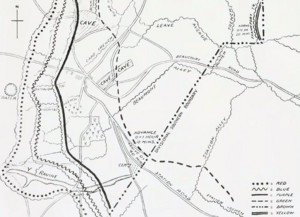
 Trench Map showing Hawthorn ridge and crater at top left |
|||||||
|
|||||||
| Belligerents | |||||||
| Commanders and leaders | |||||||
| Douglas Haig | Erich von Falkenhayn | ||||||
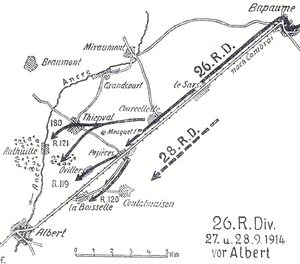
The Hawthorn Ridge Redoubt was a strong German fort built near the village of Beaumont Hamel in France. It was an important part of the German defenses during the First World War. The Germans built it after the Battle of Albert (1914) in 1914. As British and French attacks grew stronger, the Germans added more trenches and defenses around Hawthorn Ridge.
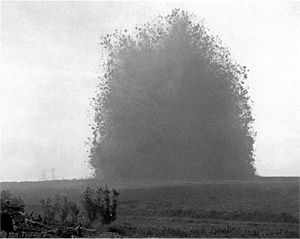
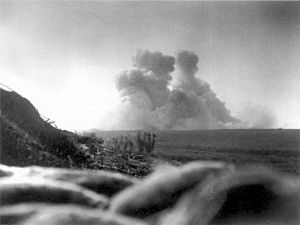
On 1 July 1916, at 7:20 a.m., the British set off a huge mine under the Hawthorn Ridge Redoubt. This was ten minutes before the main attack, called "zero hour." This mine was one of 19 mines exploded on the first day of the Battle of the Somme. Geoffrey Malins, a war cameraman, filmed the huge explosion.
The British 29th Division attacked the redoubt. However, the early mine explosion gave the Germans time to get ready. German soldiers quickly took up positions around the mine crater. When British troops tried to capture the crater, they faced heavy German fire. Only a few British soldiers reached the target, but a German counter-attack pushed them back. The strong German defense at Hawthorn Ridge Redoubt helped stop the British attack in that area.
Later, the British dug another tunnel under the Hawthorn Ridge crater. They filled it with explosives for the Battle of the Ancre on 13 November. This new mine was set off to support an attack on Beaumont-Hamel by the 51st (Highland) Division. The Scottish soldiers advanced closer to the German lines, with help from tanks and heavy artillery. This time, Beaumont-Hamel was captured, and 2,000 German soldiers were taken prisoner.
Contents
Background to the Battle
Building Defenses (1914–1915)
In late 1914, the German 26th Reserve Division arrived in the Somme area. They tried to push west towards Amiens. By October 7, their advance stopped, and both sides began to dig in.
Underground fighting, known as mining, started on the Somme front. This continued when British forces took over from the French in July 1915. German miners dug deep tunnels under places like Beaumont-Hamel. These tunnels created shelters where soldiers could hide safely, even from heavy artillery.
By January 1915, the Germans had improved their defenses. They built two wide belts of barbed wire, each about 30 yd (27 m) wide. The front line of trenches was expanded from one to three trenches. These trenches were 150–200 yd (140–180 m) apart. The first trench was for guards, the second for the main garrison, and the third for local reserves.
Dugouts, which are underground shelters, were made much deeper. They went from 6–9 ft (1.8–2.7 m) deep to 20–30 ft (6.1–9.1 m) deep. These shelters were large enough for 25 men. The Germans also built a strong intermediate line of defenses about 1,000 yd (910 m) behind the front line. Communication trenches connected these lines to a second main defense line, which was also very strong.
Trench Warfare and Raids (1915–1916)
Mining continued through late 1915 and early 1916. Both sides set off mines. The Germans even dug a special tunnel to stop British mines. On 6/7 April, German soldiers raided British lines near Y Ravine. This attack caused 112 casualties for the British.
A large British raid on 30 April was spotted by the Germans and quickly stopped. The Germans had noticed the British preparations a week before the raid.
By February 1916, the Germans began building a third line of defense. This line was about 3,000 yd (2,700 m) behind their second line. It was almost finished by 1 July. German artillery was set up to create strong barrages (lines of shellfire). They also built a deep telephone system to connect the front lines to the artillery.
However, the German defenses had some weaknesses. Their front trenches were on a forward slope, making them easy for the British to see. Also, their soldiers were packed too close to the front lines. Most of their battalions were within 2,200 yd (2,000 m) of the front, even in the new deep dugouts.
Preparing for Battle
German Defenses Around Hawthorn Ridge
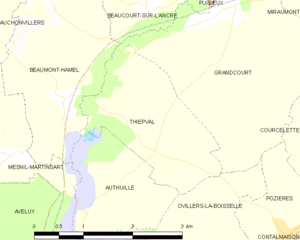
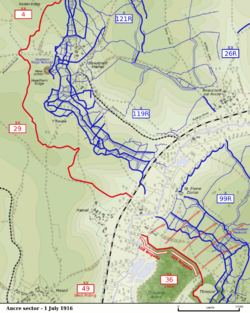
The Ancre river flows west through a valley past several villages. On the north side, there are hills and ridges. Hawthorn Ridge is one of these lower areas. The village of Beaumont-Hamel sits in a valley between two spurs. A small valley called Y Ravine is on the side of Hawthorn Ridge.
In 1916, the British VIII Corps faced the German lines from Beaucourt to Serre. The German front line ran along the eastern slope of Auchonvillers spur, around Y Ravine, and across the valley of Beaumont-Hamel. The Germans had several strong points and hidden positions in the valleys. Beaumont-Hamel was heavily fortified because it overlooked the valley the British had to cross.
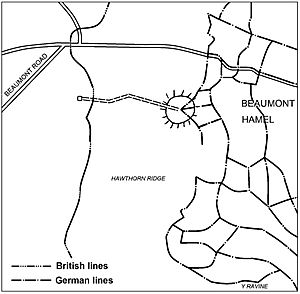
No man's land, the area between the two armies, was about 500 yd (460 m) wide near the Ancre river. It narrowed to about 200 yd (180 m) near Hawthorn Ridge. The ground was mostly flat, except for a sunken road and a low bank near the German trenches.
German artillery observers had a good view from Beaucourt Ridge. They could see British gun flashes, even if the guns were hidden. British observers, however, could not see beyond the German support trenches. This made it hard for British heavy artillery to hit the German front lines effectively.
As the British prepared for a big attack in 1916, the Germans improved their defenses. They built more observation posts and laid more barbed wire. They also tried to capture British prisoners to get information. German commanders stressed the need for lots of artillery shells to support their raids.
British Plans for Attack
The British 29th Division made special plans to capture Hawthorn Ridge Redoubt. British engineers dug three tunnels under no man's land. One tunnel was a communication link to the Sunken Lane, a road hidden from view. This lane was shown in the famous film The Battle of the Somme.
On 1 July, the 1st Battalion, The Lancashire Fusiliers were to use this tunnel to reach the Sunken Lane. From there, they would attack Beaumont-Hamel. Two other tunnels, named First Avenue and Mary, were dug close to the German front line. These were meant for Stokes mortars, which are small cannons.
The 252nd Tunnelling Company placed a large mine, called H3, under the German fort on Hawthorn Ridge. They dug a tunnel about 1,000 yd (910 m) long, 57 ft (17 m) underground. They filled it with 40,000 lb (18,000 kg) of explosives.
The commander of the VIII Corps, Lieutenant-General Aylmer Hunter-Weston, wanted the mine to explode four hours before the main attack. He thought this would give his troops time to capture the crater and for the Germans to calm down. However, the Fourth Army headquarters decided that all mines on 1 July should explode no later than eight minutes before zero hour. A compromise was reached for the Hawthorn Redoubt mine to explode ten minutes early.
Exploding the H3 mine early was also meant to draw German attention to the north side of the Ancre river. This would help other British attacks further south. The 29th Division believed that exploding the mine early would allow time for the debris to fall. However, tests showed that most of the debris would fall within twenty seconds.
When the mine exploded, the heavy artillery bombardment on the redoubt would stop. Field artillery would stop firing at 7:25 a.m.. A light barrage of shrapnel shells would continue until zero hour. In the 29th Division's area, half of the guns would stop firing three minutes early.
British Attack Plan
The British 29th and 4th divisions were to advance across the valley of Beaumont-Hamel. Their first goal was an intermediate line on Beaucourt spur. Then, they would push on to the second German defense line. This whole advance was planned to take 3+1⁄2 hours.
British artillery fire would lift off the German front trench at zero hour. The field artillery would then move its fire further east in six steps. Each step would be about twenty minutes after the previous one. The heavy artillery would lift its fire five minutes earlier each time.
Each division kept two 18-pounder artillery batteries ready to move forward quickly. Soldiers were given various ways to communicate, like visual signals, runners, flares, and lamps. Bomb specialists (soldiers who used hand grenades) carried flags to mark the front line they had reached.
The Battle of Hawthorn Ridge Redoubt
The First Day (1 July)
British cameraman Geoffrey Malins witnessed and filmed the explosion of the Hawthorn Ridge mine. He was about 0.5 mi (0.80 km) from the ridge. He described the moment at 7:20 a.m.:
The ground where I stood gave a mighty convulsion. It rocked and swayed. I gripped hold of my tripod to steady myself. Then for all the world like a gigantic sponge, the earth rose high in the air to the height of hundreds of feet. Higher and higher it rose, and with a horrible grinding roar the earth settles back upon itself, leaving in its place a mountain of smoke.
Right after the mine exploded, the heavy artillery stopped firing on the German front line. Stokes mortars, which were placed in advanced positions, began a very intense bombardment. The German soldiers described a "terrific explosion" that created a huge crater, over 50 yd (46 m) wide and 60 ft (18 m) deep.
The explosion was a signal for German infantry to get ready. Two platoons of the British Royal Fusiliers (from the 86th Brigade) rushed towards the crater. But as they reached the edge, they were met with heavy fire from the Germans already on the far side of the crater.
Many German soldiers in deep dugouts survived the explosion. However, the entrances to their shelters were blocked. They could not get out until after the British attack.
The mine explosion was quickly followed by a German counter-barrage (their own artillery fire). Within minutes, German machine-guns opened fire all along the front. British troops, who were forming up in no man's land, were caught in this machine-gun fire. They suffered many casualties.
German troops quickly occupied the far lip of the Hawthorn Ridge Redoubt crater. They turned their machine-guns and trench mortars to fire at the British troops trying to advance. The British attack on the redoubt and the entire VIII Corps front failed. It was a very costly defeat.
By 8:30 a.m., the British only held the western edge of the crater. German platoons then bombed their way forward, forcing the remaining British soldiers to retreat to their own front line. The German regiment, RIR 119, had 292 casualties, mostly from the mine explosion. The British 86th Brigade suffered 1,969 casualties, with 613 killed and 81 missing.
The Second Attack (13 November)
After the first mine explosion on 1 July, British engineers began working on a new mine. This one was loaded with 30,000 lb (14,000 kg) of explosives. It was placed under the crater of the first explosion.
On 13 November 1916, two brigades of the 51st (Highland) Division attacked. Their first goal was Station Road and Beaumont-Hamel. Then, they aimed for Frankfort Trench. Six minutes before the attack, the leading battalion moved past the British barbed wire. The new mine at Hawthorn Crater was then blown up.
The Scottish troops advanced past Y Ravine and reached their first objective by 6:45 a.m.. On the left side, fire from Y Ravine slowed their advance. Another battalion reinforced the attack at 7:00 a.m.. Later in the afternoon, a reserve battalion attacked Beaumont-Hamel from the south, with other troops joining in.
The left flank brigade was held up by uncut barbed wire south of Hawthorn Crater. They also faced heavy machine-gun fire north of the Auchonvillers–Beaumont-Hamel road. Two tanks were sent to help, but one got stuck. The British began to secure their new positions. Three battalions were pulled back to the German reserve line and reinforced at 9:00 p.m.. One battalion formed a defensive line to the south.
Aftermath
The second attack on Hawthorn Ridge Redoubt and Beaumont-Hamel was a success for the British. The lessons learned from the failed attack on 1 July, such as better artillery support and the use of tanks, helped the British capture the area. This victory was an important part of the later stages of the Battle of the Somme.


