
Operation Crusader facts for kids
Quick facts for kids Operation Crusader |
|||||||
|---|---|---|---|---|---|---|---|
| Part of the Western Desert Campaign in the Mediterranean and Middle East theatre of World War II | |||||||
 A Mark I Crusader tank passes a burning German Panzer IV |
|||||||
|
|||||||
| Belligerents | |||||||
|
|||||||
| Commanders and leaders | |||||||
|
|
||||||
| Strength | |||||||
|
|
||||||
| Casualties and losses | |||||||
| 17,700 casualties | 38,300 casualties | ||||||
Operation Crusader was a major military operation during World War II. It took place from November 18 to December 30, 1941. This battle was part of the Western Desert Campaign in North Africa. The British Eighth Army, which included soldiers from many Allied countries, fought against German and Italian forces.
The main goals of Operation Crusader were to get around the enemy's defenses. The Allies also wanted to defeat the Axis tank forces. Finally, they aimed to rescue the soldiers trapped in the Siege of Tobruk.
On November 18, 1941, the Eighth Army launched a surprise attack. The first few days were tough for the British tanks. They lost many vehicles. However, the Allies fought hard, and on November 27, New Zealand troops reached Tobruk. This helped to end the long siege.
The fighting continued into December. The Axis forces, led by General Erwin Rommel, faced supply problems. They had to pull back their troops. By December 7, Rommel's forces retreated to a new defensive line. The Allies captured many prisoners and continued to push forward.
On January 21, 1942, Rommel launched a surprise counter-attack. He pushed the Eighth Army back to the Gazala line. Both sides then regrouped for future battles. Operation Crusader was a key Allied victory in North Africa.
Contents
Understanding the Battle: Background
This section explains who was fighting and why this battle was important.
The Eighth Army: Allied Forces

After an earlier failed attack called Operation Battleaxe, General Claude Auchinleck took over as commander of the Middle East forces. The British forces in the desert were reorganized. They became known as the Eighth Army. This army was first led by General Alan Cunningham, and later by General Neil Ritchie.
The Eighth Army was made up of two main groups:
- XXX Corps: This group included the 7th Armoured Division. It also had the South African 1st Infantry Division and the 22nd Guards Brigade.
- XIII Corps: This group included the 4th Indian Infantry Division. It also had the 2nd New Zealand Division and the 1st Army Tank Brigade.

The Eighth Army also had troops defending Tobruk. These included the Australian 9th Division and the Polish Independent Carpathian Brigade. In total, the Eighth Army had about seven divisions. They had 770 tanks, including new Crusader tanks. The operation was even named after these tanks! They also had new American M3 Stuart light tanks.
Air support came from the Desert Air Force. They had up to 724 combat planes. These planes helped the ground troops during the battle.
Axis Forces: Panzergruppe Afrika

The main Axis force was called Panzergruppe Afrika. It was led by General Erwin Rommel. This force included:
- Deutsches Afrika Korps (DAK): This German tank corps had the 15th Panzer Division and the 21st Panzer Division. They had about 260 tanks.
- Italian 55th Infantry Division "Savona".
The Italian High Command, led by General Ettore Bastico, also had other forces:
- Italian XX Army Corps: This included the 132nd Armored Division "Ariete" with 146 medium tanks. It also had the 101st Motorized Division "Trieste".
- Italian XXI Army Corps: This included several infantry divisions like the 17th Infantry Division "Pavia", 102nd Motorized Division "Trento", 27th Infantry Division "Brescia", and 25th Infantry Division "Bologna".
Rommel's forces had strong defenses along the border. These defenses stretched from Bardia to Halfaya. Axis air support included about 120 German and 200 Italian planes. They could get more planes quickly if needed.
Planning the Attack: Preparations
Both sides prepared carefully for the battle.
Axis Supply Challenges

Supplying an army in the desert was very difficult. A German motorized division needed about 350 tons of supplies every day. Moving these supplies 300 miles required many trucks. The Axis forces needed about 70,000 tons of supplies each month.
However, attacks from Malta by British forces sank many supply ships. Also, there weren't enough trucks in Libya to move supplies from the ports to the front lines. This meant that even when supplies arrived, they often couldn't reach the soldiers who needed them.
During Operation Crusader in November, five supply ships were sunk. Air attacks also made it hard to move supplies during the day. These problems forced Rommel to retreat in December. The lack of fuel and other supplies greatly weakened the Axis forces.
Eighth Army's Strategy
The Allied plan was to attack the Afrika Korps with the 7th Armoured Division. The South African Division would protect their left side. Meanwhile, XIII Corps would move around the enemy's right side. They would then threaten the Axis defenses from behind.
A key part of the plan was to destroy the Axis tanks first. This would allow the lighter armored XIII Corps to advance north to the coast. XXX Corps would push towards Tobruk to meet up with the soldiers inside the besieged city.
The Allies also used a trick to fool the Axis. They made it seem like the main attack would happen later in December. They also suggested it would come from much further south. This trick worked so well that Rommel was not even in Africa when the attack began!
The Battle Begins: First Phase
This section describes the initial days of fighting.
Surprise Attack on November 18

Before dawn on November 18, the Eighth Army launched its surprise attack. They moved west from their base and crossed into Libya. Heavy rain and storms prevented Allied air attacks.
At first, everything went well for the Allies. The 7th Armoured Division moved towards Tobruk. XIII Corps also advanced. On the first day, they met no resistance.
On November 19, the 22nd Armoured Brigade met the Italian Ariete Division. The Italians fought back hard and destroyed many British tanks. In another area, the 7th Armoured Brigade reached Sidi Rezegh airfield. The 4th Armoured Brigade fought a tough battle with the German 21st Panzer Division.
On November 20, the fighting continued. The 22nd Armoured Brigade again fought the Ariete Division. The 7th Armoured Brigade defended Sidi Rezegh. The 4th Armoured Brigade fought the 21st Panzer. The British tanks, like the Stuart, were fast but had lighter guns.
The British tank forces became spread out. This made it harder for them to fight together. Rommel pulled his tanks north-west to attack Sidi Rezegh.
Breaking Out from Tobruk

The Allied plan for November 21 was for the 70th Division to break out from Tobruk. They would cut off the Germans to the south-east. The 7th Armoured Division would advance from Sidi Rezegh to meet them.
The 70th Division's attack surprised the Axis. Rommel had not expected such a strong force inside Tobruk. On November 21, the 70th Division attacked with tank support. Polish troops also created a diversion. Over 100 guns fired 40,000 shells at the Italian defenses.
The fighting was very intense. British troops advanced towards Ed Duda. However, the 7th Armoured Division could not link up with them. The Black Watch regiment suffered heavy losses attacking strongpoints.
The British continued their advance, but the Italian defenders fought bravely. They held their positions around Tugun. On November 21, fierce battles also took place around Sidi Rezegh. The German 15th Panzer Division was ordered to a different area, which was lucky for the British.
On November 22, the British tried to widen the corridor from Tobruk. They captured the "Tiger" strongpoint. But efforts to clear other strongpoints were stopped. The defenders at Tugun caused heavy losses to the British.
Turning Points: Second Phase
This phase saw intense tank battles and Rommel's bold moves.
The Battle for Sidi Rezegh

On November 23, the 70th Division attacked again from Tobruk. They tried to reach Sidi Rezegh. However, Italian troops arrived and stopped the British attack. On November 26, the British successfully captured Ed Duda ridge. Early on November 27, the Tobruk garrison finally met up with New Zealand troops.
On November 21, the 7th Armoured Division planned to attack north towards Tobruk. But they found about 200 enemy tanks arriving from the south-east. The 7th Armoured Brigade turned to face this new threat. Without tank support, the British attack to the north failed. By the end of the day, the 7th Armoured Brigade had lost many tanks.

Rommel split his forces. The 21st Panzer took up a defensive position. The 15th Panzer moved west to prepare for a tank battle. This gave the British a chance to break through to Tobruk. But the British commander, Norrie, was cautious.
In the afternoon, Rommel attacked Sidi Rezegh with the 21st Panzer. They captured the airfield. The fighting was desperate. Brigadier Jock Campbell was awarded the Victoria Cross for his bravery. The 21st Panzer, though weaker in tanks, used better tactics. They pushed the 7th Armoured Division back. The British lost another 50 tanks.
The battle at Sidi Rezegh continued until November 22. The South African 5th Brigade joined the fight. They tried to recapture the airfield but failed. The Axis counter-attack gained strength. The 7th Armoured Brigade withdrew. In four days, the Eighth Army had lost 530 tanks. Axis losses were about 100.

A famous action happened on November 23, 1941, at Sidi Rezegh. The South African 3rd Field Regiment was surrounded by German tanks and artillery. They fought bravely, firing their guns directly at the enemy tanks. Many gunners were captured, and officers were killed. But their sacrifice helped turn the tide of the battle.
Fighting on the Frontier
On November 22, the 5th New Zealand Brigade captured Fort Capuzzo. This was on the main road to Sollum. They also attacked Bir Ghirba, but were pushed back.
To the south, the 7th Indian Brigade captured Sidi Omar. They also took most of the Libyan Omar strongpoints. These were important defensive positions.
On November 23, the 5th New Zealand Brigade continued its advance. They cut off the Axis positions from Bardia. The 6th New Zealand Brigade Group moved towards Sidi Rezegh to help the 7th Armoured Division. They surprised the Afrika Korps headquarters and captured most of its staff.
Rommel's "Dash to the Wire"

On November 23, the Germans called it "Sunday of the Dead." Rommel gathered his two tank divisions and the Italian Ariete Division. He planned to cut off and destroy the rest of XXX Corps. By the end of the day, the South African 5th Brigade was destroyed.
On November 24, Rommel ordered his tank forces to push east. This was called the "dash to the wire." He hoped to relieve the besieged garrisons and threaten the British rear. This caused chaos among British support units. It also split the British corps.
On November 25, the 15th Panzer Division moved north-east. They were constantly attacked by Allied planes. The 21st Panzer Division attacked the 7th Indian Brigade but was pushed back. By evening, the 15th Panzer Division had only 53 tanks left.
The Axis forces had trouble getting supplies. On November 26, the 15th Panzer Division headed for Bardia for supplies. The 21st Panzer Division attacked towards Capuzzo and Bardia. The Italian Ariete was ordered to help clear the area.

On November 26, New Zealand troops fought the German tank divisions. Rommel realized he needed his tanks back at Tobruk. The 70th Infantry Division and the New Zealand Division were gaining ground there.
On November 25, Italian troops fought bravely against British attacks. The defenders of Tugun surrendered after running out of supplies. Rommel ordered the 21st Panzer Division back to Tobruk. The 15th Panzer Division was to attack British forces near the border.
On November 27, the 15th Panzer Division attacked Sidi Azeiz. New Zealand troops defended bravely but were overrun. Rommel congratulated the New Zealand commander. The 21st Panzer Division was delayed returning to Tobruk. Rommel's bold move had failed.
The New Zealand Division pushed west. They recaptured the Sidi Rezegh airfield. On November 27, elements of the 70th Division linked up with the New Zealanders at Ed Duda. This created a connection with the Tobruk garrison.
The Final Push: Third Phase
This phase saw the Allies secure their gains and push the Axis back.
November 27: Allied Gains

On November 27, the 15th Panzer Division met the 22nd Armoured Brigade. The British tanks were fewer but fought hard. The 4th Armoured Brigade arrived and attacked the German rear. The 15th Panzer Division also suffered from air attacks.
By November 27, the Eighth Army's situation had improved. XXX Corps had reorganized. The New Zealand Division had connected with the Tobruk garrison. General Auchinleck had ordered his commander, Cunningham, to "Attack and Pursue." Auchinleck later replaced Cunningham with General Neil Ritchie.
Securing the Tobruk Corridor
From November 26 to 27, the 70th Infantry Division attacked Italian defenses. They reached Ed Duda. On November 27, the 6th New Zealand Brigade fought a fierce battle. They linked up with the 32nd Tank Brigade at Ed Duda. This secured a small area connecting Tobruk to the outside.
By November 28, the Italian Bologna Division had regrouped. They fought in several places along an 8-mile front. Rommel wanted to cut the Tobruk Corridor. But his general, Crüwell, wanted to deal with the British tanks first.

Fierce fighting continued on November 28 around the Tobruk Corridor. Two Italian motorized battalions attacked. They overran a New Zealand field hospital. They captured 1,000 patients and 700 medical staff. They also freed 200 German prisoners.
On November 29, Rommel decided to attack Ed Duda from the south-west. The 15th Panzer Division moved west. The 21st Panzer Division was supposed to join them but was in disarray. To the east, Italian Ariete tanks overran the 21st New Zealand Battalion. The New Zealanders mistook them for friendly troops.

Lieutenant-Colonel Howard Kippenberger described the Italian tanks rolling over their infantry. The New Zealanders suffered heavy losses in these attacks. Meanwhile, the 15th Panzer reached Ed Duda. But a British counterattack pushed them back.
On November 29, the British armoured brigades were strangely quiet. The 1st South African Brigade was ordered to advance north. They were to recapture Point 175. Australian infantry, supported by Matilda tanks, also launched a bayonet charge. They took 167 prisoners.

Rommel decided to pull the 15th Panzer back. He planned a new attack for November 30. By mid-afternoon, the 6th New Zealand Brigade was under heavy pressure. They were overrun in some areas. But on the eastern flank, the 25th Battalion pushed back an attack from Ariete.
On December 1, the 15th Panzer renewed their attack. The 2nd New Zealand Division faced intense pressure. The 7th Armoured Division was ordered to help. The 4th Armoured Brigade arrived. They could have made a big difference, but their orders were to cover a withdrawal.
The remains of the 2nd New Zealand Division gathered near Zaafran. Their commander decided to withdraw. They began a fighting retreat. By the early hours, 3,500 men and 700 vehicles reached Allied lines. They headed back to Egypt.
Clearing the Frontier: Sollum

Rommel was worried about his cut-off units at the border. On December 2, he sent forces to open routes to Bardia and Capuzzo. On December 3, these forces were heavily defeated by New Zealand troops.
Rommel insisted on trying to relieve the frontier forts. But his tanks needed repairs. He sent the rest of the 15th Panzer and Italian Mobile Corps east on December 4. This caused alarm at Eighth Army headquarters. However, Rommel soon realized he couldn't do this and fight at Tobruk. The Italian Ariete went no further.
Ed Duda and Bir el Gubi
On December 4, Rommel attacked Ed Duda again. The 70th Division pushed him back. Rommel decided to pull back from Tobruk. He wanted to focus his strength against the growing threat to the south.

After the New Zealand withdrawal, Ritchie reorganized his forces. By December 3, the 11th Indian Infantry Brigade was fighting near Bir el Gubi. Italian troops in a hilltop position pushed back several attacks.
On December 4, Italian divisions counter-attacked the 70th Infantry Division. They tried to keep them inside Tobruk. On December 5, the 11th Indian Infantry Brigade continued its attack. As dusk fell, the Afrika Korps and Ariete Division intervened. They attacked the Indian brigade. The 11th Indian Brigade had to withdraw.
The Gazala Line
On December 7, the 4th Armoured Brigade fought the 15th Panzer Division. Rommel was told that supplies would not improve until the end of the month. He realized success at Bir el Gubi was unlikely. He decided to pull back to the Gazala line, about 10 miles behind him. Italian troops had prepared these positions.

On December 6, Rommel ordered his divisions to retreat west. He left the Italian Savona Division to hold out at Sollum, Halfaya, and Bardia. They held out for six more weeks. That night, the 70th Division captured German strongpoints without resistance.
Ritchie moved the 7th Armoured Division to XIII Corps. He also sent the 4th Indian Infantry Division and the 5th New Zealand Infantry Brigade forward. The Eighth Army attacked the Gazala line on December 13. The 5th New Zealand Brigade attacked along an 8-mile front. The 5th Indian Infantry Brigade made a flanking attack.

The Italian Trieste held its position. But the 1st Battalion, The Buffs, captured Point 204. The Afrika Korps counter-attacked. The British artillery and tanks fought bravely. They destroyed 15 German tanks and pushed back the attack.
On December 14, the Polish Independent Brigade joined the New Zealanders. They prepared a new attack for December 15. The attack surprised the defenders. Both brigades made good progress but could not break through the line.

Rommel considered Point 204 a key position. On December 15, Axis forces attacked it. In fierce fighting, the Ariete, 15th Panzer Division, and other units overran the Buffs. The Buffs lost over 1,000 men. The Axis attackers also suffered heavy losses. By December 15, the Afrika Korps had only eight working tanks.
Rommel was worried about British tanks moving to the south. Despite objections from Italian generals, Rommel ordered an evacuation of the Gazala line. This happened on the night of December 15-16. The British had missed a chance for a big victory.
Aftermath of the Operation
This section covers what happened after the main battle.

Over the next ten days, Rommel's forces retreated. They moved to a line between Ajedabia and El Haseia. Rommel kept his supply lines open. He rebuilt his tank force. The Eighth Army's supply lines became stretched. On December 27, Rommel damaged the 22nd Armoured Brigade. This forced the Eighth Army to pull back. The Axis forces retreated to a strong defensive line at El Agheila.
Auchinleck's determination had removed the Axis threat to Egypt. However, Axis strongholds remained on the Libya–Egypt border. The Allies decided to clear these positions. This would help their supply lines. On December 16, the 2nd South African Division attacked Bardia. It fell on January 2, 1942. Sollum fell on January 12.
The South Africans surrounded the fortified Halfaya Pass position. The garrison was short of food and water. They held out against heavy bombing. But hunger and thirst forced them to surrender on January 17. Rommel praised the Italian general who commanded them.
On January 21, Rommel launched a surprise counterattack from El Agheila. He found the Eighth Army spread out and tired. He pushed them back to Gazala. Both sides then regrouped. Operation Crusader showed that the Axis could be defeated. It was a good example of the back-and-forth fighting in the North African campaign.
Images for kids
-
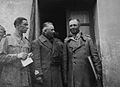
Generals Gastone Gambara and Rommel in the Autumn of 1941
-

Italian convoy en route to Italian Libya, 1941
See also
- List of World War II Battles
- North African campaign timeline
- List of World War II North Africa Airfields
- List of British military equipment of World War II
- List of Australian military equipment of World War II
- List of German military equipment of World War II
- List of Italian military equipment in World War II
