Battle of the Mareth Line facts for kids
Quick facts for kids Battle of the Mareth Line |
|||||||
|---|---|---|---|---|---|---|---|
| Part of the Tunisia Campaign of the Second World War | |||||||
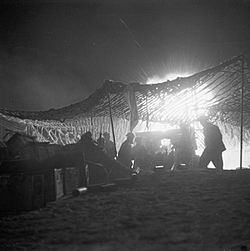 A British 25-pounder field gun in action at night, during the assault on the Mareth Line |
|||||||
|
|||||||
| Belligerents | |||||||
|
|
|||||||
| Commanders and leaders | |||||||
| Units involved | |||||||
| Strength | |||||||
| 90,000 of 123,690 men | 73,500 of 115,000 men 455 guns 139–220 tanks 480 anti-tank guns seventy-five 88 mm guns |
||||||
| Casualties and losses | |||||||
| 4,000 | 7,000 (POW) | ||||||
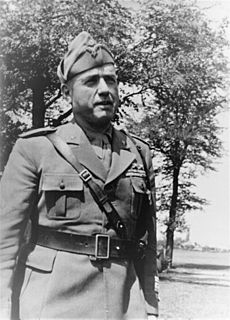
The Battle of the Mareth Line was an important fight during the Second World War. It happened in Tunisia in March 1943. The British Eighth Army, led by General Bernard Montgomery, attacked a strong defensive line. This line, called the Mareth Line, was held by Italian and German forces. These forces were part of the 1st Army, led by General Giovanni Messe.
This battle was the first major attack by the Eighth Army since their big victory at the Second Battle of El Alamein a few months earlier. The British first tried to break through the Mareth Line directly. This attack, called Operation Pugilist, created a small foothold. However, the Axis forces fought back hard, stopping the British from breaking out.
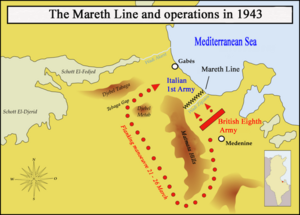
Because of this, the British planned a new strategy. They decided to go around the Mareth Line through a place called the Tebaga Gap. This plan was named Operation Supercharge II. General Montgomery sent more troops to this flanking attack. From March 26 to 31, this move forced the Axis 1st Army to pull back. They retreated about 40 miles (64 km) to a new defensive spot at Wadi Akarit in Tunisia.
Contents
Why the Battle Happened: The Background
Axis Retreat from El Alamein
Before this battle, the German and Italian armies were retreating across North Africa. This retreat started in November 1942 after their defeat at El Alamein. They were trying to escape the British Eighth Army. The Axis forces faced many problems as they pulled back. These included traffic jams, not enough fuel, bad weather, and air attacks. All these things made their retreat very slow.
The leaders in Rome and Berlin were hopeful, but the soldiers on the ground faced harsh realities. The Axis army, called the Panzer Army Africa, was very weak. It had only about 5,000 men, 35 tanks, and very few supplies. They needed 400 tons of supplies daily but only received a small fraction of that.
General Rommel, a famous German commander, wanted to retreat even further. He thought the best place to defend was at Wadi Akarit, about 120 miles (193 km) west. This area had a narrow gap between the Mediterranean Sea and a salt lake, which would be easier to defend. He also wanted his tanks to join another German army further north. This way, they could push back the British from Tunisia.
However, Rommel did not get the full support he needed. The Axis forces continued to retreat, often running low on fuel. British long-range patrols also attacked their supply lines. Many trucks were left stranded without fuel. Meanwhile, the British Eighth Army gathered fuel and ammunition for their next big attack.
By February 1943, the last Axis soldiers left Libya and reached the Mareth Line in Tunisia. This line was supposed to be a strong defensive position. However, Rommel still thought it was too open to being outflanked (attacked from the side). He preferred the Wadi Akarit position, which was further back and more secure.
The Land Around Mareth
The area in southern Tunisia where the battle took place was very difficult. It had rocky hills and desert, making it hard for large armies to move around. The Mareth Line itself was a series of forts built by the French in the 1930s. It stretched across a coastal plain and into the Matmata Hills.
The line followed a natural obstacle called Wadi Zigzaou. This was a dry riverbed with steep banks up to 70 feet (21 m) high. It was a perfect natural barrier against tanks. The French had built their forts on the north-west side of this wadi. The Axis forces had made these defenses even stronger.
The Mareth Line ended at the Tebaga Gap in the north. This was a pass between the Matmata Hills and another line of high ground. West of the Matmata Hills was rough, dry country, and then the huge, impassable sand dunes of the Grand Erg Oriental. The town of Gabès was on the coast, near the end of the Tebaga Gap route. The only main road north for the British was blocked by the Mareth Line.
The British had an advantage because General Georges Catroux, who designed the Mareth Line, was available to give them information. Montgomery's plan was clear: "destroy the enemy now opposing Eighth Army in the Mareth Line and to advance and capture Sfax."
Preparing for Battle
Battle of Medenine
Before the main Mareth Line battle, the Axis forces tried a surprise attack. This was called the Battle of Medenine, on March 6, 1943. Their goal was to slow down the British Eighth Army's attack on the Mareth Line. However, the British knew about this attack beforehand. They had secretly intercepted German radio messages.
Because they were warned, the British quickly brought in more troops and supplies. The Axis attack was a costly failure for them. General Erwin Rommel, who commanded the Axis forces, could not afford to lose more men. He needed them to defend the Mareth Line. So, he stopped the attack at dusk.
The British stayed ready for another attack, but it never came. The Axis air forces also tried their best but had little effect. On March 7, the Axis forces began to pull back towards the Mareth Line. The British followed them. The Battle of Medenine was Rommel's last fight in North Africa. He left for Europe soon after.
The Battle Begins
Operation Pugilist: The First Attack
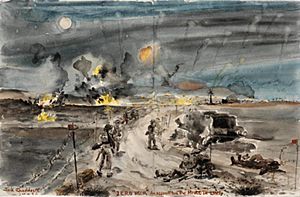
On March 19, 1943, the British XXX Corps began Operation Pugilist. The 50th (Northumbrian) Infantry Division managed to break into the Mareth Line near Zarat. This area was defended by the Italian "Giovani Fascisti" Division. However, heavy rain and the difficult ground made it impossible to bring up tanks, aircraft, or anti-tank guns. This left the British infantry isolated and vulnerable.
On March 22, German and Italian forces launched a counter-attack. They recaptured much of the ground the British had gained. The British lost 35 tanks and 200 soldiers were captured. The British held their remaining positions until dark. By March 24, all the British attacking forces were called back. The XXX Corps then prepared a new attack. This time, the 4th Indian Infantry Division would make a night attack further inland. This attack would happen at the same time as a large flanking move by Montgomery's forces.
The "Left Hook" Around the Line
In early 1943, a British patrol found a secret pass through the Jebel Dahar hills. They called it Wilder's Gap. Another patrol went even further, reaching the Tebaga Gap. This showed that there was a way to go around the Mareth Line. This patrol even went north to Gafsa and met up with the British First Army, which was advancing from the west.
Montgomery decided to use this route for a major flanking attack. He strengthened the 2nd New Zealand Division and renamed it the New Zealand Corps. This force would attack through the Matmata Hills, using Wilder's Gap, and then move into the Jebel Dahar. The British kept the assembly of this force a secret from the Axis.
The New Zealand Corps' plan had three stages. First, a 20-mile (32 km) night march. Second, another 40-mile (64 km) night march to just before the Tebaga Gap. Third, they would capture the entrance to the gap at dawn on March 21. After that, the corps would advance to El Hamma. This town overlooked the main coastal road north of Gabès.
French forces and the 1st King's Dragoon Guards protected the flank of this advance. Another British force, X Corps, would attack from Al-Hamma to Gabès. This would cut off the Axis defenders on the Mareth Line. It would also allow the New Zealand Corps to advance 80 miles (129 km) up the coast to Sfax.
The plan focused on surprising the enemy. The New Zealand Corps had fewer infantry but relied on its artillery and air support. A direct attack by XXX Corps on the Mareth Line would distract the enemy. Also, the American II Corps would advance through El Guettar. This would threaten Axis supply lines and prevent them from sending more troops to Mareth.
Fighting at the Tebaga Gap
The New Zealand Corps met Axis troops at the Tebaga Gap on March 21. However, their progress was very slow for the next four days. They were fighting against the German 164th Light Afrika Division and the 21st Panzer Division. They did manage to secure the entrance to the gap. On the Mareth Line, XXX Corps made some progress but could not break through.
On March 23, Montgomery ordered the 1st Armoured Division to join the New Zealand Corps. This division was in reserve, waiting to exploit any breakthroughs. General Horrocks, with the X Corps Headquarters, took control of the operations at the Tebaga Gap.
Operation Supercharge II: The Breakthrough
Operation Supercharge II was set to begin on the afternoon of March 26. A smaller operation happened the night before to capture a key hill called Height 184. The New Zealand Corps would attack into the Tebaga Gap with two brigades. They would capture the Axis defenses from Djebel Tebaga to Djebel Melab. The 1st Armoured Division would then move through and exploit this breakthrough.
The New Zealand brigades attacked after dark, with tanks and a creeping artillery barrage. The attacking troops moved quickly, surprising the German 164th Light and 21st Panzer divisions. The setting sun, wind, and dust made it hard for the Axis to see. British tanks pushed forward, followed by infantry. They reached their first objective and kept going, despite growing resistance.
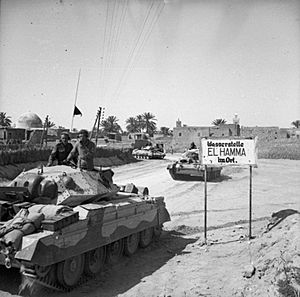
By dark, a gap had been made in the Axis defenses. The 1st Armoured Division then moved through this gap at 11:00 p.m. They quickly advanced towards El Hamma, about 20 miles (32 km) to the north-east. This town was halfway to Gabès on the coast.
On the morning of March 27, the German 15th Panzer Division tried to counter-attack the New Zealand Corps. But by 9:00 a.m., this attack was pushed back. The New Zealand Corps then advanced into the hills. By the evening of March 27, German resistance was broken. The supply line to the 1st Armoured Division was secured. The 1st Armoured Division had been stopped by defenses at El Hamma.
General Freyberg convinced General Horrocks that the New Zealand Corps should change direction. Instead of going directly to El Hamma, they should go across rough ground straight to Gabès. This would avoid the strong Axis defenses at El Hamma.
By March 28, General Messe ordered all Axis forces on the Mareth Line to pull back. They needed to face the X Corps and New Zealand Corps on their right side. By holding up the 1st Armoured Division at El Hamma, the Axis managed to avoid being completely surrounded.
On March 29, the New Zealand Corps captured Gabès. This forced the Axis to retreat further to a new line about 15 miles (24 km) behind Gabès, at Wadi Akarit. The German 164th Light, 15th Panzer, and 21st Panzer divisions fought bravely to cover this retreat. El Hamma was also evacuated on March 29. This opened the way for the 1st Armoured Division to advance north with the New Zealand Corps on their right.
What Happened After the Battle
Losses and Results
Operation Supercharge II ended on March 31. The British Eighth Army had about 4,000 casualties (killed, wounded, or missing). Many of these were from the 50th Northumbrian Infantry Division. The British also lost many tanks. The New Zealand Corps lost 51 tanks and 945 men. After the battle, the New Zealand Corps was broken up. Its parts were sent to other British corps.
On March 30, General Montgomery sent a message to General Freyberg. He congratulated the New Zealand Corps and X Corps for their "splendid results." He said their actions led to the "complete disintegration of the enemy resistance and the whole Mareth position."
The Axis forces, even though they retreated in good order, lost a lot. They had over 7,000 prisoners, with 2,500 of them being German. The German 15th Panzer Division suffered many losses. The 164th Light Afrika Division lost most of its weapons and vehicles. Some Italian divisions, like the 80th Infantry Division "La Spezia," lost nearly half their men. The 16th Infantry Division "Pistoia" was almost completely destroyed. Several Italian divisions had to be combined because they had lost so many soldiers. The 1st Army managed to retreat in good order to Wadi Akarit, where they would prepare for the next battle.
Who Fought: Order of Battle
British Eighth Army
- (General Sir Bernard Montgomery)
XXX Corps (Lieut.-General Oliver Leese)
- 50th (Northumbrian) Infantry Division
- 51st (Highland) Infantry Division
- 4th Indian Infantry Division
- 201st Guards Brigade
- 23rd Armoured Brigade
New Zealand Corps (Lieut.-General Bernard Freyberg)
- 2nd New Zealand Division
- 8th Armoured Brigade
- 1st King's Dragoon Guards
- 64th Medium Regiment, Royal Artillery
- 57th Anti-Tank Regiment, Royal Artillery
- One Battery 53rd Light Anti-Aircraft Regiment, Royal Artillery
- Leclerc Force (with the Greek Sacred Squadron)
X Corps (Lieut.-General Brian Horrocks)
- 1st Armoured Division
- 7th Armoured Division (including 4th Light Armoured Brigade, less King's Dragoon Guards)
- Free French Flying Column
Italian 1st Army
- (General Giovanni Messe)
- German 90th Leichte Afrika Division
- 101st Motorised Division "Trieste"
- 136th Armoured Division "Giovani Fascisti"
- 16th Motorised Division "Pistoia"
- 80th Infantry Division "La Spezia"
- German 164th Leichte Afrika Division
Reserve
- German 15th Panzer Division
Tebaga
- Saharan Group
Uncommitted
- German 21st Panzer Division
Gafsa front
- German 10th Panzer Division
- Centauro Group
The German 19th Flak Division, with sixteen 88 mm batteries and several 20 mm anti-aircraft batteries, was on the coast. The 1st Luftwaffe Brigade, which was a small unit, was behind the "Giovani Fascisti." The Panzer Grenadier Regiment Afrika watched the main Gabès–Mareth road. These units, along with the 164th Leichte Afrika Division, were the only mobile infantry groups available to the Axis.
See also
- List of British military equipment of World War II
- List of French military equipment of World War II
- List of German military equipment of World War II
- List of Italian Army equipment in World War II
- Tunisia Campaign
- North African campaign timeline
- List of World War II Battles
- Panzer Army Africa


