Second Battle of Eora Creek–Templeton's Crossing facts for kids
Quick facts for kids Second Battle of Eora Creek–Templeton's Crossing |
|||||||
|---|---|---|---|---|---|---|---|
| Part of the Second World War, Pacific War | |||||||
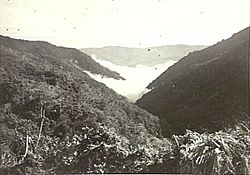 Eora Creek valley |
|||||||
|
|||||||
| Belligerents | |||||||
| Commanders and leaders | |||||||
| Units involved | |||||||
|
7th Division
|
South Seas Detachment
|
||||||
| Strength | |||||||
| 1,882–2,100 | 986–1,075 | ||||||
| Casualties and losses | |||||||
| 412 killed or wounded | 244 killed or wounded | ||||||
The Second Battle of Eora Creek–Templeton's Crossing was a major fight during the Second World War. It happened from October 11 to 28, 1942, in Papua. This battle was part of the Kokoda Track campaign.
Australian soldiers, with help from the United States, fought against Japanese troops. The Japanese had landed in Papua earlier in 1942. Their goal was to capture Port Moresby, a very important town.
This battle was part of the Australians chasing the Japanese. The Japanese were heading back towards the coast, near Buna and Gona. The Australians wanted to take back Kokoda and push further north. Eora Creek village and Templeton's Crossing had already seen fighting before. That was in August and September 1942, when Australians had to retreat.
Contents
Why the Battle Happened
Japanese forces landed in Papua on July 21, 1942. They came ashore near Buna and Gona. Their plan was to capture Port Moresby by marching along the Kokoda Track. An earlier attempt to reach Port Moresby by sea had failed. This was at the Battle of the Coral Sea in May.
The Japanese army, called the South Seas Detachment, moved south. They fought several battles along the track. By mid-September, the Australians stopped them at Ioribaiwa. The Australians then pulled back to Imita Ridge for a final stand.
But the Japanese had problems with their supplies. Also, they had lost battles elsewhere, like at Milne Bay and Guadalcanal. So, the Japanese commander, Major General Tomitaro Horii, was told to stop attacking. He was ordered to take a defensive position instead.
Horii decided to pull his troops back. He wanted to secure the Isurava–Kokoda area. On September 24, Japanese troops began to withdraw. A special group, the "Stanley Detachment," stayed behind. Their job was to create a strong defense in the Owen Stanley Mountains. The rest of Horii's army moved further north.
Australian patrols were sent out to find the Japanese. By September 27, Brigadier Kenneth Eather ordered a full attack. But the Australians found that the Japanese had already left. Patrols continued to follow, finding areas like Nauro empty by September 30.
The Battle Begins
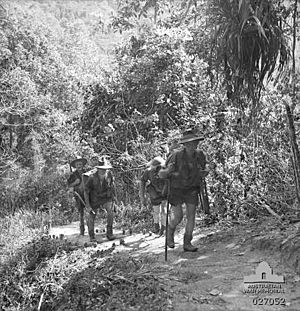
The Australian 25th Brigade started chasing the Japanese. The 3rd and 2/25th Battalions led the way. They found Menari empty and moved to Brigade Hill. There, they saw signs of a big battle from earlier in September.
Meanwhile, the 16th Brigade arrived in Port Moresby. They followed the 25th Brigade to Imita Ridge. Major General Arthur "Tubby" Allen took direct command of the 7th Division.
General Allen knew that getting supplies would be hard. He wanted to move slowly. But other top commanders, like General Sir Thomas Blamey and General Douglas MacArthur, pushed him to chase the Japanese faster. They thought the Japanese were just running away.
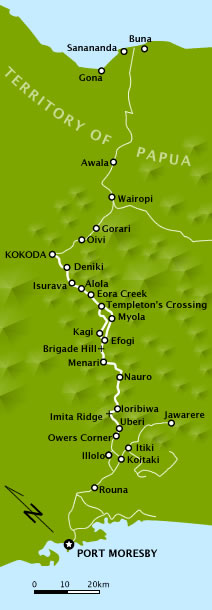
However, the Japanese had actually pulled back in an organized way. They set up four strong defensive spots. These spots were held by the Stanley Detachment. The first two were near Myola and Mount Bellamy. The third was at Templeton's Crossing. The fourth was at Eora Village.
Australians found the Japanese on October 8. A patrol from the 2/25th Battalion clashed with them near Myola Ridge. By October 10, Myola was back in Australian hands. On October 11, the 2/33rd Battalion moved towards Templeton's Crossing. The 2/25th Battalion took another path. The 16th Brigade was getting ready to lead the attack through Templeton's Crossing.
The fighting around Eora Creek and Templeton's Crossing lasted from October 11 to 28. At first, there were about twice as many Australians as Japanese. Around 1,882 Australians faced 986 Japanese.
Myola Ridge and Mount Bellamy Track
The Japanese Stanley Detachment split their forces. Most (520 men) were on the Myola track. Fewer (147 men) were on the Mount Bellamy Track. On the Myola track, the Japanese had four strong positions. These spots were well-built and helped each other. They made it hard for the Australians to attack.
On October 10, a small Australian patrol found the first Japanese position. More Australian soldiers joined the fight the next day. The 2/33rd Battalion tried to attack from the front and sides. The 3rd Battalion moved around to the west. They planned a big attack for October 15. But the Japanese had already left.
On the Mount Bellamy Track, the 2/25th Battalion met the smaller Japanese force on October 13. By October 15, they reported the Japanese positions clear. The next day, they reached Templeton's Crossing. Some people later said the 2/25th Battalion could have moved faster. These first fights were the start of the Second Battle of Templeton's Crossing–Eora Creek.
Fighting at Templeton's Crossing
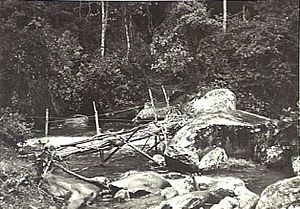
On October 16, Australian battalions reached Templeton's Crossing. Japanese artillery fired at the lead Australian troops. As D Company of the 3rd Battalion moved forward, they found the Japanese position. It was on high ground east of Eora Creek.
The Japanese had set up on two hills leading to the creek. The 3rd Battalion got ready to attack the next day. Other Australian battalions were behind them. Attacks on October 17 and 18 failed to break through.
On October 19, the 2/2nd Battalion moved forward to help. The 16th Brigade, led by Brigadier John Lloyd, took over from the 2/25th and 2/33rd Battalions. On October 20, the 2/2nd Battalion attacked from the high ground. They planned to attack again on October 21. But the Japanese Stanley Detachment had pulled back during the night. Horii's main force had already moved to Kokoda–Oivi. When the Stanley Detachment left Templeton's Crossing, Horii sent more soldiers to Eora Village. The Japanese held Eora Village with about 1,075 men and artillery. The Australians had 2,100 troops, including 1,770 infantry.
Battle for Eora Village
The Australians then moved towards Eora Village. The 2/1st Battalion led the way on the main track. The 2/3rd Battalion followed. Another group, the 2/2nd Battalion, followed a path along a ridge to the east. On the afternoon of October 21, both groups were stopped by Japanese ambushes. The Japanese then pulled back at night.
On October 22, a patrol entered Eora Village around 10:30 AM. They were immediately fired upon.
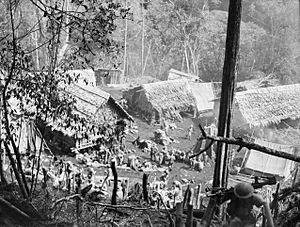
Eora Village was on a bare hill. Eora Creek was on its southwest and north sides. A smaller stream was to the northeast. From the village, the track crossed both streams over log bridges. Then it followed the west side of Eora Creek. North of the village, a ridge overlooked it. This is where the Japanese had built two strong defensive positions. They had spent almost two months making them strong. From these spots, they could fire machine guns and five artillery pieces.
On the afternoon of October 22, Brigadier Lloyd ordered a direct attack on the Japanese position. His battalion commanders thought it was a bad idea. They wanted to attack from the west, from higher ground. The attack started shortly after. It was very confusing. By dawn on October 24, the Australian attackers were stuck. They had lost 34 soldiers and many more were hurt. The attack was not working.
Lloyd then ordered the 2/3rd Battalion to attack the Japanese from the top of Eora Ridge. But it would take time to get them into position. Meanwhile, more Japanese soldiers were arriving, making their position even stronger.
The 2/3rd Battalion's attack began on the morning of October 27. Horii had ordered his troops to withdraw on the night of October 28. The Japanese commander, Lieutenant Colonel Tsukamoto Hatsuo, began pulling back artillery and troops. By the morning of October 28, the position was lightly held. The 2/3rd Battalion continued its attack on October 28. This time, the attack worked, and the Australians took the position on October 29. Lloyd was later criticized for ordering the direct attack. This decision led to more casualties and slowed the Australian advance.
What Happened Next
On October 28, Major General George Vasey took over command from Allen. The Australian advance continued on October 29. The 2/31st Battalion joined the 16th Brigade. They moved along the main track and a ridge to the east. The 25th Brigade followed a path east of Eora Creek.
Horii now focused on defending the coastal areas at Buna–Gona. He gathered his forces around Oivi and Gorari. A small Japanese force stayed behind to cover their retreat. But they pulled back without fighting.
Aola was entered on October 30. Air drops of supplies there helped the Australians. On November 2, a patrol found Kokoda empty. Vasey had regained control of the village's important airstrip. This helped a lot with getting supplies.
The two Australian brigades then fought the last battle of the campaign. This was the Battle of Oivi and Gorari from November 4 to 11, 1942. After this, the Japanese left most of their artillery. They crossed the Kumusi River and fell back to Buna and Gona. Heavy fighting continued there in December 1942 and January 1943.
The fighting at Eora Creek was very tough. A journalist called it the "bloodiest and most significant battle" of the Kokoda Track campaign. In the final part of the battle, from October 22 to 29, 72 Australians were killed and 154 wounded. The Japanese lost 64 killed and 70 wounded. Overall, from October 12 to 28, 412 Australians were killed or wounded. The Japanese lost 244 killed or wounded.
The Second Battle of Eora Creek–Templeton's Crossing was the first Australian victory in the Kokoda Campaign. But it was only a partial victory. The Australians had gotten out of the mountains. However, the Japanese army was not destroyed. They could still retreat and slow down the Australians. After the fighting, the Australian commanders removed General Allen from his command. They felt his troops had moved too slowly against a smaller Japanese force.
After the war, the battle location was kept secret by local villagers. They did this out of respect for the soldiers who died there. In 2010, the location was announced by Brian Freeman, a former Australian commando.
Australian units received special honors for their part in the battles. "Eora Creek–Templeton's Crossing II" was given for this second battle. The 3rd, 2/1st, 2/2nd, 2/3rd, 2/25th, 2/31st, and 2/33rd Infantry Battalions received this honor.


