Third attack on Anzac Cove facts for kids
Quick facts for kids Third attack on Anzac Cove |
|||||||
|---|---|---|---|---|---|---|---|
| Part of the Gallipoli Campaign | |||||||
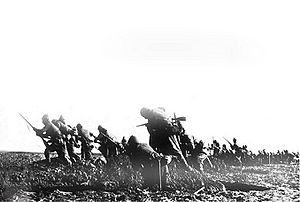 Ottoman Turkish troops going over the top in an assault on a British trench line in Anzac Cove. |
|||||||
|
|||||||
| Belligerents | |||||||
|
|||||||
| Commanders and leaders | |||||||
| Units involved | |||||||
| ANZAC | 2nd Division 5th Division 16th Division 19th Division |
||||||
| Strength | |||||||
| 17,300 | 42,000 | ||||||
The third attack on Anzac Cove happened on May 19, 1915, during the Gallipoli Campaign in the First World War. This battle saw soldiers from the Ottoman Turkish Empire try to push back the forces of the British Empire who were defending a place called Anzac Cove.
The Australian and New Zealand Army Corps (ANZAC) had landed at Anzac Cove on April 25, 1915. The Turkish army had tried twice before to take back this area. In May, the Turks gathered a large force of 42,000 soldiers to attack the ANZACs, who had about 17,300 men. The ANZAC commanders didn't know about the attack until the day before, when British planes spotted many Turkish troops gathering.
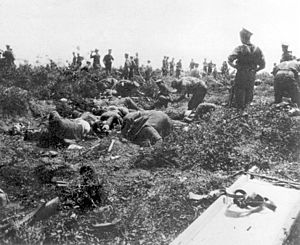
The Turkish attack started early on May 19. It mostly focused on the middle of the ANZAC lines. By midday, the attack had failed. The Turkish soldiers were caught by heavy fire from the ANZACs' rifles and machine guns. This caused about 10,000 Turkish casualties, including 3,000 deaths. The ANZACs had fewer than 700 casualties.
After the battle, three Allied groups arrived to help defend the area, but no new attack came. Instead, on May 20 and 24, two short ceasefires were called. This allowed both sides to collect their wounded and bury the dead soldiers in the area between their trenches, known as "no man's land." The Turks never managed to capture Anzac Cove. The ANZAC forces eventually left the area at the end of the year.
Contents
What Happened Before
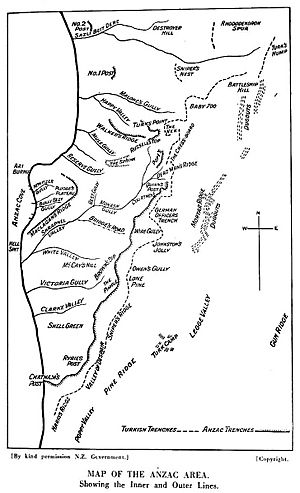
The Beachhead Area
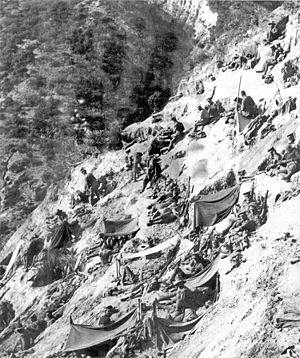
On April 25, 1915, the Australian and New Zealand Army Corps (ANZAC), led by Lieutenant-General William Birdwood, landed at a spot that became known as Anzac Cove. This area was not very big. It stretched about 2 miles (3.2 km) south and was about 750 yards (685 meters) deep at its widest point. Some reports say it was 1.5 miles (2.4 km) long and 1,000 yards (914 meters) deep.
Two important spots, Quinn's Post and Courtnay's Post, had a steep cliff behind the ANZAC trenches. In some places, the Turkish trenches were dug very close, only about 10 yards (9 meters) from the Allied lines.
The first Turkish counter-attack on Anzac Cove in April had failed. Even though Turkish soldiers briefly broke through the ANZAC lines, they were pushed back. On May 5, the Turkish Army commander, German officer Otto Liman von Sanders, told his troops to defend their positions. However, the Turkish leaders believed that even a small success at Anzac Cove could push the ANZACs "back into the sea." They also thought that getting rid of the ANZAC forces would free up several Turkish divisions to fight against the British and French at Cape Helles.
Turkish Army Strengths
The Ottoman Turkish Army during the First World War was much stronger than the Allies expected. During the war, they defeated forces from the British, French, and Russian armies. Before the landings, the Gallipoli peninsula was defended by several groups of soldiers. By April 1915, they had many artillery guns ready to defend the area.
Most Turkish army commanders were very experienced, having fought in the Balkan Wars. One advantage the Turkish Army had was their hand grenades, which British forces did not use. The British also admitted that Turkish snipers were generally better shots than the Allied snipers.
The attack was directly led by Major-General Essad Pasha. The plan was to secretly gather the attack force behind Turkish lines on May 18. Then, at 3:30 AM on May 19, while it was still dark, the Turkish forces would attack all along the ANZAC lines at the same time. The goal was to force the defenders out of their trenches and into the sea. To keep the attack a surprise, there would be no artillery bombardment before it. However, the day before, all available Turkish artillery fired at the ANZAC lines from 5:00 PM until midnight. The signal to start the attack was supposed to be a large mine exploding at Quinn's Post, but the tunnel for the mine wasn't finished by May 19.
The attacking force included about 42,000 men. Some of these groups were fresh, having just arrived, while others had fought in earlier battles at Anzac Cove.
ANZAC Forces Ready
By this time, the ANZAC Corps had two main groups, with about 17,300 men and 43 artillery guns. The New Zealand and Australian Division defended the northern part of the beachhead, and the 1st Australian Division defended the southern part. The defense line was split into four areas.
The ANZAC commanders did not know about the coming attack. On May 18, a British plane flew over the peninsula and saw that the valleys opposite the ANZAC positions were "densely packed with Turkish troops." A second plane confirmed this, reporting even more troops landing nearby. At 5:15 PM, the news reached the ANZAC divisions, who were told to expect an attack that night. Just after dark, a British battleship also reported seeing many troops and artillery moving north.
Around 11:45 PM on May 18, a Turkish bomb exploded at Quinn's Post, and the Turks started firing their small guns. With all these signs, the ANZAC troops were ordered to be ready by 3:00 AM, earlier than usual. They quickly set up more defenses by throwing out rolls of barbed wire in front of their lines.
The Attack Begins
Fighting in the Center
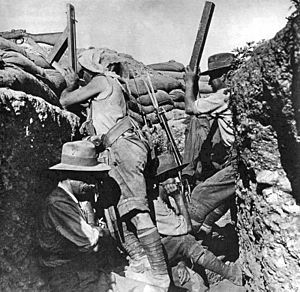
The first sign of the battle came shortly after the ANZACs were ready in the No.2 Section. The Australian 4th Battalion saw movement and light reflecting off bayonets in the valley. The Turkish 5th Division began attacking without bugles or war cries. Their trenches were only about 200 yards (180 meters) from the Australians' trenches. The Australian 1st and 4th Battalions immediately fired on the advancing Turks.
The Turkish 5th, 2nd, and 16th Divisions followed closely. The 2nd Division advanced across the 4th Battalion's front, and the 4th Battalion fired at their side with rifles and machine guns. The Turks who survived this heavy fire either moved into a gully or went back to their own lines. Waves of Turkish reinforcements tried to follow, but they were also cut down. By daylight, the only movement was wounded soldiers trying to get help.
To the south, near Lone Pine, the Australian 2nd and 3rd Battalions were digging a new trench. This new trench was meant to give them a better firing position. There was still a gap of about 50 yards (45 meters) between the two parts of the new trench. This is where the Turkish 16th Division attacked. At first, the Turks were in a gully that protected them from Australian fire. The 48th Infantry Regiment moved through heavy Australian fire into the gap. Despite one of the Australian machine guns jamming, this attack and the following waves were pushed back. Some Turks did reach the Australian trenches. The Turks came so close to the Australian artillery that the artillerymen disabled their guns so they couldn't be used against them, and joined the infantry in the trenches. The 16th Division tried four attacks, but each time they were cut down by Australian fire. This continued until about 5:00 AM, when the remaining Turks started pulling back.
Attacks in the South

Part of the Turkish 16th Division also attacked the 3rd Brigade in the No.1 Section, from Lone Pine southwards. They advanced in two waves through a field, but only three men survived the Australian fire to reach the 10th Battalion's trench. Turkish wounded and survivors were seen moving back to a gully. In the growing light, an 11th Battalion machine gun had a clear view of them, causing many casualties. The Australians kept firing until around noon, and it was clear the attack by the 16th Division had failed here. In the very south of the ANZAC area, the 9th Battalion trench was attacked. However, like elsewhere, the attacking Turks were reduced by Australian fire, with the last of them stopped by the barbed wire in front of the Australian trenches.
Battles in the North-Center
Another part of the Turkish 5th Division gathered unseen below Courtnay's Post, held by the 14th Battalion. At 4:00 AM, they rushed the trench, throwing hand grenades. Only a small group of Australians defended this spot. Two were killed and two wounded. As the Turks took over that part of the post, the surviving Australians pulled back. The Turks were now in a position to fire down on Monash Valley. However, from another part of the post, Private Albert Jacka led a small group of men in a counter-attack. Jacka shot five Turks, used his bayonet on two others, and chased the rest out of the post. He was awarded the Victoria Cross for his bravery.
Next in line, to the north, was Quinn's Post, defended by the 15th Battalion and the 2nd Light Horse Regiment. For some time after the Turkish attack started, the Turks just threw hand grenades at the post. Around 3:30 AM, Turkish machine guns and rifles opened fire on the Australians. This lasted about an hour before the Turks went over the top and attacked the post. Like elsewhere, they were stopped by the heavy Australian fire. Three more Turkish attacks were also pushed back.
On the other side of Monash Valley, the Turkish 5th and 19th Divisions attacked Pope's. Sentries from the 1st Light Horse Regiment fired on a group of Turks moving down the valley. This group, several hundred strong, started an attack on Pope's. The defenders opened fire, and only three Turkish soldiers reached the Australian positions before being shot.
Northernmost Fights
On Russell's Top, the Auckland Mounted Rifles were in a difficult spot. Their trenches were not fully built. The Turkish 19th Division, using hand grenades, attacked the New Zealanders' position in three waves. The Wellington Mounted Rifles to the north were able to use their machine guns to fire on the attackers from the side. This flanking fire caused many casualties among the Turkish soldiers. At the same time, the Aucklands charged them in a counter-attack, forcing the survivors to retreat.
Daylight and Aftermath
All along the ANZAC lines, Turkish troops kept trying to advance. This slowly stopped as the morning went on, and the Turks tried to get back to their own lines. The Australians and New Zealanders kept firing at them. It was now clear to the ANZACs that the Turkish attack had failed. However, a report reached Turkish headquarters saying that some goals had been captured. So, the Turkish commanders ordered a second attack at 5:00 AM, this time with artillery support.
Over the next few hours, several new attacks began. At 5:25 AM, the Turkish 2nd and 5th Divisions attacked again. They advanced at an angle and were again cut down. At No.1 Post, the Canterbury Mounted Rifles saw the Turks gathering for another attack. They were able to turn their machine gun and fire at the Turks from behind, which broke up the attack. The Turks attacked Quinn's four more times. This pattern of attack continued until around 10:00 AM, when Allied observers noticed that Turkish troops were unwilling to leave their trenches.
The ANZAC commanders slowly realized how serious the Turkish defeat was. At 5:25 AM, Birdwood suggested to his commanders that they counter-attack the Turkish sides. But he believed any attack into the Turkish artillery would fail. However, at 3:35 PM, British General Headquarters (GHQ) ordered him to take advantage of the situation and attack. Birdwood replied that anything less than a full assault would be useless. In the northern area, Major-General Alexander Godley decided to attack. The Wellington Mounted Rifles were ordered to attack the Turkish trenches at The Nek. The trench was 100 yards (91 meters) across "no man's land" with no cover. The regiment prepared to obey, but they planned the attack so that not every group would be wiped out. Men were chosen from all three groups. Brigadier-General Andrew Hamilton Russell contacted Godley to explain the risks of such an attack, and Russell was told to "use his own judgement," so he quickly called off the attack. The Turks continued their artillery firing on the beachhead for the rest of the day. This, along with a prisoner saying another attack was coming, convinced GHQ to bring the New Zealand Infantry Brigade back to Anzac Cove that night.
After the Battle
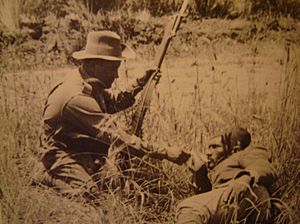
By the end of the day, the ANZAC artillery had fired many rounds, and soldiers had fired nearly a million rifle and machine-gun rounds. Turkish numbers are not fully known, but the attacking Turkish forces had about 10,000 casualties, including 3,000 dead. The most casualties were in the 5th Division. One Turkish soldier described the scene as "countless dead, countless! It was impossible to count." The ANZACs had only 160 killed and 468 wounded. Among the Australian dead was Private John Simpson Kirkpatrick, known as "the Man with the Donkey" for his bravery.
The next day, May 20, the smell of the dead bodies in "no man's land" and the many wounded soldiers still between the lines convinced the New Zealand and Australian Division staff to suggest a truce. Soon, an informal ceasefire began under the flags of the Red Cross and Red Crescent. Turkish stretcher-bearers went into "no man's land" to collect the dead and wounded. Just after 7:00 PM, it looked like the Turks were gathering troops for an attack while collecting their wounded, so the 9th Battalion opened fire on them. The Turks responded by firing their artillery at the Australian trenches.
By now, the beachhead had been reinforced with more troops. Communication between the two sides led to a more formal truce on May 24. At 7:30 AM, all firing stopped, and groups went out to bury the dead. This lasted until 4:30 PM, when the truce ended, and both sides returned to their lines.
Private Victor Laidlaw, an Australian medic, wrote in his diary about the truce:
The armistice was declared from 8:30 a.m. this morning till 4:30 p.m. it is wonderful, things are unnaturally quiet and I felt like getting up and making a row myself, the rifle fire is quiet, no shell fire. The stench round the trenches where the dead had been lying for weeks was awful, some of the bodies were mere skeletons, it seems so very different to see each side near each others trenches burying their dead, each man taking part in this ceremony is called a pioneer and wears 2 white bands on his arms, everybody is taking advantage of the armistice to do anything they want to do out of cover and a large number are down bathing and you would think today was Cup Day down at one of our seaside beaches.
Firing started again at 4:45 PM. The Turkish commanders now understood how difficult it would be to capture the beachhead. Instead of trying again, they left two of their groups to hold their lines while the others were pulled back.
The Turks never succeeded in capturing the beachhead. At the end of the year, the ANZAC forces were moved to Egypt. During the 260 days of the Gallipoli Campaign, the British Empire forces had 213,980 casualties. Of these, 35,000 were from the Australian and New Zealand Army Corps, including 8,709 Australian and 2,721 New Zealand dead. The exact number of Turkish casualties is not known, but it is thought to be around 87,000 dead out of about 250,000 total casualties.


