Battle of Bardia facts for kids
Quick facts for kids Battle of Bardia |
|||||||
|---|---|---|---|---|---|---|---|
| Part of Operation Compass | |||||||
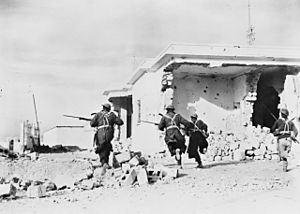 Australian troops enter Bardia, 4 January 1941 |
|||||||
|
|||||||
| Belligerents | |||||||
| Commanders and leaders | |||||||
| Strength | |||||||
| 16,000 | 45,000 | ||||||
| Casualties and losses | |||||||
| 130 killed 326 wounded |
1,703 killed 3,740 wounded 36,000 captured 13 medium tanks 117 tankettes 708 vehicles 400+ artillery guns |
||||||
The Battle of Bardia was a big fight during World War II. It happened between January 3 and 5, 1941, in Bardia, Libya. This battle was part of a larger plan called Operation Compass.
This was a very important battle for Australia. It was the first time an Australian Army group fought in the war. It was also the first battle led by an Australian general and planned by Australian officers. The 6th Australian Division, led by Major General Iven Mackay, attacked the strong Italian fortress at Bardia. They had help from planes, navy ships, and a lot of artillery fire.
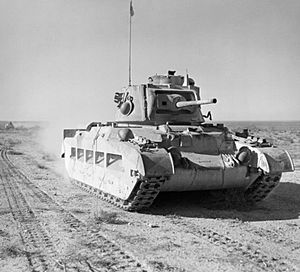
Australian soldiers attacked at dawn from the west, where the Italian defenses were weaker. Engineers used special explosives called Bangalore torpedoes to blow up barbed wire. They also used picks and shovels to fill in ditches. This allowed the soldiers and 23 Matilda II tanks to get inside the fortress. They quickly took over their targets and captured 8,000 Italian soldiers.
Later, another Australian group pushed further into the fortress. On the second day, Australian soldiers captured the town of Bardia itself, splitting the Italian defenses. Thousands more Italian soldiers were captured. By the third day, the Australians, with artillery and the remaining six tanks, took over the rest of the fortress. The Italian soldiers in the north surrendered. In total, about 36,000 Italian soldiers were captured. This victory at Bardia helped the Allied forces keep moving into Libya.
Background
Why the Battle Happened
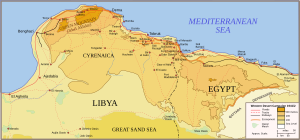
Italy declared war on the United Kingdom in June 1940. Libya was an Italian colony, and next to it was Egypt, which was controlled by the British. Even though Egypt was neutral, British forces were there to protect the Suez Canal.
Soon, small fights started along the border. In September 1940, Italian forces moved into Egypt and stopped at Sidi Barrani. They needed more supplies before they could go further.
Britain needed to send more soldiers and supplies to Egypt. But sending ships through the Mediterranean Sea was too dangerous because of Italy. So, supplies had to go all the way around Africa. This is why soldiers from Australia, New Zealand, and India were sent to help. Even when Britain was worried about being invaded at home, they still sent troops and supplies to the Middle East.
In December 1940, British forces attacked the Italians at Sidi Barrani. They captured the area and took 38,000 Italian soldiers prisoner. The remaining Italian forces were pushed back into Libya. The British then cut off the Italian garrison at Bardia from the nearby city of Tobruk. The 6th Australian Division was brought in to replace other troops and took command of the area.
The Desert Landscape
The Libyan Desert near the coast is mostly rocky, not sandy. It's very dry, with little plant life. There are also dry riverbeds called wadis. Military vehicles could drive across the rocky desert, but the heat, dust, and wind made them wear out quickly. There was almost no food or water, and little shelter from the weather.
Planning the Attack
Italian Defenses
After their defeat at Sidi Barrani, the Italian forces at Bardia were led by Lieutenant General Annibale Bergonzoli. He had about 45,000 soldiers defending the fortress. These soldiers were from different Italian divisions.
The Bardia fortress had a strong defense system. It had an 18-mile (29 km) long perimeter with a deep anti-tank ditch, lots of barbed wire fences, and two lines of strong defensive posts. These posts were about 800 yards (730 m) apart. Each post had anti-tank guns and machine guns, hidden in concrete pits connected by trenches to underground bunkers. These bunkers protected soldiers from artillery fire. However, if an enemy broke through, these posts could be attacked from behind.
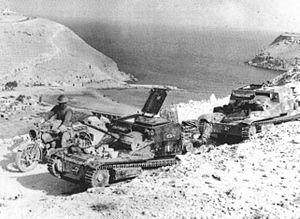
The Italians also had many artillery guns, though many were old and had problems with accuracy or ammunition. They also had some tanks, including 13 M13/40 medium tanks and 115 small L3/35 tankettes. The M13/40 tanks were good, but the L3s were not very useful. None of the Italian tanks had radios, which made it hard for them to work together.
General Bergonzoli hoped that if Bardia held out, the British would run into problems supplying their troops in the desert. But his soldiers were already tired, hungry, and thirsty, which lowered their spirits.
Allied Preparations
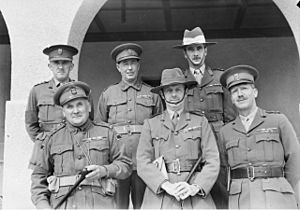
The 6th Australian Division was formed in 1939. Many of its officers were from the reserves, not regular army. At first, they didn't have enough modern equipment, but Britain sent more supplies. The Australian soldiers trained hard in Palestine.
The Australian officers were very good at planning. They believed in allowing junior leaders to make decisions, and their small units trained to patrol aggressively, especially at night.
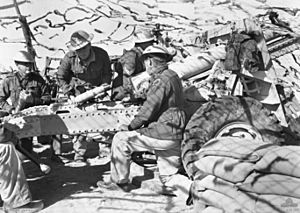
As the Australians moved into position around Bardia, they still had some shortages. They didn't have all their artillery or anti-tank guns. To help, the British added some of their own artillery units to the Australian forces.
British intelligence tried to find Italian gun positions by listening for their firing. Australian patrols went out every night to map the Italian defenses. Planes also took aerial photos. However, British intelligence thought the Italian garrison was much smaller than it actually was.
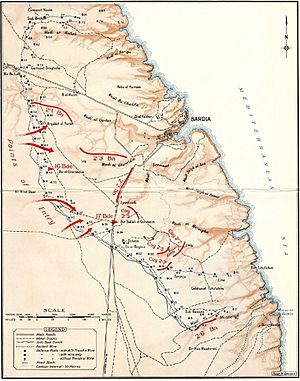
General Richard O'Connor, the British commander, met with General Mackay to plan the attack on Bardia. O'Connor suggested using the 23 Matilda tanks that were still working. Mackay believed Bardia would be a tough fight, like battles in World War I. He and his chief of staff, Colonel Frank Berryman, planned to attack the western side of Bardia's defenses. This area was weaker, good for tanks, and allowed for good artillery observation. The attack would try to split the fortress in two.
Supplying the troops in the desert was a huge challenge. They needed fuel, water, and food. Captured Italian trucks were used, but they often broke down. A port at Sallum was used to bring in supplies, but it was often shelled by Italian guns and attacked by planes. Despite these difficulties, supplies were brought forward.
The Battle Begins
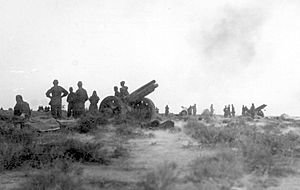
Before the ground attack, Allied planes bombed Bardia to try and make the Italians leave. When that didn't work, they bombed Italian airbases. Then, just before the battle, they bombed Bardia heavily again. Planes also helped guide the artillery fire.
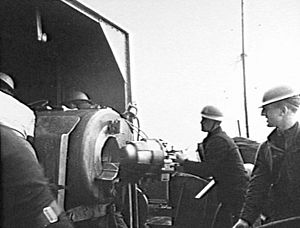
On the morning of January 3, British battleships and destroyers fired hundreds of shells at Bardia. Smaller gunboats continued firing throughout the battle. At one point, naval fire caused a cliff near the town to collapse, taking Italian gun positions with it.
Breaking Through the Defenses
The Australian soldiers woke up early on January 3, 1941. At 5:30 AM, the artillery started firing. The 2/1st Infantry Battalion moved forward, facing Italian mortar and artillery fire. Engineers used Bangalore torpedoes to blow up the barbed wire. Then, they quickly used picks and shovels to break down the sides of the anti-tank ditch.
The Australians quickly overran the first Italian posts. Within half an hour, they had captured several positions and taken 400 prisoners. The 2/2nd Infantry Battalion followed, moving through the gaps made by the engineers. The 23 Matilda tanks then advanced, moving along the Italian defensive lines.
The 2/3rd Infantry Battalion also moved towards Bardia. They attacked Italian strongpoints with grenades and quickly took them. However, some Italian M13/40 tanks counter-attacked, freeing 500 Italian prisoners. Australian anti-tank guns fought back, destroying five of the Italian tanks. By midday, 6,000 Italian prisoners had been taken. The Australians had successfully broken through the main Italian defenses.
Pushing Deeper
Next, the 2/5th Infantry Battalion and parts of the 2/7th Infantry Battalion continued the attack. They faced heavy machine gun and artillery fire. Despite losing many officers, they kept fighting. They used mortars and machine guns to suppress Italian positions and managed to capture 3,000 more prisoners.
Other Australian companies, with the help of Matilda tanks, captured more Italian posts. One Australian officer was shot by a surrendering Italian soldier, which angered the troops. By nightfall, the Australians had captured ten more posts and thousands more Italian defenders. The Italian defense was in a very difficult situation.
Bardia Falls
On the afternoon of January 3, the Australian commanders planned for the next day. They decided to advance on Bardia town and cut the fortress in two. They would use all available artillery, tanks, and more infantry.
The 2/1st Infantry Battalion started its attack at 9:00 AM. They faced heavy fire, but after a strong artillery bombardment, they captured a key Italian post. This led to a general collapse of the Italian defenses in the north. Many Italian posts surrendered without a fight.
The 2/3rd Infantry Battalion also advanced, supported by artillery and tanks. They found many Italian soldiers from support units who were not trained for combat and surrendered easily. One company captured over 2,000 prisoners. Australian carriers (small tracked vehicles) pushed ahead and found an Italian hospital with 500 patients and 3,000 unwounded Italians. They continued to the high ground overlooking Bardia and took over 1,000 more prisoners. By 4:00 PM, Australian tanks and infantry entered the town of Bardia.
The 2/2nd Infantry Battalion attacked an Italian fort on the southern headland of Bardia. The fort had large coastal defense guns that couldn't fire inland. A tank drove straight for the fort's gate, and the Italians opened it, allowing the tanks inside and capturing 300 prisoners. Thousands more prisoners were taken from service units.
By the end of the second day, tens of thousands of Italian soldiers had been killed or captured. The remaining Italian forces were cut off. General Bergonzoli and his staff left on foot for Tobruk, realizing the situation was hopeless.
The Final Push
On the morning of January 5, the 19th Infantry Brigade launched its attack on the southern part of the fortress. They advanced with artillery support and the six remaining Matilda tanks. The lead Australian company had to chase the artillery barrage to keep up. They faced fire from all sides, but many Italian positions surrendered as the infantry and tanks got close.
Australian soldiers captured several key posts, including those in the "Switch Line" defense. Other Australian units captured more Italian generals and thousands of prisoners. The remaining Italian garrisons in the north surrendered to the 16th Infantry Brigade.
Finally, only one Italian post, Post 11, was still holding out. The 2/6th Infantry Battalion attacked it from the front and rear, supported by tanks. The Italian commander, who had been wounded, lowered his flag and raised a white one. About 350 Italian soldiers surrendered at Post 11. Inside, the Australians found many guns and machine guns. The Italian commander had even won a British medal in World War I. This was the last part of Bardia to fall.
Aftermath
Results of the Battle
About 36,000 Italian soldiers were captured at Bardia. Around 1,703 Italians were killed, and 3,740 were wounded. A few thousand, including General Bergonzoli, managed to escape to Tobruk. The Allies captured many Italian guns, tanks, and vehicles. Australian losses were 130 killed and 326 wounded.
What Happened Next
Bardia became an important source of water for the Allies after the battle. However, it was captured again by Axis forces in April 1941 during Operation Sonnenblume, a German offensive. Bardia was fought over again in late 1941 and early 1942, when it was retaken by the 2nd South African Division. It changed hands one more time in June 1942 before being finally taken by the Allies in November 1942 after the Second Battle of El Alamein.
See also
- List of Australian military equipment of World War II
- List of British military equipment of World War II
- List of Italian military equipment in World War II
Images for kids
-
Gloster Gladiator biplane aircraft from No. 3 Squadron RAAF, returning to a landing ground near Sallum, after a patrol over Bardia.


