Battle of Bergen (1799) facts for kids
Quick facts for kids Battle of Bergen |
|||||||
|---|---|---|---|---|---|---|---|
| Part of the War of the Second Coalition | |||||||
 |
|||||||
|
|||||||
| Belligerents | |||||||
|
|||||||
| Commanders and leaders | |||||||
|
|
||||||
| Strength | |||||||
| 22,000 | 35,000 | ||||||
| Casualties and losses | |||||||
|
|
||||||
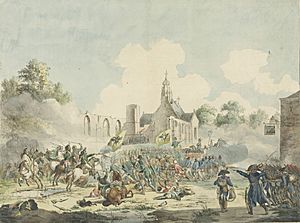
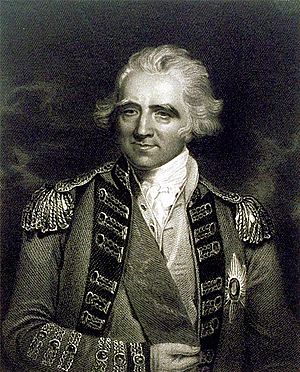
The Battle of Bergen was a big fight that happened on September 19, 1799. It was part of a larger conflict called the War of the Second Coalition. In this battle, French and Dutch soldiers, led by Generals Guillaume Brune and Herman Willem Daendels, won against British and Russian forces. The British and Russians were led by the Duke of York. This battle took place in North Holland. Today, you can find a monument called the Russisch Monument (1902) where the battle happened.
Contents
Who Fought in the Battle of Bergen?
The British and Russian armies were led by the Duke of York. He landed on September 15, 1799. His army grew to about 30,000 soldiers with 1,200 light cavalry. On September 19, these forces moved forward from Schagerbrug.
The French and Dutch armies were ready for them. The Dutch had about 12,000 soldiers. They were in a strong position near Langedijk. The French had about 10,000 soldiers. They were located in Alkmaar, Bergen, Schoorl, and Egmond aan Zee.
British and Russian Forces
The British and Russian forces were divided into four main groups, or columns. Each column had different generals and regiments.
- Left Column: Led by Lieutenant General Sir Ralph Abercromby. This group included several British brigades with different regiments like the 2/1st Foot and the 79th Foot.
- Right Column: Led by Johann Hermann von Fersen. This column was mostly made up of Russian divisions and brigades. It included musketeer regiments and grenadiers.
- Left-Centre Column: Led by Lieutenant General Sir James Pulteney. This group had British brigades, including the 2/27th Foot and the 1/17th Foot.
- Right-Centre Column: Led by Lieutenant General David Dundas. This column included British Guards brigades, like the 3/1st Foot Guards and the Coldstream Guards.
The Battle Plan and the Land
The British and Russian commanders noticed something important. The French and Dutch had left a strong position empty on their right side. This could have been a good chance for the British and Russians. They also saw that Amsterdam was not protected from one side.
The plan for the British and Russians was to attack in different places:
- The left column would go around the enemy's right side, near the Zuiderzee.
- The right column would push the enemy away from the hills of Camperduin and take Bergen.
- The right-centre column would attack Warmenhuizen and Schoorldam. They would also help the right column.
- The left-centre column would try to capture Oudkarspel. This was on the main road to Alkmaar.
The land where the battle took place was challenging. The enemy's left side was on high sand hills near the sea, from Petten to Bergen. The middle parts of the battlefield had many wide, deep, and wet ditches and canals. Bridges on the roads were destroyed, and other obstacles were set up.
What Happened During the Battle?
The battle started with the Russian forces. By 8 AM on September 19, they had taken control of Bergen. However, they were expecting help from their British allies, but the British had not even started to line up. This happened because the British and Russian commanders had not set their clocks to the same time!
Because of this mistake, the Russian forces were quickly surrounded by the French. Their commander, Hermann, was captured. His second-in-command, Jerepsoff, was killed. The Russian troops had to retreat through Bergen to Schoorl, and then they had to leave Schoorl too.
Later, a British group led by Major-General Manners fought back and took Schoorl again. They were joined by more Russian soldiers and British Guards. They pushed the enemy back. But they ran out of ammunition and were very tired. They had to pull back to Petten and the Zijpe Canal.
Meanwhile, the column led by Lieutenant-General Dundas attacked Warmenhuizen at dawn. The enemy had many cannons there. Russian soldiers bravely attacked the left side of the village. At the same time, British Guards entered from the right. These troops took Warmenhuizen and held it, even under heavy cannon fire.
The left-centre column, facing many Dutch soldiers, managed to take Oudkarspel. This was important because it secured a direct path to Alkmaar. Sir Ralph Abercromby's column also succeeded in taking the town of Hoorn. This put him in a good position to complete the turning movement.
However, because the attack on the right side failed, the commanders decided to call all the troops back. They went back to their starting positions. The column that attacked Bergen was strong enough to win if it had been used correctly. It was bigger than the enemy force. But it moved in a crowded way in difficult land. It also started fighting too early, before daylight, which caused problems.
How Many Were Lost?
Many soldiers were lost on both sides during the battle.
- British: 6 officers, 2 sergeants, and 109 regular soldiers were killed. 43 officers, 20 sergeants, 2 drummers, and 345 regular soldiers were wounded. 22 sergeants, 5 drummers, and 463 regular soldiers were missing.
- Russians: 1,741 non-commissioned officers and regular soldiers, and 44 officers were killed or captured. 1,225, including 49 officers, were wounded.
- French and Dutch (Republicans): 3,000 soldiers were captured, including 60 officers. 16 cannons were also taken.
What Happened Next?
After the battle, the new Russian Commander-in-Chief, Mikhail Kutuzov, was on his way to take charge. But when he heard about the big loss at Hamburg, he decided the campaign was hopeless and went back to Russia.
The French and Dutch armies took back all the areas they had lost. Their defense line was now protected by flooded areas. The only roads through these floods had strong defenses. This made the area between Alkmaar and the Zuiderzee easy to defend with fewer soldiers. Amsterdam was also made safe from land attacks. The rest of the army was strengthened and gathered between Langedijk and the sea. The post at Oudkarspel was made even stronger with more defenses and floods. Schoorldam and Koedijk were also fortified. The next major battle happened at Castricum on October 6.


