Siege of Knoxville facts for kids
Quick facts for kids Siege of Knoxville |
|||||||
|---|---|---|---|---|---|---|---|
| Part of the American Civil War | |||||||
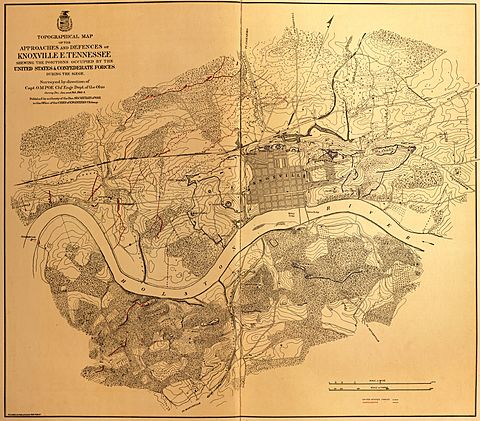
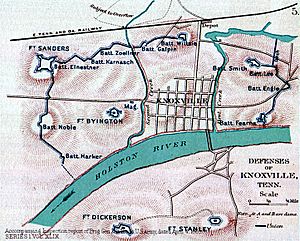 Map shows the Knoxville defenses. Mabry's Hill and Fort Hill are off map to the right. Fort Higley is off map, below and to the left of Fort Dickerson. Sevierville Heights are off map to the right of Fort Stanley. |
|||||||
|
|||||||
| Belligerents | |||||||
| Commanders and leaders | |||||||
| Units involved | |||||||
| Army of the Ohio | Longstreet's Corps | ||||||
| Strength | |||||||
| 12,000 | 14,000 | ||||||
| Casualties and losses | |||||||
| 693 | 1,296 | ||||||
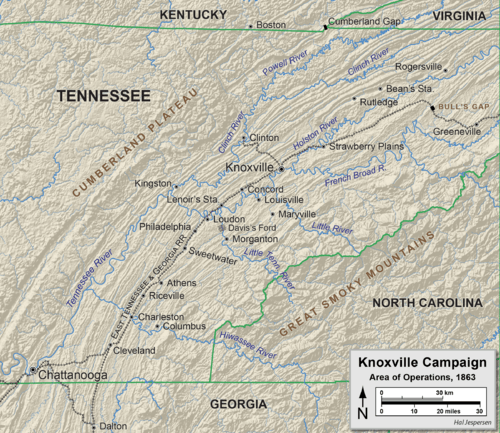
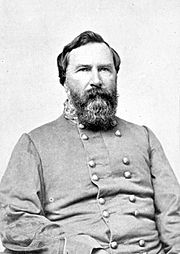
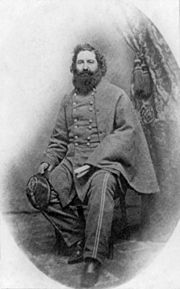
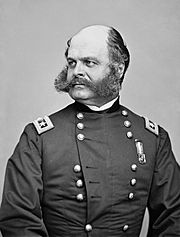
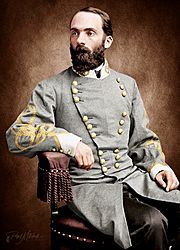
The Siege of Knoxville happened during the American Civil War. It took place from November 19 to December 4, 1863. Confederate forces, led by Lieutenant General James Longstreet, tried to capture the city of Knoxville, Tennessee. The Union army, commanded by Major General Ambrose Burnside, defended Knoxville.
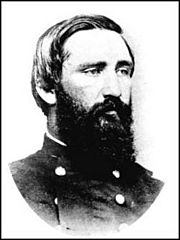
Longstreet's troops surrounded the city, but they could not completely cut it off. Union soldiers and local supporters kept bringing in food. A major attack by the Confederates on November 29, called the Battle of Fort Sanders, failed. When a large Union army, led by Major General William Tecumseh Sherman, came to help, Longstreet ended the siege. He pulled his troops back on December 4, making it a Union victory.
Contents
Why Knoxville Was Important
Union Takes Control
In August 1863, Union General Burnside led his Army of the Ohio into East Tennessee. This area had many people who supported the Union. Burnside's troops took control of Knoxville on September 1 without much fighting. By mid-September, the Union had a strong hold on East Tennessee.
However, the war situation changed when the Confederate Army defeated the Union Army at the Battle of Chickamauga. This battle happened on September 19–20, 1863. After this victory, the Confederates trapped the Union Army in Chattanooga.
More Union troops joined Burnside in Knoxville. By October, he had about 26,000 soldiers. Confederate forces were nearby, but they were not strong enough to stop the Union occupation. Still, the Confederates did win a small battle on October 20. This made Burnside pull his troops back closer to Knoxville.
Longstreet Moves In
On November 4, Confederate General Braxton Bragg ordered General Longstreet to go to Knoxville. Longstreet's mission was to capture the city. Longstreet had about 10,000 infantry, 5,000 cavalry, and 35 cannons. He faced Burnside's 9,000 Union soldiers.
Longstreet's troops crossed the Tennessee River on November 14–15. They tried to cut off Burnside's forces from Knoxville. Confederate cavalry, led by Major General Joseph Wheeler, tried to attack Knoxville from the south. But Union defenders stopped them.
Burnside's troops marched through the night to reach Knoxville. On November 16, Longstreet tried to defeat Burnside at the Battle of Campbell's Station. But the Union soldiers fought well as they retreated. They made it to Knoxville safely by early morning on November 17.
The Siege Begins
Fighting West of Knoxville
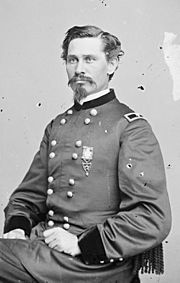
As Union soldiers arrived in Knoxville, they immediately began building defenses. Captain Orlando Metcalfe Poe, the chief engineer, directed the work. Local Union supporters and even some Black workers helped build strong walls and trenches.
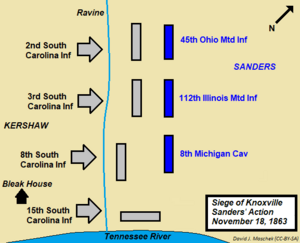
Union General William P. Sanders led his cavalry to slow down Longstreet's advance. On November 17, Sanders' men fought west of Knoxville. They pulled back slowly, making the Confederates work hard to gain ground.
On November 18, a thick fog delayed the Confederates. When it lifted, they attacked Sanders' position. Union soldiers built a low wall of fence rails for protection. Confederate cannons fired at them, causing losses. Later, Confederate snipers fired from a nearby house called Bleak House. A Union cannon fired a perfect shot, hitting the room where the snipers were.
The Confederates launched a final, strong attack. After tough fighting, the Union soldiers had to retreat. The Confederates lost about 140 men, and the Union lost 200–300. General Sanders was badly wounded and died the next day. A Union fort was later renamed Fort Sanders in his honor.
Knoxville's Strong Defenses
Knoxville was on the north side of the Tennessee River. Captain Poe designed defenses on a ridge that was higher than the city. Union soldiers built many forts and trenches around Knoxville.
The Union army had enough food because they could bring supplies into the city. Farmers from the French Broad River valley, east of Knoxville, sent in corn, wheat, hogs, and cattle. Longstreet did not have enough troops to stop these supplies.
Many forts protected Knoxville. Fort Sanders was a very strong earthwork. It had a wide, deep ditch and tall walls. It was armed with many cannons. About 440 Union soldiers defended Fort Sanders.
Other forts like Battery Noble, Fort Byington, Fort Comstock, and Fort Huntington Smith protected different parts of the city. South of the river, Fort Stanley, Fort Dickerson, and Fort Higley guarded the area.
Skirmishes and Probes
Longstreet was worried about his supply lines. He sent General Wheeler's cavalry to attack the Union garrison at Kingston. On November 24, Wheeler's cavalry tried to dislodge the Union troops at Kingston, but they failed. Wheeler then returned to Bragg's army.
On November 23, Confederate troops moved closer to the railroad north of Knoxville. Union soldiers set fire to buildings near the depot, causing a big firework show. The next day, Union troops pushed the Confederates back.
Longstreet also tried to find weak spots on the south side of the river. On November 25, Confederate brigades tried to take Armstrong Hill. This was a wooded height above the Tennessee River. Union troops were surprised at first but quickly fought back. They pushed the Confederates off the hill. The Union soldiers, who had less fighting experience, did very well in this skirmish.
The Attack on Fort Sanders
The Confederates tried to cut the cable that connected Knoxville to the south bank, but they failed. Union soldiers kept improving their defenses. They even strung old telegraph wire between tree stumps in front of Fort Sanders. This would trip up attackers.
Longstreet believed Fort Sanders was the weakest point. He thought the ditch around the fort was shallow. He didn't know that a Union sentry used a plank to cross a much deeper part of the ditch. This mistake made Longstreet decide to attack the fort.
The attack was planned for November 28 but was delayed by rain. It was then moved to the morning of November 29. Confederate soldiers moved their skirmish lines very close to the fort. This warned the Union defenders that an attack was coming.
The Confederate infantry assault began at 6:20 AM after a short artillery bombardment. The attackers ran into the wire entanglement, which slowed them down. When they reached the ditch, they were shocked. The ditch was 12 feet wide and 6 to 8 feet deep. The fort's walls were 18 feet above the bottom of the ditch.
The Confederates had to climb a slippery, steep slope while being shot at. Union soldiers inside the fort threw artillery shells with lit fuses into the crowded ditch. Union infantry also fired into the ditch from the sides. The attack failed completely.
The Confederates lost 813 men (killed, wounded, or missing). The Union lost only about 20-43 men inside and outside the fort. Soon after the attack failed, Longstreet learned that General Grant had badly defeated the main Confederate army at the Battle of Missionary Ridge. Burnside allowed a truce so the Confederates could collect their dead and wounded.
Union Relief Arrives
After the failed attack, Longstreet decided to keep the siege going. He hoped this would make Grant send more Union troops to Knoxville, taking pressure off the main Confederate army. Grant did send a large force, led by Major General William Tecumseh Sherman, to relieve Knoxville.
Sherman's army was huge, about 30,000 men. They marched quickly towards Knoxville, without their cannons or supply wagons. Grant made sure a message about Sherman's approach fell into Confederate hands. Another message reached Burnside.
On December 3, Sherman's troops were close. Longstreet realized he could not hold Knoxville. He decided to retreat northeast towards Virginia. The Confederate wagon train started moving away from the city. On the evening of December 4, Longstreet's troops began their march away from Knoxville. It was a difficult march in the rain and freezing cold.
What Happened Next
By December 5, Sherman's troops reached nearby towns. Sherman, General Gordon Granger, and General Oliver Otis Howard arrived in Knoxville on December 6. Sherman was surprised to find that the Union garrison was not starving, as he had been told.
With Knoxville safe, Sherman ordered most of his troops back to Chattanooga. Granger's corps stayed in Knoxville to help Burnside's forces. On December 7, Union troops began to chase Longstreet's retreating army.
The Siege of Knoxville was a Union victory. The Union lost 693 soldiers (killed, wounded, or missing). The Confederates lost 1,296 soldiers. Longstreet's army stayed in East Tennessee for a few more months, but they could not capture Knoxville. They finally left the area in April 1864. Both sides struggled with getting enough supplies during this campaign.
Casualties
Union losses
Click show to display table.
| Corps | Division | Brigade | Unit | Killed | Wounded | Missing | Total |
|---|---|---|---|---|---|---|---|
| IX Corps Brigadier General Robert Brown Potter |
Headquarters | Not brigaded | 6th Indiana Cavalry Regiment | 1 | 1 | 1 | 3 |
| 1st Division Brigadier General Edward Ferrero |
1st Brigade Colonel David Morrison |
36th Massachusetts Infantry Regiment | 0 | 3 | 2 | 5 | |
| 8th Michigan Infantry Regiment | 0 | 2 | 4 | 6 | |||
| 79th New York Infantry Regiment | 4 | 10 | 0 | 14 | |||
| 45th Pennsylvania Infantry Regiment | 0 | 4 | 0 | 4 | |||
| 1st Brigade Total | 4 | 19 | 6 | 29 | |||
| 2nd Brigade Colonel Benjamin C. Christ |
29th Massachusetts Infantry Regiment | 4 | 4 | 0 | 8 | ||
| 27th Michigan Infantry Regiment | 6 | 12 | 20 | 38 | |||
| 46th New York Infantry Regiment | 3 | 4 | 2 | 9 | |||
| 50th Pennsylvania Infantry Regiment | 2 | 5 | 2 | 9 | |||
| 2nd Brigade Total | 15 | 25 | 24 | 64 | |||
| 3rd Brigade Colonel William Humphrey |
2nd Michigan Infantry Regiment | 10 | 67 | 16 | 93 | ||
| 17th Michigan Infantry Regiment | 3 | 10 | 18 | 31 | |||
| 20th Michigan Infantry Regiment | 2 | 16 | 12 | 30 | |||
| 100th Pennsylvania Infantry Regiment | 3 | 9 | 0 | 12 | |||
| 3rd Brigade Total | 18 | 102 | 46 | 166 | |||
| 1st Division Artillery |
34th Battery New York Light Artillery | 0 | 0 | 0 | 0 | ||
| Battery D, 1st Rhode Island Light Artillery | 0 | 2 | 0 | 2 | |||
| 1st Division Total | 37 | 148 | 76 | 261 | |||
| 2nd Division Colonel John F. Hartranft |
1st Brigade Colonel Joshua K. Siegfried |
2nd Maryland Infantry Regiment | 1 | 7 | 26 | 34 | |
| 21st Massachusetts Infantry Regiment | 1 | 13 | 1 | 15 | |||
| 48th Pennsylvania Infantry Regiment | 3 | 7 | 5 | 15 | |||
| 1st Brigade Total | 5 | 27 | 32 | 64 | |||
| 2nd Brigade Lt. Colonel Edwin Schall |
35th Massachusetts Infantry Regiment | 1 | 4 | 1 | 6 | ||
| 11th New Hampshire Infantry Regiment | 1 | 2 | 1 | 4 | |||
| 51st Pennsylvania Infantry Regiment | 2 | 1 | 1 | 4 | |||
| 2nd Brigade Total | 4 | 7 | 3 | 14 | |||
| 2nd Division Artillery |
3rd U.S. Artillery, Batteries L and M | 0 | 0 | 0 | 0 | ||
| 2nd Division Total | 9 | 34 | 35 | 78 | |||
| Unattached | Artillery | 2nd U.S. Artillery, Battery E | 0 | 1 | 0 | 1 | |
| Summary | Corps Total | 47 | 184 | 112 | 343 | ||
| XXIII Corps Brigadier General Mahlon Manson |
2nd Division Brigadier General Julius White |
2nd Brigade Colonel Marshal W. Chapin |
107th Illinois Infantry Regiment | 0 | 0 | 0 | 0 |
| 13th Kentucky Infantry Regiment | 0 | 0 | 0 | 0 | |||
| 23rd Michigan Infantry Regiment | 0 | 8 | 2 | 10 | |||
| 111th Ohio Infantry Regiment | 0 | 5 | 2 | 7 | |||
| Henshaw's Battery Illinois Light Artillery | 0 | 0 | 0 | 0 | |||
| 2nd Division Total | 0 | 13 | 6 | 19 | |||
| 3rd Division Brigadier General Milo S. Hascall |
1st Brigade Colonel James W. Reilly |
44th Ohio Infantry Regiment | 1 | 5 | 0 | 6 | |
| 100th Ohio Infantry Regiment | 0 | 0 | 0 | 0 | |||
| 104th Ohio Infantry Regiment | 1 | 10 | 0 | 11 | |||
| Battery D, 1st Ohio Light Artillery | 0 | 0 | 7 | 7 | |||
| 1st Brigade Total | 2 | 15 | 7 | 24 | |||
| 2nd Brigade Colonel Daniel Cameron |
65th Illinois Infantry Regiment | 3 | 20 | 0 | 23 | ||
| 24th Kentucky Infantry Regiment | 4 | 55 | 0 | 59 | |||
| 103rd Ohio Infantry Regiment | 2 | 22 | 2 | 26 | |||
| Wilder Indiana Battery | 0 | 0 | 0 | 0 | |||
| 2nd Brigade Total | 9 | 97 | 2 | 108 | |||
| 3rd Division Total | 11 | 112 | 9 | 132 | |||
| Unattached | Provisional Brigade Colonel William A. Hoskins |
12th Kentucky Infantry Regiment | 0 | 0 | 0 | 0 | |
| 8th Tennessee Infantry Regiment | 0 | 0 | 0 | 0 | |||
| Reserve Artillery | Captain Andrew J. Konkle | 24th Battery Indiana Light Artillery | 0 | 0 | 0 | 0 | |
| 19th Ohio Battery | 0 | 0 | 0 | 0 | |||
| Summary | Corps Total | 11 | 125 | 15 | 151 | ||
| Cavalry Corps Brigadier General James M. Shackelford |
1st Division Brigadier General William P. Sanders (mw) Colonel Frank Lane Wolford |
1st Brigade Colonel Frank Wolford Lt. Colonel Silas Adams |
1st Kentucky Cavalry Regiment | 2 | 4 | 2 | 8 |
| 11th Kentucky Cavalry Regiment | 0 | 0 | 2 | 2 | |||
| 12th Kentucky Cavalry Regiment | 3 | 5 | 6 | 14 | |||
| 1st Brigade Total | 5 | 9 | 10 | 24 | |||
| 2nd Brigade Lt. Colonel Emery S. Bond |
112th Illinois Infantry Regiment (mounted) | 18 | 38 | 12 | 68 | ||
| 8th Michigan Cavalry Regiment | 3 | 14 | 28 | 45 | |||
| 45th Ohio Infantry Regiment (mounted) | 4 | 11 | 23 | 39 | |||
| 15th Battery Indiana Light Artillery | 0 | 0 | 0 | 0 | |||
| 2nd Brigade Total | 25 | 63 | 64 | 152 | |||
| 3rd Brigade Colonel Charles D. Pennebaker |
11th Kentucky Infantry Regiment (mounted) | 0 | 2 | 0 | 2 | ||
| 27th Kentucky Infantry Regiment (mounted) | 4 | 10 | 1 | 15 | |||
| 3rd Brigade Total | 4 | 12 | 1 | 17 | |||
| 1st Division Total | 34 | 85 | 75 | 194 | |||
| 2nd Division | 1st Brigade | 2nd Ohio Cavalry Regiment | 0 | 0 | 5 | 5 | |
| Summary | Corps Total | 34 | 85 | 80 | 199 | ||
| Army of the Ohio Major General Ambrose Burnside |
Summary | Army Total | 92 | 384 | 207 | 693 |
Confederate losses
Click show to display table.
| Division | Brigade | Date | Killed | Wounded | Missing | Total |
|---|---|---|---|---|---|---|
| Hood's Division Brigadier General Micah Jenkins |
Colonel John Bratton | Nov. 14–Dec. 4 | 22 | 109 | 5 | 136 |
| Brig. Gen. Henry L. Benning | Nov. 14–Dec. 4 | 1 | 5 | 0 | 6 | |
| Brig. Gen. Jerome B. Robertson | Nov. 25 | 8 | 17 | 6 | 31 | |
| Brig. Gen. Jerome B. Robertson | Nov. 29 | 1 | 1 | 0 | 2 | |
| Brig. Gen. Evander M. Law | Nov. 25 | 14 | 64 | 7 | 85 | |
| Brig. Gen. Evander M. Law | Nov. 29 | 1 | 5 | 1 | 7 | |
| Brig. Gen. George T. Anderson | Nov. 17–18 | 3 | 57 | 0 | 60 | |
| Brig. Gen. George T. Anderson | Nov. 29 | 33 | 129 | 25 | 187 | |
| Hood's Division Total | - | 83 | 387 | 44 | 514 | |
| McLaws Division Major General Lafayette McLaws |
Colonel Solon Z. Ruff (k) | Nov. 29 | 48 | 121 | 81 | 250 |
| Brig. Gen. Goode Bryan | Nov. 29 | 27 | 121 | 64 | 212 | |
| Brig. Gen. Benjamin G. Humphreys | not reported | 0 | 18 | 0 | 18 | |
| Brig. Gen. Benjamin G. Humphreys | Nov. 29 | 21 | 87 | 56 | 164 | |
| Brig. Gen. Joseph B. Kershaw | Nov. 17–18 | 19 | 116 | 3 | 138 | |
| McLaw's Division Total | - | 115 | 463 | 204 | 782 | |
| Grand Total | - | 198 | 850 | 248 | 1,296 |


