
Action of 11–12 December 1917 facts for kids
Quick facts for kids Action of 11–12 December 1917 |
|||||||
|---|---|---|---|---|---|---|---|
| Part of The North Sea Campaign of the First World War | |||||||
 |
|||||||
|
|||||||
| Belligerents | |||||||
 German Empire German Empire |
 United Kingdom of Great Britain and Ireland United Kingdom of Great Britain and Ireland |
||||||
| Commanders and leaders | |||||||
| Reinhard Scheer Paul Heinrich |
J. R. C. Cavendish Vincent Molteno |
||||||
| Strength | |||||||
| 3rd Half-Flotilla: SMS G-101, G-103, G-104, V-100 4th Half-Flotilla: 5 destroyers |
HMS Pellew, Partridge HMS Ouse, Garry |
||||||
| Casualties and losses | |||||||
| 3 wounded | Partridge: 97 men killed 52 captured Pellew: 4 killed prisoner total: 61 (naval and merchant) |
||||||
The Action of 11–12 December 1917 was a naval battle during the First World War. It happened in the North Sea near Bergen, Norway. German warships attacked convoys (groups of ships traveling together) that were sailing between Norway and Lerwick in the Shetland Islands. These convoys carried important supplies like coal.
The German Navy used its newest and biggest destroyers for this attack. They split their forces into two groups. One group attacked ships off the Norwegian coast, destroying a convoy of six merchant ships and their escorts. The other group attacked ships along the British east coast. This second attack was less successful, but one cargo ship was sunk, and another was badly damaged.
Contents
Why This Battle Happened
Shipping During Wartime
During the First World War, Germany used U-boats (submarines) to sink many ships. This caused big problems for countries like Britain, which needed supplies from other nations. Neutral countries, like Norway, also lost many ships.
Britain tried to protect its ships by having them travel in convoys. These convoys were groups of merchant ships escorted by warships. Neutral ships were often afraid to arm themselves. This made them easier targets for German U-boats.
Norway's Role in the War
Norway was a neutral country, but it needed coal from Britain. In 1917, Britain and Norway made a deal. Norway would let Britain use some of its merchant ships. In return, Britain would make sure Norway received enough coal.
This deal was important because Norway faced food shortages and social unrest. The Norwegian government wanted to avoid a revolution. This agreement helped Britain get more ships and ensured Norway received vital supplies.
To get coal to Norway, Britain started a special convoy route in April 1917. Ships would travel from the Humber Estuary in England to Lerwick in the Shetland Islands. From Lerwick, they would cross the North Sea to Norway.
These convoys were usually protected by two British destroyers and several armed trawlers (smaller fishing boats used for military tasks). The convoys were quite successful, but they had to sail through areas where German surface ships could attack them. Also, since they sailed from neutral ports like Bergen, German spies could easily learn about their movements.
Previous Attack: Action off Lerwick
On 17 October 1917, German ships attacked a convoy near Lerwick. Two German cruisers, Brummer and Bremse, surprised the British escort ships, HMS Strongbow and HMS Mary Rose. The German ships were faster and had stronger guns.
HMS Strongbow was quickly disabled. HMS Mary Rose tried to fight back but was also sunk. The German ships then sank several merchant ships in the convoy. They often fired on lifeboats, which was against the rules of war. This attack showed Britain that their convoys needed better protection from surface ships, not just U-boats.
Planning the Attack
Germany's Plan
Admiral Reinhard Scheer, the commander of the German High Seas Fleet, was happy with the success of the Lerwick attack. He decided to plan an even bigger operation. He wanted to attack the Scandinavian convoy route in two different places at once.
The German 2nd Destroyer Flotilla, led by Commodore Paul Heinrich, was chosen for this mission. This flotilla had the newest and fastest destroyers.
- The 3rd Half-Flotilla would attack ships near the Norwegian coast.
- The 4th Half-Flotilla would attack ships along the British east coast.
The light cruiser SMS Emden would act as a radio relay station. The German ships left port early on 11 December. They split up later that day to head for their different targets.
British Convoy Changes
After the Lerwick attack, the British Navy held meetings to improve their convoy system. They realized their escorts were not strong enough to fight off attacks from German surface ships. They decided to change the convoy departure point from Lerwick to Methil Docks in Scotland. Methil was better equipped and closer to some trade routes.
They also planned to run convoys more often from Methil. To protect these convoys, they would add cruiser escorts. However, these changes were not fully in place by December.
British Ship Movements, 10–11 December
On 10 December, a convoy of coal ships left Lerwick for England. It was escorted by the destroyers HMS Ouse and Garry. Another convoy also left Lerwick, escorted by HMS Rother and Moy.
On 11 December, the daily convoy for Scandinavia left Lerwick. It included six merchant ships from Norway, Sweden, and Denmark, plus one British ship. This convoy was escorted by the destroyers HMS Pellew and Partridge, along with four armed trawlers.
Two British cruiser forces were also at sea to provide protection. One force, with the armored cruisers HMS Shannon and Minotaur, sailed from Scapa Flow. Another force, with three light cruisers, sailed to sweep the area near Norway and Denmark.
The Attacks
3rd Half-Flotilla's Attack
As the German 3rd Half-Flotilla sailed north, the weather got worse. There was a strong gale and heavy waves. Despite the storm, they continued their mission. At around 11:30 a.m. on 12 December, they spotted the Scandinavian convoy.
The convoy was near its meeting point off Bergen, Norway. HMS Pellew and HMS Partridge were leading the merchant ships. The British destroyers saw the German ships. Partridge tried to send a warning, but its searchlight was not working well. When it finally sent a signal, the German ships were very close.
The British destroyers went to battle stations. Pellew ordered the convoy to scatter. The German ships split up, with some attacking the destroyers and one heading for the merchant ships. The British were outnumbered and fighting against the wind and spray.
German gunners were very accurate. Partridge was hit in the engine room, filling it with steam and killing the crew inside. It was hit again and began to sink. The captain ordered the ship abandoned. Some crew members tried to fire a torpedo, but it did not explode. Many crew members were killed or captured.
Pellew was also hit in the engine room and lost speed. It tried to fire torpedoes, but only one launched. A sudden rain squall helped Pellew hide. The German ships then focused on the convoy. They quickly sank all the merchant ships and the armed trawler Livingstone. The other trawlers, Commander Fullerton, Tokio, and Lord Alverston, were also sunk. Within 45 minutes, the convoy was destroyed.
British Response
The British cruiser Shannon received a distress signal from Partridge. The commander, Captain Molteno, immediately increased speed. He sent his destroyers ahead to help. However, by the time they arrived, the German destroyers had a two-and-a-half-hour head start on their way home. The British destroyers spent an hour rescuing survivors.
The British commander-in-chief, Beatty, ordered more ships to prepare to sail. But the German destroyers, because of the bad weather, headed for the Skagerrak to return to their base in Kiel. They managed to escape the British cruisers.
4th Half-Flotilla's Attack
On 11 December, the German 4th Half-Flotilla was near the British east coast. They intercepted British radio messages. They thought a British convoy was leaving the Firth of Forth. However, this information was incorrect.
The German ships were actually getting closer to a different convoy. This convoy was escorted by HMS Ouse and HMS Garry. It had left Lerwick on 10 December and was sailing south. The British convoy was unaware of the German force nearby.
4th Half-Flotilla on 12 December
Around 0:30 a.m. on 12 December, the German 4th Half-Flotilla found the Danish ship Peter Willemoes. This ship had fallen behind its convoy. The German destroyers sank it with torpedoes. They did not rescue survivors or gather information.
Later, around 4:00 a.m., the Germans found the Swedish ship Nike near Blyth. They torpedoed it and again left the survivors. The Germans mistakenly thought Nike had sunk. As they left, they saw four steam trawlers. They thought these were the convoy they were looking for.
The German destroyers opened fire on the trawlers. One, JJ Smart, was sunk, and another, Ranter, was damaged. The Germans searched for more ships until 5:00 a.m., then headed back to meet their cruiser, Emden. The Royal Navy did not know about this German attack for several hours.
Aftermath
Casualties and Prisoners
The Germans reported that they took 52 prisoners from HMS Partridge and the armed trawlers. They also captured 23 civilian sailors from the merchant ships. Only three German sailors were wounded.
From the British side, 97 crew members from Partridge were killed, including its captain. Four men from Pellew were also killed. In total, 61 prisoners were held in Germany from the British ships and the convoy.
What Happened Next
HMS Pellew, badly damaged, managed to reach Norwegian waters. Norway was neutral, so the ship could only stay for 24 hours. The crew worked hard to repair the ship with help from another British destroyer, HMS Sabrina. After some diplomatic discussions, Pellew was allowed to leave and safely reached Scapa Flow on 15 December.
New Convoy System
The attacks showed that Britain needed a better convoy system. The Admiralty (the British Navy's headquarters) decided to adopt new plans.
- Convoys would now sail from Methil, Scotland, instead of Lerwick. Methil was better equipped and more convenient.
- Convoys to Scandinavia would run every three days.
- Cruiser escorts would be added to protect the convoys.
- The new route was longer and closer to German bases. So, a battle squadron (a group of powerful warships) from the Home Fleet would help reinforce the local escorts.
These changes were put in place in the New Year.
Ships Involved
- SMS Emden (Light cruiser)
- 2nd Flotilla: Commodore Paul Heinrich (destroyers)
- 3rd Half-Flotilla: Hans Kolbe
- SMS G-101
- SMS G-103
- SMS G-104
- SMS V-100
- 4th Half-Flotilla (Paul Heinrich)
- 5 Destroyers
- 3rd Half-Flotilla: Hans Kolbe
- Destroyers
- HMS Pellew
- HMS Partridge
- Armed trawlers
- HMT Livingstone
- HMT Commander Fullerton
- HMT Lord Alverstone
- HMT Tokio
- Cordova (Britain): 2,284 tons
- Maracaibo (Denmark): 526 tons
- Bollsta (Norway): 1,701 tons
- Kong Magnus (Norway): 1,101 tons
- Torleif (Sweden): 832 tons
- Bothnia (Sweden): 1,723 tons (carrying coal)
British Covering Force
- Cruisers: from 2nd Cruiser Squadron
- HMS Shannon (Captain Vincent Molteno)
- HMS Minotaur
- Destroyers
- HMS Sable
- HMS Sorceress
- +2 other destroyers
Lerwick–Immingham Convoy Escorts
- Destroyers
- HMS Ouse
- HMS Garry
Lerwick–Immingham Convoy Ships
- Peter Willemoes (Sweden)
- Nike (Denmark)
- 4 coal ships
Armed Trawlers (Attacked by 4th Half-Flotilla)
- J J Smart (sunk)
- Ranter (damaged)
- + two other trawlers
Images for kids
-
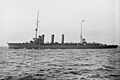
SMS Brummer (a German cruiser involved in the earlier Lerwick attack)
-
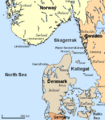
A map showing the Skagerrak, a sea area important for German ships returning home.
-
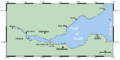
Map of the Firth of Forth, where Methil Docks are located.
-
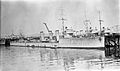
HMS Paladin (1916), a typical M-class destroyer like those used by the British.
-
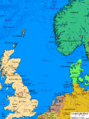
A French map of the North Sea, showing Bergen in Norway and Lerwick in Shetland.
-
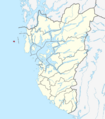
Map of Rogaland in Norway, showing Utsire Island.
-
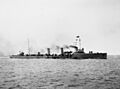
German destroyer G-101, around 1916.
-
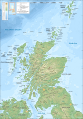
East coast of Scotland and northern England.
-
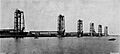
Coal hoists at Immingham dock (1912), where coal convoys departed.


_IWM_SP_1403.jpg)


See Also
- Naval warfare of World War I
- Convoys in World War I