Battle of Amara facts for kids
Quick facts for kids Battle of Amara |
|||||||
|---|---|---|---|---|---|---|---|
| Part of the Mesopotamian Campaign of World War I | |||||||
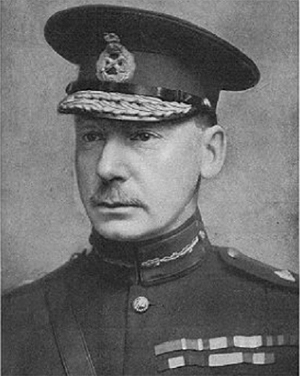
 General Charles Townshend, who commanded the British forces during the battle. |
|||||||
|
|||||||
| Belligerents | |||||||
| Commanders and leaders | |||||||
| Units involved | |||||||
|
6th (Poona) Division
|
|||||||
| Casualties and losses | |||||||
| 4 killed 21 wounded |
120 killed or wounded 1,773 captured |
||||||
The Battle of Amara was an important fight during World War I. It happened between May 31 and June 3, 1915. This battle was part of the Mesopotamian Campaign, which took place in what is now Iraq. British forces fought against the Ottoman army. The battle happened in the flooded areas along the Tigris river, between the towns of Qurna and Amara. The British won the battle and captured Amara. They also forced the Ottoman troops to retreat.
Contents
Why the Battle Happened
British Goals in Mesopotamia
After the Ottomans lost the Battle of Shaiba, General John Nixon gave new orders. He commanded the 6th (Poona) Division to move north. This division was led by General Charles Townshend. Their goal was to capture the city of Amara. General Nixon hoped this would make the Ottomans pull back their forces. This move would also clear the way for the British to advance towards Baghdad.
The Challenging Battlefield
The land between Qurna and Amara was mostly flooded. It had many marshes and small islands. Some hills stuck out from both sides of the Tigris river. The Ottoman army had set up their defenses on these islands. They had gun positions on the western side of the river. These guns supported their infantry, who were dug into trenches. Further north, there were also villages like Abu Aran, Muzaibila, and Ruta. Ottoman and Arab soldiers guarded these villages.
Townshend's Clever Plan
To fight in this watery area, General Townshend used special boats. These were called bellums, small canoes used by local people. Each bellum could hold 5 to 10 soldiers. Townshend divided his troops into four groups. Each group had a different colored flag. His plan was to attack Ottoman positions on both sides of the river at the same time. Small British warships helped with the attack. These included sloops, armed launches, and other light boats. They fired their guns to support the soldiers. Barges and rafts also carried 4-inch guns and machine guns.
How the Battle Unfolded
The First Day: May 31
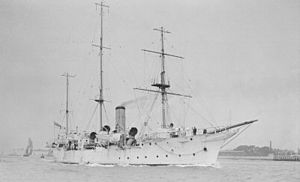
The battle began early on May 31, at 1:00 AM. The 22nd Punjabis regiment started moving through the marshes. They were on the eastern side of the river. By 4:30 AM, they were about 1,500 meters from the Ottoman positions. At 5:30 AM, British gunboats and artillery started firing. The Ottomans fired back 20 minutes later, but their shots missed. General Townshend was on the sloop HMS Espiegle.
Around 6:00 AM, the 17th (Ahmednagar) Brigade began its advance. This group included the Oxford and Buckinghamshire Light Infantry, the 103rd Mahratta Light Infantry, and the 119th Infantry. They moved along the western side of the river. At the same time, the 22nd Punjabis attacked on the east bank. They captured the Ottoman forts there. From these captured spots, they fired machine guns and rifles. This helped the British advance on the western side. By 11:30 AM, all the Ottoman forts on the islands were captured. The British faced very little resistance. Townshend then paused the attack.
The Second Day: June 1
The next day, British ships started shelling Abu Aran at 5:30 AM. The Ottoman artillery did not fire back. Soon, British planes reported something important. The Ottoman troops in all three villages were retreating in large numbers. Townshend's gunboats quickly chased after them. They reached the villages around 3:00 PM.
The armed launch Shaitan led the British fleet. At 6:00 PM, they caught up with the fleeing Ottoman ships. The British opened fire. This caused the Ottoman gunboat Marmaris to get stuck. Several small boats and barges filled with troops and supplies also got stranded. This happened near Ezra's Tomb. The river was too shallow for big ships to go further. So, Townshend moved to a smaller tugboat called Comet. He continued upriver with three armed launches. The sloop HMS Odin stayed behind to take control of the Marmaris.
The Capture of Amara: June 3
After traveling for a day, the British launches were close to Amara. The Shaitan was far ahead of the others. It entered Amara on the morning of June 3. It sank an Ottoman steamer carrying troops. The Shaitan passed through the town without being fired upon. Half a mile north of Amara, about 300 Ottoman soldiers appeared. They came from the forested river banks and surrendered. The Shaitan's nine-man crew collected their weapons. They then escorted the prisoners back to Amara.
The small crew held the town until the other launches arrived. General Townshend's force of 41 men then accepted the surrender. The civil governor and military commander of Amara gave up. About 800 more Ottoman soldiers were taken prisoner. Townshend stayed in Amara until the next day. A steamer arrived with the 2nd Brigade of the Royal Norfolk Regiment. This larger force secured the British position in the town.
What Happened Next
After capturing Amara, Townshend's main fleet went back to Basra. Only the Comet and Shaitan stayed behind. General Nixon praised Townshend's quick and effective actions. He also highlighted how well the Army and Navy worked together. The crew of the Shaitan received the Distinguished Service Medal. This was for their brave role in capturing the town.
The British victory at Amara encouraged General Nixon. He decided to continue moving up the Tigris river. This led to more battles, including the Battle of Ctesiphon and the siege of Kut.


