Battle of Rafa facts for kids
Quick facts for kids Battle of Rafa |
|||||||
|---|---|---|---|---|---|---|---|
| Part of the Middle Eastern theatre of World War I | |||||||
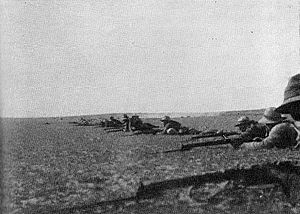 Part of the British Empire firing line at Rafa |
|||||||
|
|||||||
| Belligerents | |||||||
|
|||||||
| Commanders and leaders | |||||||
| Strength | |||||||
| Desert Column ANZAC Mounted Division Imperial Camel Corps Brigade 7th Light Car Patrol |
Ottoman garrison of 2,000 soldiers | ||||||
| Casualties and losses | |||||||
| 71 killed, 415 wounded |
200 killed, 168 wounded, 1,434 prisoners |
||||||
The Battle of Rafa, also known as the Action of Rafah, was a key battle fought on January 9, 1917. It was the third and final battle that helped British forces take back the Sinai Peninsula during the Sinai and Palestine campaign of World War I. The Desert Column, a group of soldiers from the Egyptian Expeditionary Force (EEF), attacked an Ottoman Army base. This base was at El Magruntein, near Rafah, on the border between Egypt and the Ottoman Empire. This battle marked the start of fighting inside Ottoman territory, in a region called Palestine.
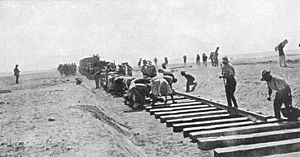
After winning battles at Romani in August 1916 and Magdhaba in December, the Ottoman Army had to retreat. The EEF pushed eastward, getting supplies through new lines of communication. This advance was possible because a railway and a water pipeline were being built. When the railway reached El Arish on January 4, 1917, the Desert Column could attack Rafa. The battle lasted all day. The Ottoman soldiers defended their strong positions, which included redoubts (small forts) and trenches. These were on a hill surrounded by flat land. Eventually, the Ottoman forces were surrounded by Australian Light Horsemen, New Zealand mounted riflemen, mounted yeomanry, camel soldiers, and armored cars. Late in the afternoon, the New Zealand Mounted Rifles Brigade captured the main fort. The remaining defenses were taken soon after.
Contents
Why the Battle Happened
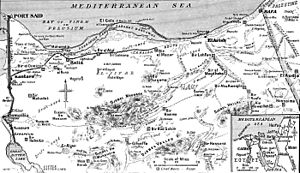
After their victory at the Battle of Romani in August 1916, the ANZAC Mounted Division and other troops went on the attack. Their progress depended on building a railway and a water pipeline. On December 23, 1916, the ANZAC Mounted Division captured El Arish. This was after a day of fighting at the Battle of Magdhaba. Meanwhile, the 52nd (Lowland) Division set up a base at El Arish. This town was on the Mediterranean Sea, about 30 miles (48 km) from the railway's end.
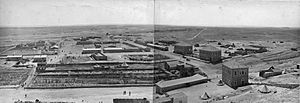
El Arish was 90 miles (140 km) from the nearest British base, at Kantara. This made getting supplies difficult at first. But when the Royal Navy arrived on December 22, supplies started coming by ship. The base at El Arish grew quickly. Workers from the Egyptian Labour Corps unloaded supplies. The Egyptian Camel Transport Corps then moved them. The infantry and navy protected these important supply activities. On January 4, 1917, the first train arrived at El Arish. This greatly improved the ability to bring in supplies and support large groups of soldiers.
General Sir Archibald Murray, who led the EEF, wanted to finish crossing the northern Sinai. He believed an attack would force Ottoman forces to leave their desert bases. So, he ordered an advance from El Arish to Rafa, about 27 miles (43 km) away. He wanted this to happen as soon as possible.
Getting Ready for Battle
On December 28, Major General Harry Chauvel ordered a scouting mission. His 1st Light Horse Brigade checked the road towards Rafa. They found it good for cars and artillery. Two days later, they scouted further, finding good land with crops. A small group went even closer to the main Ottoman defenses at El Magruntein. They reported "great activity" there.
On January 5, the weather cleared. A plane from No. 1 Squadron, Australian Flying Corps (AFC), saw 2,000 to 3,000 Ottoman soldiers digging defenses. These were south of Rafa, in the El Magruntein area. Two days later, British planes found strong Ottoman bases at El Kossaima and Hafir el Auja. These could threaten the EEF's right side or send help to Rafa. On January 7, German planes bombed El Arish. The next day, No. 1 Squadron AFC planes flew all day, watching the preparations for the Rafa attack.
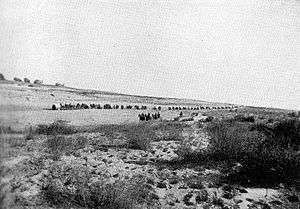
Lieutenant General Philip Chetwode, who commanded the Desert Column, left El Arish on January 8. He headed towards Rafa, where 2,000 Ottoman soldiers were based. Chetwode's force was similar to the one Chauvel led at Magdhaba. It included the 5th Mounted Brigade and the 7th Light Car Patrol. This patrol had four gun cars and three supply cars. The journey was about 30 miles (48 km). They started before sunset to have enough time to reach El Magruntein. The first few miles were over heavy sand dunes, which were hard for the horses pulling guns and wagons. Later, they found an old road that was easier to travel on. The first soldiers reached Sheikh Zowaiid around 10:00 PM. The Desert Column camped near the village. Here, the horses found grass, the first since leaving Australia.
The plan for the attack on Rafa, set for January 9, was like Chauvel's successful plan at Magdhaba. The soldiers and cars would surround the Ottoman base. They would then charge forward, get off their horses, and attack the defenders. The defenders were in three lines of trenches and forts around a hill.
The Attacking Force
The mounted units of the Desert Column, led by Chetwode, included:
- The ANZAC Mounted Division, led by Chauvel. This had the 1st and 3rd light horse brigades, the New Zealand Mounted Rifles Brigade, and several artillery batteries.
- The 1st, 2nd, and 3rd battalions of the Imperial Camel Corps Brigade with a mountain gun battery.
- The 5th Mounted Brigade with a battery of 18-pounder guns.
- The 7th Light Car Patrol, with six armored cars armed with machine-guns.
No. 1 Squadron AFC moved closer to El Arish to support the attack.
Ottoman Defenders
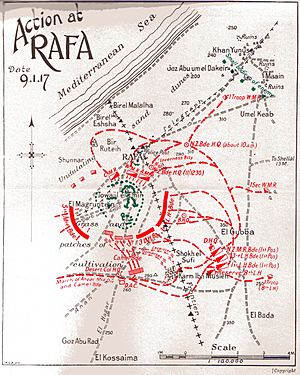
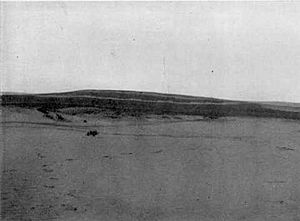
Rafa was defended by the Ottoman 31st Infantry Regiment. They had one mountain gun battery. British planes had estimated their strength at 2,000 to 3,000 soldiers. They were well dug-in in four main positions on high ground, known as Hill 255 or El Magruntein. Their main fort, about 200 feet (61 m) high, overlooked the flat land. This main fort was supported by three other groups of forts, called A, B, and C by the British. These forts were connected by trenches. They offered strong, all-around defense with a clear view of the battlefield for about 2,000 yards (1,800 m). The only weak spot was behind the position, to the north-east.
The Battle Begins
The Desert Column started its final approach to attack Rafa on January 9, 1917. They had no extra ammunition for their artillery, rifles, or machine-guns. Chetwode had ordered all wheeled vehicles, except the guns, to stay at Sheikh Zowaiid. This decision caused problems later when ammunition ran low. Supplies were sent forward but often did not reach the soldiers who needed them.
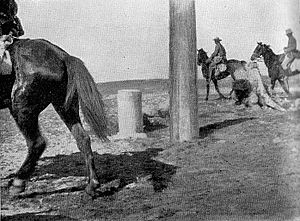
At 1:00 AM, the 1st Light Horse and New Zealand Mounted Rifles brigades led the column. They met and captured a Bedouin camel patrol. At 6:15 AM, the Auckland Mounted Rifle Regiment (New Zealand Mounted Rifles Brigade) was the first to cross the Egyptian-Ottoman border. These two brigades rode to positions from which to attack Rafa from the south, east, and north. Other units followed, including the rest of the ANZAC Mounted Division, part of the 5th Mounted Brigade, the Imperial Camel Brigade, and the 7th Light Car Patrol.
By 6:45 AM, the ANZAC Mounted Division headquarters was set up west of Karm Ibn Musleh. The 1st and 3rd light horse brigades and artillery took positions to the south. They guarded against Ottoman soldiers retreating. The New Zealand Mounted Rifles Brigade was to the north. The 5th Mounted Brigade was held in reserve. By 7:00 AM, a patrol cut the telegraph line from Rafa. This isolated the Rafa garrison. British artillery then began firing on the forts at El Magruntein.
Just after 8:00 AM, the New Zealand Mounted Rifles Brigade moved north. They got into position to attack the C4 and C5 groups of forts and trenches. The 1st Light Horse Brigade moved to attack the C3, C2, and C1 groups. After capturing these, they would attack the main fort. Three battalions of the Imperial Camel Brigade were ordered to attack the D group of forts. The 3rd Light Horse Brigade was kept in reserve. At 9:30 AM, the artillery began a 30-minute bombardment. Under this cover, the attacking troops advanced. By 9:45 AM, they were within 2,000 yards (1,800 m) of the Ottoman trenches.
The Attack Intensifies
As the 1st Light Horse Brigade advanced, they faced heavy machine-gun and shrapnel fire. To the south, the Imperial Camel Brigade moved towards the B4 fort. At 10:30 AM, the 5th Mounted Brigade was ordered to attack forts further west. They dismounted 2,000 yards (1,800 m) from their targets. They were immediately met with heavy machine-gun fire.
By 10:00 AM, the attack from the north, led by the Auckland Mounted Rifles, reached Rafa. They quickly captured the village. They also took six German and two Ottoman officers, 16 other soldiers, and 21 Bedouins. Two groups were sent to watch for Ottoman reinforcements. One went north towards Khan Yunis and one east towards Shellal.
With the Ottoman garrison at El Magruntein cut off, orders were given to commit all reserves. The attack was to be "pressed home." By 11:00 AM, the attacking force was spread out. They were supported by various artillery batteries.
Brigadier General Edward Chaytor, leading the New Zealand Mounted Rifles Brigade, moved his headquarters closer. Half an hour later, the attack was moving forward steadily. By 12:15 PM, the Wellington Mounted Rifles Regiment joined the front line. They were within 600 yards (550 m) of El Magruntein. The 2nd Battalion of the Camel Brigade also advanced. Soon after, the Canterbury Mounted Rifles Regiment linked up with the 5th Mounted Brigade. This completed the circle around the Ottoman trenches. The 7th Light Car Patrol reached the Rafa road. From there, they fired on the A1 and A2 forts. The artillery batteries also moved forward.
Running Low on Ammunition
The Ottoman defenders held strong positions. Each fort helped protect the others with supporting fire. The attacking soldiers were often exposed to this fire. They kept firing to keep the defenders from aiming. Slowly, the circle around the Ottoman positions tightened. However, between 12:15 PM and 2:15 PM, progress slowed.
By early afternoon, ammunition began to run low. Even though Chauvel urged more effort, the mistake of leaving ammunition vehicles behind was costly. The attack began to falter. The New Zealand Mounted Rifles Brigade ran out of ammunition for some machine-guns. The Inverness-shire Battery ran out of shells and had to pull back.
At 2:30 PM, Chauvel ordered a new push against the C group of forts to start at 3:30 PM. Artillery would keep firing on these forts until then. However, 15 minutes later, captured Ottoman and German soldiers said that their 160th Regiment had left Shellal to reinforce Rafa. Shellal was about 10 to 13 miles (16 to 21 km) away, or about three and a half hours. This was confirmed when two battalions were seen advancing from Shellal towards Rafa. Another 500 soldiers were seen approaching Rafa from Khan Yunus.
Final Attacks and Victory
The main attack, launched at 3:30 PM, was supported by all available guns. It was slow going against the determined Ottoman defenders. German planes also bombed the attackers. Meanwhile, Ottoman reinforcements from Khan Yunus and Shellal began attacking the two groups of Wellington Mounted Rifles Regiment soldiers. Four guns from the Canterbury Mounted Rifles Regiment moved forward. They provided effective covering fire until the attacking troops were very close to the trenches.
After steady and persistent work, by 4:00 PM, smoke hung over the central fort from rifle and machine-gun fire. The covering fire was so effective that the Ottoman defenders had trouble aiming. This allowed the attacking forces to cover the last 600 to 800 yards (550 to 730 m) in two quick pushes. Around 4:30 PM, the New Zealand Mounted Rifles Brigade launched its final attack on the central fort. They lacked artillery support but used machine-guns effectively. They captured the central fort in a final bayonet charge, running and firing. From this captured position, they could fire on other forts still held by Ottoman defenders.
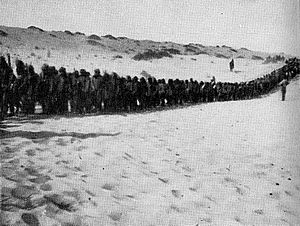
With the New Zealanders holding the main fort, the 1st and 3rd light horse brigades advanced. They captured the remaining forts in their areas. As the 3rd Battalion of the Imperial Camel Brigade approached the B group of trenches, a white flag appeared. The B2 and central B forts were taken by 4:50 PM. They captured 5 officers and 214 other soldiers. The Warwickshire Yeomanry captured the B1 fort and another 101 prisoners. Aircraft helped these attacks by bombing the forts and trenches. The planes had new radios, which helped commanders know how the battle was going. The New Zealanders stayed near the main fort while prisoners were gathered and sent away. Chetwode praised all the troops, especially the New Zealand Mounted Rifles Brigade.
Battle Losses
During the battle, the Desert Column had three times more losses than at Magdhaba. They had 487 casualties. This included 124 New Zealanders: 71 killed, 415 wounded, and one missing. The Ottoman forces, including some German machine-gunners, had between 1,472 and 1,635 prisoners, with 162 of them wounded. About 200 Ottoman soldiers were killed.
After the Battle
After the battle, a strong group of two light horse regiments stayed behind to guard the area. Most of the Desert Column returned to Sheikh Zowaiid for water and food, arriving around midnight. The two light horse regiments at Rafa stood guard while the battlefield was cleared. Ambulance units worked through the night to help the wounded. The 3rd Light Horse Field Ambulance stayed on the battlefield. All available ambulance carts and empty wagons were sent from Sheikh Zowaiid to help move the wounded to the hospital.
The ANZAC Mounted Division's ambulance units had been reorganized before the battle. They had equipment to transport 92 patients at a time. The next morning, the 8th Light Horse Regiment was attacked by Ottoman cavalry and camel units. After some fighting, the attackers had to retreat, leaving 14 prisoners. The entire 3rd Light Horse Brigade returned to the battlefield on January 10 to collect captured items.
El Arish Bombed
On the night of January 19, German and Ottoman aircraft carried out a large bombing raid on El Arish. They dropped bombs and fired machine-guns into the camp. Many horses were killed or injured, as they were an easy target from the air.
Future Plans
The campaign across the Sinai desert, which began in August, ended with the Ottoman Empire being pushed out of Egyptian territory. With the British victory at Rafa, and the railway and water pipeline advancing, the EEF could build a strong base. From here, they planned to move into Ottoman territory. To do this, they needed to capture Gaza. The First Battle of Gaza took place in March 1917.
On January 19, British planes saw that the Ottoman Army had left El Kossaima. They had also reduced their main desert base at Hafir el Auja. However, British headquarters believed Ottoman forces would still hold areas in the center of the Sinai Peninsula. This was to control the local Arab people. To deal with Ottoman units behind the advancing EEF, a raid was carried out at Nekhl. Two columns of light horse and yeomanry, with three aircraft, moved out from Serapeum. This was about 60 miles (97 km) to the east. However, as the columns approached on February 17, planes found that the Ottoman garrisons had already left. No fighting occurred.


