New Zealand Mounted Rifles Brigade facts for kids
The New Zealand Mounted Rifles Brigade was a special group of soldiers from the New Zealand Army during the First World War. This brigade was formed in 1914 as part of the New Zealand Expeditionary Force. It was one of the first New Zealand units to travel overseas for service.
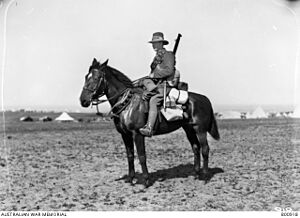
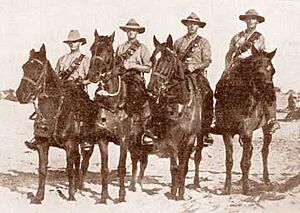
This brigade was made up of three main regiments: the Auckland Mounted Rifles, the Canterbury Mounted Rifles, and the Wellington Mounted Rifles. It also included smaller support teams. In total, the brigade had about 1,940 men and 2,032 horses. By the end of the war, over 17,700 different soldiers had served in this brigade. These soldiers were "mounted infantry," meaning they rode horses to get to battles, then got off their horses to fight on foot.
By late 1914, the brigade arrived in British Egypt. They became part of the New Zealand and Australian Division. Their first big challenge was fighting on foot during the Gallipoli Campaign against the Ottoman Turkish Empire. After seven tough months, they left Gallipoli and returned to Egypt. In 1916, they joined the ANZAC Mounted Division. The brigade then helped protect the important Suez Canal.
After a Turkish attack in the Sinai Desert, the brigade helped clear the enemy from Egypt. Over the next two years, they pushed the Turkish forces out of Palestine. This long effort is known as the Sinai and Palestine Campaign. After the war ended in 1918, the brigade played a small role in the Egyptian Revolution of 1919. It was officially disbanded in June 1919.
In 2025, one mounted rifles unit, the Queen Alexandra's Mounted Rifles, is still part of the modern New Zealand Army.
Contents
Forming the New Zealand Mounted Rifles Brigade
On 4 August 1914, the British Empire declared war on the German Empire. Just two days later, New Zealand offered to send soldiers to help. This group was called the New Zealand Expeditionary Force (NZEF). The British government accepted this offer. They specifically asked for a mounted infantry brigade. This unit became known as the New Zealand Mounted Rifles Brigade.
These soldiers were called "mounted infantry" because they rode horses to travel quickly. When they reached a battle area, they would get off their horses. Then, they would fight on foot, just like regular infantry soldiers.
The brigade's first leader was Colonel Andrew Russell. His command included a headquarters, three regiments, and support troops. These soldiers came from New Zealand's Territorial Force. Each of New Zealand's four military districts provided a mounted regiment for the NZEF. Each regiment contributed a squadron, keeping their own badges and traditions. The brigade started with 1,940 men and 2,032 horses. Even with all these men, their fighting strength on foot was like a single infantry battalion. The fighting was so intense that over 17,700 men served in the brigade by the war's end.
How the Brigade Was Organised
Template:New Zealand Mounted Rifles Brigade When it first formed in 1914, the brigade had its headquarters and three mounted regiments. These were the Auckland Mounted Rifles, the Canterbury Mounted Rifles, and the Wellington Mounted Rifles. It also had support units from the New Zealand Engineers, a Field Ambulance (for medical help), and an Ammunition Subsection.
New Zealand did not send its own artillery for the brigade. The plan was for the British Army to provide artillery support. Later, another regiment, the Otago Mounted Rifles, joined the brigade during the Gallipoli Campaign. In July 1916, the machine-gun sections from the three regiments were combined. They formed a new unit called the Brigade Machine-Gun Squadron.
Training for Overseas Service
In New Zealand, new soldiers for the brigade trained at Featherston Camp. This camp was north-east of Wellington. About 8,000 men lived there in nearly 300 buildings. The camp had many facilities, including dining halls, cook-houses, and stables for 500 horses.
The training program was thorough. It included eight weeks of foot drills and two weeks of shooting practice. There were also eight weeks of mounted drills (riding horses). Soldiers learned about hygiene, military rules, and how to care for animals. All mounted soldiers had to pass riding tests. After training, they traveled to Australia. From there, they sailed on troopships to Egypt.
The Brigade in Egypt
In October 1914, just two months after the war began, the brigade sailed from New Zealand. They arrived at the Suez Canal on 3 December 1914. Two days later, they landed at Alexandria. From there, they traveled by train to Cairo. They set up camp in a western suburb called Zeitoun.
The brigade was now part of the New Zealand and Australian Division. This division also included the New Zealand Infantry Brigade and two Australian brigades. On 18 December, Egypt became a British protectorate. Three days after a new Sultan was crowned, the brigade marched through Cairo. This was a show of strength.
The soldiers spent their time training in Egypt. They did day and night marches through the desert. They also practiced with rifles and machine-guns. In February, they completed a four-day exercise. During this, they marched about 25 miles (40 km) each day. In April, the infantry brigades were ordered to leave for a secret destination. Soon, news arrived about the Gallipoli landings. A week later, the mounted rifles brigade was told to follow. However, they had to leave their horses behind. They would fight on foot.
Fighting in Gallipoli
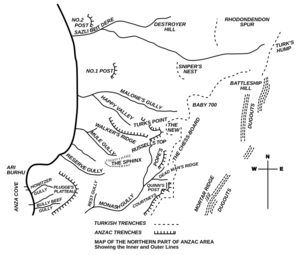
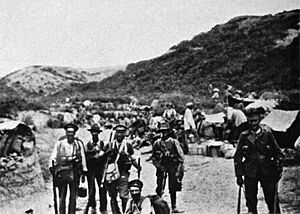
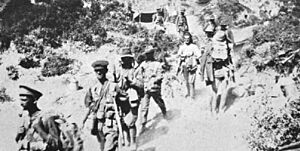
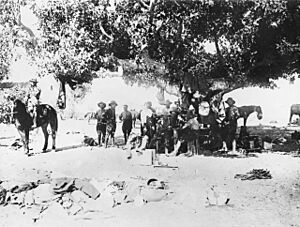
The brigade's ships arrived off Gallipoli on 12 May. The soldiers stayed on board until dark. Then, they landed at Anzac Cove. They camped on the beach that night. The next day, they took over the northern part of the beachhead. They relieved the Royal Naval Brigade on Walkers Ridge. The brigade's headquarters was set up on the highest point, known as Russell's Top.
The Wellington Mounted Rifles were on the right, looking into Monash Valley. The Auckland Mounted Rifles were in the center. The Canterbury Mounted Rifles were on the left, near the sea. They were responsible for No.1 and No.2 Posts. No.2 Post was the furthest north position. Moving between these posts and the main lines was only safe at night.
Defending Walker's Ridge
In May, reports showed that Turkish soldiers were gathering around the ANZAC positions. They were preparing an attack. Just after midnight on 19 May, the Turks began firing. They used small arms, artillery, and hand grenades. This continued until 3:30 AM, when the Turkish infantry charged forward.
In the brigade's area, the main attack hit the Auckland Mounted Rifles. They waited until the Turks were very close, about 20 yards (18 m) away. Then, every weapon fired. The machine-guns caused many casualties among the attackers. The Turks were forced to take cover. At daybreak, they began to retreat, leaving thousands of dead soldiers. The Canterbury Mounted Rifles also saw another Turkish force forming for an attack. Their machine-guns fired, breaking up the group and forcing them to withdraw.
Later, on 20 May, another Turkish attack started. But it failed against the brigade's machine-gun fire. That afternoon, white flags appeared over the Turkish trenches. All firing stopped. It seemed they wanted a truce to collect their wounded. However, they started collecting weapons and bringing in more soldiers. The brigade warned them they would fire in ten minutes. The Turks returned to their trenches. An armistice (a temporary stop to fighting) was later agreed for 24 May. This allowed both sides to bury their dead.
The Battle for No.3 Post
On 27 May, the brigade noticed the Turks building a new position. It was about 450 yards (410 m) east of No.2 Post. This new position would be dangerous to the New Zealand post. So, it had to be captured. The 1st Squadron, Canterbury Mounted Rifles, was given this task. After dark on 28 May, they attacked the position. By 11:30 PM, they had forced the Turkish defenders to leave.
Once the position was secure, the 6th Squadron Wellington Mounted Rifles moved in. They carried spades and picks to improve the defenses. This new position became known as No.3 Post. The squadron was ordered to "hold the post till relieved." They dug through the night. At daybreak, they had to stop and take cover. The post came under heavy fire from the surrounding hills.
Unable to do much during the day, the 6th Squadron was relieved by the 9th Squadron Wellington Mounted Rifles at 9:30 PM. The 9th Squadron tried to improve defenses. But thirty minutes later, about 1,000 Turks surrounded and attacked the post. By 11:30 PM, they had cut the telephone wires. The New Zealanders had to expose themselves to fire, which kept the attackers back for a while. But the strong Turkish attack allowed them to reach the trenches.
At midnight, the 2nd Squadron Wellington Mounted Rifles was sent to help. But they couldn't break through the Turkish lines. They had to set up their own defense between No.2 and No.3 Posts. The fighting continued fiercely. By 7:10 PM, the 9th Squadron reported losing the northern side of the post to the Turks. As it got dark, the Turkish attacks slowed down. At 10:30 PM, the 10th Squadron and half of the 8th Squadron Canterbury Mounted Rifles finally reached No.3 Post. They relieved the tired defenders.
The Canterbury Mounted Rifles now held the post. They fought off several Turkish attacks. However, the high command decided it was impossible to defend No.3 Post. It was abandoned that same night. The brigade suffered many casualties in this battle.
The Battle for Chunuk Bair
In August, the British planned a big attack to capture Chunuk Bair. This was a high point in the Sari Bair mountain range. The New Zealand and Australian Division would lead this attack. The first part of the plan was to clear the Turks from the foothills. This job was given to the New Zealand Mounted Rifles Brigade. They were joined by a Māori Pioneer Battalion.
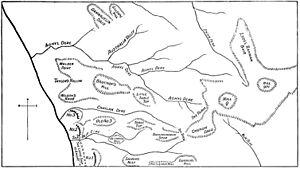
The attack began on the night of 5/6 August. The Auckland Mounted Rifles successfully captured the Old No.3 Post. To their left, the Canterbury and Otago Mounted Rifles advanced quietly, using only their bayonets. They cleared the Chailak Dere valley and moved north to Aghyl Dere. They captured several key points, including Taylor's Hollow and Beauchop Hill. To the right, the Wellington Mounted Rifles and the Māoris captured Destroyer Ridge. They then climbed the north-east face of Table Top and attacked the Turks from behind, capturing the position.
The next day, the Auckland and Canterbury Mounted Rifles, the New Zealand Infantry Brigade, and two British battalions formed a group called No.1 Column. They were ordered to hold the ground they had captured "to the last man." Throughout the next day, Turkish attackers moving over the hill became easy targets for the defenders.
The brigade held out until 9 August. By then, it had suffered so many losses that it was barely able to fight. The Auckland Mounted Rifles, for example, had only sixty-six men left from 310 who started the battle. The Canterbury Mounted Rifles lost 105 men, about forty percent of their strength. The Wellington Mounted Rifles had only sixty-seven men remaining from 173.
The Battle for Hill 60
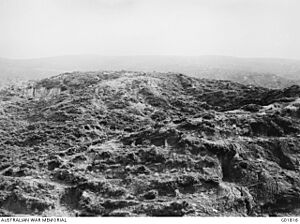
Two weeks later, the Canterbury and Otago Mounted Rifles were chosen for another battle. This was to capture Hill 60. The battle began at 3:30 PM on 21 August. The Canterbury Mounted Rifles charged directly at the hill. They suffered sixty percent casualties, including their commanding officer. However, they successfully captured the Turkish trench within fifteen minutes. But on either side, the rest of the attack had failed. This left the two regiments isolated. They did not have enough men to continue the attack. So, they were ordered to dig in and hold their position. They did this until 23 August, when the Auckland and Wellington Mounted Rifles relieved them.
On 27 August, a second attempt to capture Hill 60 began. At 5:00 PM, the Auckland and Canterbury Mounted Rifles captured the Turkish front line. The Wellington and Otago Mounted Rifles followed, moving past them to capture the Turkish reserve line. On other parts of the battlefield, the supporting attacks failed. This left the Wellington and Otago Mounted Rifles isolated on a narrow front. The brigade strengthened the ground they had captured. They moved their machine-guns forward to help defend. The front line was held by only forty men. All four regiments suffered heavy casualties. They had to fight off several counter-attacks. They were finally relieved on 29 August and moved to the rear.
Leaving Gallipoli
In September, the brigade, now with only twenty officers and 229 other soldiers, was relieved by Australian troops. They left the peninsula for a rest camp on the island of Lemnos. They arrived at Moudros on 14 September. While resting, they were joined by new soldiers. These were replacements for their many casualties.
On 10 November, the brigade returned to Gallipoli. They moved back into the front line but were not involved in any more attacks. Then, on 12 December, orders for the evacuation were given. The first to leave were soldiers with any illness. Then, one regiment or battalion from each brigade was chosen. The Auckland Mounted Rifles was chosen from this brigade. This meant the remaining soldiers had to spread out to cover more ground.
The last soldiers were scheduled to leave on the night of 19/20 December. Each regiment was divided into three groups. The first group left at 5:30 PM on 19 December. A smaller second group followed at 9:35 PM. The last group of men had to cover for the entire brigade. They kept up a steady rate of fire. They also moved their machine-guns around to make it seem like all defenses were fully manned. This deception helped them leave safely. The last small group of men left at 2:05 AM on 20 December. Once on the evacuation beach, they boarded their ships. They sailed back to Lemnos. On 22 December, they returned to Egypt. They arrived at Alexandria on 26 December and eventually returned to their old camp at Zeitoun. During the Gallipoli campaign, 4,000 men served with the brigade. Almost half of them, 727 dead and 1,239 wounded, became casualties.
Campaigns in Sinai and Palestine
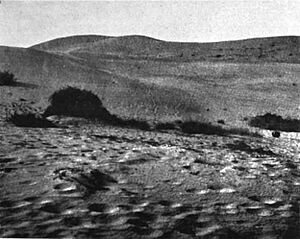
In January 1916, the brigade left Zeitoun and headed east. They camped beside the Great Bitter Lake on the Suez Canal. Here, they practiced fighting in the desert. Each squadron took turns crossing the canal on reconnaissance patrols into the Sinai Desert. In February, they had two jobs. They manned trenches along the canal on foot. They also did long-range patrols into the Sinai on horseback. In March, the brigade joined the newly formed ANZAC Mounted Division. This division included Australian light horse brigades.
Clearing the Sinai Desert
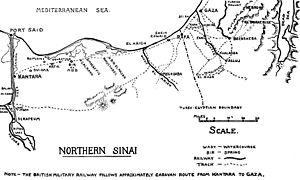
On 23 April, the brigade was suddenly ordered to Kantara, about 32 miles (51 km) away on the Suez Canal. They later learned that a Turkish force had attacked British positions in the Sinai Desert. They reached Kantara at 7:00 AM. An hour later, they moved into the desert. They camped at Hill 70 for the night and sent out patrols.
Patrols continued, sometimes with a small group of soldiers, sometimes with the whole brigade. On 15 July 1916, the three mounted regiments lost their machine-gun sections. These were moved to the new brigade Machine-Gun Squadron. However, they had limited equipment. Four days later, planes spotted a large Turkish force moving west across the desert.
The brigade took part in several important battles to clear the Sinai. These included the Battle of Romani, the Battle of Bir el Abd, and the Battle of Magdhaba. In these battles, they helped push the Turkish forces back. They secured the Suez Canal and began to advance into Palestine.
Advancing Through Palestine
After clearing the Sinai, the brigade moved into Palestine. They fought in key battles like the Battle of Rafa and the First and Second Battles of Gaza. These were tough fights against strong Turkish defenses.
A major victory came at the Battle of Beersheba in 1917. This battle involved a famous cavalry charge. The brigade also fought in the Battle of Ayun Kara and helped secure the area around the River Auja. These actions were crucial in pushing the Turkish forces further north.
Crossing the Jordan Valley
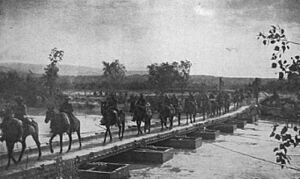
The brigade continued its advance into the Jordan Valley. They played a part in the Capture of Jericho. This was an important town. They also took part in raids on Amman and Es Salt. These raids aimed to disrupt Turkish supply lines and communications.
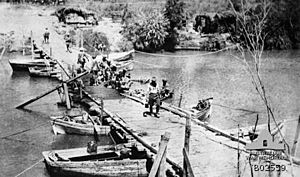
Later, as part of Chaytor's Force, the brigade helped in the Third Transjordan attack. They captured the Damieh bridge. This was a vital crossing point. These actions helped secure the Jordan Valley and contributed to the final defeat of the Ottoman forces in the region.
After the War
After the fighting ended in late 1918, the New Zealand Mounted Rifles Brigade remained in the region. They played a small role in maintaining order during the Egyptian Revolution of 1919. This was a period of unrest in Egypt. The brigade was officially disbanded in June 1919, and its soldiers returned home to New Zealand.


