Battle of Magdhaba facts for kids
Quick facts for kids Battle of Magdhaba |
|||||||
|---|---|---|---|---|---|---|---|
| Part of the Middle Eastern theatre of World War I | |||||||
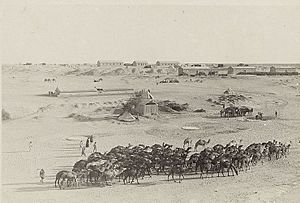
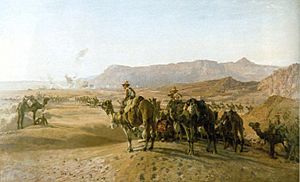 Camel corps at Magdhaba by Harold Septimus Power, 1925 |
|||||||
|
|||||||
| Belligerents | |||||||
|
|||||||
| Commanders and leaders | |||||||
| Units involved | |||||||
| 1st Light Horse Brigade 3rd Light Horse Brigade New Zealand Mounted Rifles Brigade Imperial Camel Brigade RAN Bridging Train |
80th Infantry Regiment (2nd and 3rd Battalions) Supporting troops |
||||||
| Strength | |||||||
| 6,000 | 2,000 | ||||||
| Casualties and losses | |||||||
| 22 dead 124 wounded |
300+ killed of whom 97 confirmed dead 300 wounded of whom 40 confirmed cared for 1,242–1,282 prisoners |
||||||
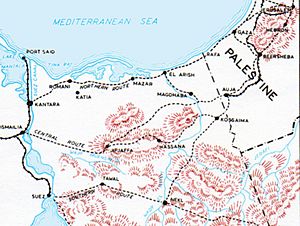
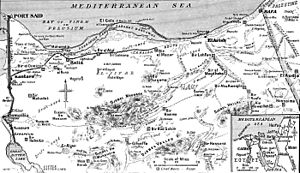
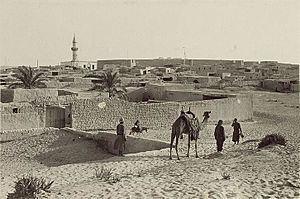
The Battle of Magdhaba happened on December 23, 1916, during World War I. It was part of the Sinai and Palestine Campaign, where British Empire forces defended Egypt. The battle saw the Anzac Mounted Division attack an Ottoman Army base in the Sinai Desert. This base was near Bir Lahfan, about 18 to 25 miles (29 to 40 km) inland from the Mediterranean Sea.
The British-led Egyptian Expeditionary Force (EEF) won this battle. Their victory helped secure the town of El Arish after the Ottoman soldiers left it.
In August 1916, Ottoman and German Empire armies had to retreat after the British won the Battle of Romani. Over the next three months, the defeated forces moved further east towards El Arish. Meanwhile, the EEF took control of the land from the Suez Canal and set up garrisons. British patrols explored the area to protect the building of new railways and water pipes. They also destroyed Ottoman water sources to stop them from crossing the Sinai Desert.
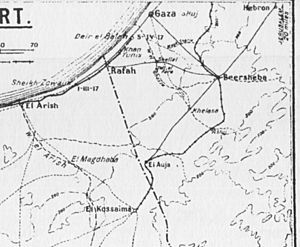
By December 1916, the British supply lines were ready for a new advance. On the night of December 20, a mounted force set out. By the next morning, they reached El Arish and found it empty. The Ottoman army had moved to Magdhaba, about 18 to 30 miles (29 to 48 km) inland, where they had a strong defensive position.
After another night march, the Anzac Mounted Division (made up of Australian and New Zealand soldiers) attacked Magdhaba. Australian, British, and New Zealand troops fought against well-dug-in Ottoman forces. The Ottomans were defending six strongholds called redoubts.
During the fierce fighting, the mounted infantry used a special tactic. They rode close to the enemy, then got off their horses to attack with bayonets. Artillery and machine guns supported them. Airplanes also helped by scouting and finding enemy positions. Eventually, all the hidden redoubts were found and captured. The Ottoman defenders surrendered in the late afternoon.
What Led to the Battle?
At the start of World War I, the Sinai Desert was left unprotected. In 1915, German and Ottoman forces tried to attack the Suez Canal but failed. After the Gallipoli Campaign, they tried again in July 1916. This force was defeated in August at the Battle of Romani.
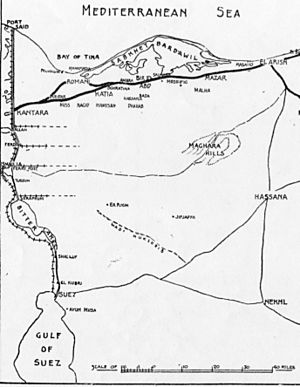
After this victory, the Anzac Mounted Division, led by Australian Major General Harry Chauvel, pushed the Ottoman army out of Bir el Abd. They chased them across the Sinai to El Arish. By mid-September 1916, the Anzac Mounted Division had followed the retreating Ottoman and German forces. They moved 20 miles (32 km) along the northern route across the Sinai Peninsula to Bir el Mazar.
The Maghara Hills, about 50 miles (80 km) southwest of Romani, were also attacked in mid-October. All these Ottoman positions were eventually left empty as British Empire forces grew stronger.
Building Supply Lines
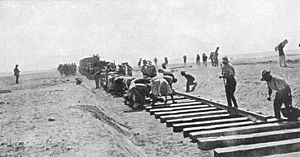
The British then set up bases along their supply lines. These lines stretched across the Sinai from the Suez Canal. They regularly sent out patrols to protect the building of the railway and water pipeline. These supply lines had railway stations, airfields, and camps for soldiers. At this time, the Egyptian Expeditionary Force (EEF) had about 156,000 soldiers.
Ottoman Army in Sinai
The Ottoman army in the Sinai region got supplies from their main desert base at Hafir El Auja. This base was connected to Beersheba, Gaza, and northern Palestine by road and railway.
This major base supported smaller Ottoman bases in the area. It sent them soldiers, ammunition, food, and medical help. If the Ottoman forces at Magdhaba and Hafir el Auja stayed strong, they could stop the EEF from moving towards Southern Palestine.
Challenges of Advancing to El Arish
Water Supply
Some areas of the Sinai had oases with water, but between Salmana and Bir el Mazar, there was little water. Beyond Bir el Mazar, there was no water until El Arish, which was 95 miles (153 km) from Kantara.
Before the British could advance to El Arish, they needed to explore the 20-mile (32 km) stretch without water. By mid-December 1916, the water pipeline had moved far enough east. This allowed enough water to be stored at Maadan. Also, many Egyptian Camel Transport Corps camels were gathered to carry water for the attacking force.
Harsh Conditions
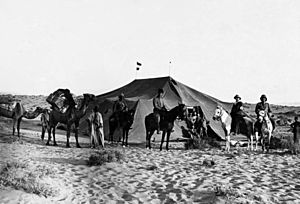
Fighting across the Sinai desert was very tough. Soldiers needed to be well-trained for the extreme heat during the day and bitter cold at night. Losing a water bottle could mean no water for 24 hours. Supplies like ammunition, food, and horse fodder had to be perfectly organized.
Mounted troops of the EEF worked hard in these conditions. They protected the railway construction and scouted new areas. They also used aerial photos to improve maps.
British War Office Changes
In October 1916, the British War Office wanted to focus on fighting on the Western Front. But after heavy fighting on the Somme and a new Prime Minister, David Lloyd George, the policy changed. Attacks on weaker enemy points away from the Western Front became more desirable.
The commander of the EEF, General Sir Archibald Murray, was encouraged to win battles on his eastern border. He thought advancing to El Arish was possible. This would threaten the southern Ottoman Empire and slow down enemy troop movements to other war zones.
New Commands: Eastern Force and Desert Column
After the victory at Romani, General Murray moved his headquarters to Cairo. This helped him manage forces across Egypt, from the Western Desert to the Sinai. In October, Lieutenant General Charles Dobell was put in charge of the new Eastern Force. His headquarters were at Kantara. Dobell was responsible for the Suez Canal and the Sinai Peninsula.
Dobell's Eastern Force included two infantry divisions and the Anzac Mounted Division. It also had the 5th Mounted Brigade and the Imperial Camel Brigade. Murray felt this force was too small for a full advance to Beersheba. However, he believed they could take El Arish and create a good base there for future operations.
In October, General Chauvel went on leave to Britain. While he was away, the Desert Column was formed. On December 7, 1916, Lieutenant General Sir Phillip Chetwode was appointed commander of this column. Chetwode's Desert Column included three infantry divisions and the mounted forces.
Getting Ready for Battle
By early December 1916, the railway had reached Bir el Mazar. This was the last water source for the EEF before El Arish. British spies reported that the Ottoman army planned to make their base at Magdhaba stronger.
Advance to El Arish
Mounted patrols found about 1,600 well-dug-in Ottoman soldiers in El Arish. They were supported by forces at Magdhaba and Abu Aweigila, about 25 miles (40 km) to the southeast.
On December 20, the advance to El Arish began. The Anzac Mounted Division left Bir Gympie at 9:45 PM. They marched about 20 miles (32 km) to El Arish. Australian airmen reported that the Ottoman soldiers had left El Arish and Maghara Hills.
The Anzac Mounted Division reached El Arish unopposed on December 21. They found water supplies and captured one prisoner. By 4:00 PM, the troops were resting in El Arish. The only casualties were two soldiers who were hurt by a mine on the beach.
On December 22, the 52nd (Lowland) Division arrived and began fortifying El Arish. At 10:00 AM, General Chetwode arrived to take command of the Desert Column. He arranged for supplies to reach El Arish quickly. Chauvel then led the mounted division out of El Arish at 12:45 AM on December 23. They headed towards Magdhaba, as scouts had found the retreating Ottoman force there.
Ottoman Forces at Magdhaba
After leaving El Arish, the Ottoman soldiers moved about 25 miles (40 km) southeast to Magdhaba. The garrison there had grown from 500 to about 1,400 soldiers, possibly up to 2,000. These were two battalions of the 80th Infantry Regiment. They also had a camel company and machine gun squads. Four Krupp mountain guns supported them. The garrison was led by Kadri Bey.
The Ottoman position at Magdhaba had six strong redoubts (small forts) linked by trenches. These redoubts were hard to spot on the flat ground. The whole position stretched about 2 miles (3 km) from east to west. On December 22, the day before the attack, the Ottoman commander, Kress von Kressenstein, inspected the garrison. He was confident they could hold off any attack.
Von Kressenstein likely felt safe because Magdhaba was far away. It was about 40 miles (64 km) from the British railway and 25 miles (40 km) from El Arish. However, he didn't know how fast and determined the Australian, British, and New Zealand mounted forces would be. He also didn't know about the new British commander, Chetwode, and his quick planning for the attack.
British Empire Forces
Chauvel's force for the attack on Magdhaba included three brigades of the Anzac Mounted Division: the 1st Light Horse Brigade, the 3rd Light Horse Brigade, and the New Zealand Mounted Rifles Brigade. Three battalions from the Imperial Camel Brigade also joined them. These nine regiments and three battalions were supported by artillery batteries.
This force, about 7,000 strong, left El Arish just after midnight. They marched for 40 minutes, then led their horses for 10 minutes, and rested for 10 minutes each hour. They reached the plain 4 miles (6 km) from Magdhaba around 5:00 AM on December 23. The Ottoman fires were visible for about an hour during their march. This showed the Ottomans did not expect an attack after the British had already ridden 30 miles (48 km) to El Arish.
Air Support
Airplanes regularly scouted the area. On November 15, the Australian Flying Corps took 24 photos of enemy camps and supply dumps.
The Royal Flying Corps's 5th Wing supported the Anzac Mounted Division. This wing included No. 14 Squadron and the Australian Flying Corps's No. 1 Squadron. They were ordered to provide close air support, long-range scouting, and bombing. On December 22, one British and ten Australian planes dropped a hundred bombs on Magdhaba. During the battle, they bombed and machine-gunned the area, even though targets were hard to find.
Medical Support
After problems during the Battle of Romani, medical support was improved. Two extra hospital trains were ready on the Sinai railway. Medical teams were placed close to the battlefield. Hospitals were set up at various locations, including Bir el Abd, Bir el Mazar, and Kantara East.
The Battle Begins
At 6:30 AM, the No. 5 Wing attacked the Ottoman defenses. This drew fire, showing where machine guns, trenches, and five redoubts were located. The redoubts were around the village, protecting the only water supply. Throughout the day, pilots gave frequent reports on enemy positions and movements. They usually landed near Chauvel's headquarters to give verbal updates, as planes didn't have wireless communication then.
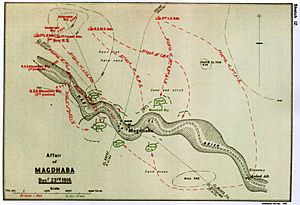
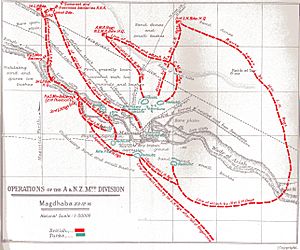
The main attack came from the north and east, led by the New Zealand Mounted Rifles Brigade. They were supported by machine guns and the 3rd Light Horse Brigade. This attack began near Magdhaba village. British Empire artillery opened fire as the New Zealanders moved towards the Ottoman right side and rear.
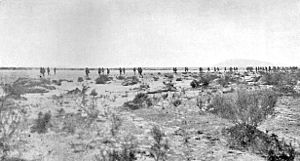
Chauvel's plan to surround the enemy quickly began to work. Despite heavy Ottoman fire, the New Zealand mounted troops found cover and dismounted. Some got as close as 400 yards (366 m) from the enemy. At the same time, the Imperial Camel Brigade moved directly towards Magdhaba. By 8:45 AM, they were slowly advancing on foot, followed by the 1st Light Horse Brigade in reserve.
Chauvel's encirclement grew at 9:25 AM. The 10th Light Horse Regiment, led by Brigadier General J. R. Royston, circled the enemy positions. They moved through Aulad Ali to cut off any retreat to the south. They successfully captured Aulad Ali and 300 prisoners.
The Ottoman artillery and trenches were hard to find. But by 10:00 AM, the New Zealand Mounted Rifles Brigade was moving forward. An aerial report said small groups of Ottoman soldiers were starting to retreat. So, the 1st Light Horse Brigade was ordered to move directly on the town. They faced heavy shrapnel fire but took cover in the Wadi el Arish. They dismounted and continued their attack at 10:30 AM against the Ottoman left. Meanwhile, the Imperial Camel Brigade advanced 900 yards (823 m) over flat ground, section by section, covering each other with fire.
By 12:00 PM, all brigades were fighting hard. The 10th Light Horse Regiment continued to sweep around the enemy's right side. An hour later, the Imperial Camel Brigade reached the 1st Light Horse Brigade. By 1:55 PM, fierce fighting was hurting the Ottoman garrison. Reports continued of small numbers of Ottoman troops retreating.
By 2:15 PM, the 10th Light Horse Regiment was moving across the Wadi el Arish. They attacked the rear of Redoubt No. 4. By 2:55 PM, the Imperial Camel Brigade was within 500 yards (457 m) of the Ottoman defenses. At 3:20 PM, they attacked Redoubt No. 2 with the 1st Light Horse Brigade. Ten minutes later, the New Zealand Mounted Rifles Brigade attacked with fixed bayonets. The 10th Light Horse Regiment, attacking from the south, captured two trenches. This cut off any retreat for the Ottoman soldiers.
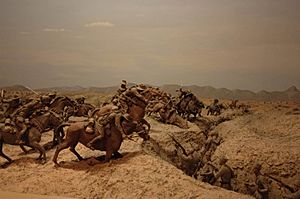
By 4:00 PM, the 1st Light Horse Brigade had captured Redoubt No. 2. Chauvel ordered all units to attack at 4:30 PM. The Ottoman soldiers held on until the attackers were within 20 yards (18 m). But by then, they were losing and began to surrender in small groups. All organized fighting stopped ten minutes later. As darkness fell, scattered firing died out. Prisoners were rounded up, and horses were watered at the captured wells. Chauvel then ordered the battlefield to be cleared.
At 11:30 PM, the Anzac Mounted Division's headquarters left Magdhaba. They arrived back in El Arish at 4:10 AM on December 24, 1916.
Who Was Hurt and Captured?
Of the 146 known British Empire casualties, 22 were killed and 124 were wounded. Five officers were killed and seven wounded. The New Zealand Mounted Rifles Brigade lost two officers and seven soldiers killed, and 36 soldiers wounded.
No more than 200 Ottoman soldiers escaped. Between 1,242 and 1,282 men were captured. This included the 80th Regiment's commander, Khadir Bey, and 43 other officers. Over 300 Ottoman soldiers were killed; 97 were buried on the battlefield. Forty wounded Ottoman soldiers were cared for.
After the Battle
With the victory at Magdhaba, El Arish was now safe. This was the first town captured on the Mediterranean coast. Infantry from the 52nd (Lowland) Division quickly began to fortify the town. The Royal Navy arrived on December 22, 1916, and supplies began landing at El Arish on December 24. The railway arrived on January 4, 1917, followed by the water pipeline. El Arish quickly became a major base for the EEF.
Aerial scouting found Ottoman forces moving their headquarters north from Beersheba. Their main desert base at Hafir El Auja was slightly reinforced. Other Ottoman outposts remained, along with strong defenses at El Magruntein, which were defending Rafa on the border.
Returning to El Arish
Chauvel's force had left El Arish the night before with only one water bottle per man. Desert Column staff sent more water from El Arish to Lahfan. A water convoy was also sent from Lahfan to Magdhaba.
After getting water at Magdhaba, the New Zealand Mounted Rifles and 3rd Light Horse Brigades rode back to El Arish. The 52nd (Lowland) Division helped the returning soldiers by lending camels, water containers, and sandcarts.
Clearing the Battlefield
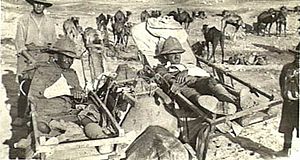
A dressing station was set up 3 miles (5 km) west of Magdhaba. Here, 80 wounded soldiers were treated on the day of the battle. Field ambulances performed urgent surgeries and gave tetanus shots. On the night after the battle, treated wounded were taken in sandcarts and on cacolets (camel stretchers) to El Arish.
Part of the 1st Light Horse Regiment and some New Zealand troops stayed at Magdhaba overnight. They continued clearing the battlefield the next morning. The remaining 44 British Empire and 66 Ottoman Empire wounded were taken to an Ottoman hospital inside Magdhaba. From there, they were sent to the dressing station. At 5:00 PM, the ambulance convoy began its 23-mile (37 km) march to the receiving station.
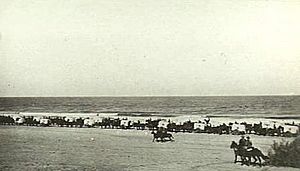
The convoys of wounded met infantry with sandcarts a few miles from El Arish. This allowed the wounded to travel more comfortably. They arrived at the receiving station at 4:00 AM on December 25. The 52nd (Lowland) Division provided medical supplies and staff. Evacuation by sea was planned but delayed by a storm. On December 29, the largest ambulance convoy of the campaign moved out. It had 77 sandcarts, nine sledges, and many cacolet camels, carrying 150 wounded along the beach.
Recognition for the Troops
After the battle, General Chetwode praised the mounted rifle and light horse attack method. He said he had never known cavalry to find, surround, and then dismount to fight as infantry with rifles and bayonets.


