British capture of Tobruk facts for kids
Quick facts for kids British capture of Tobruk |
|||||||
|---|---|---|---|---|---|---|---|
| Part of the Western Desert Campaign of the Second World War | |||||||
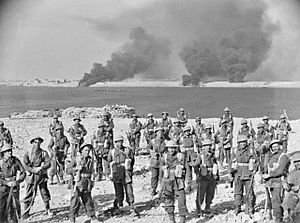 Men of the Australian 2/11th Battalion, 6th Australian Division after the capture of Tobruk |
|||||||
|
|||||||
| Belligerents | |||||||
| Commanders and leaders | |||||||
| Strength | |||||||
| 22,000 troops | |||||||
| Casualties and losses | |||||||
| 3,048 killed or wounded 20,000 POW 1 cruiser scuttled |
400 killed or wounded | ||||||
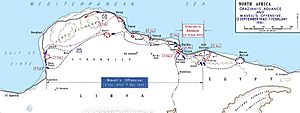
The British capture of Tobruk was an important battle during Operation Compass. This was the first major attack by the Western Desert Force (WDF) in the Western Desert Campaign of the Second World War. The battle took place between 21 and 22 January 1941.
After winning the Battle of Bardia (3–5 January 1941), the 6th Australian Division and the 7th Armoured Division moved quickly. They reached the Italian forces in Tobruk on 6 January.
Tobruk was a key port and naval base for Italy in Eastern Cyrenaica. The Italians had made it very strong before the war. However, after losing battles at Attack on Nibeiwa, Battle of Sidi Barrani, and Battle of Bardia, the Italian 10th Army was very weak. They had lost most of their divisions. Only the 61st Infantry Division "Sirte" and scattered soldiers were left to defend the port.
In the end, the Italian forces in Tobruk suffered heavy losses. About 3,048 soldiers were killed or wounded, and 20,000 were taken prisoner. One Italian warship was also sunk. The Australian and British forces had about 400 soldiers killed or wounded. After capturing Tobruk, the WDF continued to advance west towards Derna and Mechili.
Contents
Background to the Battle
Operation Compass: The Start of the Fight
In September 1940, Italy invaded Egypt. Their advance stopped about 100 kilometers (60 miles) into Egypt at Sidi Barrani. Here, the Italian soldiers dug in and set up defenses. The British first prepared to defend against an Italian push towards Mersa Matruh. But when this didn't happen, they planned a surprise attack.
This attack was called Operation Compass. It began on 9 December 1940. The first part was the Attack on Nibeiwa, where an Italian armored group was completely defeated. The next day, the British Western Desert Force fought three Italian divisions at the Battle of Sidi Barrani. They won this battle by 11 December.
After these victories, the last Italian division in Egypt retreated towards Libya. The British 7th Armoured Division pushed forward. By 15 December, they had cut the road between Bardia and Tobruk. At Bardia, the Italians had gathered many troops. After careful planning, the British attacked and defeated these Italian defenders between 3 and 5 January 1941.
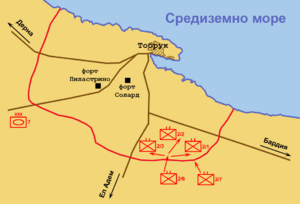
On the morning of 5 January, while the Australians were still finishing the fight at Bardia, the British commander, Wavell, gave a new order. He told the 7th Armoured Brigade to advance west, go past Tobruk, and cut it off. By 6 January, the brigade had reached El Adem, which is now Tobruk Airport. By 7 January, most of the British forces had arrived and completely surrounded Tobruk.
The 19th Australian Brigade took up positions facing the eastern defenses of Tobruk. The 16th Australian Brigade covered the western side. The 4th Armoured Brigade moved to the west of the city. The 7th Support Group blocked the western exits. The 7th Armoured Brigade protected the main force from any attacks from the west.
Getting Ready for Battle
Italian Defenses at Tobruk
After Tobruk was surrounded, the Italian commander, Graziani, told Mussolini that the city was now "invested" by enemy armored vehicles. He believed the outcome was easy to predict. Graziani also told Mussolini that the 54-kilometer (34-mile) long Tobruk defense line was held by only 22,000 men with 340 guns. This was not enough to defend such a large area.
On 9 January, Graziani informed the Tobruk commander, General Enrico Pitassi Mannella, that no help would be sent. Graziani ordered another Italian division to fall back to a line further west. Mannella then had bridges on the roads leading into Tobruk destroyed to slow down the British.
General Pitassi Mannella had some tanks, but most were old or broken. Only seven of his M11/39 tanks were working. He had no spare parts or fuel for them. Because of this, he had many of his lightly armed tanks buried in the sand to act as fixed strong points.
Tobruk's Fortifications
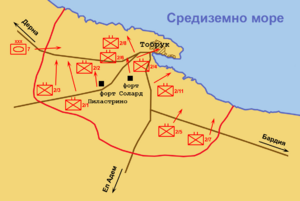
Pitassi Mannella divided Tobruk's defenses into two main areas, with many smaller strong points. The Eastern Sector faced the road from Bardia, and the Western Sector faced the desert and roads from other directions.
The first line of defense in the Eastern Sector was held by border guards and infantry. Pitassi Mannella expected the main attack from this direction. So, he set up a second line of defense about 4 to 6 kilometers (2.5 to 3.7 miles) behind the strong points. Here, every available tank was dug in to act as a strong point.
In front of the strong points, the Italians cleared out an 18-kilometer (11-mile) long anti-tank ditch. They also laid 7,000 tripwire mines and 16,000 pressure mines. To make up for a lack of proper anti-tank mines, Pitassi Mannella even buried old bombs upright in the desert. He hoped that British tanks driving over them would set them off.
Italian Artillery
Pitassi Mannella organized his artillery into three groups. Two groups were for the Eastern Sector and one for the Western Sector. He correctly guessed that the British would attack from the south. So, he sent many of his guns, including anti-aircraft guns used as anti-tank guns, to that area.
For long-range firing, Pitassi Mannella relied on the Italian cruiser San Giorgio in Tobruk harbor. This ship had very large guns. There were also two shore batteries with naval guns.
The Italians had no air reconnaissance, so they didn't know where the British guns were. Most British artillery had a longer range than the Italian guns, which were often from the First World War. This meant the Italians had little chance of firing back effectively. Pitassi Mannella decided to use every gun that could fire directly as an anti-tank gun. He managed to gather 110 anti-tank guns. However, only the smaller 37 mm and 47 mm guns had armor-piercing ammunition.
British Preparations for Attack
After surrounding Tobruk, the British forces had used up the Italian supplies they had captured earlier. The British commander, O'Connor, made sure new supplies came through the port of Sollum. He set up supply depots about 70 kilometers (43 miles) east of Tobruk.
O'Connor was worried about having enough fuel and supplies for the next part of the offensive after Tobruk fell. So, he delayed the attack to gather more supplies. Since the 7th Armoured Division had suffered more losses than the 6th Australian Division, O'Connor decided the Australians would lead the attack. Some damaged British tank units were pulled back, and their equipment was given to other regiments.
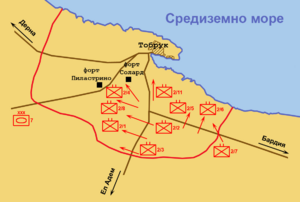
The first wave of the attack would be the 16th Australian Brigade and the 7th Royal Tank Regiment. They would be followed by the 17th Australian Brigade and the 19th Australian Brigade. The 7th Armoured Division would attack along the western side of the perimeter to keep the Italian defenders busy. On 19 January, the Royal Air Force (RAF) dropped leaflets asking the Italians to surrender, but Pitassi Mannella ignored them.
The Attack on Tobruk
Night of 20/21 January
From midnight until 2:00 a.m. on 21 January, the Royal Navy warship HMS Terror and three smaller ships heavily bombarded Tobruk. Meanwhile, destroyers waited further out at sea, ready to attack the Italian cruiser San Giorgio if its crew tried to escape. For the rest of the night, RAF Wellington bombers attacked the port, defenses, and made loud noises to hide the sound of British tanks gathering for the attack.
Morning Assault
At 5:40 a.m., the British artillery began firing along the entire Italian defense line. They focused on a specific area where two Italian sub-sectors met. Under the cover of darkness, Australian engineers and British artillery fire cleared a path through the Italian minefield. At first light, the 2/3rd Australian Battalion attacked. Within an hour, the Australians had created a breach about 1.6 kilometers (1 mile) wide.
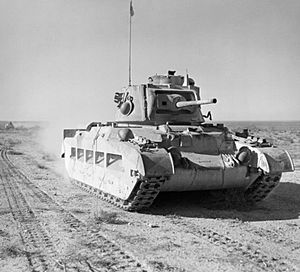
At 7:00 a.m., 18 Matilda II tanks moved through the gap. Three tanks went left with the 2/3rd Australian Battalion. Another three went right with the 2/1st Australian Battalion to make the gap wider. At the same time, the remaining Matilda tanks advanced with the 2/2nd Australian Battalion towards Tobruk. The first Italian unit they overran was an artillery group, which had no time to prepare their guns for direct firing.
The Italian units had a big problem: they lacked radios. Telephone lines had been cut by the British bombing. General Pitassi Mannella only learned about the British attack around 8:30–8:45 a.m. from a messenger. By 9:10 a.m., the Australian 2/2nd Battalion had reached Sidi Mahmud. The 2/1st Battalion was at Sidi Daud. The 17th Australian Brigade had captured the Italian artillery positions between these two points. By 10:30 a.m., the Australians had taken over four Italian strong points and destroyed six of the ten artillery groups in the area.
At 8:30 a.m., the 19th Australian Brigade, supported by cavalry, moved towards the Italian 4th Tank Infantry Regiment. The Australian brigade was supported by 78 field guns, which moved forward every two minutes. The 19th Australian Brigade quickly overran the Italian III Battalion, 69th Infantry Regiment. An Italian company and three M11/39 tanks tried to close the gap in the second line but were defeated within minutes. The three M11/39 tanks were knocked out.
Air Support and Afternoon Fight
By 11:50 a.m., Pitassi Mannella had told Graziani that the Eastern Sector was destroyed, with only a few isolated Italian positions still holding out. All Graziani could do was send three Italian fighter planes to Tobruk. However, the RAF quickly shot them down. Between 12:00 p.m. and 2:00 p.m., the 19th Australian Brigade attacked the 4th Tank Infantry Regiment's position with great force. Many Italian officers and soldiers were killed in this fierce fighting. Throughout the day, British Blenheim bombers flew many missions against Tobruk. British and Australian fighter planes patrolled the skies to the west.
At 1:00 p.m., Pitassi Mannella ordered his mobile reserve, with the seven working M11/39 tanks, to attack the Australian left flank. But two Australian anti-tank guns and two tanks destroyed five of the seven M11/39s. When Australian infantry pushed forward, the mobile reserve surrendered. At 4:00 p.m., the 2/8th Australian Battalion attacked the Pilastrino position. Meanwhile, the 2/4th Australian Battalion reached and surrounded the Italian headquarters at Fort Solaro.
Pitassi Mannella and his staff hid in the cellars. But by 6:30 p.m., Pitassi Mannella ordered his staff to surrender. At the same time, the 6th Divisional Cavalry Regiment reached the edge of Tobruk. However, they were stopped by fire from the Italian cruiser San Giorgio. Soldiers from the 2/4th Australian Battalion moved down the cliffs and used 3-inch mortars against the San Giorgio.
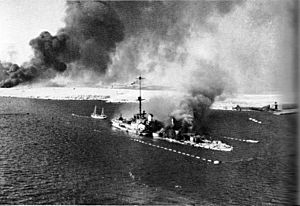
Having lost contact with forces outside Tobruk, Admiral Massimiliano Vietina organized the defense of the harbor with the few men he had. Graziani had refused his request to make a desperate attack on the British ships outside the harbor. So, Vietina began to systematically destroy the harbor and its supplies.
22 January: The Final Surrender
By nightfall, half of the fortified area of Tobruk had been captured. At 4:15 a.m. on 22 January, Admiral Vietina ordered Captain Stefano Pugliese to blow up the ammunition stores of the San Giorgio. This was to prevent the British from capturing the ship. General Iven Mackay ordered a general advance for the morning of 22 January.
At 8:30 a.m., Admiral Vietina surrendered to General Horace Robertson of the 19th Australian Infantry Brigade. Soon after, General Della Mura surrendered with the remaining Italian forces at the Pilastrino position. By 4:00 p.m., the last Italian strong point surrendered, and Tobruk had fallen.
Aftermath of the Battle
Casualties and Losses
The Italians suffered heavy losses in the battle. More than 24,000 soldiers were casualties. This included 18 officers and 750 soldiers killed, 30 officers and 2,250 men wounded. More than 20,000 Italian soldiers became prisoners of war. The British also captured 208 guns and 87 tanks.
The British XIII Corps (the new name for the Western Desert Force) had much fewer casualties. They suffered about 400 casualties in total, with 355 of them being Australian soldiers.
What Happened Next
By the time Tobruk surrendered, the British divisions had already moved on. The 7th Armoured Division reached Mechili and fought a battle there on 24 January. At the same time, the 6th Australian Division had reached the Italian positions at Derna on the same day.
See also
- List of Italian military equipment in World War II
- List of Australian military equipment of World War II
- List of British military equipment of World War II


