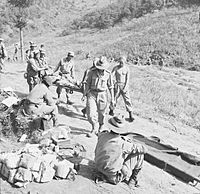
First Battle of Maryang-san facts for kids
Quick facts for kids First Battle of Maryang-san |
|||||||
|---|---|---|---|---|---|---|---|
| Part of the Korean War | |||||||
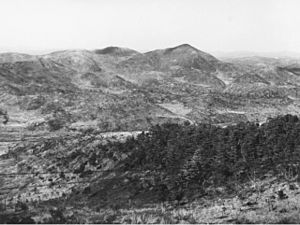 Maryang-san (right), Korea |
|||||||
|
|||||||
| Belligerents | |||||||
| Commanders and leaders | |||||||
| Units involved | |||||||
| Strength | |||||||
| 320 men | 1,200 men | ||||||
| Casualties and losses | |||||||
| 20 killed 104 wounded |
283 killed 50 captured |
||||||
| Top - 0-9 A B C D E F G H I J K L M N O P Q R S T U V W X Y Z |
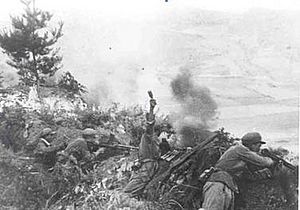
The First Battle of Maryang-san (also known as the Defensive Battle of Maliangshan in Chinese) was a major fight during the Korean War. It happened from October 3 to 8, 1951. This battle involved soldiers from the United Nations Command (UN), mainly from Australia, Britain, and Canada. They fought against the Chinese People's Volunteer Army (PVA).
The battle was part of a bigger UN attack called Operation Commando. This operation aimed to push the Chinese forces back from the Imjin River. Even though the Maryang-san battle was smaller, it was very important. The 1st Commonwealth Division managed to remove a much larger Chinese force from key hills like Kowang-san (Hill 355), Hill 187, and Maryang-san (Hill 317).
Australian soldiers used smart tactics, similar to those used in New Guinea during World War II. They attacked from unexpected directions and used the high ground to their advantage. They then fought off many Chinese counterattacks. Both sides had many casualties.
This battle was one of the last big movements of troops in the war. After this, the war became more about holding fixed positions, like in World War I. A month later, the Chinese took Maryang-san back, and it stayed in their hands until the end of the war. Today, this battle is seen as one of the Australian Army's greatest achievements in the Korean War.
Why the Battle Happened
The War Situation in 1951
After Douglas MacArthur was replaced, Matthew Ridgway became the new UN commander. Then, James Van Fleet took over the Eighth Army. In 1951, the Chinese Spring Offensive failed. The UN forces then pushed back all Chinese gains.
In July, the UN strengthened their defense lines. They also launched small attacks in the east. These attacks captured important hills like the Punchbowl and Bloody Ridge. In September, they continued fighting for Heartbreak Ridge.
Forming the Commonwealth Division
The British Commonwealth forces in Korea changed a lot around this time. Different countries like Australia, Britain, and Canada decided to work together more closely. They formed the 1st Commonwealth Division on July 28, 1951. This division included Canadian, British Commonwealth, and British infantry brigades.
Major General James Cassels led this new division. It was part of the US I Corps. The division was positioned about 48 kilometers (30 miles) north of Seoul, the capital. The 28th Brigade, which included the 3rd Battalion, Royal Australian Regiment (3 RAR), was led by Brigadier George Taylor.
Peace talks were happening, so there was less fighting. 3 RAR mostly defended positions and trained new soldiers. They also moved 12 kilometers (7.5 miles) north of the Imjin River in September.
Getting Ready for Battle
Who Fought Where
In late September and early October, General Van Fleet planned a new attack. This was called Operation Commando. The goal was to move 10 kilometers (6 miles) north of the 38th Parallel. This would give the UN forces a better position in the peace talks.
Operation Commando was set for October 3-5, 1951. The US I Corps planned for three of its divisions to attack together. These included the 1st Commonwealth Division, the US 1st Cavalry Division, and the South Korean 9th Division. Their goal was to capture a new defense line called the Jamestown Line.
The 1st Commonwealth Division faced about 6,000 Chinese soldiers from the 191st Division. These Chinese forces were dug into hills overlooking the Imjin River. They had strong defensive positions.
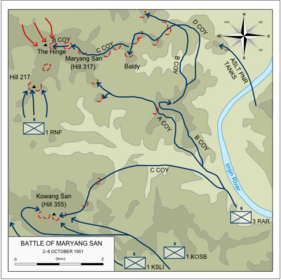
The 28th British Commonwealth Brigade was given the main task. They had to capture Kowang San (Hill 355) and Maryang San (Hill 317). General Cassels planned the attack in three stages:
- Phase 1 (October 3): 28th Brigade would take Hill 355.
- Phase 2 (October 4): 25th Canadian Brigade would attack Hill 187.
- Phase 3 (October 5): 28th Brigade would capture Hills 217 and 317.
The 3 RAR and the 1st Battalion, Royal Northumberland Fusiliers (1 RNF) would capture Maryang San. Before the attack, soldiers carefully checked the area. They planned to use artillery, air support, and surprise attacks.
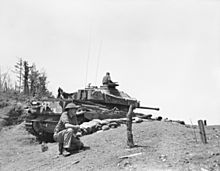
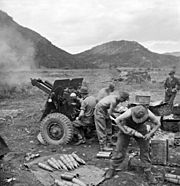
They had a lot of support. This included over 120 guns and mortars from the 16th Field Regiment, Royal New Zealand Artillery. Two British Centurion tank squadrons also helped.
First Moves
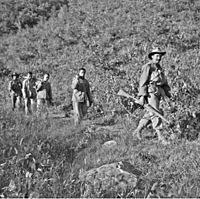
Lieutenant Colonel Francis Hassett, who led 3 RAR, studied the area carefully. American troops had tried to take Maryang San before and failed. Hassett decided to use a different tactic. He planned to move along the tops of ridges to attack the Chinese from unexpected directions. This tactic had worked against the Japanese in New Guinea.
The Chinese defenders on Maryang San were also trying a new tactic. They would use small units to tire out attackers. Then, their main force would counterattack before the UN troops could settle into new positions.
Before the main attack, the Australians had to capture Hill 199. This would allow tanks and machine guns to support the attack on Hill 355. The 28th Brigade crossed the Imjin River on October 1. The next day, 3 RAR moved into position. One company (C Company) moved close to Hill 355. Another company (D Company) was sent to help the Canadian brigade.
The Battle Begins
Capturing Hill 199 (October 3)
At 3:00 AM on October 3, B Company of 3 RAR moved north towards Hill 199. They crossed an open valley in the dark and heavy mist. Artillery and mortar fire hit Chinese positions.
By 8:00 AM, B Company reached the high ground. They then took Hill 199 with only three soldiers wounded. Five Chinese soldiers were killed, and one was captured. By mid-morning, both the British Shropshires and the Australians had captured their first goals.
The Australians on Hill 199 prepared for a counterattack, but none came. D Company returned and took a position between C Company and the British Borderers.
Meanwhile, the British Borderers attacked Hill 355. They met strong resistance and had to pull back. A second attack later that day gained some ground. The attack was behind schedule because the Chinese fought hard. More than 2,500 Chinese artillery rounds fell on the 28th Brigade. However, the Allies fired over 22,000 rounds in return.
Taking Hill 220 and Kowang-San (October 4)
On October 4, C Company 3 RAR attacked Hill 220, a spur leading from Hill 355. They started at 9:00 AM. The Australians quickly defeated the defenders. They pushed forward and cleared the eastern slopes of Kowang-San by 12:00 PM. They killed 13 Chinese soldiers and captured three. Eleven Australians were wounded.
At the same time, the British Borderers attacked the western side of Kowang-San. The Chinese defenders, fearing attacks from two sides, left Hill 355. They pulled back under heavy fire.
The Canadians also attacked their objectives. They expected a tough fight, but the Chinese unexpectedly pulled back. The Canadians captured their goals easily. They reached the Jamestown Line by nightfall. They faced no more resistance, though Chinese artillery caused some casualties.
The 28th Brigade was a day behind schedule. But the overall attack was still going well. The Chinese brought in fresh troops to defend Maryang San.
The Fall of Maryang San (October 5)
Maryang San was the final goal. It was a steep hill about 2,500 meters (2,700 yards) north of Hill 355. The attack was planned for October 5. The Royal Northumberland Fusiliers would attack Hill 217 first. Then, they would help the Australians attack Hill 317 (Maryang San).
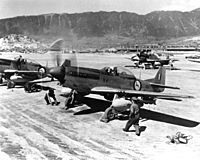
Overnight, Allied artillery heavily shelled Chinese positions. Mustang fighter planes from No. 2 Squadron, South African Air Force also attacked. They targeted Chinese supply lines. Both the Australians and Fusiliers were set to attack at 5:45 AM.
The Fusiliers moved in the dark, but thick fog made it hard to find their way. They started their attack at 11:00 AM. They surprised some Chinese outposts. But the Chinese on Hill 217 fought back strongly. They used heavy machine guns and forced the Fusiliers to pull back. The Fusiliers had many casualties and ran low on ammunition.
Earlier, at 4:45 AM, B and D Companies of 3 RAR moved across the valley. The Australians planned to attack Maryang San from the east. The Fusiliers were supposed to help from the southwest, but they were stuck on Hill 217. Previous attempts to capture Maryang San had failed because the approach was across an open valley. The Australians planned to cross the valley in the dark and attack the Chinese flank.
3 RAR had only 320 men left after previous fighting. They faced two fresh Chinese battalions, about 1,200 men, on Maryang San.
B Company, led by Captain Henry Nicholls, moved first in the heavy mist. They lost direction and became separated. D Company kept moving forward. When the mist lifted at 11:20 AM, they were exposed halfway up the hill. But their approach had surprised the Chinese. D Company got close enough to throw grenades.
After a fierce 20-minute fight, the Australians cleared their first objective. They had three killed and 12 wounded. The Chinese lost 30 killed and 10 captured.
A Company created a diversion, attacking southwest. This made the Chinese send more troops there, thinking it was the main attack. Meanwhile, D Company pushed on towards the 'Uniform' feature. They captured this objective by 4:00 PM. Total Chinese casualties included 98 killed and 40 captured.
After B and D Companies made progress, C Company moved up. They immediately attacked Hill 317 (Maryang San). They captured 10 prisoners without losing any men. The Chinese were well dug-in, but there was no barbed wire. By 5:00 PM, Maryang San had fallen to the Australians. The Chinese pulled back under heavy fire.
The Fusiliers kept fighting on Hill 217 but could not capture it. However, their efforts, along with A Company's diversion and D Company's rapid advance, helped win the day. A Company continued to attack, pushing the Chinese back. They suffered 20 casualties but killed at least 25 Chinese.
With Maryang San captured, the Australians started digging in. They changed the Chinese trenches into a strong defensive position. They expected a Chinese counterattack that evening. The Chinese still held three key ridge positions: 'Sierra', the 'Hinge', and the summit of Hill 317. These would see more fighting.
The Hinge (October 6–8)
The night of October 5/6 was quieter than expected. The Australians used this time to improve their defenses. The next day, Taylor ordered the Australians to capture the 'Sierra' feature. This was a wooded knoll between Maryang San and the Hinge. The Fusiliers would also renew their attack on Hill 217.
The Hinge was important because it overlooked Hill 217. The Fusiliers planned to attack the Hinge from the east, using the Australian positions on Maryang San as a base. This would help them outflank the Chinese on Hill 217.
At 7:00 AM on October 6, 9 Platoon C Company moved towards Sierra. They used the heavy mist for cover. They found many Chinese soldiers in strong positions. The Australians attacked quickly with grenades and bayonets. They caused many casualties and forced the Chinese to retreat.
9 Platoon held the knoll for 13 hours, fighting off several counterattacks. They used accurate rifle and machine-gun fire. One Australian was killed, and several were wounded. The Chinese lost 19 killed, 30 wounded, and seven captured.
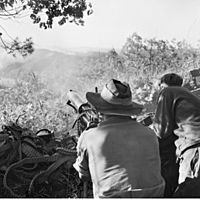
The Fusiliers again attacked Hill 217 from the south. Despite artillery support and machine-gun fire from the Australians, they could not advance. Chinese machine guns in bunkers stopped them. The Fusiliers had over 100 casualties in two days. The Chinese then counterattacked, forcing the Fusiliers to pull back.
It became clear that Hill 217 could only be taken from Hill 317, through the Hinge. So, the Australians were tasked with capturing the Hinge the next day. B Company would lead this attack. They moved to Hill 317 on the afternoon of October 6.
In the early hours of October 7, Allied artillery and mortars bombarded the Hinge. Hassett moved his headquarters to Hill 317 to direct the battle. The attack began at 8:00 AM. B Company moved down the ridgeline, using trees and grass for cover.
At first, it seemed the Chinese had left. But then, the lead Australian platoons were hit by heavy fire from behind. After intense fighting, the Hinge fell by 9:20 AM. The Australians lost two killed and 20 wounded. More than 20 Chinese were killed.
The Chinese then shelled the Hinge heavily. B Company quickly dug in, but they were short on ammunition. Evacuating the wounded was also difficult.
Throughout the day, B Company on the Hinge and C Company on Hill 317 faced intense shelling. At 8:00 PM, both positions were heavily shelled for 45 minutes. This signaled a Chinese counterattack. Heavy mist helped the Chinese get close to the Australian lines.
Throughout the night of October 7/8, the Hinge was attacked three times by a large Chinese force. The Australians fought back in desperate hand-to-hand combat. They stopped the Chinese with intense small arms and artillery fire.
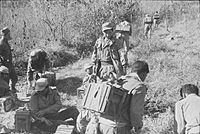
The fighting caused a severe shortage of ammunition. Resupplying the Australians was hard due to heavy shelling. They used salvaged ammunition, but this caused weapon problems. Evacuating the wounded was also a big issue. Korean porters and Australian soldiers carried supplies and wounded under fire.
To help the Australians, Taylor ordered other British units to send their Korean porters. The entire division's artillery fired in support of 3 RAR.
B Company held their positions all night until 5:00 AM on October 8. The Chinese finally gave up. The Chinese 191st Division pulled back 3 kilometers (1.9 miles), giving up control of Hill 217 without a fight. At dawn, over 120 Chinese dead and wounded lay around the Australian defenses. The Australians were victorious but exhausted after five days of heavy fighting.
After the Battle
Counting the Costs
Four hours later, at 9:00 AM, 3 RAR was relieved on Maryang San and the Hinge by the British Borderers. 3 RAR had lost 20 killed and 104 wounded. Chinese casualties on Hill 317 were very high, with 283 killed and 50 captured. It's believed the Australians destroyed at least two Chinese battalions.
1 RNF advanced on Hill 217 again, this time without resistance. They met patrols from 1 KOSB on the Hinge. Hill 217 was occupied on October 9. Some Australian platoons stayed on Maryang San until October 9.
For his leadership, Lieutenant Colonel Hassett was immediately given the Distinguished Service Order (DSO). Many other soldiers also received awards for their bravery. The Royal Australian Regiment was given special honors for "Kowang-San" and "Maryang San." The First Battle of Maryang San is still considered one of the Australian Army's greatest achievements in the Korean War.
Lessons Learned
The British Commonwealth supply system worked well, despite some problems. Ammunition, equipment, food, and water kept flowing. 3 RAR used 900,000 rounds of small arms, 5,000 grenades, and 7,000 mortar rounds. All these supplies were carried by Korean Service Corps porters and Australian soldiers over difficult terrain, often under fire. Many Korean porters were killed or wounded.
The support from artillery and tanks was excellent and very important. Tanks operated in tough terrain. New Zealand gunners fired over 50,000 rounds. Air support from the South African Mustangs was also crucial.
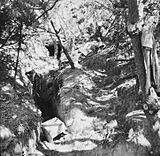
This battle was also important because the Chinese used "tunnel warfare" for the first time. A Chinese company defended their positions from a U-shaped tunnel. This tunnel could hold 100 men and was a bomb shelter and a base for counterattacks. The Chinese commander, Peng Dehuai, was impressed. He ordered similar deep tunnels to be built along the entire front line. These tunnels became a huge challenge for UN forces later in the war.
What Happened Next
Operation Commando ended on October 15. The US I Corps successfully took the Jamestown Line. Chinese losses were estimated at 21,000, while UN losses were 4,000.
These operations were the last big movements of troops in the war. After this, the war became a static war. It was like World War I, with fixed defenses, trenches, bunkers, and minefields. Both sides built defenses. Patrolling in no mans land also began. UN commanders became more careful about limiting casualties.
The 1st Commonwealth Division had 58 killed and 262 wounded during Operation Commando. 3 RAR and 1 RNF had the most casualties. The Chinese 64th Army later received praise for keeping their casualties "light," though some estimates say they lost over 3,000 men.
3 RAR played a vital role in the battle. They used smart tactics and strong fire support to drive the Chinese from Kowang-San and Maryang San. They then held these key positions against many counterattacks.
A month later, Maryang San was retaken by the Chinese from the Borderers. This was during fierce fighting at the Second Battle of Maryang San. It was never regained by UN forces and remained in Chinese hands until the end of the war.
See also
 In Spanish: Primera Batalla de Maryang San para niños


