Battle of Dungeness facts for kids
Quick facts for kids Battle of Dungeness |
|||||||
|---|---|---|---|---|---|---|---|
| Part of First Anglo-Dutch War | |||||||
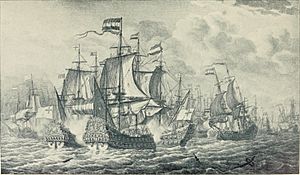
 Brederode entangled with the Garland and Anthony Bonaventure. To the right Hollandia comes to the rescue |
|||||||
|
|||||||
| Belligerents | |||||||
| Commanders and leaders | |||||||
| Strength | |||||||
| 73 warships and some fireships, though only part was able to participate | 37 warships | ||||||
| Casualties and losses | |||||||
| 1 ship lost in accidental explosion |
5 ships lost: |
||||||
The Battle of Dungeness was a major naval battle. It happened on November 30, 1652. This fight was part of the First Anglo-Dutch War. It took place near the coast of Dungeness in Kent, England. The Dutch navy won this battle. This gave them control of the English Channel for a short time.
Contents
Why the Battle Happened
In September 1652, the English government made a mistake. They thought the Dutch wouldn't send out a fleet so late in the year. So, they sent many of their ships to other parts of the world. Some of their biggest ships were also being repaired. Many sailors left or protested because they weren't getting paid. This made the English navy much weaker at home.
Meanwhile, the Dutch worked hard to make their fleet stronger. Dutch merchants needed their goods to be shipped safely. So, their navy had to make one last effort to protect their trading ships.
The Battle Begins
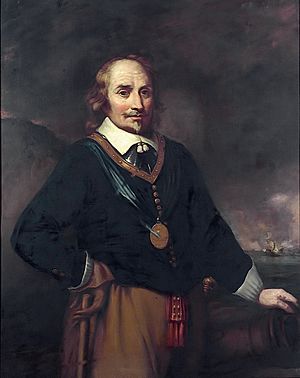
On November 21, 1652, the Dutch commander, Maarten Tromp, set sail. He had 88 warships and five fireships. He was protecting a huge group of 270 merchant ships. These ships were going to France, the Mediterranean, and the Indies.
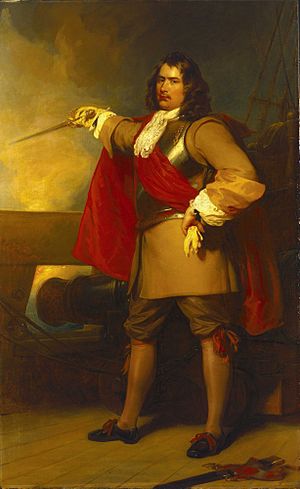
After making sure the merchant ships were safe, Tromp looked for the English fleet. On November 29, he found them. The English fleet had 42 large ships and ten smaller ones. They were led by General at Sea Robert Blake.
Blake's fleet was anchored in a place called The Downs. The English decided to avoid a fight. They quickly sailed south. Blake might not have known how big the Dutch fleet was. Or he might have feared getting trapped.
The wind was strong, so the English couldn't go back to The Downs. They headed for Dover. The two fleets anchored about five miles apart for the night. A storm scattered some Dutch ships during the night.
Fierce Fighting at the Exit
The next morning, both fleets moved southwest. The English stayed close to the coast. The Dutch kept some distance. Sandbanks kept the fleets from fighting for a while.
Eventually, the coastline forced the English to turn south. There was a narrow exit near Dungeness. Blake hoped to escape through it. But about seventeen Dutch ships were already waiting for him. Blake continued his move.
Around 3:00 PM, the leading ships of both fleets met. It was a fierce exchange of cannon fire. Blake's ship, the Triumph, was the first big English ship to pass through the exit.
At that moment, Tromp's ship, the Brederode, arrived. Tromp raised his red "bloodflag" to signal an attack. Blake turned his ship to fire at the Brederode. Tromp fired back.
The next English ship, the Garland, tried to get between them. But it crashed into the front of the Brederode. Both ships got stuck together. The Brederode's front part broke off.
The Dutch crew on the Brederode quickly boarded the Garland. Tromp promised a reward to the first person to take down the English flag. A Dutch sailor climbed the mast and replaced the English flag with the Dutch one. The English captain, Richard Batten, even blew up his own upper deck to try and get rid of the Dutch.
Meanwhile, another English ship, the Anthony Bonaventure, attacked the Brederode. It fired a lot of small cannonballs, forcing the Dutch crew below deck.
Then, Vice-Admiral Johan Evertsen came to help Tromp. His ship, the Hollandia, attacked the Anthony Bonaventure. Now, four ships were stuck together. In a very tough fight, the Dutch killed the entire crew of the Anthony Bonaventure. This included Captain Walter Hoxton.
Tromp's secretary was killed by a musket ball next to him. Tromp then urged his men to attack the Garland. He shouted, "Children, things cannot go on this way. It's them or us!" The Garland was captured. Sixty of its 150 crew members were killed, including Captain Batten. The Garland was badly damaged.
Blake's Retreat
Blake tried to help the Garland and Anthony Bonaventure. But Dutch ships kept attacking his Triumph. Blake didn't get much help from the rest of the English fleet.
Other English ships realized the problem. The exit was like a bottleneck. Trying to force their way through would let the Dutch defeat them one by one. Most Dutch ships also did not join the fight.
Commodore Michiel de Ruyter was annoyed. He sailed his ship, the Witte Lam, into the exit to attack the English. But no one followed him, so he had to pull back. He wrote in his journal, "If we had had any help... we would have beaten the entire fleet."
Despite the problems, the English couldn't leave Blake alone. The two strongest English ships, the Vanguard and the Victory, used their powerful guns. They broke through the Dutch ships. This allowed Blake to escape and join the main English force. Blake's Triumph had lost its front mast. Blake himself was wounded.
End of the Battle
Around 5:00 PM, darkness ended the battle. A large part of the Dutch fleet had not even arrived yet. By nightfall, the English fleet had lost five ships. The Garland and Anthony Bonaventure were captured. They were later used by the Dutch navy. Two smaller English ships were burned, and one was sunk.
That evening, the Dutch lost one ship, the Schiedam. It caught fire and exploded. Its captain died the next day.
Blake retreated under the cover of darkness to his anchorage. The Dutch didn't follow. They used the time to repair their ships, especially the Brederode.
The next morning, the Dutch captured three English merchant ships. Tromp was not fully happy. He felt the Dutch had missed a chance to completely destroy the English fleet. He chased Blake, but Blake had already reached the River Thames.
A group of English ships, sent to help Blake, were met by the Dutch. Two new frigates escaped. But an armed merchant ship, the Hercules, was run aground by its captain. Most of the crew fled. The Hercules was captured by the Dutch.
Tromp then let his merchant convoy split up. Each group continued to its destination with its protecting warships. Tromp thought about attacking Blake in the Medway river. But no pilot in the Dutch fleet dared to sail in those dangerous waters.
What Happened After
The battle led to important changes in the English fleet. Some of Blake's ships were merchant vessels that had been forced into service. Many of their captains refused to fight. Some naval captains also wanted to fight only when they chose.
Blake threatened to resign if things didn't change. So, the English government made new rules. All forced merchant ships had to be commanded by naval captains. New "Sailing and Fighting Instructions" were also issued. These rules gave the admiral much more power over his fleet.
The Dutch victory gave them temporary control of the English Channel. This meant they controlled merchant shipping in the area.
There is a famous story that Tromp attached a broom to his mast. This was supposedly a sign that he had "swept the sea clean" of his enemies. However, this is likely just a legend. At that time, a broom on a mast meant a ship was for sale. Also, Dutch records from that time don't mention it.
Ships in the Battle
Here are some of the ships that fought in the Battle of Dungeness:
England (Commander: Robert Blake)
- Triumph 60 (flagship)
- Victory 60
- Vanguard 58
- Fairfax 56
- Speaker 54
- Laurel 50
- Worcester 44
- Garland 44 – Captured
- Entrance 43
- Lion 42
- Convertine 42
- Foresight 42
- Dragon 40
- Fortune 36
- Hound 35
- Sapphire 34
- Princess Maria 33
- Mary flyboat 32
- Waterhound 30
- Dolphin 30
- Advantage 26
- Swan 22
- Greyhound 20
- Hannibal 44
- Anthony Bonaventure 36 – Captured
- Lisbon Merchant 34
- Loyalty 34
- Culpepper 30
- Cullen 28
- Prudent Mary 26
- Samuel 26
- Martha 25
- Katherine 24
- Exchange 24
- Acorn 22
The Netherlands (Commander: Maarten Tromp)
Tromp's Squadron
- Brederode 56 (flagship)
- Vrede 44 (flag of acting Vice-Admiral Gideon de Wildt)
- Campen 40
- Wapen van Holland 39
- Prins 38 (flag of Rear-Admiral Corstiaen Corstiaenszoon de Munnick)
- Groote Liefde 38
- Engel Gabriel 36
- Burgh 34
- Gideon 34
- Hollandia 32
- Hoorn 32
- Rotterdam 30
- Amsterdam 30
- Sint Pieter 28
- Star 28
- Gouda 28
- Vergulde Pelicaen 28
- Sint Maria 28
- Hollandia 26
De Ruyter's Squadron
- Vrijheid 46 (flag of acting Vice-Admiral Augustijn Balck)
- Witte Lam 38 (flag of Commodore Michiel de Ruyter)
- Sint Mattheeus 34
- Croon Imperiael 34
- Meerman 32
- Zeelandia 32
- Schiedam (= Gelderland) 30
- Graaf Hendrick 30
- Leyden 28
- Achilles 28
- Arke Troyane 28
- Frisia 28
- Breda 28
- Sphera Mundi 26
- Gulden Beer 24
- Overijssel 22
Evertsen's Squadron
- Hollandia 38 (flag of Vice-Admiral Johan Evertsen)
- Wapen van Veere 38
- Princes Louise 36 (acting Vice-Admiral Johan de Liefde)
- Gulden Haen 36
- Wapen van Zierikzee 34
- Faam 30
- Gouden Leeuw 30
- Gouden Leeuwin 30
- Haes 30
- Zeeuwsche Leeuw 28 (flag of Commodore Cornelis Evertsen the Elder)
- Zeeridder 28
- Neptunus 28
- West Capelle 28
- Goes 26
- Liefde 26
- Eendraght 24
- Sint Joris 23
- Liefde 23
- Eendraght 18
Florisse's Squadron
- Monnickendam 36 (flag of Rear-Admiral Pieter Florisse Blom)
- Wapen van Nassau 36
- Tobias 30
- Casteel van Medemblick 30
- Sampson 30
- Wapen van Monnickendam 28
- Prins Maurits 28
- Eenhoorn 28
- Lastdrager 28
- Prinses Albertina 26
- Peereboom 24
- Vergulde Schel 24


