
Battle of Goose Green facts for kids
Quick facts for kids Battle of Goose Green |
|||||||
|---|---|---|---|---|---|---|---|
| Part of the Falklands War | |||||||
 Darwin schoolhouse on fire |
|||||||
|
|||||||
| Belligerents | |||||||
| Commanders and leaders | |||||||
|
|
||||||
| Units involved | |||||||
|
|
||||||
| Strength | |||||||
|
1,160+ | ||||||
| Casualties and losses | |||||||
|
|
||||||
The Battle of Goose Green (called Batalla de Pradera del Ganso in Spanish) was an important fight during the Falklands War. It happened from May 28 to May 29, 1982. British and Argentine forces fought near the small settlements of Goose Green and Darwin on East Falkland.
These places were important because they had an airfield. Argentine troops were strongly dug in there. This was close to San Carlos Water, where British forces had landed.
The main British attack force was the 2nd Battalion Parachute Regiment (2 Para). Their leader was Lieutenant-Colonel Herbert Jones. Before the battle, BBC Radio accidentally announced the attack. This news likely warned the Argentine defenders. Colonel Jones and other British soldiers were very upset about this.
The battle began early on May 28. The British advance was slowed by strong Argentine defenses. Colonel Jones was killed while bravely charging an enemy machine-gun post. The Argentine soldiers later agreed to a ceasefire and surrendered the next morning.
Both Jones and his second-in-command, Major Chris Keeble, received medals for their bravery. Jones was given the Victoria Cross after his death. Major Keeble received the Distinguished Service Order.
Contents
Why the Battle of Goose Green Happened
The Land and Weather

Goose Green and Darwin are on a narrow strip of land called an isthmus. This land connects Lafonia in the south with Wickham Heights in the north. The area is hilly and has no trees. It is covered with grass, thick thorny bushes called gorse, and wet, spongy ground called peat bogs. This made it very hard for soldiers to hide.
The Falkland Islands have a cold and wet climate. From May to August, which is winter there, the ground is often soaked with water. This made walking very slow and tiring, especially at night. It often rained, and strong winds blew constantly. The weather could change quickly from rain to snow, fog, or sun. There wasn't much sunshine, so troops had few chances to get warm and dry.
Why the British Attacked Goose Green
Most Argentine forces were near Port Stanley, about 50 miles (80 km) east. Another group was at San Carlos, where the British had landed. An Argentine force was also at Goose Green and Darwin. They had artillery, mortars, and machine guns.
British intelligence first thought the Argentine force at Goose Green was not a big threat. So, their first plan was to simply go around Goose Green.
However, after the British landed at San Carlos on May 21, Argentine air attacks damaged and sank British ships. This made British leaders in the UK worried that the war was slowing down. The British government wanted a quick ground attack to show progress. They also faced pressure from the United Nations for a ceasefire. Taking Darwin–Goose Green was seen as important to control a large part of East Falkland before any ceasefire.
So, on May 25, Brigadier Julian Thompson, the ground forces commander, was ordered to attack the Argentine positions at Goose Green and Darwin.
Argentine Defenses at Goose Green
The Argentine forces defending Goose Green were called Task Force Mercedes. They had about 1,083 men. These included soldiers from the 12th Infantry Regiment (12IR) and the 25th Infantry Regiment (25IR). They also had air defense guns and howitzers (large cannons). Pucará aircraft from Stanley could also provide air support.
The Argentine commander, Lieutenant-Colonel Ítalo Piaggi, set up defenses all around the area. His A Company of 12IR was key. They were positioned along a gorse hedge from Darwin Hill to Boca House. Other companies were placed to cover different approaches. Minefields were also laid in important areas.
The Argentine force was made up of units from different regiments. They had not worked together before. Many were young soldiers who had been conscripted (drafted). Some units, like the 25IR Company, were highly trained and motivated. Others were less so. Despite challenges, an air drop of supplies on May 19 boosted their spirits.
At the start of the battle, the number of fighting soldiers on both sides was about the same.
British Forces for the Attack

Brigadier Thompson ordered the 2nd Battalion of the Parachute Regiment (2 Para) to attack Goose Green. They were the closest unit to the area. Colonel Jones was told to "carry out a raid on Goose Green isthmus and capture the settlements." Jones was more interested in "capture" than "raid." Thompson later admitted he hadn't given enough troops for a quick capture.
2 Para had different companies, including rifle, patrol, and support companies. They were supported by three 105mm artillery guns, anti-tank missiles, and Scout helicopters. Three Royal Air Force Harriers and the warship HMS Arrow were also ready to help.
The British Attack Plan
An SAS team had reported that only one Argentine company was at Darwin–Goose Green. But other British intelligence said there were more enemy forces. Colonel Jones believed the SAS report, thinking they had better information.
Based on this, Jones planned a six-phase attack. It would start at night and continue into the day.
- C Company would secure the starting line.
- A Company would attack from the left side (Darwin).
- B Company would attack from the right side (Boca House) after A Company started.
- D Company would advance between A and B companies.
- C Company would then move through D Company to deal with any remaining Argentine soldiers.
- Finally, C Company would clear the airfield. A and D companies would secure Darwin and Goose Green settlements.
Since many helicopters were lost when SS Atlantic Conveyor sank, 2 Para had to march 13 miles (21 km) from San Carlos to their starting point. The attack was planned for 3:00 AM on May 28, but delays meant it started at 3:35 AM.
First Contacts

Before the main British landing on May 21, there were air and naval attacks on Goose Green. The SAS also made a raid to make it seem like a bigger attack.
On May 22, four British Harriers attacked the airfield at Goose Green. They faced heavy anti-aircraft fire. On May 26–27, Argentine soldiers tried to raid SAS positions but found them empty. The next day, an Argentine platoon spotted British patrols and fired at them.
Throughout May 27, British Harriers were active over Goose Green. One Harrier was shot down by Argentine anti-aircraft fire while attacking Darwin Ridge. The earlier attacks, patrols, and even the BBC announcement warned the Argentine soldiers that an attack was coming.
The Battle of Goose Green
Fighting at Darwin Parks

At 3:35 AM, HMS Arrow began firing, marking the start of the attack. British artillery also fired about 1,000 rounds during the night.
2 Para's A Company advanced first. They came under fire but reached their first goal, Burntside House, without losses. They found it was occupied by civilians, not Argentine soldiers.
B Company followed, moving along the coast. They met little resistance at first. As they neared Burntside Hill, they exchanged fire with Argentine forces but found the positions empty. Argentine soldiers had pulled back after initial clashes. British soldiers had to use special grenades to clear trenches.
D Company faced heavy fire from an Argentine machine-gun. Two brave British soldiers charged the gun, silencing it. They were hit but saved their comrades. D Company then cleared the Argentine position on Coronation Ridge but lost three men.
Around 7:30 AM, an Argentine platoon from the 25IR C Company counterattacked. Their leader, 2nd Lieutenant Roberto Estévez, directed artillery fire even after being wounded. This fire stopped the British A Company, who were in open ground. Estévez continued directing fire until he was killed by a sniper. He and his radio operator were honored after their deaths.
British A Company was pinned down by heavy machine gun and sniper fire for an hour. B Company also pulled back. The British soldiers couldn't cross the open ground. After five hours, their ammunition was running low. They tried to call for the Argentines to surrender using a loudspeaker.
The Death of Colonel H. Jones
With the British attack stalled, Colonel Jones, the 2 Para commander, tried to lead a charge up a small gully. Three of his men were killed following him. Jones then ran towards an Argentine trench. He was hit twice and fell just meters from the trench, dying within minutes. He was later awarded the Victoria Cross.
A British helicopter sent to help Jones was shot down by an Argentine Pucará aircraft. The pilot was killed, and the aircrewman was badly wounded. The Pucará then crashed, and its pilot was also killed.
After Jones's death, Major Chris Keeble took command. It took him two hours to reorganize the attack. Some military experts later said that while Jones was brave, his actions sometimes made things harder for 2 Para.
Taking Darwin Hill

By 10:30 AM, A Company tried to advance again but was pushed back by Argentine fire. British mortar crews fired over 1,000 rounds, which helped prevent the Argentines from aiming well. Many Argentine deaths were caused by mortar fire.
The Argentines called for air support. Their Skyhawk fighter-bombers mistakenly attacked Argentine positions. They also faced Argentine anti-aircraft fire, which damaged one plane.
The British advance started again around noon. A Company cleared the eastern part of the Argentine position. B Company, with anti-tank missile support, took Boca Hill after fierce fighting.
A Company then overcame the Argentine defenders on Darwin Hill, securing it by 1:13 PM. With their leaders killed or wounded, the remaining Argentine soldiers on Darwin Ridge surrendered. The battle for Darwin Ridge was over. The British had secured their goals after six hours of fighting. They lost their commanding officer, other officers, and nine soldiers. Thirty were wounded. A British sniper was said to have caused many British casualties.
Attack on the Airfield

After securing Darwin Ridge, C and D Companies moved towards the airfield and Darwin School. B Company went south of Goose Green. C Company faced heavy fire from 35mm anti-aircraft guns at Goose Green. Their commander and several men were wounded.
At the airfield, Argentine anti-aircraft gunners tried to stop the British. They were forced to leave their positions, destroying their guns. A large part of an Argentine platoon surrendered.
There was an incident where British soldiers claimed Argentine defenders opened fire during a truce, killing a British officer and wounding another soldier. However, Argentine accounts differ.
Four British soldiers and about a dozen Argentines were killed in these fights. A British soldier died from a splinter from an anti-aircraft shell. Argentine anti-aircraft guns also destroyed the schoolhouse, believing snipers were inside.
Around this time, three British Harriers attacked the Argentine 35mm gun positions. The Argentine guns were already out of action due to earlier damage. This attack boosted British morale.
Meanwhile, an Argentine platoon on the outskirts of Goose Green continued to resist. Argentine Pucará and Aermacchi aircraft attacked the British. One Aermacchi was shot down by a British missile, killing the pilot. Another Pucará was shot down by British small arms fire. The pilot survived and was captured.
Nightfall on May 28
By nightfall, the situation for 2 Para was difficult. A Company was still on Darwin Hill. B Company was isolated and under fire. Argentine helicopters landed nearby, bringing in more Argentine soldiers.
B Company managed to call in artillery fire on these new Argentine troops, forcing them to scatter. For C Company, the attack had stopped, with their commander injured and platoons spread out. D Company was exhausted, hungry, and low on ammunition and water.
Major Keeble felt the situation was risky. He worried about an Argentine counter-attack. He decided to ask for an Argentine surrender rather than continue fighting the next morning. If they didn't surrender, his plan was to "flatten Goose Green" with all available firepower and then attack. More British troops and artillery were brought in to support this plan.
The Surrender
The British sent a message by radio to Mr. Eric Goss, the farm manager in Goose Green. He delivered it to Colonel Piaggi. The message explained that a British delegation would come forward to discuss surrender terms. Piaggi agreed to meet them.
After midnight, two Argentine Air Force prisoners of war were sent to Piaggi with the surrender terms. The terms stated that the Argentine forces must surrender unconditionally by leaving the town, removing helmets, and laying down weapons. If they refused, the British would bombard Darwin and Goose Green. The message also warned Piaggi that he would be responsible for the safety of civilians.
After reading the terms, Piaggi decided to surrender. He knew there were no more reinforcements coming. He suggested to Wing Commander Wilson Pedrozo that they talk to the British. Pedrozo reluctantly agreed.
The next morning, an agreement for an unconditional surrender was reached. Pedrozo held a short parade, and the soldiers laid down their weapons. After burning their regimental flag, Piaggi led his troops into captivity.
After the Battle
Impact on the War
Before the battle, Argentines had sunk four British ships, including one carrying important helicopters. This made the British government anxious for progress. The victory at Goose Green was a much-needed success for Britain. It showed that the Argentines could not stop the British from landing and moving inland. From this point on, British forces kept the upper hand in the war.
Prisoners and Casualties

Between 45 and 55 Argentine soldiers were killed, and 86 were wounded. The rest of the Argentine force was taken prisoner. Wounded Argentines were taken to hospital ships. Argentine soldiers who died were buried in a cemetery north of Darwin. Prisoners were used to clear the battlefield. In one incident, while moving ammunition, an explosion killed three Argentine soldiers and wounded ten.
After clearing the area, the prisoners were marched to San Carlos.
The British lost 18 killed (16 paratroopers, one Royal Marine pilot, and one engineer) and 64 wounded. Nearly 50 needed surgery. The seriously injured were taken to the hospital ship SS Uganda.
By June 3, Gurkhas were deployed at Darwin and Goose Green. They searched for Argentine patrols. In one encounter, a Gurkha soldier threatened an Argentine officer with a knife to make him surrender.
The Commanders

Lieutenant-Colonel Ítalo Ángel Piaggi surrendered his forces on May 29, Argentina's Army Day. After the war, he had to leave the army. He later wrote a book defending his decisions and criticizing the lack of support from Stanley. He said his forces had plenty of rifle ammunition but ran out of mortar rounds and only had a few artillery shells left. In 1992, after a legal fight, he got his military rank and pay back as a full colonel. He died in 2012.
Lieutenant-Colonel Herbert 'H' Jones was buried at Ajax Bay. After the war, his body was moved to the British cemetery in San Carlos. He was given the Victoria Cross after his death for his extreme bravery.
Major Chris Keeble took command of 2 Para when Jones was killed. He received the DSO for his leadership at Goose Green. Keeble's flexible leadership was key to the British victory. Even though soldiers wanted him to stay in command, a new lieutenant-colonel was flown in from the UK to take over the battalion.
BBC Incident
During the planning of the attack, the British soldiers heard on the BBC World Service news that the 2nd Battalion of the Parachute Regiment was ready to attack Darwin and Goose Green. This made the commanders very worried that their plan was no longer a secret. Colonel Jones was very angry and said he would sue the BBC and the government.
Images for kids
-
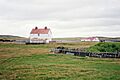
Isolated cottages in Darwin settlement
-
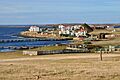
Goose Green on a sunny day
-
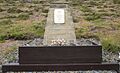
Memorial to Lieutenant-Colonel Herbert Jones, VC, OBE close to Darwin, Falklands Islands


See also
 In Spanish: Batalla de Pradera del Ganso para niños
