Battle of Myriokephalon facts for kids
Quick facts for kids Battle of Myriokephalon |
|||||||
|---|---|---|---|---|---|---|---|
| Part of the Byzantine–Seljuq Wars | |||||||
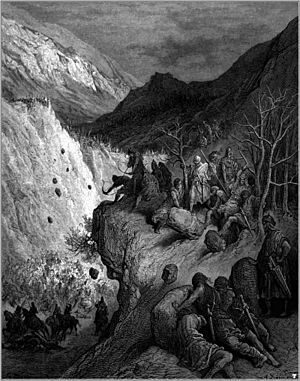
 This image by Gustave Doré shows the Turkish ambush at the pass of Myriokephalon. |
|||||||
|
|||||||
| Belligerents | |||||||
| Byzantine Empire Hungary Principality of Antioch Grand Principality of Serbia |
Sultanate of Rum | ||||||
| Commanders and leaders | |||||||
|
Kilij Arslan II | ||||||
| Strength | |||||||
| 25,000–40,000 | Unknown (likely smaller) | ||||||
| Casualties and losses | |||||||
| Approx. 1⁄4 of the army or half of those troops who were directly attacked (left and right wings only), possibly heavy |
Unknown | ||||||
The Battle of Myriokephalon was a major battle fought on September 17, 1176. It was a clash between the Byzantine Empire and the Seljuk Turks. The fight happened in the mountains of southwestern Turkey, near a place called Myriokephalon.
The Byzantine army was moving through a narrow mountain pass when the Seljuk Turks ambushed them. This battle was a big defeat for the Byzantines. It marked the last major attempt by the Byzantines to take back control of central Anatolia from the Turks.
Contents
Why the Battle Happened
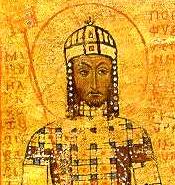
In 1161, the Seljuk Sultan Kilij Arslan II and the Byzantine Emperor Manuel I Komnenos made a peace deal. Manuel wanted peace for his lands in Anatolia. Kilij Arslan needed time to deal with rivals within his own kingdom.
After a powerful Muslim ruler named Nur ad-Din Zangi died in 1174, Kilij Arslan took over new lands. He also forced his brother, Shahinshah, out of his territory near Ankara. Shahinshah and other leaders fled to Manuel for help.
Manuel demanded that Kilij Arslan give back some of the lands he had conquered. This was part of their earlier peace treaty. However, Kilij Arslan ignored Manuel's request. This led to the breakdown of their peace.
Both sides had different goals. The Seljuks wanted to expand from the dry central plateau into more fertile coastal areas. The Byzantines wanted to get back the lands they had lost in Anatolia over the past century.
Manuel's March to Battle
In 1176, Emperor Manuel gathered a very large army. He planned to march against the Seljuk capital, Konya. His army was so big it stretched for about ten miles.
Kilij Arslan tried to negotiate for peace again, but Manuel refused. He was confident his large army would win. Manuel sent part of his army on a different route, but that group was ambushed and destroyed.
The Seljuks also made Manuel's march harder. They destroyed crops and poisoned water supplies. Kilij Arslan's forces kept bothering the Byzantine army. They tried to push Manuel's army into a specific mountain pass called Tzivritze, near the old fortress of Myriokephalon.
Manuel decided to go through the pass, even though it was dangerous. He might have been low on supplies and water, and his soldiers were getting sick. He chose to risk an ambush rather than try to fight the Turks on open ground.
The Armies
Byzantine Army
The Byzantine army was huge. Historians estimate it had between 25,000 and 40,000 soldiers. This included about 25,000 Byzantine troops. There were also allied soldiers from Hungary, Antioch, and Serbia.
The army was divided into several groups. They entered the mountain pass one after another.
- The first group was the vanguard, mostly infantry (foot soldiers).
- Then came the main group of soldiers.
- Next was the right wing, led by Baldwin of Antioch.
- After them came the baggage and siege engines (like giant catapults).
- Then the left wing, led by Theodore Mavrozomes and John Kantakouzenos.
- The Emperor Manuel and his best troops followed.
- Finally, the rear group, led by Andronikos Kontostephanos.
Seljuk Army
We don't know exactly how many Seljuk soldiers there were. Historians believe the Seljuk Sultanate of Rum could usually gather about 10,000 to 15,000 soldiers. This battle likely had a similar number.
The Seljuk army had two main parts:
- Askari: These were full-time, professional soldiers. They were often armored and fought with bows and lances. They were the main fighting force.
- Turkoman tribesmen: These were irregular horsemen. They were semi-nomadic and fought under their own leaders. They were good at quick attacks with bows and arrows. They were less reliable but very numerous.
The Battle in the Pass
The Byzantine vanguard and main groups entered the pass first. They faced some attacks but got through with few losses. The Turks might not have been fully ready yet. These groups sent their infantry up the slopes to push back the Seljuk soldiers.
However, the groups that followed were not as careful. They didn't stay in tight formations or use their archers well. As the first two groups left the pass, the last groups were just entering. This allowed the Turks to trap them inside.
The Turkish attack came down from the high ground. It hit the Byzantine right wing especially hard. This group quickly broke apart, with soldiers running into more ambushes. Many soldiers died, and their leader, Baldwin, was killed.
The Turks then focused on the baggage and siege equipment. They shot the animals pulling the wagons, blocking the narrow road. The left wing also suffered many losses. One of its leaders, John Kantakouzenos, died fighting alone.
The remaining Byzantine soldiers panicked. A sudden dust storm made things even worse. Emperor Manuel seemed to lose hope for a moment. But his officers encouraged him, and he managed to get his army organized again. They fought their way past the destroyed wagons and out of the pass.
Outside the pass, they joined up with the first two groups, who had already built a fortified camp. The rear group, led by Andronikos Kontostephanos, arrived later with few losses.
That night, the Seljuks attacked the camp with mounted archers, but the Byzantines fought them off. The next day, the Turks circled the camp, firing arrows. Manuel ordered two counterattacks, but there was no major battle.
What Happened After
Both sides lost soldiers, but it's hard to know exactly how many. Historians think about half of the Byzantine army was involved in the main fighting, and about half of those soldiers were lost. Most importantly, Manuel's siege equipment was captured and destroyed. Without it, the Byzantines couldn't attack Konya.
Kilij Arslan wanted peace quickly. He sent an envoy (a messenger) to Manuel with gifts. They agreed that the Byzantine army could leave safely. In return, Manuel had to destroy two forts, Dorylaeum and Sublaeum, on the border.
However, some Turkoman tribesmen still attacked the retreating Byzantine army. Kilij Arslan probably couldn't control them. Because of this, Manuel didn't fully keep his promise. He destroyed the less important fort of Sublaeum but left Dorylaeum intact.
Manuel compared his defeat to the earlier Battle of Manzikert, a major Byzantine loss. But he also boasted that he had made a good peace deal. It's clear that Kilij Arslan, even though he won, didn't think his army could completely destroy the Byzantines. Many of his irregular troops might have been more interested in taking their plunder than continuing the fight.
Long-Term Effects
Myriokephalon was a big defeat, but it didn't completely destroy the Byzantine army. The very next year, the Byzantines won a notable victory against the Seljuks at the Battle of Hyelion and Leimocheir. In that battle, a Seljuk army walked into a Byzantine ambush.
Manuel continued to fight smaller battles against the Seljuks with some success. He made another peace deal with Kilij Arslan in 1179.
However, Myriokephalon was a turning point. After this battle, the power balance in Anatolia slowly shifted. The Byzantine Empire could no longer seriously try to take back central Anatolia. This land was now lost to the empire forever.
The defeat had a greater psychological impact than a military one. It showed that the Empire couldn't defeat Seljuk power in central Anatolia. Manuel had spent a lot of time on military adventures in Italy and Egypt. Some argue he neglected the more urgent problem of the Turks.
During the Myriokephalon campaign, Manuel made several tactical mistakes. He didn't scout the route well and ignored advice from his officers. This led his army straight into the ambush. However, his army was well-organized into different groups. This organization helped most of his army survive the ambush.
After Manuel's death, the Byzantine Empire faced many problems. It was never again strong enough to launch a major attack in the east.
See also


