
Battle of Steenkerque facts for kids
Quick facts for kids Battle of Steenkerque |
|||||||
|---|---|---|---|---|---|---|---|
| Part of the Nine Years' War | |||||||
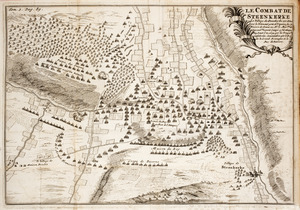 Map of the Battle of Steenkerke |
|||||||
|
|||||||
| Belligerents | |||||||
| Commanders and leaders | |||||||
| Luxembourg Montal Boufflers |
William of Orange Ferdinand Willem Solms Hugh Mackay † Henry Casimir II Overkirk |
||||||
| Strength | |||||||
| 80,000 | 80,000 | ||||||
| Casualties and losses | |||||||
| 7,000 to 8,000 killed or wounded | 8,000 killed or wounded to 10,000 killed or wounded, 1,300 captured, plus 13 guns | ||||||
The Battle of Steenkerque was a major fight during the Nine Years' War. It happened on August 3, 1692, near a town called Steenkerque in what is now Belgium. A French army, led by Marshal Luxembourg, fought against an Allied army. The Allied forces were led by William of Orange. The French managed to stop a surprise attack and win the battle. However, both sides suffered many losses.
Contents
Planning the Attack: The Battle of Steenkerque
Marshal Luxembourg had already achieved his main goal for 1692. He had captured the city of Namur in June. Because of this, he wanted to avoid another big battle. He set up his army in a strong defensive position. His right side was near the Zenne river at Steenkerque. His left side was close to Enghien. He thought the Allied army would not dare to attack such a strong position.
William of Orange was the commander of the Allied army. His troops were camped near Halle. William usually would not have risked an attack. But he saw a chance to surprise the French. So, before dawn on August 3, he ordered his soldiers to move towards the French right side.

William planned his attack very carefully. About 300 cavalry and dragoons took positions near the French camp. The French did not notice them. They thought these were just troops covering soldiers looking for supplies. But these troops were actually hiding 800 pioneers. Pioneers were soldiers with axes and shovels. They were there to widen forest paths and fill ditches. This helped make it easier for the Allied army to move forward.
Allied Attack Columns
After the pioneers finished their work, Lieutenant General Württemberg was to lead the first attack. He had 5,000 to 6,000 Dutch, English, Danish, and German infantry. They also had artillery. Their job was to take control of Steenkerke. Once the French were pushed out, Württemberg had to hold the position. He needed to wait for the rest of the army to arrive.
The main attack was planned with three large groups of soldiers, called columns:
- The first column had 8,000 men. It was led by the Prince of Nassau-Usingen. This group included English and Dutch brigades.
- The second column had 6,000 to 7,000 men. It was led by Henry Casimir II. This group was made up of Dutch brigades.
- The third column had 11,000 men. It was led by the Count of Solms. This group included Dutch, English, and Scottish Guards. It also had English and Danish brigades.
Each of these columns had its own artillery. About 15,000 horsemen, led by the Earl of Athlone, were ordered to follow the infantry. They were ready to support the attack wherever needed.
The Battle Unfolds
The Allied advance guard, led by the Duke of Württemberg, moved quietly. They got close to the French camps around 5:00 a.m. The day started well for the Allies. After a short fight, Württemberg took control of a hill and a forest. These were right across from Steenkerke. By 9:00 a.m., he set up artillery and began firing at the French. For his next move, he needed the main Allied army to arrive.
,_vorst_van_Nassau-Dietz._Als_aanvoerder_bij_een_veldslag,_SK-C-1226.jpg)
To Württemberg's frustration, it took all morning for Lieutenant General Hugh Mackay to arrive with the first column's infantry. The other two columns were nowhere to be seen. Either by bad luck or poor planning, the cavalry had moved in front of the infantry. This blocked the infantry of the other columns from reaching the front line.
Meanwhile, de Montal, the experienced French commander, quickly organized his troops. William decided he could not wait any longer. Despite the delays and the missing columns, he ordered Württemberg and Mackay to attack around 1:00 p.m. Their troops captured the first three lines of French defenses. They were very close to winning a great victory. But de Montal held them off long enough for Luxembourg to bring up his main army.
.jpg)
The Allied main army arrived in small groups, not all at once. This meant they did not try to attack the French center. Mackay's troops were spread out and under heavy French pressure. He asked William for permission to pull back and reorganize. William ordered him to continue the attack. Mackay reportedly said, "The Lord's will be done." He then led his regiment and was killed, along with many of his soldiers. Over 8,000 of the 15,000 Allied troops fighting became casualties. Five British regiments were almost completely destroyed. Around 6:00 p.m., William decided to stop the attack.
Württemberg was furious. He told Mérode-Westerloo, a young officer, that he could have beaten the French if the other columns had arrived. He had only 14,000 men available. Mérode-Westerloo rode back to the king. He later wrote that he told the king a great chance to defeat the French had been lost. The king just smiled and said nothing.
Luxembourg saw a chance to win completely. He sent in his best troops, the Maison du Roi. These elite soldiers attacked head-on. They were joined by troops from Enghien, led by Boufflers. Württemberg's soldiers and the remaining troops of the first column fought hard but were pushed back. However, the French counterattack was very costly for them. The columns of Henry Casimir and Solms had finally reached the edge of the forest. They were now fighting the French. The battle only ended when darkness fell. William then ordered his troops to go back to their starting positions near Halle. A rear-guard, led by Hendrik Van Nassau-Ouwerkerk, covered their retreat. The French quickly stopped chasing them. They had lost about 7,000 to 8,000 soldiers killed or wounded.
After the Battle
Both sides could say they won something. The French stopped the Allied attack and held their ground. They might have also prevented an attack on Namur. The Allies, on the other hand, caused many losses for the French. They might have also stopped the French from moving towards Liege. After the battle, the two armies stayed near each other for the rest of the summer. But nothing major happened before they went to their winter camps.
During the battle, the Allies had a firepower advantage. They fought with new flintlock muskets. The French still used older muskets. When King Louis XIV heard about this, he immediately demanded that his infantry get the new muskets. However, it took several years for all French soldiers to get the new weapons. This was due to problems with manufacturers and some officers not wanting to change.
After the battle, some English politicians blamed Solms for their heavy losses. They said it was not incompetence, but a deliberate act. They wanted him removed. These claims were mostly due to anti-Dutch feelings and opposition to the war in Parliament. There was no real proof for these claims. When William returned to London in October, he just said he would think about it. Solms died the next year from wounds he got at the Battle of Landen.
The Steenkirk Cravat
A type of clothing item was named after this battle. A "steenkirk" was a lace cravat. It was worn loosely or carelessly, with long lace ends. According to Voltaire's book L'Âge de Louis XIV, this style became popular after the Battle of Steenkerque. French gentlemen supposedly had to fight with their cravats disarranged because of the surprise attack by the Allies.
The Steenkirk cravat became a popular fashion item in France for many years. Both men and women wore it. It then spread from France to England, where it was also worn by both genders.
