Battle of the North Cape facts for kids
Quick facts for kids Battle of the North Cape |
|||||||
|---|---|---|---|---|---|---|---|
| Part of World War II | |||||||
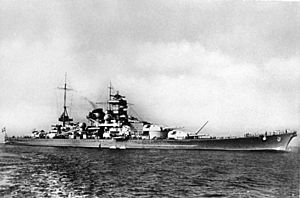 German battleship Scharnhorst, c. 1939 |
|||||||
|
|||||||
| Belligerents | |||||||
| Commanders and leaders | |||||||
| Strength | |||||||
| 1 battleship 1 heavy cruiser 3 light cruisers 8 destroyers |
1 battleship 5 destroyers |
||||||
| Casualties and losses | |||||||
| 21 killed 11 wounded 1 battleship slightly damaged 1 heavy cruiser damaged 1 destroyer damaged |
1,932 killed 36 captured 1 battleship sunk |
||||||
The Battle of the North Cape was a major naval battle during World War II. It took place on December 26, 1943, in the cold Barents Sea near the North Cape of Norway. In this battle, the German battleship German battleship German battleship Scharnhorst tried to attack Allied ships carrying supplies to the Soviet Union. However, it was stopped and sunk by the Royal Navy's battleship HMS Duke of York, along with several cruisers and destroyers. One of these was the Norwegian destroyer HNoMS Stord.
This battle was the last time big battleships from Britain and Germany fought each other. It showed how important radar had become in naval warfare.
Why the Battle Happened
Since August 1941, the Allies (like the United Kingdom) sent convoys of ships from Britain and Iceland to ports in the northern Soviet Union. These convoys carried important supplies for the Soviet war effort against Germany. The journey was very dangerous because German naval ships and aircraft in occupied Norway often attacked them.
The Threat of German Warships
A big worry for the Allies were powerful German battleships like the Tirpitz and the Scharnhorst. Just the threat of these ships being nearby could cause problems for the convoys. For example, Convoy PQ 17 was scattered and mostly sunk because of false reports that the Tirpitz was coming to attack. To protect the convoys, the Royal Navy had to use many of its own powerful ships.
Germany's Plan: Operation Ostfront
In late December 1943, the German navy, called the Kriegsmarine, planned to attack the Allied convoys. This plan was called Operation Ostfront. They knew about a convoy called JW 55B, which had 19 cargo ships heading to Russia. It was protected by several destroyers and other warships. There was also another convoy, RA 55A, returning to the UK.
Britain's Plan: Admiral Fraser's Strategy
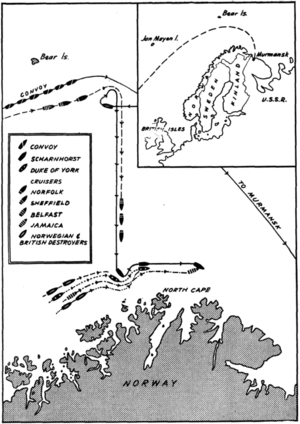
Admiral Sir Bruce Fraser, who led the British Home Fleet, wanted to get rid of the Scharnhorst. He knew it was a big danger to the convoys. He planned to use convoy JW 55B to draw the Scharnhorst out. Fraser hoped the Scharnhorst would try to attack JW 55B.
He told his captains his plan: he would wait for the Scharnhorst between the convoy and its base in Norway. Then, in the dark Arctic night, he would get close, light up the Scharnhorst with special star shells, and open fire using his ships' fire-control radar.
The Ships Set Sail
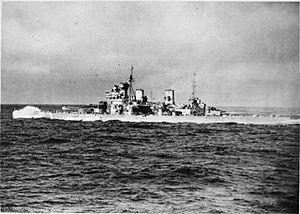
Convoy JW 55B left Scotland on December 20. German planes spotted it two days later. By December 23, the British knew the Germans were watching the convoy. Admiral Fraser then sailed with his main force, called Force 2. This included his flagship, the battleship HMS Duke of York, the cruiser HMS Jamaica, and four destroyers, including the Norwegian HNoMS Stord.
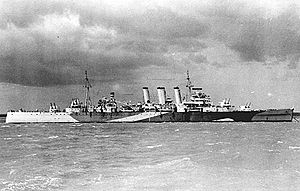
Fraser didn't want to scare the Scharnhorst away too early. As JW 55B got closer to the danger zone, another British force, Force 1, led by Vice Admiral Robert Burnett, sailed west from Russia. Force 1 included the cruisers HMS Belfast, HMS Norfolk, and Sheffield. On December 25, the Scharnhorst, with five destroyers, left its base in Norway under the command of Rear Admiral Erich Bey. It headed towards the convoy in stormy weather.
The Battle Begins
Admiral Fraser learned early on December 26 that the Scharnhorst was at sea. Bad weather meant German planes couldn't fly to find the British ships. The rough seas also made it hard for Admiral Bey's ships to move. He couldn't find the convoy. Thinking he had missed it, Bey sent his destroyers south to search a wider area. They then lost contact with the Scharnhorst.
Fraser prepared for the attack. He moved the empty convoy RA 55A out of the way and told JW 55B to turn around. This allowed him to get closer. He also ordered four destroyers from RA 55A to join his force.
First Contact: Cruisers vs. Scharnhorst
The Scharnhorst, now alone, met Admiral Burnett's Force 1 shortly after 9:00 AM. The British cruiser Belfast was the first to spot the Scharnhorst on its radar. The British cruisers quickly moved closer. From about 13,000 yards (11,900 meters), the British ships opened fire. The Scharnhorst fired back.
The German battleship was hit twice. One shell destroyed its forward radar controls, making the Scharnhorst almost blind in the snowstorm. Without radar, the German gunners had to aim by looking at the flashes from the enemy guns. This was harder because two British cruisers used special gunpowder that made less flash. Admiral Bey thought he was fighting a battleship, so he turned south to get away and maybe lead them away from the convoy.
The Scharnhorst's faster speed allowed Bey to escape his pursuers. He then turned northeast, trying to go around the British ships and attack the unprotected convoy. Burnett, instead of chasing, correctly guessed Bey's plan. He moved Force 1 to protect the convoy.
Around noon, the Scharnhorst was again found by the cruisers' radars as it tried to reach the convoy. They exchanged fire again. The Scharnhorst hit the Norfolk twice with 11-inch shells, damaging a gun turret and its radar. Burnett's destroyers couldn't get close enough to launch torpedoes. After this, Bey decided to go back to port. He ordered his destroyers to attack the convoy at a position a German submarine had reported earlier. But the report was old, and the destroyers missed the convoy.
The Final Chase and Sinking
The Scharnhorst sailed south for several hours, using its speed to get away. Burnett chased, but the Sheffield and Norfolk had engine problems and fell behind. This left the Belfast alone chasing the Scharnhorst, which was dangerous for the Belfast. But the Scharnhorst's broken radar meant the Germans couldn't take advantage. The Belfast was able to find the German ship again on its radar.
Admiral Bey didn't know his ship was sailing into a trap. Admiral Fraser's main force was heading straight for the Scharnhorst and was perfectly placed to cut off its escape. The Belfast kept sending radio signals about the Scharnhorst's position. The battleship Duke of York pushed through the rough seas to reach the German ship. Fraser sent his four escorting destroyers ahead to get into position to fire torpedoes.
The main British force spotted the Scharnhorst on radar at 4:15 PM. They moved to get all their guns ready. At 4:48 PM, the Belfast fired star shells, lighting up the Scharnhorst. The German ship was caught by surprise, with its main guns pointing the wrong way. The Duke of York opened fire and hit the Scharnhorst with its first shots. These hits disabled the Scharnhorst's front gun turrets and destroyed its airplane hangar. Bey turned north, but the cruisers Norfolk and Belfast attacked him. He then turned east, going very fast. The Scharnhorst was now being attacked by the Duke of York and Jamaica on one side, and Burnett's cruisers on the other.
The Scharnhorst kept taking heavy hits from the Duke of York's 14-inch shells. At 5:24 PM, a desperate Bey sent a message to Germany: "I am surrounded by heavy units."
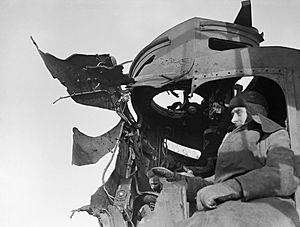
Bey tried to create more distance between his ship and the British ships. Two 11-inch shells from Scharnhorst passed through the Duke of York's masts, damaging some radio antennas and knocking over the radar antenna. Despite the terrible weather, an officer quickly climbed the mast and fixed the radar.
The Scharnhorsts luck got much worse at 6:20 PM. A shell from the Duke of York hit its side armor and destroyed a boiler room. The Scharnhorsts speed dropped to only 10 knots (18.5 km/h). Even though they quickly repaired it to 22 knots (40.7 km/h), the Scharnhorst was now open to torpedo attacks from the destroyers. Five minutes later, Bey sent his last radio message: "We will fight on until the last shell is fired."
At 6:50 PM, the Scharnhorst turned to fight the destroyers Savage and Saumarez. This allowed the Scorpion and the Norwegian destroyer Stord to attack with torpedoes. They hit the Scharnhorst twice on its right side. As the Scharnhorst turned to avoid more torpedoes, the Savage and Saumarez hit it three more times on its left side. The Saumarez was hit several times by Scharnhorst's smaller guns, and 11 of its sailors were killed.
Because of the torpedo hits, the Scharnhorst's speed dropped again to 10 knots. This allowed the Duke of York to get very close. With the Scharnhorst lit up by star shells "hanging over her like a chandelier," the Duke of York and Jamaica started firing again from only 10,400 yards (9,500 meters) away. At 7:15 PM, the Belfast joined in. The British ships fired many shells at the German ship. The cruisers Jamaica and Belfast fired their last torpedoes.
The Scharnhorst's end came when the British destroyers Opportune, Virago, Musketeer, and Matchless fired 19 more torpedoes. Hit many times and unable to escape, the Scharnhorst finally flipped over and sank at 7:45 PM on December 26.
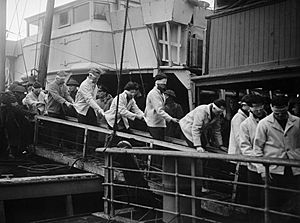
Out of 1,968 crew members, only 36 were rescued from the freezing water. Neither Rear Admiral Bey nor Captain Hintze were among those saved. The British had very few casualties, with only 21 killed and 11 wounded. Most of these were on the destroyer Saumarez. After the battle, Fraser sent a message to the British Admiralty: "Scharnhorst sunk." The reply was: "Grand, well done."
After the Battle
Later that evening, Admiral Fraser spoke to his officers on the Duke of York. He said: "Gentlemen, the battle against Scharnhorst has ended in victory for us. I hope that if any of you are ever called upon to lead a ship into action against an opponent many times superior, you will command your ship as gallantly as Scharnhorst was commanded today."
Admiral Fraser also sent a special message about the Norwegian destroyer Stord: "... Stord played a very daring role in the fight and I am very proud of her..." The captain of the Duke of York also praised the Stord, saying it "carried out the most daring attack of the whole action."
The Importance of Radar
The sinking of the Scharnhorst showed how important radar was in modern naval battles. The German battleship should have been able to outfight all the British ships except the Duke of York. But losing its radar early on, combined with the bad weather, put it at a big disadvantage. The Scharnhorst was hit by 31 of the 52 radar-guided shots fired by the Duke of York. After the battle, the German naval commander, Großadmiral Karl Dönitz, said: "Surface ships are no longer able to fight without effective radar equipment."
Impact of the Victory
The sinking of the Scharnhorst was a big victory for the Allies in the Arctic. It changed the balance of power at sea even more in their favor. This battle happened only a few months after Operation Source, which had badly damaged the German battleship Tirpitz while it was docked in Norway.
With the Scharnhorst destroyed and Germany's other battleships out of action, the Allies no longer had to worry about German battleships attacking their convoys in the Arctic and Atlantic. This meant the Allies could use their naval ships for other important tasks. This battle was the last time battleships fought in European waters during World War II. It was also one of the few major naval battles in the war that happened without air support.
See also


