
Battle of the Strait of Otranto (1917) facts for kids
Quick facts for kids Battle of the Strait of Otranto |
|||||||
|---|---|---|---|---|---|---|---|
| Part of the Mediterranean Theater of World War I | |||||||
 SMS Novara in action |
|||||||
|
|||||||
| Belligerents | |||||||
| Commanders and leaders | |||||||
| Strength | |||||||
| 1 armored cruiser 3 light cruisers 4 destroyers 3 submarines |
2 light cruisers 10 destroyers 1 seaplane carrier 47 drifters |
||||||
| Casualties and losses | |||||||
| 2 light cruisers damaged | 1 light cruiser damaged 2 destroyers sunk 1 destroyer damaged 14 drifters sunk 4 drifters damaged |
||||||
The Battle of the Strait of Otranto in 1917 was a big naval fight during World War I. It happened on May 15, 1917, in the Strait of Otranto, which is a narrow passage of water. This battle was the largest surface ship battle in the Adriatic Sea during the war.
The fight started when the Austro-Hungarian navy attacked the Otranto Barrage. This barrage was a blockade set up by the Allies (Britain, France, and Italy). It used small, lightly armed ships called drifters with anti-submarine nets and mines. Its goal was to stop German and Austro-Hungarian submarines (U-boats) from getting into the Mediterranean Sea.
The Austro-Hungarian navy wanted to break this blockade. They sent three light cruisers and two destroyers, led by Commander Miklós Horthy. The Allied navies quickly responded. During the battle, the Austro-Hungarian cruiser SMS Novara was badly damaged. However, more Austro-Hungarian ships arrived, forcing the Allied commander, Rear Admiral Acton, to pull back. The battle ended without a clear winner.
Contents
Who Fought: The Ships and Their Crews
Austro-Hungarian Forces: Breaking the Blockade
Commander Miklós Horthy led the main Austro-Hungarian attack force. It included three fast cruisers: Novara, Saida, and Helgoland. These cruisers were changed to look like large British destroyers. Their mission was to attack the drifters on the night of May 14 and destroy as many as possible before morning.
Two destroyers, Csepel and Balaton, were also part of the plan. They were sent to attack the Albanian coast. This was a trick to confuse the Allies and draw their attention away. Three submarines, U-4, U-27 (Austro-Hungarian), and UC-25 (German), also joined the operation.
A strong support group was ready to help if needed. This group included the armored cruiser Sankt Georg, two more destroyers, and four torpedo boats. An older battleship, SMS Budapest, and three more torpedo boats were also available.
Allied Forces: Protecting the Barrage
On the night of May 14, Allied destroyers were patrolling north of the blockade. This group included the Italian ship Mirabello and French destroyers Commandant Rivière, Bisson, and Cimeterre. Another Italian destroyer, Borea, was busy escorting a convoy of supply ships.
A larger support force was based in the port of Brindisi. This force had British cruisers Dartmouth and Bristol, along with several French and Italian destroyers. These ships were ready to respond quickly to any attack.
The Raid: Attacking the Drifters

The Austro-Hungarian destroyers Csepel and Balaton made the first move. Around 3:24 AM, they attacked the Italian convoy that Borea was escorting. They sank Borea and a ship carrying ammunition. Another ship was set on fire and had to be left behind.
Meanwhile, the three Austro-Hungarian cruisers passed through the line of drifters. At 3:30 AM, they began attacking the small blockade ships. Often, the Austro-Hungarians warned the drifter crews to leave their ships before opening fire. But some drifter crews chose to fight back. The Gowan Lee fired at the Austro-Hungarian ships. It was badly damaged but stayed afloat. Its captain, Joseph Watt, later received the Victoria Cross for his bravery.
There were 47 drifters in the blockade that night. The Austro-Hungarians managed to sink 14 of them and damage four more. Because there weren't enough Allied escort ships, the remaining drifters had to pull back. However, they returned to their positions a short time later.
The Battle: Allied Ships Respond
Chasing the Attackers
By this time, the Allied naval forces knew about the raid. They quickly moved to block the Austro-Hungarian ships from escaping. Rear Admiral Alfredo Acton, who led the Italian Scouting Division, ordered the Mirabello group to head south at 4:35 AM. He then boarded the British light cruiser HMS Dartmouth.
By 6:45 AM, the cruisers Dartmouth and Bristol were sailing north. They were joined by Italian destroyers Rosolino Pilo, Antonio Mosto, Simone Schiaffino, Acerbi, and Aquila. Their goal was to cut off the Austro-Hungarian cruisers. More Italian ships, including the light cruiser Marsala, were also getting ready to help.
Clash with Destroyers
The Mirabello group met the Austro-Hungarian cruisers around 7:00 AM. But the Allied ships were outgunned, so they tried to follow the fleeing cruisers instead of fighting directly. At 7:45 AM, Rear Admiral Acton's ships found the Austro-Hungarian destroyers Csepel and Balaton.
After 20 minutes, the Italian destroyers got closer to the Austro-Hungarian ships. The two groups exchanged gunfire. A shot from Csepel hit Aquila, damaging its engines. By then, the Austro-Hungarian destroyers were close to the coastal guns at Durazzo, which helped them escape.
Cruisers in Combat
At 9:00 AM, lookouts on Bristol spotted smoke from the Austro-Hungarian cruisers. The Allied ships turned to fight them. The British ships had more guns and more powerful weapons. Dartmouth had eight 6-inch guns, and Bristol had two 6-inch and ten 4-inch guns. Each Austro-Hungarian ship had nine 3.9-inch guns.
However, the Allies quickly lost their advantage in numbers. Their destroyers either had engine problems or were busy protecting other damaged ships. Both sides sent more support ships to the battle. Italian seaplanes from the seaplane carrier Europa flew over the Austro-Hungarian cruisers. They dropped bombs on Helgoland, but only scored a near-miss. This near-miss still caused some damage to the ship's rudder.

Dartmouth, which was faster than Bristol, got close enough to the Austro-Hungarian ships to open fire. A shell from Dartmouth hit Novara. The Austro-Hungarian ships then created a smoke screen to hide themselves. Dartmouth was hit several times. By 11:00 AM, Acton ordered Dartmouth to slow down so Bristol could catch up.
Novara was hit many more times. Its main pumps and a steam pipe were damaged, causing the ship to lose speed. At 11:05 AM, Acton turned away, trying to separate Saida from Novara and Helgoland. At this moment, the Austro-Hungarian support group, led by Sankt Georg, was getting closer. This made Acton temporarily pull back to gather his ships.
This short break allowed the Austro-Hungarians to save the damaged Novara. Saida took Novara under tow, while Helgoland protected them.
The Retreat and Final Attacks
Acton didn't know that Novara was badly damaged. He also worried that his ships would get too close to the Austrian naval base at Cattaro. So, he called off the chase. The destroyer Acerbi misunderstood the signal and tried to launch a torpedo attack. But the combined fire from Novara, Saida, and Helgoland drove it away.
At 12:05 PM, Acton realized how bad Novara's situation was. But by then, the Sankt Georg group was too close. The Sankt Georg group met up with Novara, Saida, and Helgoland. Csepel and Balaton also arrived. The entire group then returned to Cattaro together.
Later, at 1:30 PM, the German submarine UC-25 fired a torpedo at Dartmouth, causing serious damage. The destroyers escorting Dartmouth forced UC-25 to leave. Dartmouth had to be abandoned for a while before it could be towed back to port. The French destroyer Boutefeu tried to chase the German submarine. However, it hit a mine that UC-25 had laid that morning and quickly sank.
Aftermath: What Changed?
After the raid, the British navy decided that the drifters in the blockade would have to pull back at night. This was because there weren't enough destroyers to protect them. The drifters could only work for less than twelve hours a day and had to leave their positions by 3:00 PM every day.
Even though the Austro-Hungarian cruisers were damaged, their forces caused more serious harm to the Allied blockade. Besides the sunk and damaged drifters, the cruiser Dartmouth was almost sunk by the German submarine UC-25. The French destroyer Boutefeu hit a mine and sank. Also, a supply convoy heading to Valona was stopped.
However, in the bigger picture of the war, the battle didn't change much. The blockade itself was never very good at stopping German and Austro-Hungarian U-boats. The drifters could only cover about 0.5 miles (0.8 km) each. The Strait of Otranto is 40 miles (64 km) wide, so only a little more than half of it was covered. The raid had risked some of the Austro-Hungarian fleet's best ships for a goal that didn't offer big strategic benefits.
Images for kids
-
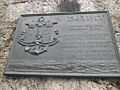
Monument for the "heroes of the Battle of Otranto" in Prevlaka, now in Croatia

