Second Battle of Bapaume facts for kids
Quick facts for kids Second Battle of Bapaume |
|||||||
|---|---|---|---|---|---|---|---|
| Part of the Hundred Days Offensive of World War I | |||||||
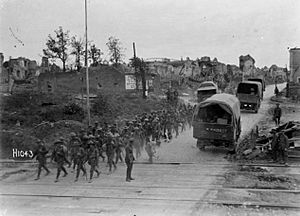 New Zealand soldiers marching through Bapaume after it was taken back, September 1918 |
|||||||
|
|||||||
| Belligerents | |||||||
|
|||||||
| Commanders and leaders | |||||||
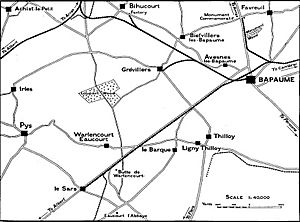
The Second Battle of Bapaume was an important fight during World War I. It happened in Bapaume, France, from August 21 to September 3, 1918. This battle was a follow-up to the Battle of Albert. It was a key part of the Allies' big push, known as the Hundred Days Offensive.
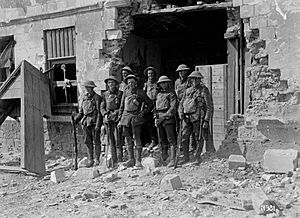
Over two weeks, British and New Zealand soldiers fought hard. On August 29, soldiers from the New Zealand Division finally entered Bapaume. The German army had pulled back. The New Zealanders then pushed on to Bancourt Ridge, east of the town.
Contents
Why the Battle Happened
The Hundred Days' Offensive began on August 8, 1918, on the Western Front. This was the last major campaign of World War I. It started with the Battle of Amiens. In that battle, Canadian and Australian forces pushed the German lines back about 8 kilometers (5 miles).
After a few days, the German army started to get their defenses ready again. So, the British commander, Field Marshal Douglas Haig, decided to attack elsewhere. He chose the Bapaume area as the next target.
About Bapaume
Bapaume was a small town with important roads and railway lines. These connected it to other towns like Albert and Arras. German forces had captured Bapaume early in the war. It was a major target for British forces in the Battle of Somme in 1916.
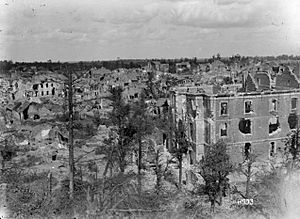
In early 1917, the Germans destroyed much of Bapaume when they moved back to the Hindenburg Line. They also left many hidden traps. Later, during the Spring Offensive, the Germans took Bapaume back. The land around Bapaume was mostly flat, which was good for using tanks.
The Attack Plan
General Julian Byng's Third Army was given the job of attacking Bapaume. This group included five divisions, which are large military units. The New Zealand Division and the British 37th and 42nd Divisions were the first to fight. The 5th and 63rd Divisions were kept ready to join later. Only the New Zealand Division was at its full strength.
Facing them was the German 17th Army, led by General Otto von Below. This army had eight divisions, but most were not as strong as the Allied ones.
The battle was planned in two parts:
- Part 1: An attack across a 15-kilometer (9-mile) front towards the Albert–Arras railway. The New Zealand Division played a smaller role here at first.
- Part 2: This part was planned for August 23. The goal was to capture Bapaume and then move further east. The New Zealanders were meant to lead this main attack. The French army also made some attacks to the south to distract the Germans.
The Battle Begins
Fighting for the Railway
The battle started on August 21. Two groups of New Zealand soldiers moved forward in thick fog. They captured the village of Puiseux and over 100 German prisoners. They set up a new line about 1,000 meters (1,090 yards) beyond the village.
The British 5th Division then took over the advance. They struggled to capture their target, Achiet-le-Petit. New Zealand patrols helped them. Even so, the 5th Division moved forward 3.2 kilometers (2 miles) and took over 500 prisoners. They had few soldiers lost.
On August 22, there was little fighting. The British focused on making their new positions stronger. The German commander, von Below, thought the Allied attacks had failed. He ordered his army to counterattack. The Germans took back a position called the Dovecot, which overlooked the New Zealand lines. British machine gunners helped push back these German attacks.
On August 23, the British 42nd Division attacked the Dovecot again. With help from a New Zealand group, they took the position early in the morning. The New Zealanders also helped protect the side of the 5th Division. The 5th Division attacked towards Irles and Loupart Wood. Meanwhile, the 37th Division captured Bihucourt.
By August 23, the front line was east of the Albert-Arras railway. The Allies held most of the high ground south and west of Bapaume. They had taken over 2,000 prisoners and 25 field guns.
Moving Towards Bapaume
The New Zealand Division was given the job of capturing Grévillers. Then, they were to push into Bapaume and beyond. The British 37th Division was to capture Biefvillers. The attack had two parts. First, the 1st Infantry Brigade would capture Loupart Wood and Grévillers. Then, the 2nd Infantry Brigade would capture Bapaume and the high ground beyond.
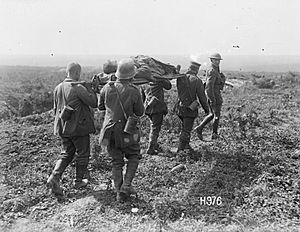
The New Zealand attack started on August 24. The 1st Infantry Brigade moved forward at night to clear the way to Bapaume. They faced heavy machine gun fire. Supporting tanks were also hit. Despite bad weather, Grévillers was captured. They took 380 prisoners and several guns. Over 100 New Zealand soldiers were lost.
The 2nd Infantry Brigade had to join the fight early. They helped the 37th Division capture Biefvillers. By 10:00 am, the village was clear. This helped protect the side of the 1st Infantry Brigade.
However, the 2nd Infantry Brigade was now ahead of other divisions. They were open to German fire from three sides. More German soldiers arrived in the area. The Germans even pushed back the leading New Zealand groups from Avesnes-lès-Bapaume. Still, the New Zealand Division was in a good position to take Bapaume. The front line was less than 1 kilometer (0.6 miles) from the edge of Bapaume.
Taking Bapaume
First Try
The plan to take Bapaume was to surround it. The 1st Infantry Brigade would move south of Bapaume. The 2nd Infantry Brigade would move north. The goal was to make the Germans leave the town without a costly street fight.
The attack began at 5:00 am on August 25 in thick fog. New Zealand soldiers moved around the south side of Bapaume. They faced machine-gun fire from the town's edge. They reached the Albert Road. But the British 63rd Division was slowed by strong German defenses at Thilloy. This left the New Zealand soldiers open on both sides. They dug in and fought patrols for the rest of the day. They learned that two German divisions were defending Bapaume.
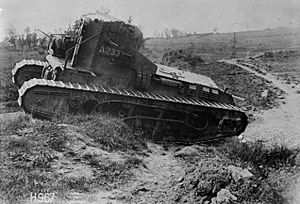
To the north, the 2nd Infantry Brigade had artillery support and tanks. One group, the 1st Canterbury Regiment, made good progress. They reached their goal by 7:00 am. Another group, the 1st Otago, struggled. Their supporting tanks mistakenly fired on them. After this "friendly fire" was fixed, the tanks attacked the Germans but were soon destroyed. Still, the 1st Otago Battalion reached their goal. They linked up with the 37th Division.
Later, the German 111th Division tried to counterattack. But British planes spotted them. An artillery barrage hit the Germans. The New Zealanders and 37th Division then attacked. They cleared Monument Wood and part of Favreuil. The 2nd Infantry Brigade had nearly 500 soldiers lost that day. They would not fight much more in the battle. The day's fighting led to over 400 German prisoners and many machine guns captured.
Second Try
The New Zealanders kept trying to surround Bapaume on August 26. But they made little progress in the south. The 63rd Division was still fighting hard at Thilloy. The New Zealand 1st Infantry Brigade was stopped by gunfire from Bapaume. They had to pull back to where they started.
To the north, the New Zealand Rifle Brigade faced German artillery. They attacked at 6:30 am without artillery support or tanks. Despite heavy machine gun fire, they reached their first goals. But they could not go further because of strong German defenses at St. Aubin and Beugnâtre. By 10:00 am, the attack slowed. They had to fight off a German counterattack from Beugnâtre.
Later that evening, another attack was planned with artillery support. The British 5th Division captured Beugnâtre. This helped protect the New Zealand Rifle Brigade. The New Zealanders reached the Cambrai road but could not hold it. They secured the railway line instead. St. Aubin was also captured.
Third Try
By August 26, the front line had moved forward about 910 meters (1,000 yards). Bapaume was now surrounded from the north, but less so from the south. Overnight, the Germans were ordered to retreat far west of the Hindenburg Line.
On August 27, the 63rd Division continued trying to capture Thilloy. The New Zealanders avoided a direct attack on Bapaume. They hoped the Germans would leave once fully surrounded. Both Bapaume and Thilloy were heavily shelled. But Thilloy still held out. The next day, the 42nd Division took over from the 63rd Division.
The New Zealand commander, Russell, started planning a direct attack on Bapaume for August 29. However, they still hoped the Germans would leave on their own. The shelling of Bapaume continued on August 28. New Zealand soldiers moved close to the town from the south. Very heavy shelling happened that evening. The German response was quiet.
Early on August 29, there was no gunfire from Bapaume. The town had been left empty overnight. New Zealand patrols entered the town from the north. They saw Germans retreating towards Bancourt. Other New Zealand soldiers entered Bapaume from the south. The Germans had also left Thilloy, and the 42nd Division secured it.
Bapaume was now in New Zealand hands. The Germans had left many hidden traps, which had to be found and removed. The New Zealand Rifle Brigade moved forward and set up a new line east of Bapaume. The Germans had retreated to the villages of Frémicourt and Bancourt.
Chasing the Germans
The battle was not over for the New Zealand Division. They were ordered to keep chasing the Germans and capture Bancourt Ridge. This ridge was in front of Bancourt and Frémicourt. The advance started again on August 30.
The 1st Rifle Battalion, with artillery help, cleared Frémicourt in 90 minutes. They then pushed onto Bancourt Ridge. But they had to pull back because the 1st Infantry Brigade had not reached its part of the ridge. They took 400 prisoners and moved the front line forward 2,000 meters (2,187 yards).
In the 1st Infantry Brigade's area, German artillery hit the gathering troops. One group, the 2nd Auckland Battalion, was caught in the open. They had delayed their attack because the nearby 42nd Division had not moved up enough to protect their sides. Despite this, the Wellington soldiers secured their goal on Bancourt Ridge. When the Aucklanders did move, they lost the benefit of their artillery support. Their efforts to take Bancourt village were slowed by machine gun fire. They finally took it by 8:00 am and pushed onto the ridge. However, the 42nd Division had failed to take Riencourt. This left the Aucklanders' sides open, and they had to retreat to the foot of the ridge. Riencourt finally fell to the 42nd Division early on August 31 after a night attack.
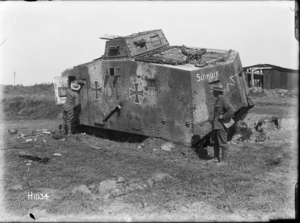
At daybreak on August 31, the Germans counterattacked with three divisions and four A7V tanks. Two of these tanks were captured by the New Zealanders. The German attack caused the New Zealanders to lose some ground, but they took it back later that day.
On September 1, the Allies continued their push to capture Bancourt Ridge. The 42nd, New Zealand, and 5th Divisions advanced. The New Zealanders often found themselves ahead of the divisions on their sides. The New Zealand Rifle Brigade quickly reached the top of the ridge, taking 70 prisoners. The 1st Infantry Brigade was a bit slower. One battalion reached the top, but another could not hold its part of the ridge. That evening, the 2nd Infantry Brigade took over the front line.
What Happened Next
On September 2, the 2nd Infantry Brigade continued the advance. They cleared Germans from positions overlooking Haplincourt. They overcame many machine gun nests and captured over 350 prisoners and 80 machine guns. The New Zealand Division then rested for a few days. The focus for the Allied forces was now to chase the Germans to the Hindenburg Line.
On September 9, the New Zealand Division moved forward again. They reached the outer defenses of the Hindenburg Line. On September 12, the New Zealanders attacked and captured Trescault Spur. After this, the New Zealand Division went back to Bapaume for a two-week rest.
During the Second Battle of Bapaume, the Allied IV Corps lost over 11,000 soldiers. But they advanced over 32 kilometers (20 miles) and took nearly 8,000 German prisoners. For the New Zealand Division, over 800 soldiers were killed and over 2,300 were wounded. It was one of their most costly battles of the war.


