
Zeebrugge Raid facts for kids
Quick facts for kids Zeebrugge Raid |
|||||||
|---|---|---|---|---|---|---|---|
| Part of the First World War | |||||||
.png) Diagram of Zeebrugge harbour after the raid |
|||||||
|
|||||||
| Belligerents | |||||||
| Commanders and leaders | |||||||
| Strength | |||||||
| 1,700 Royal Marines 1 destroyer |
|||||||
| Casualties and losses | |||||||
| 227 killed 356 wounded 1 destroyer sunk |
8 killed 16 wounded |
||||||
The Zeebrugge Raid was a daring plan by the Royal Navy during World War I. It happened on April 23, 1918. The goal was to block the Belgian port of Zeebrugge. This port was a secret base for German U-boats (submarines) and other small ships. These German vessels were a big threat to Allied ships in the English Channel and the southern North Sea.
The British wanted to sink old ships right at the entrance of the canal. This would stop German ships from leaving the port. Earlier attempts to close these ports by bombing them had failed. As more Allied ships were sunk by U-boats, blocking the ports became very important. The British Navy leaders decided to try this risky raid.
An earlier attempt was planned for April 2, 1918. But it was called off at the last minute. The wind changed direction, making it impossible to create a smokescreen to hide the ships. The raid finally happened on April 23, along with another attack on the nearby port of Ostend. Two of the three old ships meant to block the canal were sunk. One of two submarines crashed into a bridge (called a mole) that connected the shore to the harbor wall. This was meant to trap the German soldiers there.
However, the blocking ships were sunk in the wrong place. After just a few days, the Germans managed to open the canal for submarines during high tide. Even so, important lessons were learned from this operation. These lessons would later help in similar raids during World War II.
Contents
Why the Raid Happened
Stopping German Submarines
During World War I, German U-boats were a big problem for the Allies. These submarines would sink supply ships and warships. The ports of Zeebrugge and Ostend in Belgium were important bases for these U-boats. From there, they could easily attack ships in the English Channel.
British leaders knew they had to stop the U-boats. They tried different plans to attack or block these ports. But many plans were too risky or difficult. For example, some ideas involved landing soldiers, but it was hard to keep them supplied.
In late 1917, a new plan was approved. It focused on blocking Zeebrugge and Ostend using old ships. The idea was to make it very hard for German ships and submarines to leave the ports. Volunteer sailors from the British fleet stepped forward for this dangerous mission.
Earlier Bombardment Attempts
Before the blocking raid, the British tried to destroy the lock gates at Zeebrugge. These gates were important because they controlled the water level in the canal to Bruges. Destroying them would make the canal tidal, meaning ships could only pass at certain times.
British warships, called monitors, tried to bomb the gates from far away. They used huge 15-inch guns. But hitting a small target from 13 miles away was very hard. They also needed perfect weather and wind conditions for a smokescreen to hide them. Several times, the ships sailed out but had to turn back because the weather changed.
One bombardment happened on May 12, 1917. British planes tried to guide the gunners, but there were problems. Many shells didn't explode, and planes ran out of fuel. German planes also attacked the British observation aircraft. Even though the British thought they had succeeded, later photos showed that the lock gates were not destroyed. The port remained open for German ships.
Another bombardment targeted Ostend on June 5, 1917. This time, the British had better luck hitting the dockyard. German reports showed that some of their ships were damaged. But the Germans quickly repaired the damage. These bombardments showed that just shelling the ports wasn't enough to stop the U-boats. A more direct approach was needed.
Planning the Attack
German Defenses at Zeebrugge
By 1917, the Germans had strong defenses along the Belgian coast. They had huge artillery batteries with powerful guns. For example, the "Kaiser Wilhelm II" battery had 12-inch guns that could shoot over 23 miles. The "Tirpitz" battery also had large guns. Besides these big guns, there were many smaller guns, trenches, and machine-gun nests.
The only weak spot in their defenses was the lock gates at Zeebrugge. If these gates could be destroyed, the canal would become tidal. This would make it much harder for German ships and submarines to use the port.
British Preparations
The British Navy asked for volunteers for a "special service" in February 1918. Most of the sailors didn't know the exact mission. Old cruisers, like the HMS Vindictive, were prepared for the raid. They removed unnecessary parts from the ships that were going to be sunk.
The fleet gathered near England. The first chance for the raid was in early April 1918. On April 2, the fleet sailed, and Zeebrugge was bombed by British planes. But the raid depended on smokescreens to hide the ships from German guns. The wind was blowing in the wrong direction, so the attack was called off. All 77 ships had to turn back.
The Raid Begins

The second attempt happened on April 23, at the same time as a raid on Ostend. The Zeebrugge raid started with a distraction attack on the long harbor wall, called the Zeebrugge Mole. The old cruiser Vindictive led this part of the attack. Two old ferries, Daffodil and Iris II, went with her.
Two old submarines, filled with explosives, were also part of the plan. They were supposed to blow up the bridge that connected the mole to the shore. Vindictive was meant to land about 200 sailors and a group of Royal Marines. Their job was to destroy German gun positions near the canal entrance.
But things went wrong. The wind changed, and the smokescreen that was supposed to hide Vindictive blew away. German gunners saw Vindictive and fired heavily. The ship was forced to land in the wrong spot. This meant the marines lost their heavy gun support and suffered many casualties.
However, one of the submarines, HMS C3, commanded by Lieutenant Richard Sandford, succeeded. Its explosives blew up the viaduct (bridge), cutting off the mole from the shore.
The main goal was to sink three old cruisers filled with concrete to block the canal. These ships were HMS Thetis, HMS Intrepid, and HMS Iphigenia. Thetis was badly damaged by German fire and hit an underwater wire net. It started to sink before reaching the main channel. Its crew managed to move it over a shallow part of the channel and then sank it. The other two ships were sunk in the narrowest part of the canal.
The submarines C1 and C3 were old and had volunteer crews. They carried five tons of explosives. They were meant to crash into the viaduct and explode, stopping Germans from reinforcing the mole. The crews were supposed to escape just before the crash. C1 arrived too late. Lieutenant Sandford bravely steered C3 into the viaduct himself, instead of using the automatic system.
After the Raid
Casualties and Awards
About 1,700 men took part in the Zeebrugge Raid. More than 200 were killed, and 300 were wounded. The destroyer HMS North Star was sunk. Among the dead was Frank Arthur Brock, who had designed the smokescreen. Most of the British casualties were buried in England. The Germans had fewer losses: eight killed and sixteen wounded.
The Zeebrugge Raid was presented as a big British victory. Eight Victoria Crosses, the highest award for bravery, were given out. This included awards to sailors and marines who showed incredible courage during the attack. For example, Albert Edward McKenzie from Vindictive and Captain Alfred Carpenter, who commanded Vindictive, received Victoria Crosses. Lieutenant-Commander Arthur Leyland Harrison and Lieutenant-Commander George Bradford received posthumous (after death) VCs for leading raiding parties.
Images for kids
-

SS Brussels, torpedoed several times during the raid by the British and scuttled by the Germans in October 1918
-
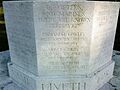
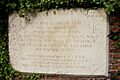
Dedication text of Zeebrugge Cross of Sacrifice in Dover
-
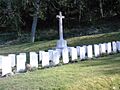
Zeebrugge Memorial and graves from St James Cemetery in Dover
-
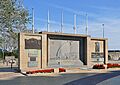
Saint George's Day memorial in Zeebrugge
-
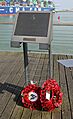
Commemorative plate in the port of Zeebrugge
-
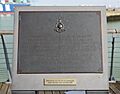
Detail of the commemorative plate in the port of Zeebrugge
-

William Lionel Wyllie - The Storming of Zeebrugge Mole, St George's Day
-
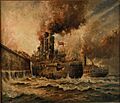
Charles John De Lacy - HMS Vindictive at Zeebrugge, 23 April 1918
-
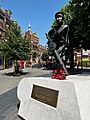
Monument in London to Albert Mckenzie for his role in the raid
-
Memorial plaque for the missing in Zeebrugge Churchyard
-
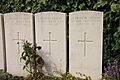
Graves of unidentified British casualties buried in Zeebrugge Churchyard


See also
- St Nazaire Raid – a similar operation of the Second World War
