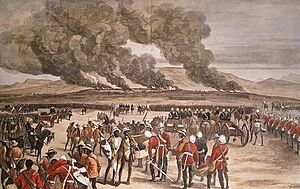
Anglo-Zulu War facts for kids
Quick facts for kids Anglo-Zulu War |
|||||||||
|---|---|---|---|---|---|---|---|---|---|
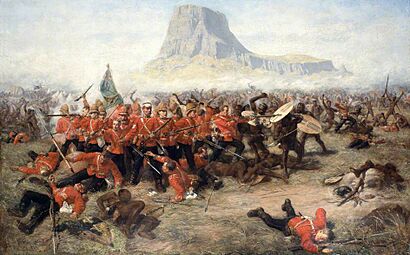
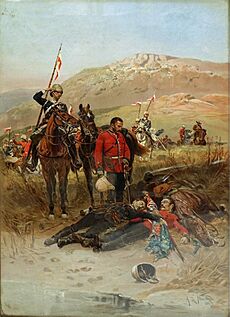
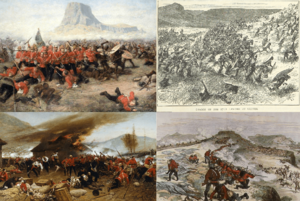 From top left clockwise: The Battle of Isandlwana, the charge of the 17th Lancers at Ulundi, the British defence of Kambula and the British defence of Rorke's Drift |
|||||||||
|
|||||||||
| Belligerents | |||||||||
| Zulu Kingdom | |||||||||
| Commanders and leaders | |||||||||
| Cetshwayo kaMpande Ntshingwayo Khoza Dabulamanzi kaMpande |
|||||||||
| Strength | |||||||||
|
1st invasion: 17 cannons 3 Gatling guns |
35,000 –50,000 | ||||||||
| Casualties and losses | |||||||||
| 1,902 killed 263 wounded |
6,930 killed 3,500+ wounded 2 captured |
||||||||
The Anglo-Zulu War was a conflict fought in what is now South Africa. It took place from January to July 1879. The war was between the powerful British Empire and the independent Zulu Kingdom. Two of the most famous battles were the Zulu victory at Isandlwana and the British defense at Rorke's Drift.
The British wanted to unite the different regions of Southern Africa under their control. This plan aimed to bring together various African kingdoms, tribal areas, and Boer republics. They believed this would help them control valuable resources like diamonds and provide workers for their mines.
In 1874, Sir Henry Bartle Frere was sent to Southern Africa to make this plan happen. However, two strong independent states stood in his way: the South African Republic (Boers) and the Zulu Kingdom.
Frere decided to act on his own. On December 11, 1878, he sent a challenging message, called an ultimatum, to the Zulu King Cetshwayo. When the Zulu King did not agree to the demands, Frere ordered Lord Chelmsford to invade Zululand. The war saw many fierce battles. The Zulus won a major victory at Isandlwana early in the war. Soon after, a small British group bravely defended Rorke's Drift against a large Zulu attack.
Eventually, the British gained the upper hand at Kambula. They then captured the Zulu capital of Ulundi. The British won the war, ending the Zulu Kingdom's independence. The British Empire later took full control of Zululand in 1887.
The war showed that the British were not unbeatable, especially after their early defeats. This, along with other problems like famines and unpopular wars, led to the government of Benjamin Disraeli losing power in 1880.
Contents
Why the War Started
The Anglo-Zulu War had deep roots in the British desire to expand their control in Southern Africa.
British Goals in Southern Africa
By the 1850s, the British Empire had colonies in Southern Africa. These colonies bordered lands belonging to the Boer settlers and native African kingdoms like the Zulus. The British wanted to expand their territory and influence.
In 1867, diamonds were discovered near the Vaal River. This discovery brought many people to the area, turning Kimberley into a large town. It also drew the attention of the British, who wanted to control these valuable resources. In the 1870s, the British took over the diamond-rich area of West Griqualand.
Lord Carnarvon, a British official, had successfully united Canada in 1867. He thought a similar plan could work in South Africa. His idea was to bring all the British and Boer territories, along with African kingdoms, into one large federation. This would give Britain more control over the region and its resources.
In 1877, Sir Bartle Frere was appointed to make this plan happen. He believed that the independent Boer states and the strong Zulu Kingdom were obstacles. Frere quickly looked for reasons to start a conflict with the Zulus.
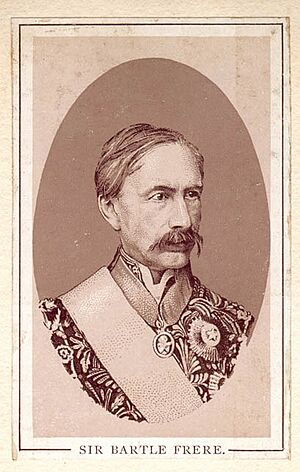
The British also annexed the Transvaal Republic in 1877. The Boers there were unhappy but feared a Zulu attack if they resisted the British. Sir Theophilus Shepstone, a British official, believed that the Zulu Kingdom was a threat to British control. He felt that Zulu power encouraged other African groups to resist British rule.
Shepstone had previously supported the Zulus in a land dispute with the Boers. However, after the British took over the Transvaal, he changed his mind. He began to support the Boer claims against the Zulus. He also expressed concerns about the Zulu army under King Cetshwayo.
Bishop John Colenso of Natal was one of the few who spoke up for the Zulus. He believed that the Zulus were being treated unfairly by the colonial government. He openly criticized Frere's efforts to make the Zulu Kingdom seem like a threat.
The British government in London, led by Prime Minister Benjamin Disraeli, did not want another war. They had other serious problems in Europe and India. However, Sir Bartle Frere was determined. He believed the powerful Zulu Kingdom stood in the way of his plans for a South African federation.
In December 1878, Frere gave King Cetshwayo an ultimatum. This message demanded that the Zulu army be disbanded and that the Zulus accept a British representative. These demands were impossible for Cetshwayo to accept, as it meant losing his power. Frere knew this would likely lead to war.
The Powerful Zulu Kingdom
The Zulu Kingdom was a strong and independent nation. Its founder, Shaka Zulu, had built a small tribe into a large and powerful kingdom by 1825. After Shaka, his half-brother Dingane kaSenzangakhona became king.
In the 1830s, migrating Boer settlers clashed with the Zulus. Dingane suffered a major defeat in 1838 at the Battle of Blood River. Later, Dingane's half-brother, Mpande kaSenzangakhona, allied with the Boers against Dingane. Mpande then became the new Zulu king.
Mpande generally kept peaceful relations with the British. However, internal conflicts and land disputes continued. After a power struggle with his brother, Cetshwayo kaMpande became the ruler of the Zulus in 1872 when his father Mpande died.
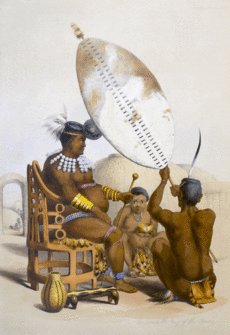
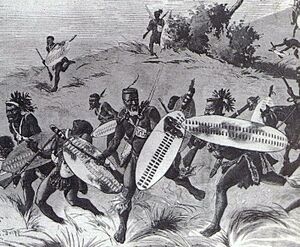
As king, Cetshwayo worked to strengthen the Zulu army. He brought back some of the military methods of his uncle Shaka. Zulu warriors were mainly armed with the iklwa (a type of thrusting spear) and large shields made of cowhide. They were well-trained in using these weapons together. While some Zulus had old firearms, they preferred their traditional weapons, seeing firearms as "the arms of a coward."
Despite his dislike for their influence, Cetshwayo allowed European missionaries in Zululand. However, he did not harm the missionaries themselves. Many Zulus who disagreed with Cetshwayo fled to British-controlled Natal. Cetshwayo tried to maintain peaceful relations with the Natal colonists.
The Ultimatum: A Call to War
Tensions grew between Cetshwayo and the British over border disputes. A special commission was set up in 1878 to look into the border issue. The commission largely sided with the Zulus.
However, Sir Henry Bartle Frere, the British High Commissioner, disagreed with the commission's findings. He called them "one-sided." Frere decided to use a meeting about the border report to deliver a surprise ultimatum to the Zulu representatives. He had already planned for British forces to invade Zululand.
Frere used three incidents as his reasons for the ultimatum:
- Two wives of a Zulu chief named Sihayo had fled into Natal. Sihayo's sons and brother went into Natal, captured them, and took them back to Zululand, where they were killed.
- Two British men, Mr. Smith and Mr. Deighton, were briefly held by armed Zulus near the Thukela River.
These incidents were minor, but Frere used them to justify his demands. He knew Cetshwayo could not agree to them.
The British government in London repeatedly told Frere to avoid war. They sent him reinforcements only for defense, not for invasion. However, Frere ignored these instructions. He delayed telling London about his ultimatum until it was too late for them to stop him.
On December 11, 1878, the ultimatum was given to Cetshwayo's representatives. It included several demands:
- The surrender of Sihayo's three sons and brother to be tried by the Natal courts.
- Payment of a fine of 500 head of cattle for the outrages committed by the above and for Cetshwayo's delay in complying with the request of the Natal Government for the surrender of the offenders.
- Payment of 100 head of cattle for the offense committed against Messrs. Smith and Deighton.
- Surrender of the Swazi chief Umbilini and others to be named hereafter, to be tried by the Transvaal courts.
- Observance of the coronation promises.
- That the Zulu army be disbanded and the men allowed to go home.
- That the Zulu military system be discontinued and other military regulations adopted, to be decided upon after consultation with the Great Council and British Representatives.
- That every man, when he comes to man's estate, shall be free to marry.
- All missionaries and their converts, who until 1877 lived in Zululand, shall be allowed to return and reoccupy their stations.
- All such missionaries shall be allowed to teach and any Zulu, if he chooses, shall be free to listen to their teaching.
- A British Agent shall be allowed to reside in Zululand, who will see that the above provisions are carried out.
- All disputes in which a missionary or European is concerned, shall be heard by the king in public and in presence of the Resident.
- No sentence of expulsion from Zululand shall be carried out until it has been approved by the Resident.
Cetshwayo did not respond to these demands by the end of the year. Frere extended the deadline to January 11, 1879. When no answer came, Frere declared a state of war. British forces, already gathered at the border, invaded Zululand on January 11, 1879.
Key Battles and Events
The First Invasion Begins
Lord Chelmsford, the British commander, planned to invade Zululand with over 16,500 troops. He wanted to surround the Zulu army and force them into a major battle. His main goal was to reach Ulundi, the Zulu capital.
On January 11, 1879, Chelmsford's main force crossed the Buffalo River into Zululand at Rorke's Drift. This column had about 4,700 men, including British soldiers and African allies.
The Battle of Isandlwana: A Zulu Victory
On January 22, Chelmsford's main column was camped near Isandlwana. Chelmsford divided his forces, leaving about 1,300 men at the camp under Colonel Henry Pulleine. Colonel Anthony Durnford later arrived with 500 more men.
The main Zulu army, nearly 20,000 strong, surprised the British camp. Chelmsford had been tricked by a smaller Zulu force and was away from the camp. The British had also failed to set up their camp defensively, which was a big mistake.
The Battle of Isandlwana was a huge victory for the Zulus. The British camp was destroyed, and they suffered heavy losses. All their supplies and ammunition were lost. This defeat forced Chelmsford to retreat quickly from Zululand.
Rorke's Drift: A Brave Defense
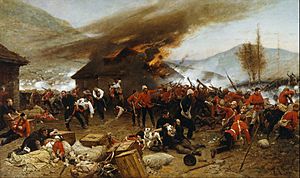
After the victory at Isandlwana, about 4,000 Zulu reserve warriors launched an attack on the nearby British border post of Rorke's Drift. This attack was not planned by King Cetshwayo.
A small British garrison, numbering around 150 men, bravely defended the mission station for 10 hours. They fought fiercely and managed to drive off the large Zulu force on January 23. This defense was a major boost for British morale after the defeat at Isandlwana.
Other Important Battles
While Chelmsford's main force was fighting, other British columns were also active.
- Colonel Charles Pearson's column advanced along the coast. They fought a Zulu force at the Inyezane River and fortified a mission station at Eshowe. After Isandlwana, the Zulus cut off their supplies, leading to the Siege of Eshowe.
- Colonel Evelyn Wood's column was in the northwest. They faced a Zulu force near Hlobane Mountain. On March 28, a British attack on Hlobane turned into a retreat with heavy British losses.
The first invasion had largely failed. Only Wood's column remained effective, but it was too weak to continue alone. King Cetshwayo had not intended to invade Natal, only to defend his kingdom.
Chelmsford spent the next two months regrouping and getting more troops. The British government sent seven regiments of reinforcements to Natal.
On March 12, a British escort carrying supplies was defeated by Zulus at the Battle of Intombe. The British force suffered 80 killed and all the stores were lost.
On March 29, Chelmsford led a column of 5,670 men to relieve the besieged troops at Eshowe. The next day, March 29, 20,000 Zulu warriors attacked Wood's fortified camp at Kambula. The British held them off for five hours. The Zulus suffered heavy losses, with up to 2,000 killed, while the British lost 83 men. This battle severely weakened the Zulu army.
On April 2, Chelmsford's column was attacked at Gingindlovu while marching to Eshowe. The Zulus were again pushed back with heavy losses. The British relieved Pearson's men at Eshowe the next day. The Zulus later burned Eshowe.
The Second Invasion and British Victory
Despite their recent successes, the British were back to where they started in January. However, Chelmsford was eager to win a decisive victory. He knew that Sir Garnet Wolseley was coming to replace him. With more reinforcements, bringing the total to 16,000 British and 7,000 African troops, Chelmsford began a second invasion in June. This time, he advanced very carefully, building fortified camps along the way to avoid another disaster like Isandlwana.
A notable casualty during this time was Prince Imperial Eugene Bonaparte, the exiled heir to the French throne. He had volunteered to serve with the British Army and was killed on June 1 while on a scouting mission.
King Cetshwayo, knowing the British were now much stronger, tried to negotiate for peace. But Chelmsford refused. He wanted to restore his reputation before being replaced. He continued his advance towards the royal capital of Ulundi.
On July 4, the two armies met at the Battle of Ulundi. Cetshwayo's forces were completely defeated. This battle marked the end of the Anglo-Zulu War.
What Happened After the War
After the Battle of Ulundi, the Zulu army broke apart. Many Zulu chiefs surrendered. King Cetshwayo became a fugitive. On August 28, he was captured and sent to Cape Town.
Sir Garnet Wolseley, who had taken over from Chelmsford, then divided Zululand into thirteen smaller chiefdoms. This plan was meant to prevent the Zulus from uniting under a single king again. However, it led to many internal conflicts and disagreements among the Zulu people. The royal family of Shaka was removed from power.
Lord Chelmsford received an honor for his role, mainly because of the victory at Ulundi. However, he was criticized for his earlier mistakes and never served in the field again. Bartle Frere was given a less important job in Cape Town.
Bishop Colenso continued to support Cetshwayo. He successfully helped get Cetshwayo released from Robben Island and returned to Zululand in 1883.
However, the new arrangement for Zululand did not bring peace. Conflicts broke out between chiefs who supported Cetshwayo and those who did not. Cetshwayo's supporters, known as the Usuthu, suffered greatly.
When Cetshwayo was restored, some chiefs who had fought against him kept their territories. This led to more clashes. On July 22, 1883, one of these chiefs, Usibepu, attacked Cetshwayo's kraal (royal village) at Ulundi. The village was destroyed, and many people died. Cetshwayo escaped but was wounded. He died soon after.
The Anglo-Zulu War was costly for the British, especially given that they fought against an enemy without modern industrial weapons. The number of British soldiers killed in combat was unusually high compared to other colonial conflicts.
See also
 In Spanish: Guerra anglo-zulú para niños


