
Battle of Kota Bharu facts for kids
Quick facts for kids Battle of Kota Bharu |
|||||||
|---|---|---|---|---|---|---|---|
| Part of the Battle of Malaya, Second World War | |||||||
 Bachok Beach, Kota Bharu, July 1941, possibly one of the Japanese landing points. |
|||||||
|
|||||||
| Belligerents | |||||||
|
|
|||||||
| Commanders and leaders | |||||||
| Units involved | |||||||
|
British India: |
Twenty-Fifth Army: 5th Division 18th Division Imperial Japanese Navy |
||||||
| Strength | |||||||
| N/A | 1 light cruiser 4 destroyers 2 minesweepers 1 submarine chaser 3 troopships 5,300 infantry |
||||||
| Casualties and losses | |||||||
| 68 killed 360 wounded 37 missing |
3 troopships damaged 320 killed 538 wounded |
||||||
The Battle of Kota Bharu was a very important battle that happened during World War II. It started just after midnight on 8 December 1941. This was even before the famous attack on Pearl Harbor in Hawaii. It was the first big battle of the Pacific War. The fight was between soldiers from the British Indian Army and the Empire of Japan.
Kota Bharu is the capital city of Kelantan State in Malaysia. In 1941, it was a key base for the Royal Air Force (RAF) and the Royal Australian Air Force (RAAF) in northern Malaya. There were three airfields nearby. The Japanese faced many challenges during their attack. Australian planes, Indian coastal defenses, and artillery fire caused them heavy losses.
Contents
Planning the Attack and Defense
The Japanese had a plan to invade Malaya. They wanted to land troops from their 5th Division in Thailand at Pattani and Songkhla. Another group from the 18th Division would land at Kota Bharu in Malaya. The troops landing in Thailand would then move across to the west coast. From there, they would invade Malaya through the state of Kedah. The group landing at Kota Bharu would push down the east coast and into Malaya's center.
The British also had a plan to defend Malaya. If the Japanese attacked from Thailand, the British planned a surprise move called Operation Krohcol. This would involve moving into southern Thailand to take important positions. This would slow down the Japanese attack. For the east coast of Malaya, the British had the Indian 9th Infantry Division defending the northern beaches. Two-thirds of the Australian 8th Division protected the southern coast.
The Japanese attack force was part of Lieutenant General Tomoyuki Yamashita's 25th Army. They sailed from Hainan Island on 4 December 1941. More ships joined them from Saigon in French Indochina. An Australian reconnaissance plane, a Lockheed Hudson, spotted the Japanese ships. Admiral Sir Thomas Phillips, the British naval commander, ordered the warship HMS Repulse to return to Singapore. The Japanese invasion force was seen again on 7 December by a Catalina flying boat. However, Japanese fighters shot down the Catalina before it could send its report. Flying Officer Patrick Bedell and his crew became the first Allied soldiers to die in the war with Japan.
Before the invasion, the Japanese had secretly recruited some local Malays. These people were part of a group called the "Tortoise Society." The Malayan police knew about this group and arrested some of its leaders before the Japanese landed. But at Kota Bharu, some members of the society helped the Japanese army. They even acted as guides.
Japanese Landings at Kota Bharu

Air Marshal Sir Robert Brooke-Popham, who led the British Forces in the Far East, was worried. He thought the Japanese fleet might be trying to make the British attack first. This would give Japan an excuse to start a war. So, he decided to delay Operation Matador. This British plan aimed to stop the Japanese invasion force before or during their landing.
Just after midnight on 7/8 December, Indian soldiers were patrolling the beaches at Kota Bharu. They saw three large ships: the Awazisan Maru, Ayatosan Maru, and Sakura Maru. These ships dropped anchor about 3 km (1.6 nmi; 1.9 mi) from the coast. They were carrying about 5,200 soldiers of the Takumi Detachment. Most of these soldiers were experienced fighters from the war in China.
The Japanese invasion force was made up of units from the 18th Division. The main attack troops were from the 56th Infantry Regiment. They were supported by artillery, engineers, and medical units. A fleet of warships protected them. This fleet included the light cruiser Sendai, four destroyers, two minesweepers, and a submarine chaser.
The invasion began with a bombardment around 00:30 local time on 8 December. This was about 50 minutes before Japanese planes attacked Pearl Harbor. Japanese landing crafts started loading almost as soon as the ships anchored. The sea was rough with strong winds, which made it hard. Some smaller boats flipped over, and several Japanese soldiers drowned. Despite these problems, the first wave of landing crafts headed for the beach in four lines by 00:45.

The British defense was led by the 8th Indian Infantry Brigade. They had four 3.7-inch Mountain Howitzers for support. The 3/17th Bn, Dogra Regiment, was in charge of defending a 10 mi (16 km) stretch of coast. This was where the Japanese chose to land. The British had made the narrow beaches and islands strong with land mines, barbed wire, and pillboxes. They also had artillery near the airfield. The Dogras defended the beaches of Badang and Sabak. These beaches were split by two rivers that led to the Pengkalan Chepa River. Behind this area were the Kota Bharu airfield and the main road inland.
The Dogras immediately fired heavily on the Japanese with artillery and machine guns. The first and second waves of Japanese soldiers were stuck on the beach. They faced intense fire from the Dogra's pillboxes and trenches. After fierce hand-to-hand fighting, the Japanese broke through the defenses on the south side of the river. On the northern side, the Japanese were stuck on an island. When dawn came, they were out in the open. Allied planes from nearby airfields started attacking the Japanese ships and the soldiers on the island. Many Japanese soldiers died or were wounded in the first two waves.
The Japanese could only get off the beach after they destroyed two pillboxes and their trenches. Even though the Dogras fought very hard, they had to pull back to their defenses in front of the airfield. Brigadier Key brought in his reserve troops to help the Dogras. At 10:30, Key ordered an attempt to take back the beaches. The fighting was very heavy, and both sides lost more soldiers. The British made some progress but could not close the gap. A second attack in the afternoon also failed.
The airfield at Kota Bharu was evacuated. By dusk on 8 December, the Japanese troops were able to move between the British units. There was also a risk of more Japanese landings further south. Because of this, Brigadier Key asked for permission to withdraw if needed.
Air Attacks and Aftermath

No. 1 Squadron RAAF, based at RAF Kota Bharu, sent 10 Lockheed Hudson bombers to attack the Japanese ships. Each plane carried four 250 lb (113 kg) bombs. In 17 flights, they lost two Hudsons that were shot down. Three more were badly damaged. One Hudson, flown by Flight Lieutenant John Graham Leighton Jones, crashed into a landing craft full of soldiers. This happened after his plane was hit while shooting at the beach. About 60 Japanese soldiers on board were killed. Only five Hudson bombers could still fly after the battle.
All three Japanese troopships were badly damaged. The Ayatosan Maru and Sakura Maru could still sail, but the Awazisan Maru was left burning and abandoned. The attacks by No. 1 Squadron RAAF killed or wounded at least 110 of its crew. The damaged ship later sank on its own or was hit by a torpedo from a Dutch submarine on 12 December.
Even with the strong defense, the Japanese had three full groups of soldiers on shore by mid-morning on 8 December. Counter-attacks by the British failed. The Japanese took Kota Bharu town on the 9th. After fierce fighting during the night, which threatened the airfield, Lieutenant Colonel Arthur Cumming's 2/12th Frontier Force Regiment tried to hold the airfield. They fought a very brave rearguard action. Cumming later received the Victoria Cross for his bravery. Brigadier Key asked for and was given permission to pull back from Kota Bharu.
The Japanese said that the landings at Kota Bharu were some of the most violent of the entire Malayan Campaign. They believe they lost about 300 soldiers killed and 500 wounded.
Images for kids
-
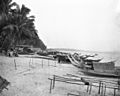
Bachok Beach, Kota Bharu, July 1941, possibly one of the Japanese landing points.
See also
- Japanese Order of Battle, Malayan Campaign
- Malayan Campaign
- Malaya Command – Order of Battle
- Operation Krohcol
- Operation Matador (1941)
- Patrick Stanley Vaughan Heenan
