
Battle of Wagram facts for kids
Quick facts for kids Battle of Wagram |
|||||||
|---|---|---|---|---|---|---|---|
| Part of the War of the Fifth Coalition | |||||||
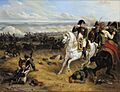
 Bataille de Wagram, 6 Juillet 1809 by Horace Vernet |
|||||||
|
|||||||
| Belligerents | |||||||
| Commanders and leaders | |||||||
|
|
||||||
| Units involved | |||||||
| Army of Germany | Hauptarmee | ||||||
| Strength | |||||||
|
154,000–171,939 584–617 guns |
136,000–173,000 388–414 guns |
||||||
| Casualties and losses | |||||||
|
25,000–40,000 21 guns |
26,000–41,250 20 guns |
||||||
The Battle of Wagram (July 5–6, 1809) was a huge battle during the Napoleonic Wars. It was a major victory for Emperor Napoleon of France and his allies. They fought against the Austrian army led by Archduke Charles. This battle was very costly for both sides, but it led to the end of the Fifth Coalition, an alliance against France. Wagram was the biggest battle in Europe up to that time.
In 1809, France had fewer soldiers in central Europe because many were fighting in Spain. The Austrian Empire saw this as a chance to regain power. They invaded Bavaria, an ally of France. Napoleon quickly responded, defeating the Austrians and taking Vienna in May 1809. Even though they lost their capital, Archduke Charles managed to save his army. He moved it north of the Danube River, allowing the war to continue. Later in May, Napoleon attacked again but was surprisingly defeated at the Battle of Aspern-Essling.
Napoleon spent six weeks getting ready for his next attack. He gathered a huge army of about 172,000 French, German, and Italian soldiers near Vienna. The Battle of Wagram began when Napoleon crossed the Danube on the night of July 4. He then attacked the Austrian army, which had about 136,000 soldiers. After crossing the river, Napoleon tried to break through the Austrian lines quickly with evening attacks. The Austrians were spread out but held strong positions. The French had some early success, but the Austrians fought back and stopped the attacks.
The next day, Archduke Charles launched his own attacks along the entire battle line. He tried to surround Napoleon's army from both sides. This attack failed on the French right side but almost broke Napoleon's left. However, Napoleon ordered a cavalry charge to stop the Austrian advance. He then moved more troops to stabilize his left side. He also set up a "grand battery" of many cannons that fired heavily on the Austrian right and center. The battle turned in Napoleon's favor. He launched an attack along the whole line. Meanwhile, Marshal Davout attacked the Austrian left, making Archduke Charles's position impossible to hold. By mid-afternoon on July 6, Charles accepted defeat and began to retreat. Napoleon tried to chase them, but Charles kept his army together and retreated to Bohemia. However, the French army eventually caught up and won another battle at Znaim. During this battle, Charles asked for a ceasefire, which effectively ended the war.
The two-day Battle of Wagram was very bloody, with about 74,000 soldiers killed or wounded. This was mainly because both sides used many cannons (around 800 in total) and fired a lot of ammunition on a flat battlefield packed with about 300,000 men. Napoleon won, but it wasn't a complete victory, and the Austrians had only slightly more casualties than the French. Still, the defeat greatly lowered the Austrians' spirits, and they no longer wanted to continue fighting. The Treaty of Schönbrunn that followed meant Austria lost a large part of its population and some land. This made Austria landlocked until 1813.
After the battle, Napoleon gave Louis-Alexandre Berthier, his chief of staff, the special title of the first Prince of Wagram. This made Berthier an official member of the French nobility.
Contents
Why the Battle of Wagram Happened
Europe in 1809: A Tense Time

In 1809, the First French Empire was very powerful in Europe. Napoleon had won big victories from 1805 to 1807, making France the strongest country. No other European power seemed able to challenge him. Even though he had defeated Austria, made an uneasy alliance with Russia, and weakened Prussia, Napoleon couldn't force Great Britain to make peace. Britain controlled the seas, so Napoleon tried to hurt them with an economic war. He created the Continental System, which stopped European countries from trading with Britain.
To make this system work, Napoleon wanted Portugal, a British trading partner, to join. When they refused in 1808, Napoleon invaded. He also made a bad decision by replacing the King of Spain with his own brother, Joseph. The Spanish people didn't like this, which led to a bloody guerrilla war. Napoleon had to send many soldiers to Spain, which weakened his army in central Europe. Also, France and Russia, who were allies on paper, were not getting along well. Russia probably wouldn't help France against its enemies.
France's main enemy in central Europe was the Austrian Empire. They had been defeated in 1805 and lost land. But Austria still had a strong army that had been reformed. By 1809, Austria was almost out of money. They knew they needed to regain influence in Germany and Italy to stay a major power. Napoleon's problems in Spain, money from Britain, and promises of help from northern Europe encouraged Austria. They decided this was their best chance to get back lost lands.
Austria hoped that German people would rise up against France. They also hoped Prussia would join them and that Russia wouldn't interfere. Austria quickly prepared its army in 1808 and 1809. They planned attacks in Bavaria, Italy, and other areas. Unlike 1805, Austria's army was modern and strong. It was led by their best commander, Archduke Charles of Austria, who was the brother of Emperor Francis I of Austria.
The Start of the Campaign
By March 1809, war between Austria and France was about to begin. The Austrian army, with 200,000 men, gathered in Bohemia. Austria hoped Prussia would join the war, so they put their main army near the Prussian border. But by early April, Prussia wasn't ready to fight. So, the Austrians had to move their main army south to attack along the Danube River. This was a good plan because the river valley would protect their capital. However, moving the army took a whole month.

On April 9, 1809, the main Austrian army crossed into Bavaria without declaring war. Bavaria was a key French ally. Other Austrian armies also launched attacks. Napoleon was in Paris, knowing war was coming but not that the Austrians would attack so quickly. The French army, called the Armée d'Allemagne, was led by Marshal Berthier. Berthier was a great chief of staff but not a good commander on his own. He misunderstood Napoleon's orders and left two army groups isolated. Because of this, Archduke Charles advanced easily at first.
Everything changed on April 17 when Napoleon arrived. He quickly gathered his troops. Before he could fully concentrate them, Charles attacked Davout's isolated group at Teugen-Hausen. But Davout fought hard and pushed the Austrians back. The war's direction had changed. Napoleon then launched his own attacks, leading to battles at Landshut, Abensberg, Eckmühl, and Ratisbon. The Austrians lost each time, and their left side was cut off. However, Charles managed to avoid a complete defeat. He saved his army and moved it north of the Danube, waiting for Napoleon's next move.

Charles's retreat left Napoleon with two choices: chase the Austrian army north of the Danube or take Vienna. Napoleon chose to occupy Vienna, which he did on May 12. But the city's bridges over the Danube were destroyed. This was a big problem for Napoleon, who wanted to continue his attack north of the river. Charles gathered most of his army on the Danube's northern bank, near Vienna. This made Napoleon attack them right away. Napoleon's quick crossing was done on weak, quickly built bridges over a swollen river. This led to the Battle of Aspern-Essling on May 21. The larger Austrian army faced only a small part of Napoleon's army, as he couldn't bring all his troops across in time. Charles tried to push back the outnumbered French, but he failed. The French defended well, with their cavalry playing a key role.
Fighting continued on May 22. Napoleon received some reinforcements and attacked. His attack was successful, but then he learned that the main bridge had broken. No more reinforcements or ammunition could cross. This meant a long battle was impossible. Napoleon immediately stopped his attack and ordered a retreat to Lobau, a large island in the Danube. The Austrians, with more soldiers and cannons, counterattacked fiercely. It took all the skill of the French commanders and the bravery of the soldiers, including the Guard, to hold off the Austrians. By nightfall, the French were safely on Lobau island. Napoleon had suffered his first major defeat.
Preparing for Another Battle

The Battle of Aspern-Essling was very costly for both sides, with about 53,000 casualties. For the Austrians, it was a costly victory. It greatly boosted their soldiers' morale, showing they could fight well. However, in the weeks after the battle, Archduke Charles became unsure about winning the war. He realized he hadn't used his huge numbers to achieve a decisive victory. Also, despite Austrian efforts to celebrate their win, it didn't change much politically. There was no general uprising in Germany, Prussia still wouldn't join the war, and Britain wasn't ready to send troops to northern Europe. Russia, France's ally, was even becoming more aggressive against Austrian forces. Charles realized that the conditions for an Austrian victory hadn't happened. He thought Austria should negotiate with Napoleon. But his brother, Emperor Francis, refused to consider peace.
Charles was the supreme commander of the Austrian army, but his brother and others at court often went behind his back. They talked directly with his chief of staff and other commanders. This constant flow of information from the front kept the court wanting to fight. They had an overly optimistic view of Austria's military situation. This made it hard for Charles to convince his brother to seek peace.
It became clear to Charles that another battle was coming. He still hoped Napoleon might offer peace. While the soldiers' morale was good after Aspern-Essling, the senior commanders were unhappy. Charles's slow preparations for the next battle made them lose confidence in him. One general even resigned just before Wagram. Archduke Charles worked hard to rebuild his army. By the end of June, it was almost back to full strength. Charles knew he couldn't launch any major attacks. He dismissed ideas to attack the French base on Lobau island or to march to Pressburg. He believed such moves would leave Bohemia, a rich province, open to French invasion. By late June, Charles still hoped Napoleon would negotiate. Napoleon encouraged this idea with tricks. If a battle did happen, Charles planned to stay on the defensive. He wrote to his uncle that he would "strike one more blow against the French" but "risk nothing or as little as possible." He felt another battle against Napoleon would have uncertain results.
.jpg)
After retreating to Lobau island, Napoleon was shocked by his defeat at Aspern-Essling. He was unusually inactive for 36 hours. Then, he regained his focus and worked to improve his army's bad situation. His army was trapped on Lobau island after the Danube swelled. Napoleon tirelessly oversaw the transformation of Lobau into a huge army base. They built temporary hospitals for 20,000 wounded soldiers, as well as warehouses and barracks. As soon as a secure bridge was built, he moved the wounded and some troops to the mainland. But he kept IV Corps on the island, planning to use it as a starting point for his next crossing.
His next task was to rebuild the army. Losses were high, especially among officers. Marshal Lannes, one of Napoleon's best commanders and a friend, was mortally wounded and died nine days later. Another important general, Louis-Vincent-Joseph Le Blond de Saint-Hilaire, also died from his wounds. Despite these losses, the army and its officers still trusted Napoleon. Morale remained high. For example, Marshal Masséna, a senior commander, injured his foot just before the new crossing. But he insisted on leading his men from a carriage, much to Napoleon's relief.
Napoleon knew he needed careful planning and more troops for another Danube crossing. He needed to secure Lobau island. Following his orders, the French artillery commanders installed a massive 124-gun battery on the island. They also placed batteries in key spots along the Danube to cover Vienna and keep the Austrians guessing about the crossing point. The French also needed strong bridges. Starting June 1, General Bertrand led huge engineering works. They built two strong bridges from the south bank to Lobau island for supplies and troops. Bertrand protected these bridges from Austrian attempts to destroy them. They also built pivoting bridges and landing craft to cross from the island to the northern bank. The French also took control of a Danube boat fleet. By late June, they controlled the river almost completely. Napoleon wrote that "the Danube no longer exists for the French army."
The First Day of Battle
Getting Ready to Fight

The Austrian commanders knew the French were preparing on Lobau island. They expected the French to attack from there. Archduke Charles wasn't sure exactly where the French would cross. He and his staff thought it would be from the north of the island, near where the Battle of Aspern-Essling was fought. Based on this, Charles built 16 defensive forts between Aspern and Groß-Enzersdorf. Strangely, he didn't extend these defenses further southeast along the river, which left his line open to being outflanked. Also, the forts didn't offer full protection.
On July 2, Charles received news that French forces were crossing the river in the north. He thought his battle plan, a repeat of Aspern-Essling, was about to happen. So, he quickly moved his entire army to face the enemy. However, it soon became clear that this French force was just a small group sent to secure a bridgehead.
On July 3, Archduke Charles decided not to fight near the Danube. He retreated to higher ground overlooking the Marchfeld plain. This was a big decision, as it meant abandoning the forts near the Danube. Instead, Charles occupied the Bisamberg heights and the Wagram plateau behind the Russbach river. This gave him a strong defensive position, covering retreat routes to Bohemia and Moravia. He believed that if the French attacked either position, the other force could attack their flank. This plan had flaws. The Austrian staff was slow, making coordination difficult. Also, the forward units were too weak for a long fight but too many for a brief delay.
Charles also wanted to avoid fighting on the flat Marchfeld plain. This open area was perfect for the French cavalry, which was stronger. Two influential staff officers had been pushing for this position for weeks, and Charles finally agreed.
Crossing the Danube River

On July 4, Charles learned that the French had weakened their position at Pressburg. This was a clear sign that Napoleon would attack soon. At 7:00 AM on July 4, Charles wrote to his brother, Archduke John of Austria, whose army was near Pressburg. Charles told John that a battle was coming and would "decide the fate of our dynasty." He ordered John to march quickly to Marchegg and join the main army. Heavy thunderstorms delayed the message, and John received it 23 hours later.
Archduke Charles didn't seriously consider that the French might cross elsewhere until late on July 4. When he did, he stuck to his plan not to move his main forces to the river. Instead, he planned to let the enemy move into the Marchfeld. He left only a small advance guard and VI Corps there to delay the French and cause confusion, while slowly retreating. His main army would stay on the strong Wagram plateau and Bisamberg heights. If the French attacked Wagram, the forces on Bisamberg would attack their flank. If they attacked Bisamberg, the Wagram forces would attack their flank. The plan was good but relied on quick coordination, which the Austrian army often lacked.
Meanwhile, the French were ready to cross. Napoleon knew the Austrians had built defenses between Aspern and Groß-Enzersdorf. He planned to cross southeast of these defenses and then go around them. This meant a longer march for his troops before reaching the enemy. On July 4, at nightfall, under a violent thunderstorm that hid their movements from the Austrians, Napoleon ordered the crossing to begin.
One French group quickly took the Hansel-Grund area, east of Lobau island. This allowed the French to set up three pivoting bridges. Other troops began to cross. Further north, 1,500 men crossed the river on landing craft without meeting resistance. Engineers then quickly built another pivoting bridge, allowing more troops to cross. One French division, already on the northern bank, made a fake attack towards Aspern and Essling to distract the Austrians. Several more bridges were finished by 2:00 AM, allowing most of the French army, with their cannons and supplies, to cross. The battle had begun.

As the French crossed east of Lobau island, the only Austrian force nearby was Armand von Nordmann's Advance Guard. They were ordered to delay the French. Nordmann's men faced heavy cannon fire from French batteries on Lobau island. With more and more French soldiers arriving, Nordmann had to move north. He left small groups at Sachsengang castle and Gross-Enzersdorf. The French quickly took Sachsengang castle. Further north, French troops headed for Gross-Enzersdorf, where more of Nordmann's soldiers were. The village was a strong defensive spot. Napoleon himself inspected it. He ordered his heavy cannons on Lobau island to bombard the village. About a thousand shells were fired, and Gross-Enzersdorf quickly caught fire. Austrian attempts to help the defenders failed. The village defenders were cut off and fighting in a burning inferno. The French stormed the position, taking 400 prisoners. By 10:00 AM, Napoleon was pleased. The bridgehead was secure, and all Austrian attempts to destroy the bridges had failed. The French controlled the river, allowing their army to cross quickly and safely.
Archduke Charles now understood Napoleon's plans. But he stuck to his decision not to fight on the flat Marchfeld plain, where the French cavalry would have an advantage. So, Charles did not support his two forward units. He watched as Nordmann slowly pulled back north, and Klenau pulled back northwest. Meanwhile, Napoleon was free to advance north into the Marchfeld plain, where he had room to deploy his forces. The French advanced in columns, with their cavalry protecting the flanks. By noon, the French were in the Marchfeld. So far, this suited both commanders.
Fighting on the Marchfeld Plain
As the French advanced, the Austrian Advance Guard, led by Nordmann and supported by Klenau's VI Corps (about 25,000 infantry), slowly retreated north. The Austrian infantry were in dense formations, good against cavalry but very vulnerable to cannon fire. They suffered heavy losses. Nordmann's infantry, originally 12,000 men, was especially exposed. By 1:00 PM, Nordmann worried that the large French cavalry might cut him off. Archduke Charles sent Liechtenstein with five cavalry regiments to help. Liechtenstein moved quickly but then stayed put. The French continued their advance without trouble.
The first serious Austrian attempt to slow the French came around 3:00 PM. Liechtenstein and Nordmann tried a joint attack, but they quickly gave up. They realized they faced a very strong French force. The Austrians pulled back, allowing the French to move closer.

Further west, Marshal Bernadotte's IX Corps advanced steadily. They met strong resistance from Nordmann's troops. Bernadotte sent two battalions forward, pushing back the Austrians. This allowed his corps to advance towards Aderklaa. Around 5:00 PM, the Austrians launched a cavalry attack to secure Aderklaa. This heavy cavalry brigade, about 1,000 horsemen, was suddenly charged by 400 Saxon cavalry from Bernadotte's Corps. The Austrian cavalry surprisingly fired pistols from 30 meters, which worked perfectly, sending the Saxons fleeing. The Saxons then brought up more cavalry. The Austrians again used pistol fire, but this time the Saxons kept charging and crashed into them. After a few minutes, the Austrians were pushed back. They were saved by another Austrian cavalry brigade. After this, Prince Liechtenstein decided he had lost too many men for no gain. He pulled most of his forces back behind the Wagram-Gerasdorf line.
Nordmann's slow retreat allowed Klenau's VI Austrian Corps to retreat skillfully with few losses. In contrast, Nordmann's Advance Guard suffered terrible losses. Its 12,000 infantry were reduced to just over 6,000. This was because Nordmann was in a dangerous spot and stayed there too long. He also had little cavalry protection. After a determined retreat, Nordmann managed to get his battered troops to the town of Markgrafneusiedl. The Advance Guard was still able to fight and joined the IV Corps, guarding the Austrian left side. The Austrian army was now spread out in a wide arc, about 19 kilometers long.
Opposite the Austrians, the French army was fully deployed by 6:00 PM. From left to right, it included Masséna's IV Corps, Bernadotte's IX Corps, Eugène's "Army of Italy," Oudinot's II Corps, and Davout's III Corps. The Imperial Guard and cavalry reserves were behind the main line. Napoleon had a good strategic position. He was in the center and had a much shorter battle line than the Austrians.
Evening Attacks
After successfully crossing the Danube and deploying his army, Napoleon had achieved his main goal for the day. However, around 6:00 PM, he ordered an immediate attack. He might have been unhappy with the day's results or feared the enemy would retreat in the dark. Napoleon probably noticed the sun was still high, the Austrian right wing was far from the main army, and Archduke John's army hadn't arrived. This attack was also meant to test the enemy's strength. The attack was planned against the Russbach line, a wide front. But the French troops were very tired. The hardest tasks were given to some of the weakest troops. Also, Napoleon ordered an immediate attack, so the staff didn't have time to send orders to all commanders, leading to uncoordinated actions.
An artillery bombardment started the French attack between 7:00 PM and 7:30 PM. The French II Corps attacked the Austrian II Corps. The Austrians were ready. They had two lines of soldiers, many skirmishers, and a strong position with earthworks. They also had 68 cannons. Still, the French crossed the Russbach stream. One French division reached the edge of Baumersdorf village. The village, mostly wooden houses, caught fire from the French cannons. But the Austrian defenders held their ground despite the flames. The French tried a flanking attack with some of their best troops. They bravely assaulted the village and took its first houses. Another regiment crossed the Russbach downstream and started climbing the slope. As they approached, they faced intense cannon fire and heavy musket fire. Then, Prince Hohenzollern personally led 500 cavalrymen against them. The French panicked and fled. They only stopped when they met the Imperial Guard. By now, it was past 8:00 PM, night was falling, and the French attack had failed with heavy losses.

While the French II Corps fought at Baumersdorf, to the west, General MacDonald attacked the Wagram plateau. His advance was hidden by thick smoke from the burning village. One French division accidentally got between two Austrian corps and advanced easily. They attacked Deutsch-Wagram. Austrian artillerymen panicked and abandoned their guns. Some infantry also retreated. General Bellegarde personally intervened, turning his flank to the enemy. The French advance also slowed due to heavy smoke. With poor visibility, the French mistook their Saxon allies for Austrians and fired at them. This caused the Saxons to retreat quickly. Archduke Charles arrived to restore order. The Austrians' morale soared, and they launched a strong counterattack. They pushed the French back beyond the Russbach to their starting positions. Bellegarde's good move and Charles's intervention saved the Austrian army from a dangerous situation. Both the Saxons and French troops retreated in disorder.
To the west, Marshal Bernadotte was preparing his own attack on Deutsch-Wagram from the west. This attack was delayed. Around 9:00 PM, the Saxons moved towards the village. They met heavy musket fire from Austrian defenders but pushed on and entered the village. Once near the church, the Saxons were stopped by fresh Austrian troops. The attack broke down, and the Saxons took shelter in nearby buildings. More Saxon troops came to help, but they were disorganized from crossing the Russbach. Entering the smoke-filled village, they also lost momentum. Visibility was very bad. The situation in Deutsch-Wagram became chaotic. All troops inside spoke German, and all, except the Austrian light infantry, wore white uniforms. Saxon troops fired at each other several times. Around 10:30 PM, a Saxon general brought fresh troops. He didn't know friendly troops were already in the village. He saw many white uniforms leaving the position and ordered his men to fire. Minutes of friendly fire and hand-to-hand combat followed before they realized these were Saxons too. This event greatly affected the attack. The Saxons in the village thought they were surrounded and retreated in disorder. Bernadotte's Saxon troops were completely demoralized. Attempts to rally them failed.
A final French attack was launched by Davout's III Corps on the French right. This attack also started late, around 9:00 PM. Davout's men were tired. Their goal was to attack the strong position at Markgrafneusiedl, which had earthworks and was defended by fresh Austrian troops. After a short cannon bombardment, Davout sent two divisions across the Russbach stream in a flanking attack from the east. His other two divisions were ordered to attack frontally through Grosshofen village. Davout also sent some cavalry to clear the way, but Austrian cavalry quickly pushed them back. Realizing his attack was useless, Davout called off his infantry attack around 10:00 PM. Only his artillery continued to fire at the Austrians. Davout's decision to stop early later drew criticism from Napoleon.
The Night of July 5 to 6
By 11:00 PM, the fighting had completely stopped. Both commanders were at their headquarters, knowing the next day would decide the battle. It was an extremely cold night. Soldiers from both armies lit fires to warm up and eat their small rations.
Late that night, the French corps commanders met at Napoleon's headquarters. Only Bernadotte was absent, still trying to rally his scattered infantry. Napoleon knew he had suffered heavy losses in the evening attacks. He had failed to achieve a quick breakthrough. About 11,000 French and allied soldiers were out of action. Despite these setbacks, the Emperor had forced the enemy to stay and was now sure Archduke Charles would fight on his current positions. For the second day, Napoleon planned a main attack against the Austrian left. This attack would be led by Davout's powerful III Corps. Davout was ordered to attack the plateau behind the Russbach stream, storm Markgrafneusiedl village, and then roll up the enemy's flank. If successful, this would force the other Austrian corps on the Wagram plateau to retreat northwest, away from any expected reinforcements. Napoleon also planned for his II and IX Corps, and the "Army of Italy," to launch smaller attacks. These would prevent the Austrians from sending reinforcements to their left. To shorten and strengthen his battle line, the Emperor ordered most of IV Corps to move closer to Aderklaa. This corps would be in its new position by 2:00 AM. Only one division was left at Aspern to defend the supply lines to Lobau island. The Imperial Guard, Cavalry Reserve, and expected reinforcements would form the army's reserve.

After the meeting, Napoleon asked Davout to stay. They spent a long time planning Davout's difficult attack on the fortified Markgrafneusiedl. Napoleon saw this as the key to winning the battle. Napoleon expected reinforcements: the French XI Corps, two divisions from the "Army of Italy," and a Bavarian division. These reinforcements would bring the French and Allied forces to 140,500 infantry, 28,000 cavalry, and 488 cannons. An additional 8,500 men and 129 cannons were left on Lobau island.
Archduke Charles was also planning for the next day. He was at his headquarters in Deutsch-Wagram. Charles was tired and had been slightly wounded while personally leading a regiment. But overall, he was probably satisfied with the first day. Despite heavy losses in Nordmann's Advance Guard (about 6,000 infantry), the rest of the Austrian army was mostly intact. Charles likely noted that while the enemy deployed surprisingly fast, everything was going as planned, as he always intended to fight them there. Losses were relatively moderate, and the army had fought very well. He believed his best option was to attack first. He later wrote that he decided "to fall on them by surprise on all sides as day broke." Orders for an all-out attack at 4:00 AM were given around midnight. Charles planned to use his much longer battle line (about 18 kilometers to the French 10 kilometers) to surround the enemy.
To do this, VI Corps was ordered to advance on Aspern. The fresh III Corps would move through Leopoldau towards Breitenlee. The Grenadier Reserve would move through Süssenbrunn. These three corps were to stay in line with each other. The Cavalry Reserve was to position itself between Süssenbrunn and Aderklaa. The Austrian 1st Corps was to move out of Wagram and advance along the Russbach. II Corps was ordered to stay put to avoid crowding and just provide cannon support. On the Austrian left, IV Corps, with the Advance Guard, was to attack the French III Corps. Archduke John's "Army of Inner Austria" was expected to arrive from Pressburg in time to support this attack. There would be no proper battle reserve. Only a small corps was left to watch the Danube and protect routes to Bohemia and Moravia if a retreat was needed.
Coordination between the corps was vital for this plan to work. But the Austrian command system often failed at this. As a result, the two corps farthest from headquarters received their orders around 3:00 AM, two hours late. Given the distance they had to march, their commanders knew they couldn't attack at 4:00 AM as ordered. Archduke Charles also expected reinforcements from his brother, Archduke John (13,000 men). John's role was crucial for supporting the attack on the French right. While Charles thought his brother would arrive any moment, John actually only began his 40-kilometer march from Pressburg around 1:00 AM that night. Without Archduke John's men, the Austrians could only gather 113,500 infantry, 14,600 cavalry, and 414 cannons for the second day.
The Second Day of Battle
Rosenberg's Attack on the Left
Positioned on the left of the Austrian army, around Markgrafneusiedl, Prince Rosenberg-Orsini commanded 18,140 men and 60 cannons of the IV Corps. He also had the battered Advance Guard (about 6,000 infantry) and 3,120 cavalry. Rosenberg received his orders on time and began his attack around 4:00 AM. He formed his corps into three large columns, led by an advance guard. Despite orders for silence, the troops moved forward with noise and some disorder.

Opposite them was Davout's III Corps, perhaps the best in the French army. Davout had 31,600 infantry, 6,200 cavalry, and 120 cannons. Davout didn't know the Austrians were attacking him, but his troops were ready because he was preparing his own attack. To the French surprise, around 5:00 AM, the Austrians attacked. Davout immediately ordered a counterattack. French cavalry rode to face the enemy cavalry. The sound of cannons from Davout's sector interrupted Napoleon's breakfast. The Emperor thought Archduke John's army had arrived. Napoleon overestimated John's strength. He immediately sent two heavy cavalry divisions and the Imperial Guard to that sector.
Meanwhile, Archduke Charles watched the operation. With Archduke John's reinforcements not appearing and other corps not in position, Charles realized Rosenberg was too exposed. Charles ordered Rosenberg to fall back to Markgrafneusiedl and defend there. This was difficult, but Rosenberg's troops managed to retreat while fighting. By 6:00 AM, Rosenberg was back in his starting positions, but his two-hour action had cost him 1,100 casualties.
Napoleon, now with Davout, saw that Archduke John's army was nowhere near. He sent the reserves back, leaving only some cavalry and cannons with III Corps. The Emperor confirmed he wanted Davout to take Markgrafneusiedl. But instead of a frontal attack, he told Davout to attack frontally with some men and flank the enemy from the east with others. This meant Davout had to delay his attack to move troops and build bridges for his cannons. Napoleon then ordered other corps to support Davout by keeping the Austrian forces busy.
The Crisis at Aderklaa
While Rosenberg attacked on the left, General Bellegarde, commander of the Austrian 1st Corps, also moved his men on time. He started just after 3:00 AM, moving south from Deutsch-Wagram. He sent an advance guard towards Aderklaa, a strategic village with earthworks. Bellegarde expected strong resistance but was surprised to find the village undefended. He quickly ordered his advance guard to occupy it. He then brought up more troops and cavalry. An immediate Austrian attack would have been dangerous for the French left, but Bellegarde had orders to wait for the Grenadier Reserve to arrive.

The task of defending Aderklaa belonged to Marshal Bernadotte, commander of the Saxon IX Corps. However, Bernadotte's inexperienced infantry had suffered greatly the day before. Many units had fled. With his infantry reduced to about 6,000 men, Bernadotte had trouble rallying them. He believed he was in an exposed position. So, he decided to abandon Aderklaa during the night, retreating almost 1 kilometer southeast to be closer to the main army. Bernadotte withdrew without permission and without telling Napoleon. This irresponsible move put the entire French left wing at risk. Around 4:00 AM, seeing the enemy in the village, Bernadotte gathered his cannons and began bombarding Aderklaa. But Austrian heavy artillery at Deutsch-Wagram fired back, destroying 15 Saxon cannons in three hours.
Meanwhile, an injured Marshal Masséna, leading his IV Corps from a carriage, was also moving towards the sector. His fourth infantry division had been left far south to defend Aspern. The movement of IV Corps was slowed by Austrian grenadiers. Arriving near Aderklaa around 7:30 AM, Masséna was spotted by Napoleon. The Emperor got into Masséna's carriage to discuss the situation. After a brief talk, Napoleon ordered the recapture of Aderklaa. Masséna ordered General Carra Saint-Cyr to storm Aderklaa. The attack was led by two regiments and a Hessian Guard brigade. Further east, the Saxon Corps also moved forward to support the attack. The French successfully drove back the Austrian battalions before the village. They moved into Aderklaa and tried to pursue beyond it. But as soon as they left the village, they met heavy fire from the Austrian second line. The French regiments withdrew to Aderklaa, reinforced by the Hessian Guard. The Saxon attack also stopped. At this moment, the Austrians had a temporary advantage, 44,000 men to the French 35,000. This was a good time for a general attack, but Austrian military rules discouraged commanders from taking too much initiative. Bellegarde stuck to his orders and waited for III Corps, which was just arriving.

Archduke Charles noticed the situation from his observation post. He quickly rode to Bellegarde with new orders. Charles then personally organized an attack on Aderklaa. This powerful attack drove the French defenders out of Aderklaa. The cavalry attack sent them fleeing with the panicked Saxons. Masséna's cavalry quickly protected the retreating infantry, driving off the Austrian horse. They then charged the Austrian cannons being set up in front of Aderklaa. The Austrian gunners fled, but Liechtenstein sent more cavalry, which pushed back the French horsemen. Meanwhile, Masséna prepared to retake Aderklaa. His men advanced despite enemy fire and cavalry threats. After bitter fighting, they retook the village around 9:45 AM.
However, the Austrians had enough fresh troops and soon launched new attacks. Despite heavy losses, the French defended the position. It took the numerous Austrians two full hours to finally push them out. The Saxons and many French continued their retreat. The first fleeing soldiers and Bernadotte reached Raasdorf, where they suddenly met Napoleon. The Emperor was furious to see Bernadotte leading the disorganized crowd and not trying to rally his men. After a brief argument, Napoleon fired the Marshal, saying, "A bungler like you is no good to me." The Saxon infantry was completely disorganized and could no longer fight. By mid-afternoon, about 12,000 panicked French and Saxon stragglers were in Raasdorf. The French center-left was close to breaking.
Klenau's Flanking March

Following Archduke Charles's plan to surround the enemy, General Klenau, commanding VI Corps, and General Kollowrat, commanding III Corps, moved towards the French left. Both commanders received their orders very late and had a long way to go. They did their best, but their leading troops only arrived between 7:30 AM and 8:00 AM, three hours later than planned.
Klenau was the first to meet the enemy. His troops left Leopoldau around 7:30 AM and moved towards Breitenlee and Hirschstetten, pushing back French outposts. The only French force there was a division of IV Corps, about 4,600 men, against Klenau's 14,000. At 8:00 AM, Klenau's cannons opened fire. He sent a brigade to take Aspern village. The French general saw this and sent a battery of ten cannons to delay the enemy. This was a bad move, as Austrian hussars suddenly appeared and captured these guns. The French tried to recapture them but failed. After a weak attempt to defend Aspern, the French retreated towards Essling. Klenau's division occupied Aspern and pursued them. The Austrians then came within range of the French heavy cannons on Lobau island, which slowed their advance. But they still pushed towards Essling, which the French abandoned around 10:00 AM.
The French retreated to protect the vital bridges to Lobau island. The Austrians then attacked the bridgehead but were quickly pushed back. They then bombarded the French supply train, causing some panic. From his position, Klenau could have attacked the undefended rear of the French army or the bridges. However, the Austrian commander chose to be cautious. His force was only about 14,000 men, some of whom were under fire from French cannons on Lobau island. His orders were to stay in line with Kollowrat's III Corps. If Kollowrat had moved forward, Klenau might have continued his attack. But Kollowrat had not yet moved from his position.
Indeed, further north, Kollowrat had been slow to move his large III Corps forward. He deployed between Süssenbrunn and Breitenlee, threatening the French flank. Kollowrat finished his movements around 9:30 AM. He did not try to attack the weak French left. He was busy securing his own rear, leaving a brigade facing Vienna and a force to guard a village behind him. He also sent troops to occupy Breitenlee. Despite his good tactical position, Kollowrat moved cautiously. He only bombarded Masséna's force with two batteries.
Napoleon's Response

The situation was becoming dangerous for Napoleon's army. He realized he was in the center of an increasingly curved battlefront. He first told Davout to speed up his attack preparations against the Austrian left. But the most urgent task was to stabilize his own damaged left wing. The Emperor didn't want to use his fresh infantry reserves yet. So, he ordered Masséna to break away from the enemy and move his IV Corps south to attack the Austrian VI Corps. This was a risky move, as Masséna's men would have to march in vulnerable columns through an area with many enemy soldiers, cavalry, and cannons. The departure of these troops would also create a huge gap in the French line. Napoleon cleverly planned to fill this gap with a massive "grand battery" of cannons. This battery would stop the enemy advance with continuous cannon fire. This needed time. With the Austrians from III Corps moving forward, Napoleon relied on Marshal Bessières's cavalry to allow Masséna to disengage and the grand battery to deploy.
Around 11:00 AM, Bessières received his orders. He was to attack the weak point of the enemy line, where Austrian III Corps and the Reserve Corps met. Only a thinly spread Austrian division was covering the wide area between Süssenbrunn and Aderklaa. With one division sent to support Davout and another protecting Masséna, Bessières brought forward his only remaining unit, the powerful 1st heavy cavalry division, led by General Nansouty. Napoleon also ordered the Guard cavalry to support, but his orders didn't reach them. The situation on the French left was so bad that Bessières decided not to wait for the Guard cavalry and ordered an immediate charge.

Bessières led Nansouty's 16 squadrons, about 2,800 men, including the elite Carabiniers and Cuirassiers. The squadrons charged, but the flat Marchfeld plain offered little cover from the devastating Austrian cannon fire. The heavy cavalry met the enemy near Süssenbrunn, but the infantry was ready, and their first charge failed. Nansouty rallied his men for a second attempt. The elite Carabiniers led the way, pushing through, but many troopers couldn't follow. It seemed the charge would do serious damage, especially when the French broke an Austrian battalion, creating a gap between two Austrian Corps. But a cavalry charge against prepared infantry has limited effects. The cavalrymen made little impression on the grenadier battalions, which were now in tight, solid squares. Nansouty skillfully turned right and attacked the Austrian artillery line near Aderklaa. Meanwhile, Bessières was bringing up the Guard cavalry for a second charge. A cannonball hit Bessières's thigh, knocking him off his horse. He lost consciousness. While Bessières was carried away, Nansouty's Carabiniers captured an Austrian artillery battery. But Liechtenstein sent fresh cavalry, which attacked the French in the flank, sending them reeling back with heavy losses. The Guard's light cavalry then launched a brief charge but were also pushed back. Nansouty took command of all the cavalry but pulled his battered troops back. The French cavalry charge was very costly, but it allowed Masséna to disengage and bought time for the grand battery to deploy.


Napoleon knew the cavalry charge was a temporary solution. While the heavy cavalry blocked the Austrian infantry, he ordered General Jacques Lauriston to assemble a huge battery. Its goal was to bombard the enemy, stop their advance, and force them to leave their position between Aderklaa and Süssenbrunn. Lauriston's battery had 84 cannons, including all 60 Imperial Guard artillery pieces and 24 from the "Army of Italy." The Guard horse artillery, with six batteries, was the first to fire around 11:00 AM. It was followed by the Guard foot artillery and then the cannons from the "Army of Italy." The grand battery was deployed in a single line, about 2 kilometers long. The cannons from the "Army of Italy" faced Liechtenstein's Reserve Corps. The Guard foot artillery was in the center, facing Kollowrat's III Corps. The Guard horse artillery extended the line south, facing Breitenlee village, which was held by the enemy. As they set up, the French cannons were ordered to fire immediately. The relatively short range (350 to 550 meters) and flat, wet ground, which made cannonballs bounce far, meant the results were almost instant. Entire lines of Austrian infantry and cavalry were wiped out with a single shot. In some cases, the French even used short-range case-shot, which was devastating for the densely packed Austrian battalions. To put more pressure on the enemy, the French battery was ordered to advance steadily while firing intensely. This soon forced Kollowrat to start pulling his forces back. However, the Austrian artillery fired back with their own cannons. The most damaging fire came from two 12-pounder batteries near Wagram, barely a kilometer away. Soon, some French gun crews were so depleted that Napoleon asked for volunteers from the Guard infantry to replace the losses. Discarded artillery matches set fire to the ripe corn crops, and some wounded soldiers on both sides, unable to crawl away, burned alive.
While the cannons roared, Marshal Masséna was near Raasdorf, forming his men for their march south. Around 11:00 AM, he rallied many of the men who had fled during the attack on Aderklaa. He then had brandy distributed to boost morale. With some of his troops still fighting to hold Aderklaa, Masséna led his men towards Essling. His goal was to threaten Klenau's Corps, which was now in an advanced position behind the French line but had not tried to attack Napoleon's rear. Klenau's passive stance was partly due to a lack of orders to advance further and partly because his relatively small force was out of touch with the main Austrian army. Still, Masséna's task was difficult. Some of his troops had to march at least eight kilometers in vulnerable column formations, moving in front of an enemy with many cavalry and cannons. Masséna showed his usual skill and determination. He used his cavalry to protect his men and used the tall corn crops to hide his advance. The French troops, though out of range of enemy muskets, were constantly bombarded by Austrian cannons. The Austrian cavalry tried an attack that almost reached Masséna's carriage. His aides had to draw swords to defend him until French cavalry arrived to push back the Austrians. Around noon, after marching about six and a half kilometers in 90 minutes, the leading elements of Masséna's Corps were in sight of Essling village, which was occupied by the enemy.
Davout's Flanking Attack
.JPG)
While the battle raged on the western side, about 10 kilometers to the east, Marshal Davout was preparing his attack. This was the maneuver Napoleon intended to win the battle. To gain a foothold on the plateau, Davout had to push back Rosenberg's Austrian IV Corps. The two forces had already fought the day before and again earlier that morning. Rosenberg had launched a surprise attack, which the French repulsed. Because other Austrian corps failed to attack at the same time, Rosenberg was forced to pull his troops back to their original positions. They occupied the plateau and the strategic village of Markgrafneusiedl, just below the slope. This village was the key position Davout had to take for his plan to succeed. Despite his large numerical superiority, Davout's mission was not easy. The Austrians had many cavalry and cannons to support their infantry. Also, the defensive position was strong. Markgrafneusiedl village had sturdy stone houses and large buildings like a church tower, a monastery, and a mill, all easy to defend. The only weakness of Rosenberg's position was its left side, where the plateau sloped gently northeast.
As the French prepared their attack, cannons on both sides fired. Rosenberg's batteries were on high ground and sometimes behind earthworks. Despite the Austrians' better tactical position, after about two hours of bombardment, the French managed to disable most of the Austrian cannons and cause fires in Markgrafneusiedl. The French artillery won because they had more high-caliber cannons and, more importantly, concentrated their fire better. Cannons from French III Corps and II Corps worked together, creating deadly crossfire. By 9:30 AM, Davout's troops were ready to attack. Original orders were for Davout to send his four infantry divisions in a frontal assault. But early that morning, Napoleon changed his mind after seeing the position himself. He noticed the weakness on the left of the Austrian position. The new orders stated that two of Davout's divisions would advance frontally from Grosshofen towards Markgrafneusiedl. This would force Rosenberg to commit some of his forces to meet them. The other two infantry divisions, supported by cavalry, would storm the plateau from the east. This order caused a significant delay. Troops had to move to their new positions, and bridges had to be built for the cannons to cross the Russbach stream. Rosenberg, commanding the Austrian forces in this sector, had reinforcements from Nordmann's Advance Guard and many cavalry. He also expected support from Archduke John's "Army of Inner Austria," but these much-needed reinforcements had not arrived.

The French began their steady advance between 9:30 AM and 10:00 AM. Their movement was hidden by thick smoke from the intense cannon fire. On the right, French cavalry had already advanced, pushing back Austrian cavalry and clearing the way for the infantry to flank the enemy left. Rosenberg responded by moving his reserves to form a new flank. However, these troops came from Nordmann's Advance Guard, which had suffered heavy losses the previous day. During this move, Austrian cavalry were pushed back up the slope by French dragoons. Meanwhile, Davout personally led two divisions to storm Markgrafneusiedl frontally. The village was defended by three Austrian brigades. The Austrian first line met the advancing French columns with steady fire, stopping the French attack temporarily. Further east, another French attack faced a similar fate when the Austrians launched a combined infantry and cavalry attack, forcing the French to pull back and regroup. The Austrian counterattack failed completely. General Nordmann was mortally wounded while trying to fix the situation. Despite their large numbers, the Austrian cavalry failed to launch a massed charge. Instead, they made several small charges that had little effect. At this crucial moment, a French division committed its entire force. Despite a failed first attack, they soon gained a strong foothold on the slope, pushing towards the tower at Markgrafneusiedl. This showed the battle in this sector was turning in favor of the French.

Meanwhile, other French divisions also rallied their men and launched another attack against Markgrafneusiedl. They were met by an Austrian division that bravely tried to hold its ground in stubborn house-to-house fighting, even though the village was largely on fire. The French were equally determined. Even senior commanders exposed themselves to danger to inspire their men. French pressure and the fast-spreading fire forced an Austrian brigade to evacuate the position and regroup on the slope behind the village. Fighting continued around the disused church, where a battered Austrian brigade held out with remarkable tenacity. The church, with its stone tower, was finally lost by the Austrians around noon. The French pushed through, forcing the Austrian regiments to withdraw to avoid being surrounded. When Rosenberg failed to retake the tower, he decided to move his entire force further back on the plateau and form a new line. This timely action temporarily stopped the French advance. Seeing this, Davout decided to force a decisive breakthrough. He committed his last reserve, the 3rd Heavy Cavalry Division. The Marshal ordered the heavy cavalry up the plateau west of Markgrafneusiedl in an immediate frontal assault against the enemy line. The division, made of four cuirassier regiments (almost 2,000 men), was led by General Arrighi de Casanova, who had no previous command experience at this level. Receiving orders to charge immediately, Arrighi quickly formed his squadrons. But once on the slope, he found himself in the middle of enemy barricades and couldn't even deploy a single squadron. The steel-clad cuirassiers tried several times to break the strong Austrian formations, but the terrain was not suitable. After suffering about 300 casualties from several ineffective charges, Arrighi pulled his men back down the slope.

It was just after noon. Despite the failed French cavalry assault, Rosenberg knew his struggling line was about to break. This could have disastrous consequences for the entire Austrian army. With all his forces committed and no reserves, the Austrian commander could do little to stop the seemingly unstoppable French attack. At this decisive moment, Archduke Charles personally brought reinforcements to his battered left wing: five battalions and a battery of cannons from Austrian II Corps, and four squadrons of hussars, as well as a cuirassier regiment from the Cavalry Reserve. With the cavalry reinforced, Archduke Charles ordered his horsemen to charge the enemy. At first, an Austrian brigade charged, overwhelming the French 7th Hussars. The Austrians then charged the French second line, which tried to drive them off with a carbine volley, but failed. The French cavalry was sent reeling. As a result of his successful charge, an Austrian general captured ten French horse artillery pieces. But the Austrian triumph was short-lived. The French quickly countercharged with their reserve. A massive, brief cavalry clash occurred. Both Austrian commanders were wounded, and the Austrians were pushed back, leaving behind the cannons they had just captured. This was the main cavalry action of the battle. Despite the Austrians committing over 30 of their 40 squadrons, the French gained the upper hand. This was largely due to their better training for massed action. The Austrians, charging in single regiments against an enemy that used entire brigades and divisions in coordinated actions, were overwhelmed. This showed their ongoing problem with coordinating large-scale cavalry charges. Around 1:00 PM, after his cavalry charge failed, Rosenberg realized he couldn't hold his positions. He began an organized retreat towards Bockfliess, about 10 kilometers northwest.
MacDonald's Column Attacks

Davout's successful flanking maneuver did not go unnoticed. Despite the distance, around 1:00 PM, Napoleon could see through his spyglass that the smoke from Davout's sector was now well beyond the visible tower at Markgrafneusiedl. This was a sign that his men had pushed back the enemy's flank. With his left now stable after Masséna's successful move, the Emperor began ordering a general attack. Masséna was to continue his march south and attack Klenau. Oudinot was ordered to prepare his Corps for an assault against the plateau and dislodge Austrian II Corps. Eugène was to take VI Corps against the enemy forces at Deutsch-Wagram. MacDonald's V Corps was to move closer to Aderklaa. MacDonald's force, though theoretically strong, had only about 8,000 men. He was preparing to storm the plateau near Wagram, when he received new orders. His force was to head west towards Aderklaa and occupy the ground held by the Grand Battery.
.jpg)
Just before 1:00 PM, MacDonald moved to his assigned location. He deployed eight battalions in a line, forming the front. The other 15 battalions remained in column, a formation better able to defend against the increasing threat from the numerous enemy cavalry. This unusual formation, about 800 meters long and 550 meters wide, was to be supported by the remaining cannons of the Grand Battery. These cannons had orders to advance on its right and fire intensely against the Austrian line. Another division was also ordered to support this attack. A cavalry regiment protected the rear of the column. The goal of this huge mass of men was to push forward and take Süssenbrunn village, which was between the Austrian Grenadier Reserve and III Corps. Once taken, they would drive a wedge between the two Austrian formations, pushing them apart. A powerful cavalry force was to protect both flanks of MacDonald's formation. The mighty Guard Cavalry Division protected the right, and the 1st Heavy Cavalry Division protected the left. A smaller cavalry division was also involved.
As MacDonald's slow-moving column advanced, Austrian artillery opened fire on the accompanying French cannons, disabling 15 of them before they could even fire back. The Austrian guns then focused on MacDonald's column, whose deep ranks were easy targets. Seeing the French advance, Archduke Charles ordered his corps commanders to turn the flanks of the Grenadier Reserve and III Corps. Austrian brigades fired heavy musket volleys against both sides of MacDonald's column, while Austrian artillery pounded the front line. However, the French had managed to dent the Austrian line and were only a few hundred meters from Süssenbrunn. With his force reduced to little more than half strength, and his battalions forced to form squares to fend off three cavalry attacks, MacDonald could go no further. He called on the available cavalry to charge and clear the enemy cannons and infantry, who he believed were in complete disarray. On his left, Nansouty, who apparently hadn't been consulted about his division's role, had kept his men too far back to protect them from enemy fire. When Nansouty arrived with his cuirassiers, the Austrians were ready, and their cannons had already moved to safety. The French cuirassiers charged Austrian divisions, but these men were now in strong mass formations, which were almost impossible for cavalry to break.

Further north, protecting the other flank of MacDonald's column, was the fresh Guard Cavalry Division. They also received MacDonald's request to charge but remained still. Their commander said he lacked orders from Napoleon or Marshal Bessières. The Emperor was too far away, and Bessières had been wounded earlier. So, the Horse Guards did not move. Around 2:00 PM, MacDonald's attack stopped. The chance to completely break the Austrian line in this sector was lost. Napoleon noted with disappointment that it was the first time the cavalry had let him down. However, given how exhausted the French forces were, MacDonald probably couldn't have followed up any breakthrough anyway. Still, the determined attack achieved Napoleon's main goal: to pin down the Austrian forces in this sector, preventing Charles from reinforcing his battered left. Forced to admit his attack had lost momentum, MacDonald did his best to protect his remaining men from the intense Austrian cannon fire. However, reinforcements were not far away. The Emperor sent Wrede's powerful Bavarian division (5,500 men), as well as elite Guard cavalry regiments and Saxon cavalry. The Bavarian division quickly arrived but only exchanged fire briefly with the enemy, as the Austrians were already in full retreat. Only the artillery truly engaged. Behind the Bavarians came the "Young Guard" infantry, led by Napoleon's aide, General Reille, with strict orders to avoid "getting involved in any adventure." With the Guard's support, the Bavarians captured Süssenbrunn and continued the pursuit. The Guard cavalry tried to stop the enemy advance but met Austrian cavalry and had to withdraw.
Masséna's "Infernal Column"
Meanwhile, Marshal Masséna had made remarkable progress since 11:00 AM. He had disengaged from the fight at Aderklaa and organized his march against Klenau. On the French left, Klenau, commander of VI Corps, was fully aware of Masséna's maneuver. He described seeing an "Infernal Column" advancing towards him. By 12:30 PM, parts of IV Corps were at Essling. Masséna received Napoleon's message, informing him of Davout's success and urging him to attack. Masséna sent his cavalry to clear the enemy horse, which was pushing back a defeated French division. Then, the cavalry attacked and captured the Austrian battery that was bombarding the bridges over the Danube, sending the gunners fleeing. An Austrian countercharge recaptured the lost battery, but more French cavalry arrived. The French cavalry attack stopped Klenau's Corps and allowed the French to attack Essling village. Six weeks earlier, the French had bravely defended this village. Now they were ordered to take it from about 1,200 Austrian soldiers. The village was in ruins, but a strong stone granary was still standing, a formidable defensive structure. Nevertheless, a French brigade stormed the position. After intense fighting, they secured Essling around 2:00 PM, sending the defenders fleeing towards Aspern. Masséna then took Aspern after a brief fight. He gathered his four infantry divisions and continued to press Klenau, sending a division towards Breitenlee. There, another French division had just taken Breitenlee village. This division was able to link up with Masséna's troops.
Masséna had completed his mission and had no further orders to continue. But hearing the intense cannon fire on his right, he understood he needed to keep attacking. He sent one division to march on Kagran, while his other three infantry divisions marched on Leopoldau. The corps cavalry went ahead of the infantry. French cavalry caught up with Klenau's infantry near Leopoldau. There, the French cavalry met two Austrian battalions already formed in strong masses. This formation was ideal for fending off enemy horse. Nevertheless, the French charged bravely but achieved little. The first mass could only be broken after horse artillery fired on them. Not long before 5:00 PM, the cavalry moved against the second mass. It was during this action that the brave Lasalle, one of the best cavalry commanders, was shot dead. Another general took overall command of the cavalry and personally led a charge to avenge Lasalle. The attempt failed, and he was also wounded. This event, and the fact that the French were now under fire from Austrian cannons on Bisamberg heights, convinced Masséna to stop his pursuit. Around 5:00 PM, Klenau had successfully moved his corps from the dangerous position near the Danube to relative safety behind the reserve V Corps, deployed on the Bisamberg heights.
Austrian Retreat
While General Klenau was being pushed out of Essling, Archduke Charles received long-awaited news about his brother's arrival. However, the news was disappointing: Archduke John and his 13,000 men, Charles's only hope for saving his collapsing left flank, would only arrive around 5:00 PM, much too late to make a difference. By now, Charles knew his troops couldn't hold out much longer. His three corps on the Wagram plateau had been fighting for about ten hours. On his right, other Austrian corps were being pushed back. Crucially, he had no reserves to support his battered line or launch a counterattack. Continuing to fight in these conditions would have meant the end of his main army and, in Charles's view, the end of the Habsburg Empire. His only realistic option was to begin an orderly retreat. He ordered this by mid-morning, directing each corps along its retreat route.
While MacDonald's attack drew the Austrians' attention, the French launched their general attack. Napoleon committed Marmont's fresh XI Corps, sending them to position opposite Austrian I Corps and fill the gap. Moreover, around 1:00 PM, the French II Corps began to advance frontally against the Austrian troops on the Wagram plateau. The energetic Oudinot, who had been waiting for his orders to attack all morning, decided to wait no longer, even though he hadn't received them yet. Opposite Oudinot was Austrian II Corps. These men were relatively fresh, having only exchanged cannon fire all morning. But they were in a very dangerous position. Their commander saw that his force was in danger of being attacked from the flank by Davout's seemingly unstoppable corps. Now Oudinot was advancing against him. At first, he tried to hold his positions, and his men met Oudinot's advancing columns with intense musket fire. However, the Austrian commander realized how fragile his position was. On his left, all the Austrian troops were in full retreat. He risked Oudinot pinning his men down while Davout advanced on his flank and rear. So, he had little choice but to order his men to fall back and form a new line further north. He sent five battalions and several batteries to form a new flank and slow down Davout's two advancing divisions, which were getting dangerously close to Baumersdorf.
Seeing the Austrians in full retreat, Oudinot lost his composure and galloped along his line, shouting commands, ordering his men to run at the enemy. One of his divisional commanders repeated this unusual and potentially disastrous order. It could have caused the columns to scatter and become vulnerable. Luckily, experienced junior officers took over and executed the necessary orderly maneuvers. During this action, Oudinot was wounded twice and had his horse shot from under him. But he kept command and, after his wounds were dressed, he led his men on. His troops stormed Baumersdorf, taking it despite brave defense. Oudinot's Corps then spread out. Most of his men continued to press the Austrian II Corps. Another division turned left against Bellegarde's I Corps. To the west, a division from the "Army of Italy," supported by the Italian Royal Guard, managed to maneuver unseen by following the Russbach riverline up to Deutsch-Wagram village. There, they attacked the unprotected flank of an Austrian grenadier division. This division had been left behind to cover Bellegarde, who had just begun to retreat. Surprising the grenadiers, the French stormed the position and pushed the Austrians back in disorder beyond Aderklaa village. They were supported by another division, which had stormed the plateau next to the village. Bellegarde reacted by sending in some of his reserves to stop the French attack. But the French managed to secure both Wagram and Aderklaa, two key positions on the battlefield.
By 4:00 PM, the entire Austrian army was in full retreat. They carried out this maneuver admirably. Their formations remained together, withdrawing in stages, with each formation protecting the retreat of the one next to it. During this retreat, General Smola, commander of the Austrian artillery, played a major role. He managed to gather enough cannons to keep the enemy at a safe distance. The French, who had been marching and fighting for over forty hours in intense heat with little water and food, slowly followed the retreating enemy. The French troops were so exhausted that around 4:00 PM, a brief moment of panic occurred at Wagram. Dozens of French infantry fled down the slope. The Old Guard had to form a square to protect the Emperor's headquarters before order was restored. A second such moment happened about an hour later. A mounted scouting party from Archduke John's army suddenly appeared near Glinzendorf. This caused panic among the stragglers and civilian contractors. The Guard again had to form a square. But John soon received word that the battle was over and quickly turned back. A final incident took place around 6:00 PM. Elements of a French regiment caught up with enemy stragglers at Bockfliess. The French found houses filled with Austrian soldiers who refused to surrender. About 200 of these men were killed, and 400 were captured. By nightfall, contact had been broken. The exhausted French had to stop their pursuit and camp. Towards dusk, French cavalry caught up with Austrian III Corps and tried to block its retreat. But the numerous Austrian cavalry in the sector quickly intervened, hitting the French flank and sending them fleeing. This convinced Archduke Charles that he had left III Corps in an exposed position. He ordered it to speed up its retreat and get in line with VI Corps. Around 8:00 PM, all fighting stopped. The Austrians were able to move away without further incident. Napoleon had won the great Battle of Wagram.
Aftermath of the Battle
Pursuit and Armistice
By nightfall on July 6, the Austrians, still able to fight, had broken contact with their pursuers. Charles had managed to reestablish a strong, though somewhat disorganized, front. The Austrians' fighting spirit during the evening made Napoleon wonder if they would fight again the next day. The Emperor woke early on July 7 and personally inspected the battlefield. He noted the huge losses on both sides and saw that the Austrians had withdrawn. He then returned to more practical matters. After receiving a report from General MacDonald, he suddenly embraced the general and made him a Marshal of the Empire. MacDonald was the only Marshal to receive this title on a battlefield. The Emperor also criticized Marmont for being slow to arrive and told Oudinot he should have been shot for attacking without orders. The French resumed their pursuit around 2:00 PM. The army was extremely tired, which prevented an earlier start. Their cannons had fired between 90,000 and 100,000 rounds during the battle, leaving their ammunition wagons empty. It took time to refill them. Among the soldiers, there were even cases of severe lack of discipline as the army moved through areas with vineyards and wine cellars. When an angry Oudinot tried to restore order among a group of cavalrymen, he was almost attacked by his own men. The pursuit was also made harder by a lack of clear information about where the Austrians were retreating. Conflicting reports said the Austrians were going towards Brünn or Znaim, or even Moravia. The French tried to close the gap by marching quickly. The army corps of Masséna, Marmont, and Davout led the pursuit. The "Army of Italy" was tasked with watching Archduke John's army.
The Austrians were actually retreating towards Znaim in Bohemia. The Austrian army had suffered greatly at Wagram and had to leave behind their wounded. But they did take thousands of French prisoners, some cannons, and a few flags. Archduke Charles used night marches well. He gathered most of his forces at Korneuburg on July 7. Charles and his senior commanders had considered different plans to continue the war. But in the end, Charles was not positioning his army to keep fighting. Charles had believed, even before Wagram, that Austria's best option was to make peace. To do this, the Empire needed a large, battle-ready army to use as leverage during peace talks. Between July 9 and 12, the French "Army of Italy" clashed with Archduke John's forces in several small fights, pushing them back into Hungary. Masséna caught up with and fought the Austrian rearguard in several actions, most notably at Hollabrunn. By now, Napoleon largely understood Charles's intentions and moved against them. Marmont and his small XI Corps were the first to engage the Austrian army at the Battle of Znaim. Marmont's 10,000 men faced about 60,000 enemy troops. But, in typical Napoleonic style, Marmont decided to attack to pin down the enemy. He expected reinforcements soon. At 10:00 PM, Napoleon arrived with more troops. The battle continued the next day, with bloody fighting around Znaim. The Austrians suffered heavy casualties, about 6,200 men. As time passed, the French force was set to grow to about 84,000 men with the arrival of Davout and Oudinot. Recognizing that another battle would be pointless, Charles decided to ask for a ceasefire. He did this on his own, without permission from Emperor Francis I. Ignoring the advice of his senior commanders, Napoleon accepted. The Armistice of Znaim marked the end of the active fighting in the 1809 war between France and Austria.
Casualties and Impact
With over 300,000 soldiers, Wagram was the largest battle in European history up to that time. With at least 72,000 casualties on both sides, it was also the bloodiest military engagement of the entire Revolutionary and Napoleonic Wars so far. The unusually high number of casualties was mainly due to an unprecedented concentration of cannons on a flat battlefield. The deadly roundshot (each army fired at least 90,000 rounds during the two days) was very effective.
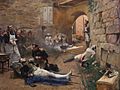
Napoleon used his usual propaganda to minimize his losses. He stated that Wagram cost the army only "1,500 dead and 3,000 to 4,000 wounded." In reality, losses were terrible. French medical services were completely overwhelmed. However, Imperial Guardsmen were given priority and were well cared for. Of the 1,200 guardsmen wounded at Wagram, half returned to duty within days, and only 145 died from their wounds. Regular troops were not as lucky. Most wounded on both sides were hit by cannon fire, which caused terrible injuries, often requiring amputation. The shock of surgery, massive blood loss, poor after-care, and infection meant the chances of survival after amputation were not good.
Overall, since neither army provided a complete list of their losses, the exact number of casualties is hard to know. Some suggest French casualties were close to 40,000 men, more than the Austrians. More careful estimates place French losses between 25,000 and 33,000 men. Five generals and 238 other officers, along with 7,000 men, were killed. Additionally, 37 generals, 883 officers, and over 25,000 men were wounded. About 4,000 men were captured, many of them wounded.
On the Austrian side, losses were also heavy. An official count showed 51,626 officers and men missing on July 11, 1809, compared to the numbers on July 5. This figure includes losses from Wagram, smaller fights after the battle, and the Battle of Znaim. Many of these missing men later returned to their units. Still, conservative estimates of Austrian losses at Wagram are about 30,000 men. Of these, 24,000 were killed or wounded, and the rest were captured. According to one historian, Austrian casualties were 41,250 total, including 23,750 killed or wounded, 10,000 missing, and 7,500 captured. French and Allied casualties were 37,500, with 27,500 killed or wounded and 10,000 missing or captured. Four Austrian generals were killed or mortally wounded during the fighting.
Images for kids
-
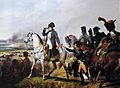
Bataille de Wagram, 6 Juillet 1809 by Horace Vernet
-
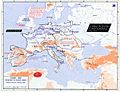
The strategic situation in Europe in 1809
-
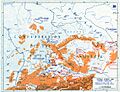
Opening moves: strategic situation on 15 April
-
Battles of Eckmühl and Ratisbon
-

A triumphant Archduke Charles of Austria-Teschen led the Austrians to victory at the Battle of Aspern-Essling.
-
Napoleon with Maréchal Jean Lannes. One of the Emperor's personal friends, Lannes was severely wounded while leading his men at Aspern-Essling. He died in extreme pain, nine days after the battle.
-
Napoleon Crossing the Bridge to Lobau Island.
-
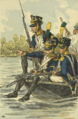
The French made extensive use of landing craft during the first phase of the crossing.
-
Napoleon supervised the landing operations closely.
-
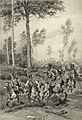
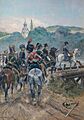
French hussars on a scouting mission. After the successful crossing of the Danube early on 5 July, the French light cavalry launched reconnaissance missions as they preceded the advance of the infantry columns.
-
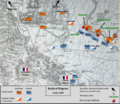
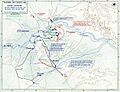
The evening attack on 5 July included offensive actions from the French "Army of Italy" (short: Ar. It.), II, III and IX Corps, against the Austrian 1st, II and IV Corps. The intervention of the Austrian Grenadier Reserve and Cavalry Reserve was not necessary.
-
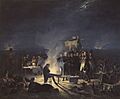
Napoleon in conference with his senior Generals late on 5 July, after the first day of battle.
-
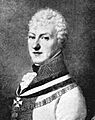
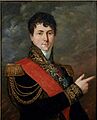
Feldmarschalleutnant Prince Rosenberg-Orsini. At the battle of Wagram, the 47-year-old Prince Rosenberg was in command of the Austrian IV Korps.
-
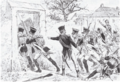
Soldiers of the 4th Line regiment storm Aderklaa.
-
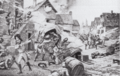
Austrian grenadiers defend Aderklaa against French troops from Molitor's division.
-
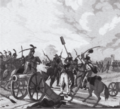
Klenau's cavalry captures Boudet's artillery during the morning combats on 6 July 1809.
-

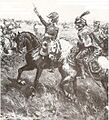
French cuirassiers cheering while charging past Napoleon at the Battle of Wagram. The Emperor committed Nansouty's heavy cavalry division, in a bid to stop the Austrian menace on his left.
-
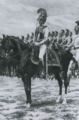
Austrian cuirassiers from the 4th Regiment stepped in to repulse the French heavy cavalry near Aderklaa.
-
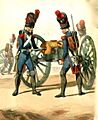
A 12-pounder from the French Guard foot artillery in action.
-
Lieutenant-Colonel Antoine Drouot, commander of the Imperial Guard foot artillery, leading the deployment of his guns at Wagram.
-
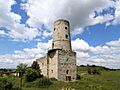
A modern photo of the tower at Markgrafneusiedl, which was the scene of heavy fighting during the second day of the Battle of Wagram.
-
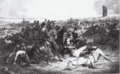
Davout ordering the assault of Markgrafneusiedl. The commander of III Corps had his horse shot under him while leading his men from the front but continued his relentless attacks on the Austrian left.
-
General Gudin, in command of Davout's 3rd Division, was instrumental in the attack of the III Corps.
-
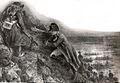
Napoleon following the smokeline of Davout's columns. The attack of III Corps constituted the crucial French offensive at Wagram.
-
MacDonald's square attack column
-
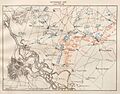
Operations on 6 July (in Russian)
-

The Chasseurs à cheval of the Guard charging Austrian dragoons.
