Battle of the Bismarck Sea facts for kids
Quick facts for kids Battle of the Bismarck Sea |
|||||||
|---|---|---|---|---|---|---|---|
| Part of the New Guinea Campaign of the Pacific Theater (World War II) | |||||||
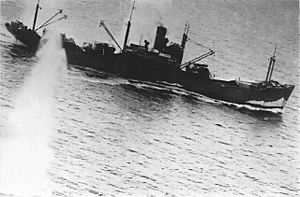
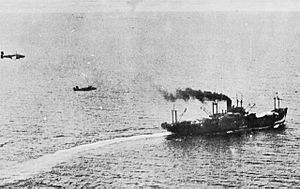
 Japanese transport under aerial attack in the Bismarck Sea, 3 March 1943 |
|||||||
|
|||||||
| Belligerents | |||||||
| Commanders and leaders | |||||||
| Strength | |||||||
| 39 heavy bombers; 41 medium bombers; 34 light bombers; 54 fighters 10 torpedo boats |
8 destroyers, 8 troop transports, 100 aircraft |
||||||
| Casualties and losses | |||||||
| 2 bombers destroyed, 4 fighters destroyed, 13 killed |
8 transports sunk, 4 destroyers sunk, 20 fighters destroyed, 2,890+ dead |
||||||
The Battle of the Bismarck Sea (March 2–4, 1943) was a major air-sea battle during World War II. It happened in the South West Pacific Area when planes from the U.S. Fifth Air Force and the Royal Australian Air Force (RAAF) attacked a Japanese convoy. This convoy was carrying soldiers to Lae, New Guinea.
Most of the Japanese ships were destroyed, and many Japanese soldiers were lost. This battle was a big win for the Allies. It showed how powerful air attacks could be against ships.
Contents
Background
Allies Push Back
After the Japanese attack on Pearl Harbor in December 1941, the United States and its Allies began to fight back. A big victory for the U.S. was the Battle of Midway in June 1942. This battle helped the Allies take control.
Later, in August 1942, Allied forces landed on Guadalcanal in the Solomon Islands. This started a long fight there. At the same time, Australian and American soldiers in New Guinea stopped a Japanese attack along the Kokoda Track. The Allies then went on the attack, capturing areas like Buna–Gona and defeating Japanese forces there.
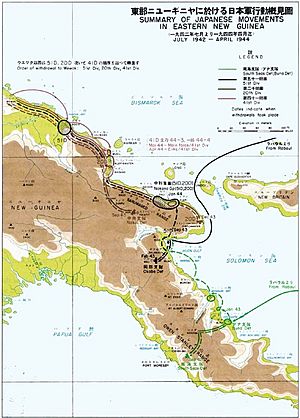
The main goal for the Allies in New Guinea and the Solomons was to capture Rabaul. Rabaul was a major Japanese base on New Britain. Taking Rabaul would help clear the way to eventually retake the Philippines. Japan knew this was a threat. So, they kept sending more soldiers, ships, and planes to the area. They hoped to stop the Allied advances.
Japan's Risky Plan
By December 1942, Japan realized they might lose the battles at Guadalcanal and Buna–Gona. So, their military leaders decided to send more troops to the South West Pacific. They planned to send about 6,900 soldiers from Rabaul directly to Lae in New Guinea.
This plan was very risky. Allied air power in the area was strong. But, if the troops didn't go by sea, they would have to march a very long way. This march would be through tough swamps, mountains, and jungles with no roads. So, they decided to take the risk by sea.
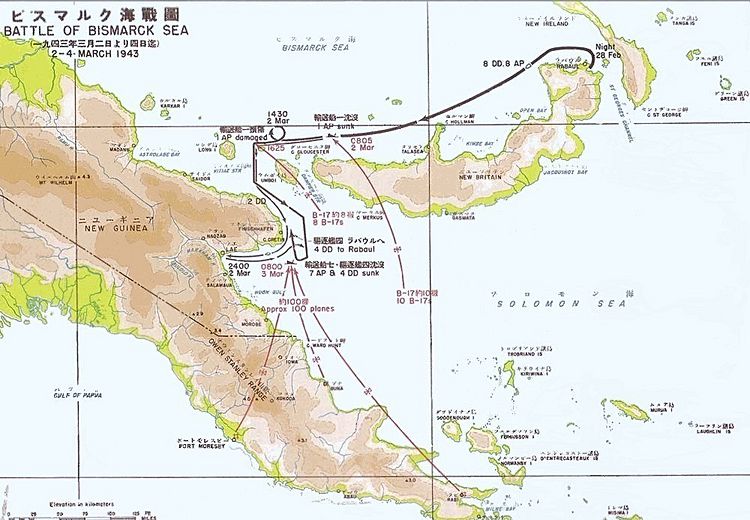
On February 28, 1943, the convoy left Simpson Harbour in Rabaul. It had eight destroyers and eight troop transports. About 100 fighter aircraft also flew along to protect them.
Allies Learn the Plan
The Allies had been watching Japan's preparations. Codebreakers in Melbourne (Australia) and Washington, D.C. (U.S.) were able to read secret Japanese messages. These messages told them where the convoy was going and when it would arrive.
The Allied Air Forces had also developed new ways to attack ships from the air. One new method was called skip bombing. They hoped these new tactics would help them sink the Japanese ships.
On March 1, a U.S. bomber spotted the convoy. The Allies then watched the convoy closely. On March 2 and 3, 1943, they launched a huge air attack. After the main air attacks, PT boats (small, fast patrol boats) and planes continued to attack on March 4. They targeted any remaining lifeboats and rafts.
In the end, all eight Japanese transport ships were sunk. Four of the escorting destroyers were also sunk. Out of 6,900 soldiers, only about 1,200 made it to Lae. Another 2,700 were rescued by destroyers and submarines and returned to Rabaul. After this, Japan stopped trying to send troops to Lae by ship. This made it much harder for them to stop the Allied attacks in New Guinea.
Allied Air Tactics
In the South West Pacific, the Allies couldn't bomb factories in Japan. So, their main goal was to stop Japanese supplies from reaching their forces. This meant attacking ships at sea. Earlier attacks on convoys hadn't worked very well. So, the Allies needed new ideas.
Group Captain Bill Garing from the RAAF suggested attacking Japanese convoys from different heights and directions at the same time.
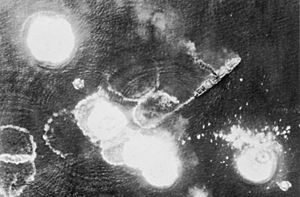
The Allies tried some new ways to attack. In February 1942, the RAAF started trying out skip bombing. This was a technique where bombers flew very low, just a few feet above the water. They would drop their bombs, which would then bounce across the water's surface. The goal was for the bombs to hit the side of the ship, or explode just above or under it.
Another similar method was called mast-height bombing. Here, bombers would fly low, about 200 to 500 feet high. Then, they would drop even lower, to about 10 to 15 feet, when they were close to the target. They would release their bombs aiming directly at the ship's side. This method proved to be more successful in the Battle of the Bismarck Sea.
For these low-level attacks to work, the planes first had to silence the ship's anti-aircraft guns. They did this by flying very close and shooting at the ships (strafing). To help with this, some U.S. Douglas A-20 Havoc bombers were changed. They had four heavy machine guns added to their noses. Later, they tried this with North American B-25 Mitchell medium bombers too. These B-25s were then used to strafe ships.
The Allied Air Forces had different types of bombers and fighters.
- Heavy bombers: Boeing B-17 Flying Fortresses and Consolidated B-24 Liberators.
- Medium bombers: B-25 Mitchells and Martin B-26 Marauders.
- Light bombers: Douglas A-20 Havocs and B-25 Mitchells.
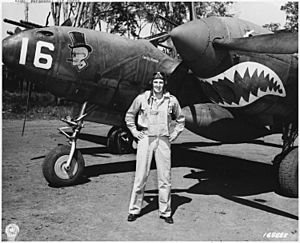
- Fighters: Bell P-39 Airacobras, Curtiss P-40 Warhawks, and Lockheed P-38 Lightnings. The P-38s were good for long-range escort missions.
The RAAF also had a special unit, No. 30 Squadron RAAF, with Bristol Beaufighter planes. These planes and their pilots were very good at low-level attacks.
The Battle
First Attacks
The Japanese convoy left Rabaul on February 28. It had eight destroyers and eight transport ships, plus about 100 fighter planes. This time, they took a route along the north coast of New Britain. They hoped this would trick the Allies into thinking they were going to Madang.
The convoy was moving slowly, at about 7 knots (about 8 miles per hour). Bad weather, with two tropical storms, kept it hidden for a while. But on March 1, a U.S. B-24 Liberator bomber spotted the convoy.
At dawn on March 2, six RAAF A-20 Bostons attacked Lae. This was to weaken its ability to protect the convoy. Around 10:00 AM, another Liberator found the convoy again. Eight B-17s took off to attack, followed by 20 more. The B-17s dropped 1,000-pound bombs from 5,000 feet. They claimed to have sunk up to three merchant ships. The Kyokusei Maru sank with 1,200 soldiers. Two other transports, Teiyo Maru and Nojima, were damaged.
The destroyers Yukikaze and Asagumo rescued 950 survivors from the Kyokusei Maru. These two destroyers then sped off to drop the survivors at Lae. The convoy, now smaller, was attacked again that evening by 11 B-17s. Only minor damage was done. During the night, RAAF PBY Catalina flying boats watched the convoy.
More Attacks
By March 3, the convoy was close enough for planes from Milne Bay to attack. Eight RAAF Bristol Beaufort torpedo bombers took off. Bad weather meant only two found the convoy, and they didn't hit anything. But the weather soon cleared.
A large force of 90 Allied planes took off from Port Moresby. At the same time, 22 RAAF A-20 Bostons attacked the Japanese fighter base at Lae. This helped reduce the air cover for the convoy. Attacks on the base continued all day.
At 10:00 AM, 13 B-17s reached the convoy. They bombed from 7,000 feet. This made the ships spread out, making them easier targets. Japanese Zero fighters attacked the B-17s, but P-38 Lightning fighters protected the bombers. One B-17 broke apart in the air. Some Japanese fighter pilots shot at the B-17 crew as they parachuted down and in the water. Allied P-38s then shot down five of these Japanese fighters.
Soon after, B-25s arrived. They dropped their bombs from 3,000 to 6,000 feet. These attacks didn't score many direct hits, but they kept the convoy ships separated. This made them perfect targets for low-level attacks.
Thirteen Beaufighters from No. 30 Squadron RAAF then approached the convoy at very low level. They made it look like they were torpedo bombers. The ships turned to face them, which was a mistake. This allowed the Beaufighters to hit the ships' anti-aircraft guns, bridges, and crews with their cannons and machine guns. A cameraman, Damien Parer, filmed this dramatic attack.
Right after, seven B-25s bombed from about 2,500 feet. Six more B-25s attacked at mast height (very low). The strafing attacks were very powerful. One co-pilot described seeing "human beings... blown off the deck by those machine guns."
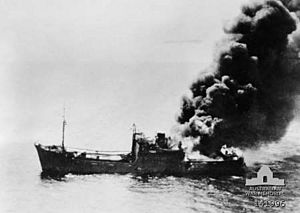
The destroyer Shirayuki was hit first. Many men on the bridge were hurt, including the Japanese escort commander, Rear Admiral Masatomi Kimura. A bomb hit caused an explosion, and the ship sank. The destroyer Tokitsukaze was also badly damaged and later sank. The destroyer Arashio was hit and crashed into the transport Nojima, disabling it. Both ships were abandoned.
Fourteen B-25s returned that afternoon, hitting more ships. By this time, one-third of the transports were sinking. Other Allied planes, including A-20 Havocs and more B-25s and Bostons, continued the attacks.
All seven of the Japanese transport ships were hit and were burning or sinking. The destroyers Shirayuki, Tokitsukaze, and Arashio were also sunk. Four destroyers—Shikinami, Yukikaze, Uranami, and Asagumo—picked up as many survivors as they could and went back to Rabaul.
That night, ten U.S. Navy PT boats went to attack the convoy. They found the burning transport Oigawa Maru and sank it with torpedoes. On the morning of March 4, a fourth destroyer, Asashio, was sunk by a B-17 bomb while rescuing survivors. Only one destroyer, Yukikaze, was undamaged among the four that survived.
About 2,700 survivors were taken to Rabaul by the destroyers. On March 4, about 1,000 more survivors were floating on rafts. For the next few nights, Allied PT boats and planes attacked Japanese rescue vessels and any remaining rafts or survivors in the water. This was done to prevent more Japanese troops from reaching New Guinea and rejoining the fight. Some Allied aircrew found this difficult, but it was seen as necessary.
On March 4, the Japanese tried to attack the Allied airfield at Buna, but they caused little damage.
Aftermath
The Battle of the Bismarck Sea was a huge defeat for the Japanese. Out of 6,900 soldiers needed in New Guinea, only about 1,200 made it to Lae. Another 2,700 were saved by ships and submarines and returned to Rabaul. About 2,890 Japanese soldiers and sailors died.
The Allies lost 13 aircrew members. Their aircraft losses were one B-17 and three P-38s in combat, plus two planes in accidents.
This victory was a big boost for Allied morale. News reports sometimes exaggerated the numbers, but it was clear the Allies had won a major battle.
The Allies used a lot of ammunition and bombs. They found that low-level attacks were much more accurate than high-altitude bombing. Also, attacking from many directions at once confused the Japanese defenses. This led to fewer Allied losses and more successful bombing. The battle proved that these new tactics worked.
After this disaster, Japan decided not to try landing troops at Lae by ship anymore. This battle caused serious worry for the safety of Lae and Rabaul. It led to a change in Japan's strategy. New Guinea operations became more important than those in the Solomon Islands. Japan sent more ships, weapons, and anti-aircraft units to other areas like Wewak or Hansa Bay.
A Japanese officer later said, "Our losses for this single battle were fantastic." He added that they could no longer send cargo ships or even fast destroyers to the north coast of New Guinea.
The Japanese plan to move the 20th Division to Madang was changed. It was delayed and the destination was moved further west to Hansa Bay. This was to avoid Allied air attacks. The troops reached Hansa Bay safely and then marched or used barges to get to Madang. They then tried to build a road from Madang to Lae, but the tough New Guinea weather and mountains stopped them.
Some submarines were used to bring supplies to Lae, but they couldn't carry enough. Japan had to develop new ways to move troops and supplies. They used coastal routes along New Guinea and New Britain, using Army landing craft. This made it very hard for Japan to stop Allied advances. After the war, Japanese officers estimated that about 20,000 troops were lost while trying to reach New Guinea from Rabaul. This was a big reason for Japan's defeat in the New Guinea campaign.
In April, Admiral Isoroku Yamamoto used extra air forces in Operation I-Go. This was an air attack meant to destroy Allied ships and planes. The operation didn't achieve much. Yamamoto himself was later killed in April 1943, due to Allied intelligence and air power.
Game Theory
In 1954, a writer named O. G. Haywood Jr. used the Battle of the Bismarck Sea as an example in an article. He showed how game theory could be used to understand the decisions made during the battle. Since then, the battle's name has been used for this type of zero-sum game in game theory.
Images for kids


