Battle of the Menin Road Ridge facts for kids
Quick facts for kids Battle of the Menin Road Ridge |
|||||||
|---|---|---|---|---|---|---|---|
| Part of the Third Battle of Ypres | |||||||
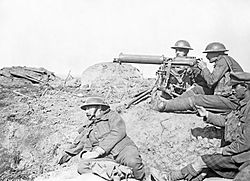 A British Vickers machine gun crew during the battle |
|||||||
|
|||||||
| Belligerents | |||||||
| Commanders and leaders | |||||||
| Douglas Haig Herbert Plumer Hubert Gough |
Erich Ludendorff Prince Rupprecht Friedrich Armin |
||||||
| Units involved | |||||||
| Second Army Fifth Army |
4th Army | ||||||
| Strength | |||||||
| 11 divisions | 5 divisions | ||||||
| Casualties and losses | |||||||
| 20,255 | 25,000 3,243 (POW) |
||||||
The Battle of the Menin Road Ridge was a major British attack during the First World War. It was part of the larger Third Battle of Ypres. This important battle took place from September 20 to 25, 1917, in the Ypres Salient area of Belgium.
Before this battle, the British army changed some of its fighting methods. They started using a "leap-frog" tactic for their infantry. This meant that groups of soldiers would stop at their first goal, while other groups would pass through them to attack the next goal. This new way of fighting worked better because the British had more artillery (big guns) and more airplanes to help from above.
In early September, the weather improved, making it easier to move supplies. The British also had better visibility, which helped them see German movements. The British soldiers successfully captured their targets and held them against German counter-attacks. This battle was a big win for the British and marked the start of a successful period for them in the war.
Why the Battle Happened
Protecting Allied Armies
The war on the Western Front was very tough. In Russia, their army was falling apart, which meant Germany might send more soldiers to the Western Front. France's army was also struggling. Because of this, the British commander, Sir Douglas Haig, believed the British attack at Ypres was very important. It was needed to protect the other Allied armies, even if the progress was slow due to bad weather.
New Ways of Fighting
The German army had strong defenses around Ypres. They used "defense-in-depth" tactics, meaning they had many strong points and concrete bunkers spread out. They also quickly counter-attacked any areas the Allies captured.
The British learned from earlier attacks that had been costly. General Herbert Plumer took charge of the main attack. He decided to use many more heavy artillery guns. These extra guns were meant to destroy German bunkers and machine-gun nests. The British also planned to hit German artillery positions harder.
The British changed their infantry tactics too. They aimed for shallower attacks, meaning they wouldn't try to push too far forward at once. Instead, they would capture a smaller area and then get ready to fight off German counter-attacks. This way, the German counter-attacks would meet a strong British defense, causing heavy losses for the Germans.
Getting Ready for Battle
British Preparations
The British army carefully studied how their previous attacks went. They learned that German defenses were very strong. General Plumer planned to capture the Gheluvelt Plateau in four steps, with six days between each step. This would give them time to move up artillery and supplies.
The British brought in many more artillery guns. They had more than double the number of guns compared to earlier battles. These guns would fire a "creeping barrage," which was a moving wall of shells that advanced just in front of the attacking soldiers. This helped protect the infantry and keep the Germans in their shelters.
The Royal Flying Corps (RFC), which was the British air force, also played a big role. They used planes to watch for German counter-attacks and to guide artillery fire. They also attacked German supply lines and airfields. This careful planning and extra firepower were key to the British strategy.
| Date | Rain mm |
°F | |
|---|---|---|---|
| 1 | 0.2 | 59 | dull |
| 2 | 1.1 | 63 | dull |
| 3 | 0.0 | 69 | fine |
| 4 | 0.0 | 71 | fine |
| 5 | 5.1 | 74 | fine |
| 6 | 24.6 | 77 | dull |
| 7 | 0.1 | 72 | dull |
| 8 | 0.0 | 72 | fog |
| 9 | 0.0 | 71 | fog |
| 10 | 0.0 | 66 | fine |
| 11 | 0.0 | 71 | fine |
| 12 | 0.0 | 62 | dull |
| 13 | 1.7 | 61 | — |
| 14 | 0.4 | 66 | dull |
| 15 | 0.1 | 67 | dull |
| 16 | 0.0 | 73 | dull |
| 17 | 0.0 | 67 | dull |
| 18 | 0.4 | 65 | fine |
| 19 | 5.1 | 72 | fine |
| 20 | 0.0 | 66 | dull |
Small Attacks Before the Main Battle
During early September, both sides tried to improve their positions. There were many small fights. For example, on September 1, a German attack was stopped at Inverness Copse. British units also tried to capture small hills and farms, sometimes succeeding and sometimes being pushed back. These small battles helped the British prepare for the main attack and test German defenses.
German Preparations
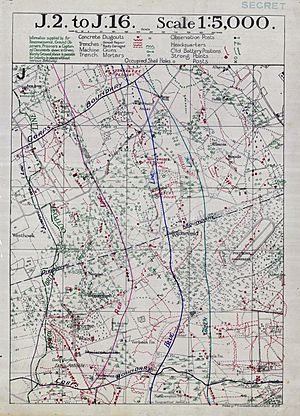
The Germans had several strong defensive lines east of Ypres. These included the Albrechtstellung, Wilhelmstellung, and Flandern I, II, and III Stellung. These lines had many concrete bunkers and machine-gun nests.
The German commander, Major-General Fritz von Loßberg, wanted his soldiers to hold their positions firmly. He believed that British attacks would eventually run out of steam and then be pushed back by German reserves. Even though the Germans had some success in August, their losses were very high.
The pause in British attacks in early September made some German commanders think the British offensive was over. This led them to move some divisions and air units to other parts of the front. This decision weakened the German defenses just before the big British attack.
The Battle Begins
On September 20, 1917, the British attack began. It had rained the night before, and a thick mist covered the ground at dawn. This mist helped hide the British soldiers as they advanced.
Second Army Attacks
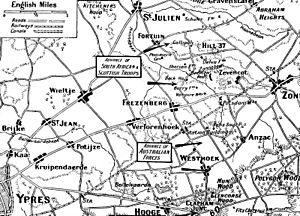
The British Second Army attacked on the right side of the front. The 19th (Western) Division faced tough German resistance from hidden bunkers and machine guns. Despite this, they reached their first objective. The mist made it hard to see, and some units lost their way, but they managed to reorganize.
Further north, the 39th Division and the 1st Anzac Corps (Australian and New Zealand soldiers) attacked the Gheluvelt plateau. They advanced behind a very powerful creeping barrage. This barrage had five layers of fire, making it very hard for the Germans to resist. Many German soldiers were so shocked by the bombardment that they surrendered quickly.
The 41st Division had a difficult time crossing a muddy valley. They faced heavy machine-gun fire from hidden German nests. Even though they couldn't capture all their objectives, they managed to stop all German counter-attacks throughout the day.
The 23rd Division was briefly held up by a German strong point in Dumbarton Wood. But they pushed through, despite heavy losses, and captured German fortifications along the Menin Road.
The 1st Australian Division quickly overcame German resistance in Glencorse Wood. They used clever tactics to get behind German machine-gunners in concrete shelters. They also captured important German strongholds, reaching their objectives on time.
The 2nd Australian Division surprised the German outposts and captured key positions. As the mist cleared, the British and Australians saw how much ground they had gained. They now had a good view of the German lines all the way to Broodseinde.
After the British and Australians reached their second objective, there were no German counter-attacks for two hours. This gave the Allied soldiers time to dig in and prepare. When German counter-attacks finally started, they were stopped by heavy British and Australian artillery and machine-gun fire.
Fifth Army Attacks
The Fifth Army attacked on the left side of the Second Army. They aimed to capture the Wilhelmstellung, a strong German defensive line. The Fifth Army had fewer heavy guns than the Second Army, so they used a three-layer creeping barrage.
The 9th (Scottish) Division faced very muddy ground in the Hanebeek valley. They used smoke and high explosive shells to clear German positions. They managed to capture Hanebeek Wood and other strong points, taking many prisoners.
The 55th (West Lancashire) Division had a harder time. They were short on soldiers and faced strong German machine-gun fire. The mist also helped the Germans hide their positions. Despite this, they eventually captured some key areas, including Gallipoli Farm and the Schuler Galleries. They also stopped German counter-attacks.
The 58th (2/1st London) Division advanced onto the Gravenstafel spur. They used a clever feint (a fake attack) to distract the Germans while their main attack came from the side. They captured important farms and took many prisoners and machine guns. Their success was due to good training, a strong creeping barrage, and smoke shells that blinded the Germans.
The 51st (Highland) Division attacked the Poelcappelle spur. The Germans fought fiercely from their machine-gun nests. But the division pushed forward and reached its final objective, getting a good view of the nearby village of Poelcappelle.
The 20th (Light) Division on the far left had to protect the northern side of the attack. They faced very strong German resistance in Eagle Trench. By the end of the day, they had not reached all their objectives, but they did capture parts of the trench.
After capturing the ground, the British quickly prepared their new positions for defense. They used captured German machine-gun nests and barbed wire. They set up communication lines using runners, dogs, pigeons, and wireless radios to stay in touch with their artillery.
Air Operations
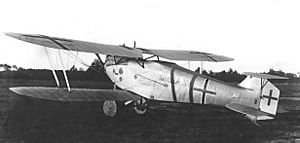
British aircraft played a crucial role. They were tasked with watching for German counter-attacks and reporting them immediately. Pilots flew low to attack German units moving on the ground. They also drove off German planes.
Despite the misty weather early on, air operations began as soon as it cleared. British anti-aircraft guns and machine guns on the ground also shot down several German planes trying to interfere.
German Counter-Attacks Fail
During the British advance, German artillery tried to fire back, but it wasn't enough to stop the British. British observation planes quickly spotted German reserve units moving up to counter-attack. These German units were seen advancing from their deeper defensive lines.
British artillery then fired heavily on these German units, forcing them to spread out and advance without cover. By the time they got close to the British lines, they were hit by intense machine-gun fire. The clear visibility helped the British and Australians see the Germans coming.
For example, a German force moving towards the 23rd and 1st Australian divisions was watched for an hour. Then, a massive artillery and machine-gun barrage hit them, stopping all movement. Similar barrages stopped other German counter-attacks. The German counter-attacks were largely defeated by nightfall.
Aftermath of the Battle
Casualties
The Battle of the Menin Road Ridge was a costly fight for both sides. The British suffered about 20,255 casualties, with 3,148 soldiers killed. However, they captured 3,243 German prisoners. German historians recorded about 25,000 German casualties, including 6,500 missing.
What Happened Next
After September 20, there were smaller attacks and counter-attacks. On September 21, British brigades attacked again and repelled several German counter-attacks. The Germans also tried to regain ground, but the British held their positions.
Crown Prince Rupprecht, a German commander, wrote that he couldn't let the British keep the high ground they had captured. He knew the German army needed time to prepare for another attack.
On September 25, a larger German attack took place. They used a huge amount of artillery. However, the German attack made little progress and lost direction in the mist. The British managed to hold most of their ground, setting the stage for the next major battle.
|


