
Naval order of 24 October 1918 facts for kids
Quick facts for kids Op. 269/A I |
|
|---|---|
| Part of Naval Operations in the First World War | |
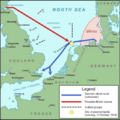
| File:German Naval Plan of 24 October 1918.svg |
|
| Location | 53°45′N 05°15′E / 53.750°N 5.250°E |
| Planned | 24 October 1918 |
| Planned by | German Naval Staff |
| Target | Southern North Sea |
| Date | 30–31 October 1918 |
| Executed by | High Seas Fleet under Admiral Hipper |
| Outcome | Cancellation following outbreak of mutiny in the German Fleet |
The German Navy's Secret Plan of 1918 was a bold idea by the German Navy leaders at the end of World War I. Their goal was to force a huge battle between their main fleet, called the High Seas Fleet, and the British Grand Fleet in the southern North Sea. This plan was made on October 24, 1918.
However, when the order to get ready was given on October 29, something unexpected happened: sailors on German ships refused to go. This protest stopped the operation. Even though the battle never happened, these protests led to bigger ones, especially the Kiel mutiny. This mutiny then sparked the November Revolution, which changed Germany's government and led to the creation of the Weimar Republic.
Why the Plan Was Made
Peace Talks Begin
This secret naval plan came about because Germany was trying to make peace. Starting on October 5, 1918, the new German government, led by Prince Max of Baden, began talking with U.S. President Woodrow Wilson. Germany asked President Wilson to help arrange a peace agreement.
One of President Wilson's main conditions was that Germany had to stop using its submarines to attack ships. Even though Admiral Scheer, the head of the German Navy Staff, didn't like this idea, the German government agreed on October 20. All German submarines at sea were called back by October 21.
In response, Admiral Scheer ordered Admiral Hipper, who commanded the High Seas Fleet, to get ready for a big attack on the British fleet. This attack would use the main battle fleet, plus new submarines. Admiral Hipper announced his plan on October 24, and Scheer approved it on October 27. The German ships then gathered at Schillig Roads near Wilhelmshaven to prepare for the battle.
The German Fleet's Situation
In October 1918, the German High Seas Fleet had 18 battleships and 5 battlecruisers. Most of these ships were built before the war started. Since the Battle of Jutland in May 1916, older, less powerful ships had been taken out of service. Two new battleships, Baden and Bayern, and a new battlecruiser, Hindenburg, had joined the fleet. However, one battleship, Rheinland, was too damaged to be fixed after it ran aground.
The German fleet had only gone on three major missions into the North Sea since June 1916. This long time without much action made the sailors feel bored and unhappy. It also made the officers feel less proud. There were even some protests by sailors in 1917. For example, 200 men from the battleship Prinzregent Luitpold were arrested in August, and two of them were executed.
The Grand Fleet
In late October 1918, the British Grand Fleet was based at Rosyth, Scotland. It had 35 battleships and 11 battlecruisers. Many of these ships were newer, built during the war, and had powerful 15-inch guns. The oldest main ship was HMS Indomitable, launched in 1908. Five of these ships were from the United States Navy, and one was from the Royal Australian Navy.
The British had fixed many problems their fleet had during the Battle of Jutland. They improved how they handled ammunition and added more armor to protect their ships. Their new "Green Boy" shells were much better at breaking through enemy armor. The British also had new weapons, like planes that could launch torpedoes from ships and fast steam-powered submarines, which the Germans didn't have.
During this time, the Spanish Flu pandemic was at its worst in the Grand Fleet. About 6% of the sailors got sick, and 1% died. For example, on October 23, 1918, 19 sailors (6% of the crew) on the light cruiser HMS Cardiff were sick. But by October 31, most were better. The destroyer HMS Torch was hit harder, with 37 sailors (41% of its crew) sick on October 31.
Despite the flu, the British sailors were in high spirits. They were eager for another big battle with the German fleet, especially because of their strong leader, Admiral Sir David Beatty.
British Intelligence
During World War I, British naval intelligence was very good at gathering information, especially by breaking enemy codes. This helped them win battles like Dogger Bank and Jutland. It also played a big part in the United States joining the war and in defeating German submarines from 1917 to 1918.
However, by late 1917, the Germans had made their communications more secure, making it harder for the British to spy on the High Seas Fleet. Between October 1917 and April 1918, the Germans managed to launch three surprise attacks into Norwegian waters. Each time, the British didn't get a warning in time to stop them.
Wireless communication was very important for controlling submarines at sea. But this also allowed the British to figure out where the submarines were. German submarines used a simpler code than their surface ships, which the British code-breaking team, Room 40, could usually read easily. In October 1918, these methods helped the British track German submarines near their home waters.
Getting Ready for Battle
The German Plan Details
The order for the High Seas Fleet's attack, issued on October 24, was very detailed:
|
Submarine Operations
The German High Seas Fleet had 24 submarines ready. They tried to call back more submarines from their missions and send them to the planned battle areas. They managed to get six more: U-43, U-108, UB-86, UB-96, UB-121, and UB-125. All these submarines were supposed to form six lines in the North Sea, waiting along the routes where the British fleet was expected to come. They would also wait outside British ports in Scotland.
Two of these submarines were lost. The first, U-78, left Heligoland on October 27 to lay mines off the Scottish coast. But on the same day, a British submarine, G2, sank her in the central North Sea. All 40 crew members died.
The second submarine lost was UB-116. She left Heligoland on October 25 with special orders to attack the British fleet's main base at Scapa Flow. Her captain, Hans Joachim Emsmann, had already sunk 26 ships. On the evening of October 28, she tried to enter Scapa Flow underwater. However, British listening devices on shore detected her. Special magnetic loops on the seabed, designed to find incoming ships and trigger mines, were activated. Emsmann raised his periscope to check his position and was spotted by lookouts. Mines exploded shortly after, disabling the submarine. British defense trawlers then finished her off with depth charges. All 37 crew members were lost.
Two other submarines, UB-98 and UB-118, crashed into each other on October 28 and had to return to port. Five more, U-43, U-67, UB-86, UB-87, and UB-130, also had to stop their missions because of mechanical problems.
How the British Reacted
The commanders of the British Fleet were expecting a battle. They had warned the fleet to prepare as early as October 14, 1918. On the afternoon of October 23, the British Admiralty (their navy headquarters) told Admiral Beatty that things were unusual. They also said they would send more destroyers from other bases to help him.
By late October 28, the situation was very tense. Vice Admiral Sydney Fremantle and Rear Admiral Reginald Hall, who were top intelligence officers, sent Admiral Beatty a full report. It said that the way German submarines were placed, along with new minefields, strongly suggested that Germany wanted to lure the Grand Fleet out. They didn't know exactly how, but they believed the German battle fleet wouldn't move before the next night. They thought Germany wouldn't risk a big fleet battle until the peace talks were settled. They also suspected that news reports about German submarines going home were fake, meant to hide a submarine trap.
For the next two days, Fremantle kept Beatty updated. He correctly reported that the German High Seas Fleet was gathering at Schillig Roads on the evening of October 29 and planned to sail on October 30. When Admiral Hipper unexpectedly delayed the operation on October 30, the British first thought it was due to fog.
The Plan Is Called Off
The German High Seas Fleet had gathered at Schillig Roads on the afternoon of October 29, ready to sail the next day. To keep the plan secret, they pretended it was just a training exercise, which was a common trick. The attack on the Thames and Flanders Coast was set for dawn on October 31, with the big battle against the British Fleet planned for that same afternoon and evening.
However, the evening of October 29 saw serious trouble and disobedience among the German sailors. They became convinced that their commanders wanted to sacrifice them to stop the peace talks. Many stokers (sailors who worked in the engine rooms) from the ships Derfflinger and Von der Tann didn't return from shore leave. There were also mass acts of disobedience on ships like Thüringen, Kaiserin, Helgoland, and Regensburg. Protests also happened on König, Kronprinz Wilhelm, and Markgraf. Even on the fleet's main ship, Baden, the crew's mood was dangerous.
These protests were mainly among the crews of the larger ships. The crews of torpedo boats, submarines, and minesweepers remained loyal. Because of this widespread refusal to obey orders, Admiral Hipper canceled the operation on October 30. He ordered the fleet to spread out, hoping to calm the protests. But when ships from the III Battle Squadron arrived at Kiel on November 1, their sailors helped start the Kiel mutiny on November 3, which had much bigger consequences.
Ships Involved
German Fleet Ships
The German fleet was organized into three main groups, plus submarines and airships:
- High Seas Fleet
- Commander-in-Chief: Admiral Franz Ritter von Hipper on the battleship Baden
- Scouting Forces (ships that scout ahead)
- Commander: Rear Admiral Ludwig von Reuter on battlecruiser Hindenburg
- I. SG (RAdm Reuter) battlecruisers: Hindenburg (Flagship), Derfflinger, Moltke, Von der Tann, Seydlitz
- II. SG (Commodore Viktor Harder) light cruisers: Königsberg (Flagship), Karlsruhe, Pillau, Nürnberg, Köln, Dresden, Graudenz
- Deputy Leader of Torpedo-Boats: Commander Hans Quaet-Faslem on light cruiser Frankfurt
- II. TBF destroyers: (3rd half-flotilla) G101, G104, V100, G103, G102; (4th half-flotilla) B97, B111, B109, B110, B112
- I. TBF (part of) torpedo boats: (2nd half-flotilla) V130, S133, S135, S134, S139
- VII. TBF (part of) torpedo boats: (13th half-flotilla) S138, V83, S65, V78, S56
- Commander: Rear Admiral Ludwig von Reuter on battlecruiser Hindenburg
- Main Body (under the Commander-in-Chief)
- III. BS (Vice Admiral Hugo Kraft), battleships: König (Flagship), Bayern, Grosser Kurfürst, Kronprinz Wilhelm, Markgraf
- Fleet Flagship: battleship: Baden (Flagship, Adm Hipper)
- I. BS (Vice Admiral Friedrich Boedicker) battleships: Ostfriesland (Flagship), Thüringen, Posen, Nassau, Oldenburg, Westfalen, Helgoland
- IV. BS (Vice Admiral Hugo Meurer) battleships: Friedrich der Grosse (Flagship), König Albert, Kaiserin, Prinzregent Luitpold, Kaiser
- Leader of Torpedo-Boats: Commodore Paul Heinrich on light cruiser Emden
- I. TBF torpedo boats: (1st half-flotilla) V129, G39, G86, G40, G38, S32
- V. TBF torpedo boats: (9th half-flotilla) G11, V6, V3, V2; (10th half-flotilla) G8, G10, V5
- VI. TBF torpedo boats: (11th half-flotilla) V128, V127, S132, S131, V126, V125; (12th half-flotilla) V43, V45, V44, S49, S50, V46
- IX. TBF torpedo boats: (17th half-flotilla) V80, S52, S51, S60, S36
- Minelaying Group
- IV. SG (Rear Admiral Johannes von Karpf) light cruisers: Regensburg (Flagship), Bremse, Brummer, Strassburg, Stralsund; attached minelayers: Arcona, Möwe
- VIII. TBF torpedo boats: (15th half-flotilla) T180, T193, T192, T195, T190, T189; (16th half-flotilla) torpedo boats: T178, T179, T176, T186
- Airships: L65, L64, L63, L52, L61, L56, SL22
- Submarines: Thirty U-boats were assigned to this operation, in six patrol lines: U-43, U-52, U-53, U-62, U-78, U-86, U-91, U-94, U-96, U-100, U-107, U-108, U-113, U-162, UB-64, UB-67, UB-80, UB-86, UB-87, UB-93, UB-96, UB-98, UB-116, UB-118, UB-121, UB-125, UB-126, UB-130, UB-131, UC-58.
British Fleet Ships
This list shows the main ships of the British Grand Fleet and other important commands in Home Waters on November 11, 1918. It does not include ships on other duties or smaller vessels. It only lists forces that would likely have been involved if the German attack had happened. Some of these ships might not have been ready to sail on October 30 due to repairs. The Grand Fleet was based at Rosyth, with one squadron usually at Scapa Flow for training.
- Grand Fleet
- Commander-in Chief: Admiral Sir David Beatty on battleship Queen Elizabeth (with attached destroyer: Oak)
- 1st BS (Admiral Sir Charles Madden) battleships: Revenge (Flagship), Emperor of India, Iron Duke, Benbow, Marlborough, Canada, Ramillies, Resolution, Royal Oak, Royal Sovereign (with attached cruiser: Blonde)
- 2nd BS (Vice Admiral Sir John de Robeck) battleships: King George V (Flagship), Orion, Ajax, Centurion, Conqueror, Monarch, Thunderer, Agincourt, Erin (with attached cruiser: Bellona)
- 4th BS (Vice Admiral Sir Montague Browning) battleships: Hercules (Flagship), Colossus, Bellerophon, Collingwood, Neptune, St. Vincent (with attached cruiser: Boadicea)
- 5th BS (Vice Admiral A C Leveson) battleships: Barham (Flagship), Malaya, Valiant, Warspite (with attached cruiser: Blanche)
- 6th BS (Rear Admiral H Rodman) battleships: New York(USN) (Flagship), Arkansas(USN), Florida(USN), Texas(USN), Wyoming(USN)
- Cruisers (with main body)
- 2nd CS (Rear Admiral E F Bruen) armored cruisers: Minotaur (Flagship), Cochrane, Shannon
- 4th LCS (Rear Admiral A F Everett) light cruisers: Calliope (Flagship), Cambrian, Caroline, Comus, Cordelia, Constance
- 7th LCS (Rear Admiral G H Borrett) light cruisers: Carysfort (Flagship), Aurora, Penelope, Undaunted, Cleopatra
- Flying Squadron (Rear Admiral R F Phillimore) aircraft carriers: Furious (Flagship), Argus, Vindictive, Nairana, Pegasus, Campania
- Battlecruiser Force
- Commander-in-Chief: Vice Admiral Sir William Pakenham on battlecruiser Lion
- 1st BCS (Rear Admiral Sir Henry Oliver) battlecruisers: Repulse (Flagship), Renown, Tiger, Princess Royal
- 2nd BCS (Rear Admiral Sir Lionel Halsey) battlecruisers: New Zealand (Flagship), Australia(RAN), Inflexible, Indomitable
- 1st CS (Vice Admiral T D W Napier) battlecruisers: Courageous (Flagship), Glorious
- 1st LCS (Rear Admiral W H Cowan): Inconstant (Flagship), Galatea, Royalist, Phaeton, Caledon
- 2nd LCS (Rear Admiral J A Fergusson): Birmingham (Flagship), Dublin, Melbourne(RAN), Sydney(RAN), Yarmouth
- 3rd LCS (Rear Admiral A T Hunt): Chatham (Flagship), Southampton, Chester, Birkenhead
- 6th LCS (Rear Admiral E S Alexander-Sinclair): Cardiff (Flagship), Calypso, Caradoc, Cassandra, Ceres
- Destroyer Command
- Commodore (Destroyers): Commodore H J Tweedie on light cruiser Castor
- 3rd DF leaders: Nimrod, Talisman; destroyers: Maenad, Mameluke, Marvel, Menace, Michael, Munster, Napier, Noble, Nonsuch, Onslaught, Petard; temporarily attached from 4th DF (Devonport): Lawford, Nizam, Norseman, Oracle, Oriana, Orpheus
- 11th DF leaders: Valorous, Seymour, Kempenfelt; destroyers: Romola, Sarpedon, Tancred, Tenacious, Tormentor, Vancouver, Vanessa, Vanity, Versatile, Viscount, Vittoria, Vivacious, Vortigern, Voyager, Walker, Walrus, Watchman
- 12th DF leaders: Valhalla, Saumarez; destroyers: Scimitar, Scotsman, Scout, Scythe, Seabear, Sepoy, Simoom, Sirdar, Speedy, Tomahawk, Torch, Trinidad, Tryphon, Vivien, Waterhen, Winchester, Wolsey, Wrestler
- 13th DF light cruiser: Champion, leaders: Valentine, Valkyrie; destroyers: Vimiera, Vega, Vectis, Violent; Vendetta, Verulam, Wakeful, Westminster; Verdun, Viceroy, Vesper, Venetia; Wolfhound, Ursa, Ursula, Urchin; Umpire, Ulster, Tower, Tristram; Vidette, Winchelsea, Westcott; Windsor, Whitley, Woolston, Walpole, Wessex
- 14th DF leaders: Vampire, Anzac; destroyers: Medina, Norman, Octavia, Opportune, Orford, Paladin, Patriot, Pellew, Penn, Peregrine, Peyton, Plover, Plucky, Pylades, Relentless, Sabre, Seafire, Seraph, Somme, Sparrowhawk, Splendid, Tactician, Tobago, Tyrant, Velox, Warwick, Whirlwind; due to transfer to 1st DF but temporarily retained by 14th DF: Nonpareil, Observer, Offa, Orestes
- 15th DF leaders: Parker, Grenville; destroyers: Patrician, Radstock, Raider, Rapid, Ready, Restless, Rigorous, Rob Roy, Rocket, Rosalind, Rowena, Sable, Sabrina, Salmon, Sorceress, Tirade, Trenchant, Undine; temporarily attached from 2nd DF (Buncrana): Marne, Medway, Michael, Mystic, Nicator, Pelican
- 21st DF (transferring from 6th DF, Dover) leaders: Botha, Douglas, Swift; destroyers: Mansfield, Melpomene, Milne, Miranda, Moorsom, Murray, Nugent, Phoebe
- Harwich Force
- 5th LCS (Rear Admiral Sir Reginald Tyrwhitt) light cruisers: Curacoa (Flagship), Coventry, Curlew, Concord, Centaur, Conquest, Danae, Dragon
- 10th DF leaders: Spenser, Shakespeare, Bruce, Montrose; destroyers: Radiant, Redgauntlet, Redoubt, Retriever, Satyr, Sceptre, Sharpshooter, Skate, Skilful, Springbok, Starfish, Stork, Sturgeon, Swallow, Sybille, Sylph, Taurus, Teazer, Tempest, Tetrarch, Thisbe, Thruster, Torrid, Truculent
- Dover Force
- 6th DF (Dover) leader: Broke; modern destroyers: Manly, Mastiff, Meteor, Morris, Termagant, Trident, Afridi, Amazon, Cossack, Crusader, Viking, Zubian
- Minelaying Destroyers
- 20th DF (Immingham) leaders: Abdiel, Gabriel, destroyers: Tarpon, Telemachus, Vanoc, Vanquisher, Venturous, Ferret, Legion, Prince, Sandfly
- Submarines operating with the Battle Fleet
- 12th S/MF: light cruiser: Fearless; submarines: K2, K3, K5, K6, K7, K8, K15
- 13th S/MF: leader: Ithuriel; K9, K10, K11, K12, K14, K16, K22
- North Sea Patrols
- 8th S/MF (Yarmouth) submarines: H21, H28, H29, H30, V1, V2
- 9th S/MF (Harwich) submarines: E29, E31, E41, E43, E45, E51, E52, E53, E56, L9, L15, L14, L17, C23, C25
- 10th S/MF (Tees) submarines: E27, E33, E39, E40, E42, E44, G6, G12, G13, L11, L12, L16
- 11th S/MF (Blyth) submarines: G1, G2, G3, G4, G5, G10, J2, J3, J4, J5, J6, J7
- 14th S/MF (Blyth) submarines: H8, H11, H12, H14, H15, H22, H23, H24, H25, H26, L8, R1, R2, R9, R12
Abbreviations Used
- Adm: Admiral
- BCS: Battle Cruiser Squadron
- BS: Battle Squadron (German: Geschwader)
- Cdre: Commodore (German: Kommodore)
- CS: Cruiser Squadron
- DF: Destroyer Flotilla
- F: Flagship (the ship where the commander is)
- FKpt: Fregattenkapitän (a German naval rank, like a frigate captain)
- hf: half-flotilla (German: halbflottille)
- LCS: Light Cruiser Squadron
- RAdm: Rear Admiral (German: Konteradmiral)
- (RAN): Means a ship from the Royal Australian Navy
- S/MF: Submarine Flotilla
- SG: Scouting Group (German: Aufklärungsgruppe)
- TBF: Torpedo-Boat Flotilla (German: Torpedoboot Flottille)
- (USN): Means a ship from the United States Navy
- VAdm: Vice Admiral (German: Vizeadmiral)
Images for kids
-
The German Naval Plan of 24 October 1918.

