Timeline of the Suez Crisis facts for kids
The Suez Crisis was a big event in history where several countries were involved in a conflict over the Suez Canal. This timeline explains the military plans and battles that happened during this time.
Contents
Planning for Conflict
British Plans
In July 1956, British Prime Minister Anthony Eden asked his top military general, Field Marshal Gerald Templer, to start planning an invasion of Egypt. Eden first wanted to use paratroopers to take the canal. But Templer and other military leaders said this plan wouldn't work because the paratroopers weren't trained enough.
Instead, they suggested a plan using sea power. This plan involved the Royal Marines taking over Port Said. This city would then be used as a base for British troops to take control of the Suez Canal area. Later, they added a plan to bomb Egypt to try and weaken its economy and remove its leader, Gamal Abdel Nasser.
French and Israeli Plans
At the same time, Israel's military chief, General Moshe Dayan, thought Israel should attack Egypt. Israel's Prime Minister, David Ben-Gurion, preferred to attack with France's help. By September 1956, France and Israel began secretly planning a war against Egypt. France wanted to use airfields in Cyprus to bomb Egypt, but if that wasn't possible, they hoped to use Israeli airfields.
Britain was told about this secret French-Israeli alliance in early October. Ben-Gurion explained Israel's goals: to secure shipping routes, stop attacks from Egyptian forces, and take control of the Sinai Peninsula. He also mentioned finding oil in Sinai and suggested building a pipeline to Israel.
Secret Agreement: The Protocol of Sèvres
In October 1956, after some hesitation, British Prime Minister Eden agreed to include Israel in the plan. Britain had been careful because of its alliances with Jordan and Iraq, fearing a negative reaction in the Arab world if they fought alongside Israel. However, winter was coming, and Eden needed to act quickly.
A secret meeting took place in Sèvres, near Paris. Britain and France asked Israel to join their plan against Egypt. They agreed that Israel would invade the Sinai. Then, Britain and France would step in, pretending to separate the fighting Israeli and Egyptian forces. They would tell both sides to move back 16 kilometers from the Suez Canal.
After this, Britain and France would argue that Egypt couldn't control such an important waterway alone. They would say it needed to be managed by Britain and France. Ben-Gurion didn't fully trust the British, but he agreed. He saw it as a good chance to strike back at Egypt.
The secret agreement, called the Protocol of Sèvres, set these dates:
- October 29: Israel would invade the Sinai.
- October 30: Britain and France would demand both sides leave the canal zone.
- October 31: Britain and France would begin their military operation.
British and French Operation Musketeer
General Stockwell proposed a plan called Operation Musketeer. It would start with a two-day air attack to gain control of the skies. Instead of Port Said, this plan aimed to capture Alexandria. After taking Alexandria from the sea, British tanks would fight a big battle south of Alexandria to defeat the Egyptian army.
Musketeer needed many soldiers. Britain could only provide 50,000 troops, but Stockwell estimated 80,000 were needed to defeat the 300,000-strong Egyptian Army. France agreed to provide the extra 30,000 troops.
General Charles Keightley was put in charge of Musketeer, with French Admiral Barjot as his second-in-command. Many officers found Stockwell to be very unpredictable. In contrast, most admired French General André Beaufre for his calm and sharp mind.
A big problem was the week-long delay between sending troops to the Mediterranean and starting the invasion. Also, winter weather would make the invasion impossible after late November. Prime Minister Eden also kept interfering with the planning. He was so secretive that he didn't even tell Keightley what the main goal was: whether to retake the canal, remove Nasser, or both. This made planning very difficult.
Later, Admiral Pierre Barjot suggested making Port Said the main target again. This would need fewer troops and shorten the delay before the invasion. General Keightley agreed to this idea, which led to the plan called "Revise."
Britain's top naval officer, Admiral Louis Mountbatten, strongly advised Eden against seizing the Suez Canal. He warned it would make the Middle East unstable, weaken the United Nations, divide the British Commonwealth, and hurt Britain's standing in the world. His advice was ignored, but he still worked hard to prepare the Royal Navy for war.
British and French Operation Revise
Operation Revise had three main parts:
- Phase I: British and French air forces would gain control of the skies over Egypt.
- Phase II: British and French air forces would launch a 10-day "aero-psychological" campaign to damage the Egyptian economy.
- Phase III: Troops would land by air and sea to capture the canal zone.
This plan was approved by the British and French governments on September 8, 1956. Both Stockwell and Beaufre thought Revise was too open-ended, without a clear final goal. However, Eden and Mollet liked it because it offered more political flexibility and might cause fewer Egyptian civilian deaths.
Israeli Preparations
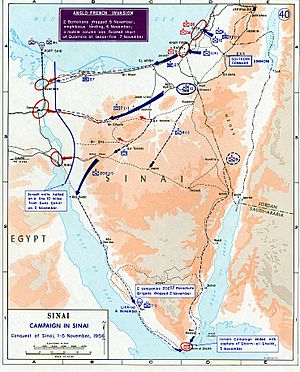
At the same time, Israel was preparing its own plan, called Operation Kadesh, to invade the Sinai. General Dayan's plan focused on using air power and quick battles to surround Egyptian forces. The Israeli Air Force would first gain control of the air. Then, Israeli forces would quickly surround and capture key Egyptian strongholds in the Sinai.
Israel's main military targets were Sharm el-Sheikh, Arish, Abu Uwayulah (also known as Abu Ageila), and the Gaza Strip. Egypt had blocked the Tiran Straits (near Sharm el-Sheikh) since 1953, and capturing Sharm el-Sheikh would give Israel access to the Red Sea and the Indian Ocean. The Gaza Strip was targeted to remove training areas for Fedayeen groups and prevent Egypt from using it to attack Israeli troops. Arish and Abu Uwayulah were important centers for the Egyptian Army in the Sinai. Taking these four targets was meant to make the entire Egyptian Army retreat into Egypt.
Operation Kadesh used an "outside-in" approach. Israeli paratroopers would first capture distant points, and then those closer to Israel. For example, Colonel Ariel Sharon's 202nd Paratroop Brigade was to land far west in the Sinai to take the Mitla Pass. This would cut off Egyptian supply lines in the eastern Sinai.
American Intelligence
The American Central Intelligence Agency (CIA) was watching these activities. They took high-altitude photos and gathered information from sources in London, Paris, and Tel Aviv.
Operation Kadesh Begins
Start of the Conflict
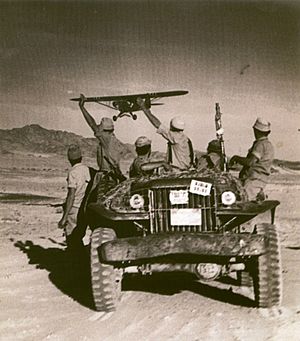
The conflict began on October 29, 1956. Israeli Air Force Mustang planes attacked Egyptian positions across the Sinai. Israeli soldiers were also placed along the border with Jordan because Israel expected Jordan to join the war.
The Israel Border Police enforced a curfew in Israeli-Arab villages near the Jordanian border. This led to the tragic killing of 48 civilians in the village of Kafr Qasim. The police involved were later tried and jailed. This event had a big impact on Israeli law regarding ethics in war.
Early Actions in Southern Sinai
General Moshe Dayan first planned to block the important Mitla Pass. He wanted a paratrooper battalion, led by Lieutenant Colonel Rafael Eitan, to drop near the pass. The rest of the brigade, led by Colonel Ariel Sharon, would then advance to meet them.
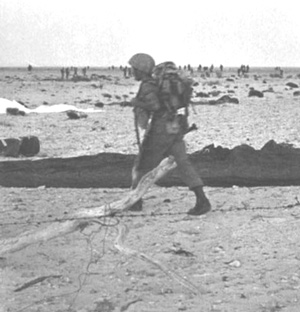
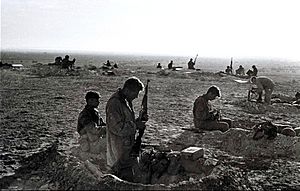
On October 29, Israeli paratroopers were dropped into the Sinai Peninsula, east of the Suez Canal. At the same time, four Israeli P-51 Mustangs cut all overhead telephone lines in the Sinai, making it hard for Egyptian commanders to communicate. Due to a navigation mistake, the paratroopers landed three miles from their target. Eitan marched his 400 men to Jebel Heitan, where they dug in and received supplies from French planes.
Colonel Sharon's 202nd Paratroop Brigade quickly moved towards the Mitla Pass. Many of their vehicles broke down. Dayan's efforts to keep the attack a surprise worked. The Egyptian commander, Field Marshal Abdel Hakim Amer, first thought the Israeli attack was just a large raid, not a full invasion. He didn't order a general alert. By the time Amer realized his mistake, the Israelis had already advanced far into the Sinai.
Early Actions: Gulf of Aqaba and Central Front
As paratroopers landed, the Israeli 9th Infantry Brigade captured Ras al-Naqb. This was an important starting point for their later attack on Sharm el-Sheikh. Instead of a direct attack, they surrounded the town at night, surprising the Egyptians, who then surrendered without any Israeli casualties.
The 4th Infantry Brigade, led by Colonel Josef Harpaz, captured al-Qusaymah. This would be used as a base for the attack on Abu Uwayulah. Colonel Harpaz surrounded al-Qusaymah with two groups from the southeast and northeast in a night attack. After a short battle, the Israelis took al-Qusaymah.
Battle of Jebel Heitan
Sharon's paratroopers continued to advance to meet the 1st Brigade. On the way, Sharon attacked Themed at dawn and captured the town with his tanks. His men then came under attack from Egyptian MIG-15 jets. On October 30, Sharon met Eytan near Nakla.
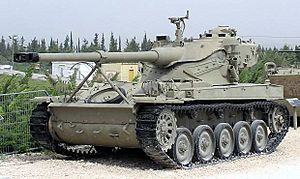
Dayan had not planned for more advances beyond the passes, but Sharon decided to attack Egyptian positions at Jebel Heitan. Sharon sent his lightly armed paratroopers against Egyptians who were dug in and supported by aircraft, tanks, and heavy artillery. Sharon believed the Egyptian 4th Armored Division was arriving and would destroy his forces if he didn't take the high ground. He sent two infantry companies and some AMX-13 tanks into the Heitan Defile on the afternoon of October 31.
The Egyptian forces were in strong defensive positions and fired heavily. Sharon's men were forced to retreat into a "Saucer" area, where they were surrounded. Sharon sent in another force, while his trapped men used the cover of night to climb the walls of the Heitan Defile. The Egyptians were defeated and forced to retreat. In this battle, 260 Egyptian and 38 Israeli soldiers were killed.
Although it was an Israeli victory, Sharon was criticized for attacking Jebel Heitan without permission. He was also criticized for not realizing that with the Israeli Air Force controlling the skies, his men were not in as much danger from Egyptian tanks as he thought. Dayan defended Sharon's decision to attack without orders but criticized his head-on tactics, which led to many casualties.
Air Operations: First Phase
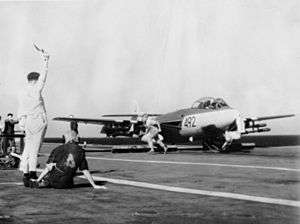
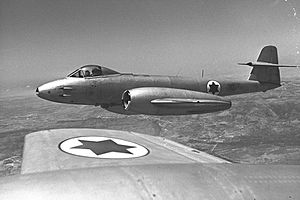
From the start, the Israeli Air Force dropped paratroopers, flew supplies, and carried out medical evacuations. Israel's new French-made Dassault Mystere IV jets provided air cover. In the early part of the conflict, the Egyptian Air Force attacked Israeli ground forces. They used their new Soviet-made MiG-15 jets as escorts, while older British-made De Havilland Vampire and Gloster Meteor jets attacked Israeli troops.
In air battles, Israeli planes shot down seven to nine Egyptian jets, losing only one of their own. However, Egyptian attacks on ground forces continued until November 1. On October 31, Israeli planes heavily attacked the Egyptian 1st Armored Brigade as it moved towards Abu-Ageila, causing great damage. Eight Egyptian MiG-15s attacked the Israeli planes, damaging two. Egyptian anti-aircraft fire hit five more Israeli planes and killed two pilots.
The next day, with British and French forces joining the war, Israeli and French planes again attacked the Egyptian 1st Armored Brigade. When British and French air and naval forces attacked, President Nasser ordered his pilots to fly their planes to bases in southern Egypt. This left the Israeli Air Force free to attack Egyptian ground forces as Israeli troops advanced into the western Sinai.
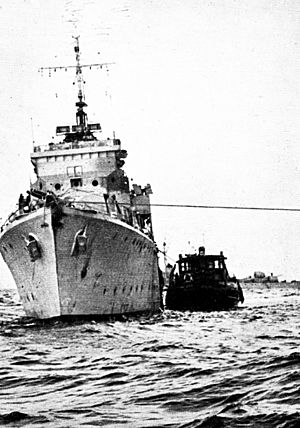
On November 3, Israeli Dassault Mystère jets attacked a British warship, HMS Crane, which they mistook for an Egyptian ship. The ship was hit with rockets, cannon fire, and napalm bombs, causing damage and wounding three crewmen. The ship fired back, and there are different stories about whether it shot down an attacking jet.
On October 30, the Egyptian Navy sent the Ibrahim el Awal, a former British destroyer, to Haifa to shell its oil facilities. On October 31, Ibrahim el Awal reached Haifa and began firing its guns. The French destroyer Kersaint, guarding Haifa port, fired back but missed. The Ibrahim el Awal then turned northwest.
The Israeli destroyers INS Eilat and INS Yaffo, along with two Israeli Air Force Dassault Ouragans, chased and attacked the Egyptian warship. They damaged its engine, rudder, and anti-aircraft guns. Without power and unable to steer, Ibrahim el Awal surrendered to the Israeli destroyers. Two Egyptian crew members were killed and eight wounded. The Egyptian destroyer was later added to the Israeli Navy and renamed INS Haifa.
On the night of October 31, in the northern Red Sea, the British light cruiser HMS Newfoundland fought and sank the Egyptian frigate Domiat. The Domiat was left a burning wreck after a short battle. The British destroyer HMS Diana then sank it. Of the Domiat's crew, 38 were killed and 69 were rescued. British losses were one killed and five wounded. On November 4, Egyptian torpedo boats attacked a British destroyer off the Nile Delta. The attack was stopped, with three torpedo boats sunk.
Abu Uwayulah Operations
The village of Abu Uwayulah, 25 km inside Egypt, was a key target for Israel because it was a central road hub for the entire Sinai. East of Abu Uwayulah were ridges forming a natural defense area called the "Hedgehog." About 3,000 Egyptian soldiers held this area in well-fortified trenches.
On October 30, an Israeli tank attack on the Umm Qataf ridge failed. The Egyptian commander, Colonel Yassa, was wounded and replaced. To the south, another Israeli unit found a gap in the "Hedgehog" defenses. Israeli forces quickly stormed and took this gap. The new Egyptian commander did not realize how dangerous this breakthrough was.
Led by Colonel Avraham Adan, an Israeli force entered the gap and attacked Abu Uwayulah at dawn on October 31. After an hour of fighting, Abu Uwayulah fell to the Israelis. At the same time, another Israeli battalion attacked the Ruafa ridge.
Meanwhile, another Israeli attack on the eastern "Hedgehog" failed. By noon, the Israeli Air Force launched many airstrikes on Egyptian positions, sometimes accidentally hitting their own ground forces. After taking Abu Uwayulah, Adan sent all his forces against the Ruafa ridge. A chaotic battle with much hand-to-hand fighting took place on the night of October 31. Even though every Israeli tank involved was destroyed, Ruafa fell to the Israelis after a night of fighting.
On the morning of November 1, Israeli and French planes attacked Egyptian troops at Umm Qataf with napalm. The 10th Brigade, joined by the 37th Armored Brigade, attacked Umm Qataf again but were defeated. However, the fierce Israeli attacks and low supplies of water and ammunition caused the Egyptian commander to order a general retreat from the "Hedgehog" on the evening of November 1.
Gaza Strip Operations
The city of Rafah was important because controlling it would separate the Gaza Strip from the Sinai and open a path to northern Sinai. Egyptian and Palestinian forces held the forts outside Rafah. Israeli forces, including the 1st Infantry Brigade and 27th Armored Brigade, were assigned to capture Rafah.
Dayan ordered Israeli forces to focus on breaking through rather than clearing every Egyptian strongpoint. The attack began with Israeli engineers clearing paths through the minefields around Rafah at night. French warships provided fire support.
Using the cleared paths, Israeli tanks entered Rafah. They quickly took Crossroads 12, losing 2 killed and 22 wounded. In the north, Israeli troops fought confused night battles but successfully stormed Hills 25, 25A, 27, and 29, losing six killed. On the morning of November 1, Israeli AMX-13 tanks surrounded and took Hills 34 and 36. At this point, the Egyptian general ordered his forces to leave their posts outside Rafah and retreat into the city.
With Rafah mostly cut off, Dayan ordered the 27th Armored Brigade's AMX-13s to move west and take al-Arish. By this time, Nasser had ordered his forces to retreat towards the Suez Canal, so the Israelis met little resistance at first. General al-Abd and his men left Rafah through a gap in the Israeli lines and headed back to the canal zone. Three hours later, the Israelis took Rafah.
There were reports that after taking Rafah, Israeli troops killed 111 people, including refugees, in Rafah's Palestinian refugee camp. The details of these killings are debated. The Israelis later faced strong opposition at the Jeradi Pass in northern Sinai. A combination of flanking attacks and airstrikes led to an Egyptian defeat there. On November 2, Israeli forces took al-Arish without a fight, as its defenders had retreated.
Meanwhile, Israeli forces attacked Egyptian defenses outside Gaza City late on November 1. After breaking through, Israeli tanks entered Gaza City. They attacked the al-Muntar fortress, killing or capturing 3,500 Egyptian National Guard troops. By noon on November 2, there was no more Egyptian resistance in Gaza City. On November 3, Israeli forces attacked Egyptian and Palestinian forces at Khan Yunis. After a fierce battle, Israeli tanks broke through the strong defenses held by the 86th Palestinian Brigade.
After street fighting with Egyptian soldiers and Palestinian fedayeen, Khan Yunis fell to the Israelis. There are claims of a massacre after Khan Yunis fell, known as the Khan Yunis killings. Israel stated that Palestinians were killed in street fighting, while Palestinians claimed Israeli troops executed unarmed people. The United Nations Relief and Works Agency reported that 275 people were killed in the massacre.
In both Gaza City and Khan Yunis, street fighting led to the deaths of "dozens, perhaps hundreds, of non-combatants." Food and medicine distribution for refugees was difficult because some Palestinians looted warehouses. Israel also believed the UNRWA, not Israel, was responsible for refugee care, which slowed aid. By noon on November 3, Israel controlled almost the entire Gaza Strip. The UN estimated that 447 to 550 Palestinian civilians were killed by Israeli troops during the first weeks of Israeli occupation.
Sharm el-Sheikh Operations
By November 3, Israel had successfully taken the Gaza Strip, Arish, the Hedgehog, and Mitla Pass. Sharm el-Sheikh was the last Israeli objective. The main challenge for Colonel Abraham Yoffe's 9th Infantry Brigade was getting supplies, as there were no good roads linking Ras an-Naqb to Sharm el-Sheikh. After taking Ras an-Naqb on October 30, Dayan ordered Yoffe to wait until Israel had full control of the air.
To outflank Sharm el-Sheikh, Dayan ordered paratroopers to take the town of Tor in western Sinai. The Egyptian forces at Sharm el-Sheikh had a very strong defensive position but had been heavily bombed by Israeli planes since the war began. Yoffe set out for Sharm el-Sheikh on November 2. His biggest problems were the difficult land and vehicle breakdowns. Israeli Navy ships supported the 9th Division as it advanced.
After many small fights on the edges of Sharm el-Sheikh, Yoffe ordered an attack on the port around midnight on November 4. After four hours of heavy fighting, Yoffe ordered his men to retreat. On the morning of November 5, Israeli forces launched a huge artillery attack and napalm strikes against the Egyptian defenders. At 9:30 am on November 5, the Egyptian commander surrendered Sharm el-Sheikh. The Israelis lost 10 killed and 32 wounded, while the Egyptians lost about 100 killed and 31 wounded. Another 864 Egyptian soldiers were taken prisoner.
British and French Canal Invasion
To support the invasion, Britain and France sent many air forces to Cyprus and Malta. The airbases on Cyprus were so full that a third, less-used airfield had to be opened for French planes. Even the RAF base in Malta was very crowded with British bombers.
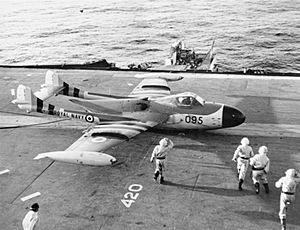
The British sent aircraft carriers HMS Eagle, Albion, and Bulwark. France had the battleship Jean Bart and aircraft carriers Arromanches and La Fayette. Additionally, HMS Ocean and Theseus were used for Britain's helicopter assault, which was the world's first.
The combined British and French fleet was watched closely and even bothered by the United States Sixth Fleet, which included the carriers USS Coral Sea and USS Randolph, later joined by USS Forrestal.
Revise: Phases I and II
On the morning of October 30, Britain and France sent final warnings to Egypt and Israel. They started Operation Musketeer on October 31 with a bombing campaign. Nasser responded by sinking all 40 ships in the canal, closing it to all shipping until early 1957.
Despite the risk of an invasion, Field Marshal Abdel Hakim Amer ordered Egyptian troops in the Sinai to stay put. He told Nasser that Egyptians could defeat the Israelis and then the British and French. Amer also advised Nasser to send more troops into the Sinai, even though they risked being cut off if the canal zone was seized. Only late on October 31 did Nasser ignore Amer's hopeful view and order his forces to retreat from the Sinai back to the canal zone to face the expected British and French invasion. Eden and Mollet ordered Phase I of Operation Revise to begin 13 hours after their ultimatum.
British bombers from Cyprus and Malta flew towards Cairo to destroy its airport. However, Eden personally ordered them back when he learned American civilians were being evacuated there. Fearing a negative reaction if Americans were killed, Eden sent the bombers back to Malta. Other planes were ordered to hit Almaza airbase outside Cairo. British night bombing was not very effective.
Starting on the morning of November 1, planes from aircraft carriers began daytime attacks on Egypt. By the night of November 1, the Egyptian Air Force had lost 200 planes. With Egypt's air force mostly destroyed, General Keightley ordered the start of Revise Phase II, which involved widespread attacks to stop enemy movements. On November 3, French planes attacked the aerodrome at Cairo. One French plane was shot down, and its pilot was captured and executed by the Egyptians.
The very aggressive French General Beaufre suggested that British and French forces should seize the canal zone immediately with airborne landings, instead of waiting the planned ten days for Revise II to finish. He argued they should take the risk of sending paratroopers without sea landings for several days. By November 3, Beaufre finally convinced Keightley and Stockwell of his idea, and they approved Operation Telescope, the code name for the airborne assault on the canal zone.
On November 2, 1956, Admiral Mountbatten sent a letter to Eden, telling him to stop the invasion before troops landed, as it was already too costly politically. The next day, Mountbatten made a desperate phone call to Eden asking to cancel the invasion, but he was refused. Mountbatten's views caused disagreements with General Gerald Templer, who supported the invasion. Templer wrote a memo saying that the action had stopped a dangerous trend and possibly prevented a larger war.
Paratroopers Land
In the early morning of November 5, an advance group of the British Parachute Regiment dropped onto El Gamil Airfield, a narrow strip of land. The paratroopers couldn't return fire while landing, but once on the ground, they used their weapons effectively. After taking the airfield with a dozen casualties, the rest of the battalion arrived by helicopter. They then secured the area around the airfield.
During the street fighting, Egyptian forces fought defensively, trying to cause as many casualties as possible and only retreating when faced with overwhelming force. Their SU-100 tank destroyers were very effective in city fighting. The British forces moved towards Port Said with air support before digging in to wait for the beach assault. With close support from carrier-based planes, the British paratroopers took Port Said's sewage works, then the cemetery, killing about 30 Egyptians without losing any men. They then fought a fierce battle for the Coast Guard barracks, where strong fire from the defenders stopped their advance. An attack by supporting planes caused heavy casualties for the defenders. Overall, the British paratroopers defeated the Egyptians, losing 4 dead and 32 wounded.
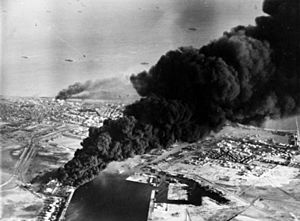
At the same time, Lieutenant Colonel Pierre Chateau-Jobert landed with French paratroopers at Raswa. Raswa had a small drop zone surrounded by water, but the French general assured them it was manageable. 500 heavily armed French paratroopers, quickly moved from Algeria, jumped over the al-Raswa bridges. They quickly secured the western bridge, putting Egyptian positions out of action with bazookas and mortars. French planes provided close air support, destroying several SU-100 tanks. Other planes hit two large oil storage tanks in Port Said, which caught fire and covered most of the city in thick smoke for days. Egyptian resistance varied; some fought until destroyed, while others gave up easily. The French paratroopers stormed and took Port Said's waterworks that morning, an important target in a desert city. Chateau-Jobert then began an attack on Port Fuad. An American military historian later wrote that "Air support and fierce French assaults transformed the fighting at Port Fuad into a rout." During the fighting, French paratroopers often took no prisoners and executed Egyptian POWs.
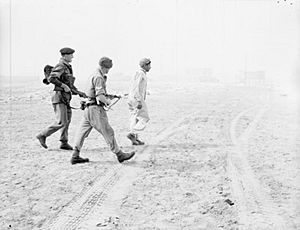
The Egyptian commander at Port Said, General Salahedin Moguy, then offered a truce. He met with British and French generals and was offered terms to surrender the city and march his men to the Gamil airfield to be taken to prisoner-of-war camps in Cyprus. Moguy had no intention of surrendering; he only offered the truce to gain time for his men to dig in. When fighting resumed, vans with loudspeakers drove through the city, encouraging resistance by announcing that London and Paris had been bombed by the Russians and that World War III had started. Since the paratroopers alone were not enough, Beaufre and British Admiral Manley Laurence Power urged that the sea landings be sped up to the very next day.
Stockwell and Knightley, who wanted to stick to the original plan, opposed this. Stockwell always preferred to follow plans strictly, while Beaufre was open to changing plans based on new situations. The American historian Derek Varble summarized their differences: Stockwell liked existing plans because they reduced risks, while Beaufre saw plans as just a means to an end, easily changed by new circumstances.
Royal Marines Land at Port Said
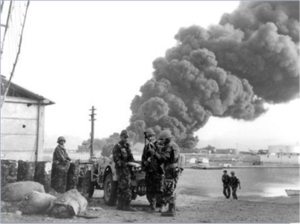
At first light on November 6, commandos of No. 42 and 40 Royal Marines stormed the beaches using old World War II landing craft. Warships offshore fired, providing cover for the landings and causing significant damage to Egyptian defenses. The town of Port Said was heavily damaged and seen to be on fire.
The men of 42 Commando tried to bypass Egyptian positions and focus on breaking through inland. The Royal Marines of 40 Commando were supported by Centurion tanks as they landed on Sierra Red beach. When they entered downtown Port Said, the Marines faced fierce city combat as Egyptians used buildings like the Casino Palace Hotel as strongholds.
Nasser declared the Suez War a "people's war." Egyptian troops were ordered to wear civilian clothes, and guns were given to civilians. Nasser believed this would create a dilemma for the British and French. If the Allies reacted aggressively, it would kill innocent civilians, gaining world sympathy for Egypt and lowering morale in Britain and France. If they reacted cautiously, Allied forces would get bogged down by sniper attacks from people hiding among civilians.
These tactics worked well against the British. British leaders, especially Eden and Admiral Mountbatten, were afraid of being called "murderers" and tried to limit Egyptian civilian deaths. Eden often interfered with the bombing plans, removing targets that might cause too many civilian deaths. He also limited the size of guns used at the Port Said landings to minimize casualties.
The American historian Derek Varble noted that Eden's concern for civilians and the goal of the bombing campaign (to terrorize Egyptians) were contradictory. Despite Eden's efforts, British bombing still killed hundreds of Egyptian civilians, mostly due to inaccurate aiming. In Port Said, heavy street fighting and fires destroyed much of the city and killed many civilians.
In the afternoon, 522 more French paratroopers were dropped near Port Fuad. These troops were constantly supported by French naval planes, which flew many missions. For example, even with catapult problems, the French carrier La Fayette completed 40 combat flights. The French were also helped by AMX-13 light tanks. While clearing Port Fuad, the French paratroopers killed 100 Egyptians without losing any men. After securing Port Fuad, the French continued to face occasional sniper fire and fought a tough battle for an Egyptian police post, losing two soldiers while killing or capturing all 72 defenders.
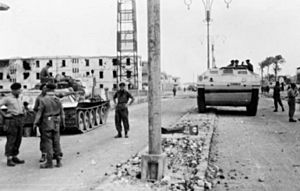
British commandos of No. 45 Commando assaulted by helicopter. They met strong resistance, with shore batteries hitting several helicopters. Also, friendly fire from British carrier-based aircraft mistakenly hit 45 Commando. One Marine was killed and 15 wounded when a plane mistakenly fired into a group of Marines. This helicopter assault was the first time UK forces used helicopters to drop men directly into a combat zone. Lieutenant Colonel Norman Tailyour, leading 45 Commando, was accidentally landed in a stadium still controlled by Egyptians, leading to a very quick retreat. Street fighting and house clearing, with strong opposition from well-hidden Egyptian snipers, caused more casualties. Most Egyptian soldiers now wore civilian clothes and operated in small groups, but they remained organized. Civilians who took up arms were also organized into groups. The Egyptians were slowly pushed back as the British took key targets. In one case, five British officers were killed or wounded by an Egyptian hidden in a wardrobe.
Especially fierce fighting happened at Port Said's Customs House and Navy House. The Egyptians destroyed Port Said's Inner Harbour, forcing the British to use the Fishing Harbour to land their forces. The 2nd Battalion of the Parachute Regiment landed by ship in the harbor. Centurion tanks of the British 6th Royal Tank Regiment landed and reached the French paratroopers by noon. The British and French forces met near the Suez Canal Company offices. While the building was easily captured, the surrounding warehouses were heavily defended and taken only after fierce fighting, in which two British soldiers were killed. The warehouses were taken with help from Centurion tanks firing at close range. While the British were landing at Port Said, the French paratroopers at Raswa fought off Egyptian counter-attacks involving SU-100 self-propelled guns.
After getting into position in downtown Port Said, 42 Commando moved down the main north-south road to meet the French forces at the Raswa bridge. They also took Port Said's gasworks. Meanwhile, 40 Commando, supported by the Royal Tank Regiment, continued clearing the downtown area of Egyptian snipers. Colonel Tailyour arranged for more reinforcements to be brought in by helicopter.
Hearing rumors that Moguy wanted to surrender, both Stockwell and Beaufre left their command ship for Port Said. Upon landing, they learned the rumors were false. Instead of returning to their ship, they spent the day in Port Said and were cut off from news. Only late in the day did they learn about the United Nations ceasefire. Instead of focusing on breaking out to take al-Qantarah, the Royal Marines got stuck clearing every building in Port Said of snipers. The Centurions of the Royal Tank Regiment, supported by French paratroopers, began a slow advance towards al-Qantarah on the night of November 6.
Egyptian sniper attacks and the need to clear every building slowed the British paratroopers' efforts to link up with the Royal Marines. When Stockwell learned the ceasefire would start in five hours at 9:00 pm, he ordered Colonel Gibbon and his Centurions to race to take al-Qantarah quickly to improve the Allied bargaining position. What followed was a confused series of close-quarters battles down the road to al-Qantarah. British forces reached al-Cap, a small village four miles north of al-Qantarah, at 2:00 am, when the ceasefire took effect. Total Royal Marine casualties in the Port Said landings were 9 killed and 60 wounded.
Images for kids


