Battle of St Quentin Canal facts for kids
Quick facts for kids Battle of St Quentin Canal |
|||||||
|---|---|---|---|---|---|---|---|
| Part of the Hundred Days Offensive of World War I | |||||||
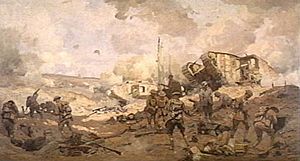 Breaking the Hindenburg Line by William Longstaff |
|||||||
|
|||||||
| Belligerents | |||||||
|
|
|||||||
| Commanders and leaders | |||||||
| Strength | |||||||
| 32 divisions: 30 British Empire; two United States divisions | 39 divisions | ||||||
| Casualties and losses | |||||||
The Battle of St Quentin Canal was a very important battle during World War I. It started on September 29, 1918. This battle involved soldiers from Britain, Australia, and America. They were all part of the British Fourth Army, led by General Sir Henry Rawlinson.
The main goal was to break through a very strong German defense line called the Hindenburg Line. In this area, the Germans used the St Quentin Canal as part of their defenses. The attack was successful, breaking through the Hindenburg Line for the first time. This victory, along with other Allied attacks, made the German leaders realize they could not win the war.
Contents
Why the Battle Happened
General Rawlinson wanted the Australian Corps, led by Lieutenant General Sir John Monash, to lead the attack. The Australians were known for being very good fighters. However, Monash was worried because his Australian troops were tired and low on numbers. They had been fighting hard for many months.
Monash was happy when Rawlinson offered him the American II Corps. This group included the U.S. 27th and 30th Divisions. American divisions had twice as many soldiers as British ones. Major General George Windle Read, the U.S. Corps commander, put his American forces under Monash's command for the battle.
However, the American soldiers were new to battle. So, 217 experienced Australian officers and non-commissioned officers (N.C.O.s) were sent to help and advise the U.S. troops. The British leaders thought the German soldiers were losing their spirit and would not fight as hard. Monash believed the battle would be more about careful planning and engineering than heavy fighting. But this idea turned out to be wrong. The Germans fought back very strongly.
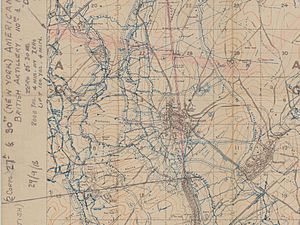
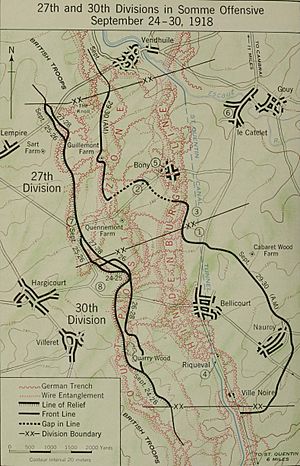
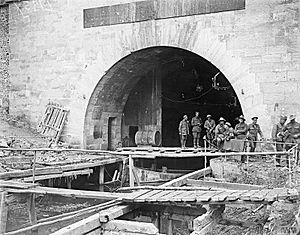
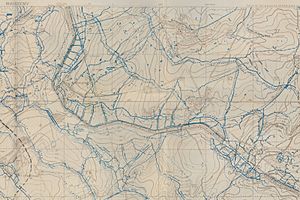
Monash planned the battle. He wanted the Americans to break through the Hindenburg Line first. Then, the Australian 3rd and 5th Divisions would follow to push further. Monash planned to attack the Hindenburg Line south of Vendhuile. Here, the St Quentin Canal goes underground for about 5,500 meters through the Bellicourt Tunnel. The Germans had made this tunnel part of their strong defenses. This tunnel was also the only place where tanks could cross the canal.
Where the canal went underground, the main Hindenburg Line trenches were west of the canal. Two British corps, III and IX, would support the main attack. Rawlinson made a big change to Monash's plan. He decided that IX Corps would attack directly across the deep canal cutting south of the Bellicourt Tunnel. This idea came from Lieutenant-General Sir Walter Braithwaite, who led IX Corps. Monash thought this attack would fail because it was too risky. Many soldiers in the 46th (North Midland) Division of IX Corps, who were to lead this attack, also felt it was too dangerous. The Germans believed this part of the canal was impossible to cross.
Before the Main Attack
After the German spring offensive, the British, French, and American armies fought back. These counterattacks, called the Hundred Days Offensive, pushed the Allies back to the Hindenburg Line by autumn 1918. This was near the village of Bellicourt, where the Battle of Épehy had been fought on September 18, 1918.
First Attack on September 27
Monash's plan for the main battle assumed that the Allies would already control the German outposts (forward positions). The Australians had already captured these in the southern part of the front. This was where the American 30th Division would attack. But the northern part of the line was still held by the Germans.
The American 27th Division was ordered to attack on September 27. Their job was to clear out German forces from these outposts. These included strong points like The Knoll, Gillemont Farm, and Quennemont Farm. The Commander in Chief, Field Marshal Sir Douglas Haig, first did not want to use the Americans for this. He wanted to save them for the main attack. But Rawlinson convinced him to change his mind.
The British III Corps had tried and failed to capture these outposts before. Rawlinson thought this was because the British troops were too tired. He was sure the Germans were about to give up. The American soldiers were not experienced. Also, there were not enough American officers. Only 18 officers were with the 12 attacking companies. The rest were away training.
The U.S. attack on September 27 was not successful. Monash asked Rawlinson if they could delay the main attack planned for September 29. But Rawlinson said no. This was because Marshal Ferdinand Foch wanted to keep constant pressure on the Germans with coordinated attacks.
Because of the confusion from the failed attack, the American 27th Division had to start the battle on September 29 without the usual strong artillery support. The British artillery commander said changing the firing plan at the last minute would cause problems. The American divisional commander, Major General John F. O'Ryan, also worried about accidentally hitting their own troops. So, all the Allied commanders agreed to stick to the original artillery plan.
This meant the artillery barrage (a wall of exploding shells) would start about 900 meters beyond where the infantry actually began their advance. This left the soldiers very open to enemy fire at the start. The 27th Division had to advance further than even the experienced Australians had been asked to do. They needed to move about 4,500 meters in one push. Rawlinson sent more tanks to help make up for the lack of a "creeping barrage" (where artillery fire moves forward just ahead of the troops). But the lack of this moving artillery shield for the 27th Division greatly hurt their attack near the tunnel.
The Main Attack on September 29
Before the battle, the British fired the largest artillery bombardment of the war. About 1,600 guns fired almost 1,000,000 shells in a short time. This included over 30,000 mustard gas shells, aimed at German headquarters and gun positions. Many high explosive shells had special fuses that were very good at destroying German barbed wire. The British also had detailed captured plans of the German defenses, which helped them a lot.
Monash's plan for September 29 was to break through the main Hindenburg Line defenses. Then, they would cross the canal tunnel area, break through another fortified line called the Le Catelet–Nauroy Line, and finally reach the Beaurevoir Line. This was the final fortified line and the goal for the first day. Rawlinson thought capturing the Beaurevoir Line on the first day was too ambitious, so he removed it as a first-day objective.
Attack Over Bellicourt Tunnel
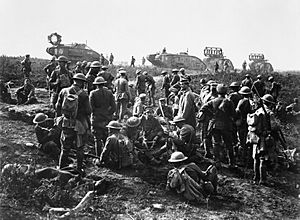
On September 29, the two American divisions attacked first, followed by the two Australian divisions. About 150 tanks from the British Tank Corps supported them. This included the new American 301st Heavy Tank Battalion, which used British tanks. The Americans' goal was the Le Catelet-Nauroy Line, a defense line east of the canal. After the Americans, the Australian 3rd Division (behind the U.S. 27th) and 5th Division (behind the U.S. 30th) were supposed to move through the American forces and push towards the Beaurevoir Line. The Australian 2nd Division was kept in reserve.
On the left side of the attack, the U.S. 27th Division started at a disadvantage. They did not reach any of their goals on the first day and suffered many losses. The 107th Infantry Regiment had the most casualties of any U.S. regiment in a single day during the war. Instead of moving past the Americans, the Australian 3rd Division got stuck fighting for positions that should have already been captured.
Even with some brave actions, the slow progress on the left side also hurt the progress on the right. As the American 30th Division and then the Australian 5th Division moved forward, the units to their left did not. This meant they faced German fire from the sides and rear, as well as from the front. Thick fog at the start of the attack also made things harder. American troops sometimes walked past Germans without knowing they were there. The Germans then caused big problems for the Americans following the first attack wave. Fog also made it hard for infantry and tanks to work together.
The 30th Division did break through the Hindenburg Line in the fog on September 29, 1918. They entered Bellicourt, captured the southern entrance of Bellicourt Tunnel, and reached the village of Nauroy. Australian troops then joined them to continue the attack.
The advancing Australians found many American soldiers who were lost and without leaders. Charles Bean, an Australian historian, wrote that Monash's plan fell apart by 10 o'clock. From then on, Australian battalion or company commanders at the front mostly directed the attack. General John J. Pershing praised the 30th Division, saying they "broke through the Hindenburg Line on its entire front and took Bellicourt and part of Nauroy by noon of the 29th."
There has been much debate about how successful the American forces truly were. Monash wrote that they showed their inexperience and paid a high price for it. However, their sacrifices did help the day's operations succeed partly. The U.S. II Corps did not capture their main goal, the Catelet–Nauroy Line. During the battle, Monash was very angry about how the American divisions performed. Rawlinson wrote that the Americans seemed "in a state of hopeless confusion" and might not be able to act as a corps. He feared their casualties were high, but blamed them for it.
Meanwhile, on the right side of the Bellicourt Tunnel front, the Australian 32nd Battalion, led by Major Blair Wark, met up with the 1/4th Battalion, Leicestershire Regiment. This British unit from the 46th Division had already crossed the canal and were now strong east of the Hindenburg Line.
By this time in the war, the Tank Corps had suffered many losses. There were fewer tanks available for this battle than for the Battle of Amiens in August. Eight tanks were destroyed when they drove into an old British minefield. The September 29 attack also showed how easily tanks could be destroyed by strong German anti-tank weapons. In one case, four heavy tanks and five medium tanks were destroyed in just 15 minutes by German field guns in the same spot. This happened while trying to stop heavy machine gun fire from the Le Catelet–Nauroy Line. It showed the danger of German field guns to tanks without close infantry support. Tanks could protect the infantry, but they also needed infantry to warn them about hidden guns. In this attack, the machine gun fire was so intense that the infantry were ordered to pull back. This left the tanks far ahead and easy targets for the German guns.
Attack Across the Canal Cutting
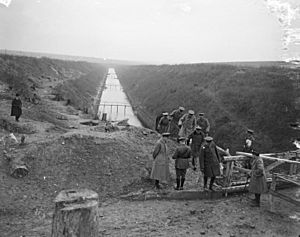
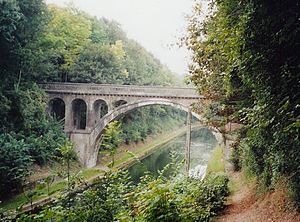
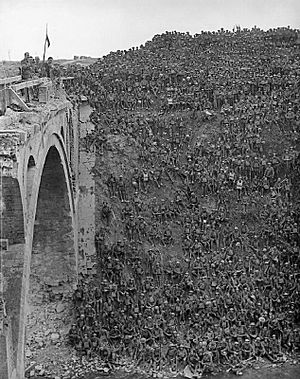
The attack across the canal cutting, also known as the Battle of Bellenglise, involved IX Corps (led by Braithwaite). This attack was on the right of the American and Australian Divisions, between Riqueval and Bellenglise. The British 46th Division, led by Major-General Gerald Boyd, led this assault. In this area, the St Quentin Canal was a huge, natural anti-tank "ditch." The main Hindenburg Line trenches were on the east (German) side of the canal.
IX Corps was supported by tanks from the 3rd Tank Brigade. These tanks had to cross the Bellicourt Tunnel in the American 30th Division's area. Then, they moved south along the east bank of the canal. IX Corps had to cross the very difficult canal cutting. This cutting became deeper as it neared Riqueval. Its very steep banks, strongly defended by machine gun positions, were over 15 meters deep in some places. After crossing, they had to fight through the Hindenburg Line trenches. The 46th Division's final goal for September 29 was high ground beyond the villages of Lehaucourt and Magny-la-Fosse. The British 32nd Division would then follow and move past the 46th Division.
After a very strong artillery bombardment (which was heaviest in this area), and in thick fog and smoke, the 46th Division fought through the German trenches west of the canal. Then, they crossed the waterway. The 137th (Staffordshire) Brigade led this attack.
The fierce "creeping artillery barrage" helped the attack greatly. It kept the Germans trapped in their dugouts. The soldiers used different floating aids made by the Royal Engineers. These included makeshift floating piers and 3,000 lifebelts from cross-Channel ships. They used ladders to climb the brick wall along the canal. Some men from the 1/6th Battalion, the North Staffordshire Regiment, led by Captain A. H. Charlton, managed to capture the Riqueval Bridge over the canal. They took it before the Germans could blow it up.
The 46th Division captured the village of Bellenglise, including its large tunnel/troop shelter. This shelter was part of the Hindenburg Line defenses. By the end of the day, the 46th Division had taken 4,200 German prisoners and 70 guns. This was out of a total of 5,100 prisoners for the entire army.
The attack across the canal achieved all its goals, right on time. The division suffered fewer than 800 casualties. This great success happened where many least expected it. The 46th Division's attack was seen as one of the most amazing achievements of the war. Charles Bean called it an "extraordinarily difficult task" and a "wonderful achievement." Monash wrote that it was an "astonishing success" that helped him greatly later that day.
Later that day, the leading brigades of the 32nd Division (including Lieutenant Wilfred Owen, a famous poet, from the Manchester Regiment) crossed the canal. They moved forward through the 46th Division. The entire 32nd Division was east of the canal by nightfall. On the right side of the IX Corps area, the 1st Division was operating west of the canal. Their job was to protect the right side of the 46th Division by clearing Germans from the area east and north-east of Pontruet. They met strong German resistance and heavy fire from the south.
On the evening of September 29, IX Corps was ordered to capture the Le Tronquoy Tunnel defenses. This would allow the French XV Corps to cross the canal tunnel. The next day, the 1st Division advanced under a creeping barrage. Early in the afternoon, the 3rd Brigade of the division met up with the 14th Brigade of the 32nd Division on the tunnel summit. The 14th Brigade had fought its way forward from the German side of the canal.
What Happened Next
Later Fighting
On October 2, the British 46th and 32nd Divisions, with support from the Australian 2nd Division, planned to capture the Beaurevoir Line. This was the third line of Hindenburg Line defenses. They also aimed for the village of Beaurevoir and the high ground overlooking the Beaurevoir Line. The attack succeeded in making the breach in the Beaurevoir Line wider. However, they could not capture the high ground further on. Still, by October 2, the attack had created a 17-kilometer gap in the Hindenburg Line.
Attacks continued from October 3 to 10. The Australian 2nd Division captured Montbrehain on October 5. The British 25th Division captured the village of Beaurevoir on October 5/6. These attacks cleared the fortified villages behind the Beaurevoir Line and captured the high ground. This resulted in a complete break in the Hindenburg Line. The Australian Corps was then pulled back from the front line on October 5 for rest. They did not return to the front before the Armistice (the end of fighting) on November 11.
Cemeteries and Memorials
American soldiers who died in the battle were buried in the Somme American Cemetery near Bony. Missing soldiers are also remembered there. The U.S. 27th and 30th Divisions (and other units that served with the British) are honored on the Bellicourt Monument. This monument stands right above the canal tunnel.
Australian and British soldiers who died were buried in many Commonwealth War Graves Commission cemeteries in the area. These include Bellicourt British Cemetery, Unicorn Cemetery in Vendhuile, and La Baraque British Cemetery in Bellenglise (for UK dead only). Australian soldiers with no known grave are remembered on the Villers-Bretonneux Australian National Memorial. Missing British soldiers killed in the battle are remembered on the Vis-en-Artois Memorial.


