Operation Mosaic facts for kids
Quick facts for kids Mosaic |
|
|---|---|
Mosaic G2 test
|
|
| Information | |
| Country | United Kingdom |
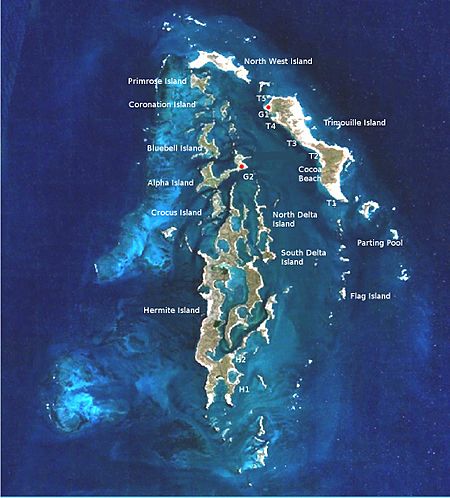
| Test site | Monte Bello Islands, Western Australia |
| Period | May–June 1956 |
| Number of tests | 2 |
| Test type | tower |
| Max. yield | 60 kilotonnes of TNT (250 TJ) |
| Navigation | |
| Previous test series | Operation Totem |
| Next test series | Operation Buffalo |
Operation Mosaic was a series of two British nuclear tests. These tests happened in the Montebello Islands off the coast of Western Australia. The first test was on May 16, 1956, and the second on June 19, 1956.
These tests were part of Britain's efforts to make its nuclear weapons more powerful. Scientists wanted to try new ways to increase the bomb's strength. The second test in this series was the largest nuclear explosion ever in Australia.
The tests followed Operation Totem and came before Operation Buffalo. The Monte Bello Islands had been used before for Operation Hurricane in 1952. They were chosen again because a new test site wasn't ready yet.
Contents
Why Britain Tested Nuclear Bombs
After World War II, Britain wanted to stay a powerful country. It had worked with the United States on nuclear technology during the war. But a new US law stopped them from sharing nuclear secrets.
So, Britain decided to build its own atomic bombs. The first one was tested in 1952. Soon after, the United States developed an even more powerful bomb, called a hydrogen bomb. Britain felt it needed to catch up.
Britain started its own hydrogen bomb program in 1954. There was talk around the world about stopping nuclear tests. Britain wanted to test its new, more powerful bombs before any ban happened.
What Was the Purpose of Operation Mosaic?
British scientists wanted to make their nuclear bombs stronger. They explored a method called "boosting." This involves adding light elements like lithium-6 and deuterium to the bomb. These elements create more reactions, which increases the bomb's power.
Scientists also thought using a natural uranium "tamper" could make the bomb even stronger. A tamper helps to hold the bomb's core together longer during the explosion. Operation Mosaic was designed to test these ideas. The goal was to gather information for building Britain's own hydrogen bomb.
Choosing the Test Site
The previous tests in 1953 were at Emu Field. But this site was too far away and hard to reach. A new, permanent test site was being built at Maralinga in South Australia. However, it wouldn't be ready until September 1956.
So, the Montebello Islands were chosen again. The Royal Navy could easily support the operation there. There were also questions about whether Australia would allow a very large test at Maralinga.
The Australian government had agreed that no hydrogen bomb tests would happen in Australia. Even though "boosted fission weapons" are not true hydrogen bombs, these tests were linked to hydrogen bomb development.
The British Prime Minister, Sir Anthony Eden, spoke with the Australian Prime Minister, Robert Menzies. Eden explained the tests would use light elements to boost the bombs. He promised the explosions would not be too powerful. Menzies approved the tests in June 1955.
Getting Ready for the Tests
Planning for Operation Mosaic began in February 1955. The British Admiralty gave it the codename "Operation Mosaic." Captain Hugh Martell was in charge of the naval force. Charles Adams was the main scientist.
A team of British officials traveled to Australia. They met with Australian officials and the Atomic Weapons Tests Safety Committee (AWTSC). This committee was set up by Australia to make sure the tests were safe. They agreed that AWTSC members would be present when the decision to fire a bomb was made.
Ships and Aircraft
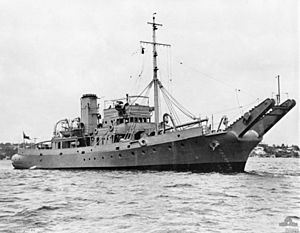
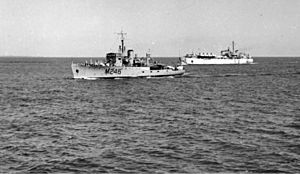
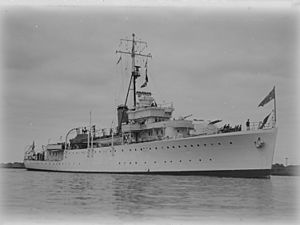
A group of ships was gathered for the operation. HMS Narvik was the main ship. HMS Alert provided housing for scientists and important visitors. Other ships, including cruisers and destroyers, helped with weather reporting.
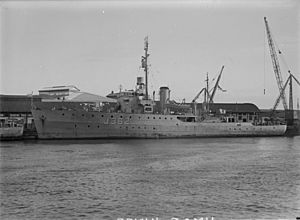
The Royal Australian Navy (RAN) also provided ships. HMAS Warrego and Karangi surveyed the islands. They had to be careful because some areas were still radioactive from a previous test. Other RAN ships helped with supplies and moving people.
The Royal Air Force (RAF) provided many aircraft. Shackletons flew weather flights. Varsity aircraft tracked clouds and checked for radiation. Canberra bombers collected radioactive samples from the clouds. The United States Air Force (USAF) also sent planes to collect samples.
The G1 Test
The G1 test device was set up on Trimouille Island. Scientists did several practice runs. The nuclear material was brought to the islands by ship.
On May 14, 1956, members of the Australian safety committee arrived. They were concerned about not having enough information about the tests. The British scientists shared some details with them, and the committee approved the test.
The G1 device exploded at 11:50 AM local time on May 16. The explosion was powerful, as expected. The mushroom cloud rose very high into the sky.
After the explosion, a special team went to the island. They wore protective clothing to retrieve measuring tools and check the ground. They also set up a decontamination area. The main danger to the ships' crews was radioactive seaweed, so they were told not to eat fish.
The results of G1 were mixed. The bomb's power was as expected. But the "boosting" effect from the lithium deuteride was not very strong. This showed that scientists still had more to learn about the process. The fallout cloud first moved out to sea, but then changed direction. Some radioactive material drifted over mainland Australia.
The G2 Test
Because of the G1 results, scientists decided to use a natural uranium tamper for the G2 test. This would help them learn more about increasing the bomb's power. They wanted to make sure the test wouldn't go over the agreed-upon power limit.
Scientists faced challenges with the weather. They needed specific wind conditions to make sure fallout didn't blow over the mainland. These conditions were rare at that time of year. There was also a deadline for the test, as the main ship, Narvik, needed to return to the UK for another operation.
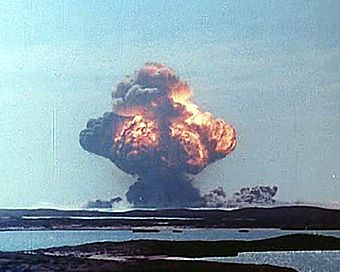
The G2 device was detonated on Alpha Island at 10:14 AM local time on June 19. It produced a yield of 60 kilotonnes of TNT (250 TJ). This made it the largest nuclear device ever exploded in Australia.
The cloud from G2 rose even higher than predicted. Collecting samples from this cloud was difficult. A special vehicle was used to get close to the explosion site to collect samples. However, the aircraft sent to track the cloud had trouble finding it.
Most of the fallout drifted over the sea. But because of different winds at different heights, some of it still drifted over the mainland. This caused concern in Australia. People worried about radioactive contamination. However, checks showed that the contamination levels were very low and not dangerous to people.
After the Tests
By the 1980s, the radioactivity on the islands had mostly gone away. It was no longer dangerous for visitors. However, some radioactive metal pieces remained. The islands were a restricted area until 1992.
A survey in 2006 found that the wildlife on the islands had recovered. In 2009, efforts were made to remove rats and wild cats from the islands. Birds and marsupials were brought from nearby Barrow Island to help the ecosystem.
Today, the Monte Bello Islands are a park. Visitors are advised not to spend too much time at the test sites. They are also told not to take any pieces of the old test equipment as souvenirs. A pyramid-shaped monument marks the spot of the G2 explosion on Alpha Island.
Summary of Tests
| Name | Date time (UTC) | Local time zone | Location | Height | Type | Yield | Notes |
|---|---|---|---|---|---|---|---|
| G1 | 16 May 1956 03:50 | AWST (+8 hrs) | Monte Bello Islands, West Australia 20°14′S 115°33′E / 20.23°S 115.55°E | 31 m (102 ft) | tower, weapons development | 15 kt | Tested a Boosted fission weapon design with lithium deuteride. |
| G2 | 19 June 1956 02:14 | AWST (+8 hrs) | Monte Bello Islands, West Australia 20°24′S 115°32′E / 20.40°S 115.53°E | 31 m (102 ft) | tower, weapons development | 60 kt | Tested boosting with lithium deuteride and a natural uranium tamper. |


