Second Battle of the Jordan facts for kids
Quick facts for kids Second Transjordan attack on Shunet Nimrin and Es Salt |
|||||||
|---|---|---|---|---|---|---|---|
| Part of the Middle Eastern theatre of World War I | |||||||
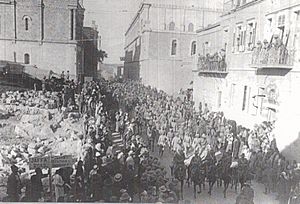 Prisoners captured during the 2nd Transjordan operations marching through Jerusalem May 1918 |
|||||||
|
|||||||
| Belligerents | |||||||
| Commanders and leaders | |||||||
| Units involved | |||||||
| 60th (London) Division Anzac Mounted Division Australian Mounted Division Imperial Camel Corps Brigade Two Companies Patiala Infantry |
Fourth Army VIII Corps 3rd Cavalry Division Caucasus Cavalry Brigade 143rd Regiment 3rd and 46th Assault Companies 48th Division 703rd Infantry Battalion a storm battalion, a machine gun company and Austrian artillery |
||||||
| Strength | |||||||
| 7,000 troops | |||||||
| Casualties and losses | |||||||
| 1,784 | |||||||
The Second Transjordan attack on Shunet Nimrin and Es Salt was a battle fought in the Jordan Valley during World War I. It took place between April 30 and May 4, 1918. This battle was part of the wider Sinai and Palestine Campaign.
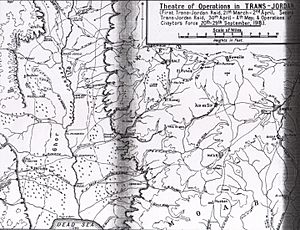
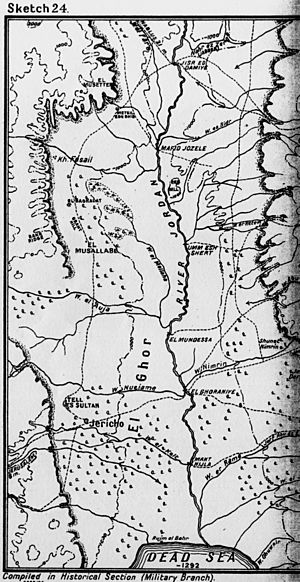
The fight happened in three main areas. First, in the Jordan Valley, British Empire forces defended their positions against attacks from the Ottoman Seventh Army. Second, on the eastern edge of the Jordan Valley, British infantry attacked Ottoman troops at Shunet Nimrin and El Haud. Third, after the town of Es Salt was captured, Ottoman forces strongly counterattacked the British light horse brigades in the hills.
These strong Ottoman counterattacks forced the British forces to retreat back to the Jordan Valley. They stayed there through the summer until the Battle of Megiddo began in mid-September.
Why the Battle Happened
After a failed attack on Amman in early April, German and Ottoman forces made their defenses stronger. They moved their army headquarters closer to Es Salt. Just a few weeks later, British forces were ordered to attack again. Their goal was to capture Shunet Nimrin and Es Salt, and then move on to Amman.
Even though Es Salt was captured, the main attack failed. The British infantry could not break through the strong Ottoman defenses at Shunet Nimrin. Also, the British mounted troops faced very strong counterattacks from Ottoman forces coming from Amman and Nablus. By the fourth day, the British were forced to retreat back to the Jordan Valley.
Earlier Battles and Changes
German and Ottoman forces had won battles in 1917. But by the end of that year, they lost many areas in the Levant, including Jerusalem. The British Egyptian Expeditionary Force (EEF) pushed them back. In February 1918, the Ottoman Army was forced to retreat again from Capture of Jericho.
In late March and early April, German and Ottoman forces stopped the first British attack across the Jordan River towards Amman. The goal of that first attack was to destroy parts of the Hejaz Railway near Amman. While some areas like Shunet Nimrin and Es Salt were briefly captured, the British had to withdraw. They only kept control of the Jordan River crossings.
Around this time, a major German attack started on the Western Front in Europe. This meant that the war in Palestine became less important to the British government. Many British soldiers (about 60,000) were sent to Europe. They were replaced by soldiers from the British Indian Army. This caused a big reorganization of the British forces in Palestine.
The British commander, General Edmund Allenby, wanted to occupy the Transjordan area. This would help him connect with his Arab ally, Feisal, and the Hejaz Arabs. If Feisal's forces were defeated, German and Ottoman forces could attack the British from the side. This would make their positions near Jerusalem very risky. Allenby hoped that attacks in the hills of Moab would distract the Ottomans. He also wanted to help T.E. Lawrence and Feisal capture the important railway junction at Daraa.
Getting Ready for Battle
After the first attack on Amman, British infantry also attacked towards Tulkarem. On April 11, Ottoman forces attacked British positions in the Jordan Valley but were pushed back. Between April 15 and 17, Allenby's Arab forces attacked Ma'an with some success.
To support the Arab attacks, Lieutenant-General Philip W. Chetwode ordered an attack on Shunet Nimrin on April 18. This was meant to draw Ottoman attention away. Then, on April 20, Allenby ordered Lieutenant-General Harry Chauvel to destroy the forces at Shunet Nimrin and capture Es Salt.
During the first attack, the weather was bad, making roads muddy. But a few weeks later, the rainy season was over, and movement was easier. However, the main road through Shunet Nimrin was now heavily defended. British mounted brigades had to use smaller roads and tracks.
Battle Plans
Allenby's big plan was to capture a large area of land. He wanted to capture Amman, and then advance quickly towards Daraa. He believed the Ottomans would not move troops from other areas to defend Shunet Nimrin.
The British needed to control the Jisr ed Damieh crossing. This crossing was important for Ottoman supplies and reinforcements. If the British controlled it, they could secure their left side.
Chauvel planned to first move the Imperial Camel Corps Brigade to control river crossings south of Jisr ed Damieh. Then, the 4th Light Horse Brigade would advance to control the road from Jisr ed Damieh to Es Salt. With this side secure, the 60th (London) Division would attack Shunet Nimrin from the front. Meanwhile, the Anzac and Australian Mounted Divisions would move north to capture Jisr ed Damieh. After leaving some troops there, they would move to Es Salt, capture it, and then attack Shunet Nimrin from behind.
Challenges Before the Fight
Both the first and second attacks assumed Ottoman reinforcements would not cross the river. This turned out to be a big mistake. Neither Chauvel nor Shea (commander of the 60th Division) were very confident about the second attack.
Chauvel thought the operation was too difficult. He felt he didn't have enough power or supplies. He asked to delay the attack, but British Headquarters insisted on the first stage: clearing the area up to Es Salt and Jisr ed Damieh.
The soldiers of the 60th (London) Division were tired from the first attack on Amman. Facing 5,000 well-defended Ottomans at Shunet Nimrin was a tough challenge.
General Chetwode later said these attacks were "the stupidest things he [Allenby] ever did." Chauvel also didn't trust the promised help from the Arab forces. The attack on Shunet Nimrin relied on the Beni Sakhr tribe cutting the Ottoman supply line.
The Beni Sakhr Tribe
The Beni Sakhr tribe, a Bedouin group, told Allenby they had 7,000 men who could help. They said they would join the Hejaz Arabs. Allenby moved the attack date forward by two weeks, hoping these 7,000 men would make up for missing Indian cavalry. He also hoped they could hold Es Salt and Shunet Nimrin permanently.
However, this rushed the preparations. British Headquarters didn't really know what the Beni Sakhr could do. They ordered Chauvel to attack on April 30 without asking T. E. Lawrence or his liaison officer, who knew the Beni Sakhr leader was confused and scared. British planes later saw the Bedouin ploughing fields, not gathering for battle. They left when the attack began.
Ottoman Defenses
The Ottoman Fourth Army headquarters had moved to Es Salt after the first attack. Ottoman forces in the hills were stronger than the British thought. Amman was held by several battalions. The main Ottoman force of 5,000 soldiers defended Shunet Nimrin, with 1,000 defending Es Salt.
After the first attack, the Ottoman Fourth Army received many reinforcements. These included cavalry and German infantry units. They were based mainly on the west bank of the Jordan River.
When the attack started, the German commander, Otto Liman von Sanders, ordered more troops to be sent by train to Daraa. Ottoman troops also moved to counterattack the British from the side.
British Attacking Force
General Chauvel took command of the Jordan Valley for this operation. His force was stronger than the one that attacked Amman before. It included:
- The 60th (London) Division (infantry)
- The 20th Indian Brigade (infantry from Indian states)
- The Anzac Mounted Division
- The Australian Mounted Division
Other units like the Imperial Camel Corps Brigade and the 22nd Mounted Brigade were on the west bank of the Jordan River to protect the left side.
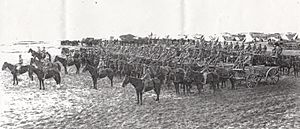
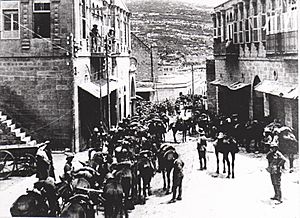
The Australian Mounted Division had been resting. They marched through Jerusalem to the Jordan Valley to join the Anzac Mounted Division.
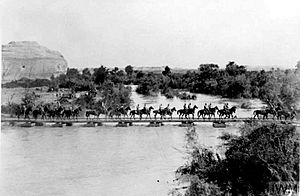
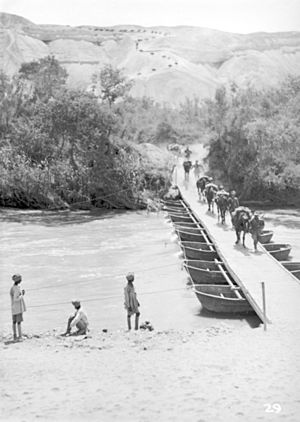
The Australian Mounted Division crossed the Jordan River on a pontoon bridge. They advanced quickly north towards Jisr ed Damieh. The 3rd Light Horse Brigade then moved to capture Es Salt. The 4th Light Horse Brigade stayed to protect the northern side.
The force attacking Shunet Nimrin from the west included two brigades of the 60th (London) Division. They were supported by artillery and the Canterbury Mounted Rifle Regiment.
Air Support
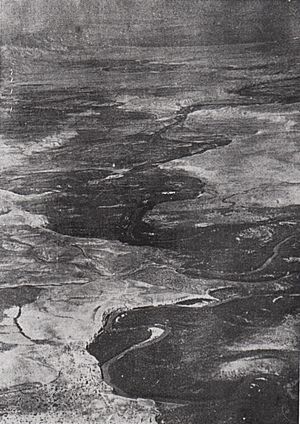
British aircraft bombed Ottoman positions and flew reconnaissance missions. They took many photos to update maps of the area. They also increased patrols to prevent Ottoman planes from attacking British forces. This was successful, as the Ottomans did not know about the British preparations.
The Battle Begins
April 30: Infantry Attacks Shunet Nimrin
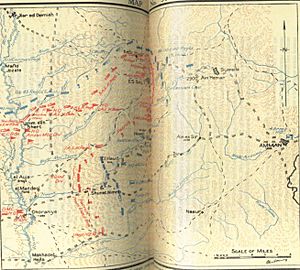
The main road from the Ghoraniyeh crossing led to Shunet Nimrin, where Ottoman forces were strongly dug in. Their defenses controlled the road to Es Salt and Amman. The Ottomans were ordered to hold Shunet Nimrin at all costs.
The British plan was to surround Shunet Nimrin. First, the light horse would capture Es Salt and block the main road to Amman. Second, the Beni Sakhr tribe was supposed to capture Ain es Sir and block another track. With Shunet Nimrin isolated, a frontal attack by British infantry was expected to succeed.
The infantry attack began in moonlight. They captured the first Ottoman outposts easily. But the second line of defenses was very strong. Machine gun fire stopped the British advance by mid-morning. The 179th Brigade was fired upon as soon as they moved. Some progress was made, and 118 prisoners were captured. The 180th Brigade tried three times but failed to reach their objective.
The British artillery had trouble getting ammunition forward. Communication with the artillery was also difficult. The attack was stopped and planned to restart the next morning.
April 30: Light Horse Advance
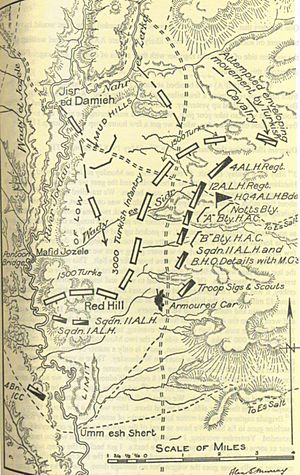
The Australian Mounted Division crossed the Ghoraniyeh bridge at 4:00 AM on April 30. The 4th Light Horse Brigade led the way north towards Jisr ed Damieh. Their job was to protect the northern side and stop Ottoman forces from crossing the Jordan River. The 3rd Light Horse Brigade would then advance to capture Es Salt.
The terrain was good for fast movement. The light horsemen attacked Ottoman cavalry posts and pushed them back. However, Ottoman resistance grew stronger. The light horsemen were stopped about 1.5 miles from Jisr ed Damieh.
A squadron of the 11th Light Horse Regiment tried to capture the Jisr ed Damieh bridgehead but couldn't get close. Ottoman forces counterattacked, forcing the Australians to withdraw. The Ottomans then secured the bridge, allowing reinforcements to cross the Jordan River.
The 4th Light Horse Brigade held a long defensive line. Their artillery was not very effective due to the long range. Around midday, the 1st Light Horse Regiment captured Red Hill after intense fighting. However, a large Ottoman force stopped further advances.
General Chauvel visited the front and understood the difficulties. He had no extra troops to send. He ordered the 4th Light Horse Brigade to withdraw slightly but still hold the road to Es Salt.
April 30: Capture of Es Salt
At 6:30 AM, the 3rd Light Horse Brigade began its climb to Es Salt. They carried ammunition and were supported by mountain artillery on camels.
The 3rd Light Horse Brigade surprised an Ottoman cavalry outpost. They quickly captured a hill and fired on the main Ottoman position. After a strong attack, the Ottomans were driven back, and 28 prisoners were taken. The 8th Light Horse Regiment then galloped into Es Salt.
The town was full of surprised Ottoman troops. The Australians charged, breaking up any attempts to organize a defense. A German officer was forced to surrender. By 7:00 PM, 400 prisoners were captured, along with many machine guns and Ottoman army documents.
The 3rd Light Horse Brigade also tried to seize a road junction outside Es Salt. They pushed back escaping Ottoman soldiers but were stopped by strong machine gun fire. They set up positions and waited until daylight.
Other British brigades, like the 1st and 2nd Light Horse and 5th Mounted Brigades, were also climbing towards Es Salt. The track was very steep and narrow, making progress slow. They bivouacked for the night, unaware that Es Salt had already been captured.
The first troops from this column reached Es Salt early on May 1. The 2nd Light Horse Brigade advanced through the town and secured the road junction. The other brigades set up defensive lines around Es Salt.
April 30: Ottoman Counterattack Preparations
The German commander, Liman von Sanders, learned of the British attack. He ordered the 24th Infantry Division and 3rd Cavalry Division to move towards Jisr ed Damieh to counterattack the British.
The Ottoman Seventh Army formed a new combat group for counterattacks. This group included infantry, cavalry, and German units.
Columns of German and Ottoman troops were seen moving to the west bank of the Jordan River. They were fired upon by Australian artillery. During the night, the Ottoman 3rd Cavalry Division and parts of the 24th Division crossed the Jordan River at Jisr ed Damieh. They hid in the foothills, ready to attack the 4th Light Horse Brigade.
May 1: The Battle Continues
Infantry Attacks Shunet Nimrin Again
After a 75-minute bombardment, the infantry attacked Shunet Nimrin again at 5:30 AM. They made some progress, but strong machine gun fire stopped them. The Ottoman positions were well hidden.
The Beni Sakhr tribe had failed to cut the road from Amman. So, Ottoman reinforcements from Amman began to arrive at Shunet Nimrin in the evening. The Beni Sakhr had already left, playing no part in the fighting.
German and Ottoman Attack in the Jordan Valley
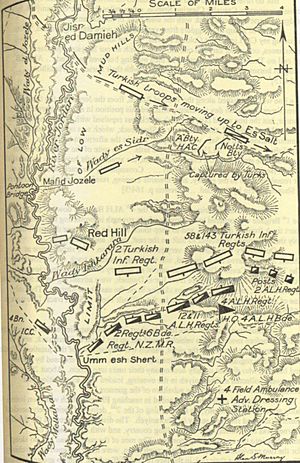
At about 7:30 AM, the 4th Light Horse Brigade, protecting the northern side, was suddenly attacked. A strong Ottoman force, including the 24th Infantry Division and German 146th Infantry Regiment, had crossed the Jordan River unseen. They advanced in two waves, estimated to be very large.
The Ottoman attack was very fast. They pushed the light horsemen back. The 4th Light Horse Brigade was attacked from three directions. They were outnumbered five to one. The British artillery fired rapidly, but they were also heavily shelled by Ottoman guns.
The 4th Light Horse Brigade was forced back into rocky hills. Their guns were pushed into gullies. Many horses were killed by machine gun fire. Nine guns had to be abandoned, but the gunners removed parts to make them useless. The remaining men and horses climbed into the hills to escape.
Red Hill Captured
After the 4th Light Horse Brigade was pushed back, a large number of Ottoman soldiers attacked Red Hill. The two squadrons defending it were forced to withdraw. This left only a narrow path for the 4th Light Horse Brigade to retreat south.
Retreat from Jisr ed Damieh
The 4th Light Horse Brigade was gradually forced back, fighting desperately. Ottoman units began to surround them. Two troops were sent to hold them off while the rest of the brigade withdrew. The light horsemen led their horses through the hills, racing against the Ottoman attackers on the plain.
Casualties were significant, including men killed, wounded, and missing. Nine guns and several wagons were captured by the Ottomans.
Reinforcements Arrive
General Chauvel ordered reinforcements to the Jordan Valley. These included units from the New Zealand Mounted Brigade and other mounted brigades. Major General Edward Chaytor was put in command of the defense against the Ottoman attack in the Jordan Valley.
Chaytor moved the defensive line to a better position, just north of the Umm esh Shert track. This withdrawal was done smoothly.
New Line Holds
A new, shorter defensive line was set up to protect the Umm esh Shert track. This track was vital for supplies and communication to Es Salt. The Ottoman advance was stopped about 1 mile north of Umm esh Shert. The line was held by New Zealand, Yeomanry, and Light Horse regiments.
The Ottoman 24th Infantry Division launched three unsuccessful attacks against this new line. The line held, keeping the vital track to Es Salt open. The 1st Light Horse Brigade also moved to help protect the track.
The British forces at Es Salt now relied on this single, rough track for all their supplies. Ammunition and food were running low. Supplies had to be sent up by about 200 donkeys during the night. They reached Es Salt safely and returned.
May 1: Yeomanry Advance Towards Shunet Nimrin's Rear
While other brigades defended Es Salt, General Hodgson ordered the 5th Mounted Brigade to move through Es Salt and attack the rear of Shunet Nimrin. The 60th (London) Division was still attacking Shunet Nimrin from the front.
The 5th Mounted Brigade encountered strong Ottoman defenses. Their commander thought the position was too strong to attack. Hodgson ordered them to attack vigorously. However, after seeing the strength of the Ottoman position, Hodgson decided to postpone the attack until the next morning.
May 2: Continued Fighting
The British forces fought hard. An attempt by the 1st Light Horse Brigade almost succeeded in getting around Shunet Nimrin, but the Ottoman forces were too strong. The light horse brigades at Es Salt were also under serious threat from Ottoman reinforcements coming from Amman and Jisr ed Damieh.
By evening, the attack on the rear of Shunet Nimrin had failed. Es Salt was being attacked from the southeast, north, and northwest. The attacks on Es Salt were held, but fighting continued through the night.
Supplies of ammunition and medical supplies reached Es Salt. However, the path back to the Jordan Valley was very narrow and only kept open by hard fighting. The soldiers' rations had run out, but they found water, grazing for horses, and some food in Es Salt.
Chaytor's Force Defends the Track
Chaytor's force continued to defend the Umm esh Shert supply line. They were attacked by increasingly strong Ottoman forces. An outpost on "Table Top" hill was attacked and forced to withdraw, but the main line held.
Light Horse Join Yeomanry Attack
The 2nd Light Horse Brigade joined the 5th Mounted Brigade to attack the rear of Shunet Nimrin. However, the attack on Es Salt from the east became very serious. Hodgson asked if these brigades could be moved to defend Es Salt.
Chauvel insisted that the attack on Shunet Nimrin's rear must continue, as success there would solve many problems. However, he agreed that two regiments of the 2nd Light Horse Brigade could be sent to defend Es Salt.
The 5th Mounted Brigade, now with fewer troops, tried to force their way towards Shunet Nimrin. But the ground was difficult, and they faced heavy machine gun and artillery fire. Their advance was stopped well short of its goal. The attack failed.
Infantry Attacks Continue
The 60th (London) Division continued to attack Shunet Nimrin from the west. However, Ottoman reinforcements kept arriving. It became clear that the operations could not succeed.
Ottoman Attacks on Es Salt
Early on May 2, the Ottoman 3rd Cavalry Division and infantry attacked Es Salt from the north-west. Hodgson sent troops to stop them. Reinforcements were sent to the 3rd Light Horse Brigade. A convoy of ammunition arrived at a critical moment.
Pressure also grew on the eastern side of Es Salt from Arabs, Circassians, and Ottoman reinforcements from Amman. Two regiments of the 2nd Light Horse Brigade and one from the 1st Light Horse Brigade moved to defend Es Salt from these attacks.
British aircraft flew reconnaissance missions. They reported large enemy forces and transport moving towards Es Salt.
May 3: Decision to Withdraw
During the night, another infantry brigade (the 181st Brigade) arrived in the Jordan Valley. However, they were too late to change the battle's outcome.
By the evening of May 3, Ottoman forces in the Jordan Valley began to withdraw north to reinforce attacks on Es Salt.
Allenby and Chauvel met on May 3. Allenby had seen the strength of the Ottoman troops from his aircraft. The British garrison at Es Salt was being attacked from almost all sides. The main goal of capturing Shunet Nimrin had failed. The threat of Hodgson's force being surrounded was too great. Allenby decided to order a general withdrawal. The orders were sent out at 4:00 PM.
Ottoman Attacks on Es Salt Held
All day on May 3, Ottoman attackers closed in on Es Salt. Australian aircraft reported increased enemy activity. A fresh column of Ottoman reinforcements attacked the 10th Light Horse Regiment. Although they gained some ground, they could not advance further.
On the Amman side of Es Salt, the 2nd Light Horse Brigade faced close combat with Ottoman attackers. Major Shannon, leading the 8th Light Horse Regiment, sent a small troop to charge the enemy from behind. This surprise bayonet charge broke up the Ottoman assault, killing many and capturing 319 Ottoman soldiers. This desperate move relieved pressure on Es Salt.
Evacuation of the Wounded
By the afternoon of May 3, only 42 minor casualties had been evacuated from Es Salt. Only 29 camels and riderless horses were left for the wounded. The 2nd Light Horse Field Ambulance left with all the wounded their camels could carry, leaving the seriously wounded behind.
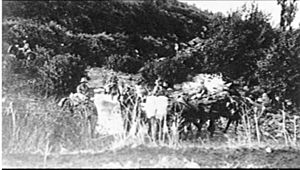
After abandoning much equipment, all but two mortally wounded men were finally put on camel stretchers. Under heavy fire from townspeople, they began a dangerous 20-mile descent down the Umm esh Shert track. Some wounded had waited three days. The journey was terrible, with camels struggling on the rough path. One camel fell over a cliff, but its patients were rescued. The convoy arrived at the collecting station the next morning.
Motor ambulances then took the wounded to main dressing stations, where surgeries were performed. From there, they were sent to Jerusalem.
Retreat on May 4–5
To prepare for the retreat, engineers improved the Umm esh Shert track. During the night of May 3/4, Hodgson's force withdrew from Es Salt. By the evening of May 4, the entire force had crossed the Jordan River and returned to their lines.
The 2nd Light Horse Brigade covered the first part of the withdrawal. The 1st Light Horse Brigade protected the Umm esh Shert track. Two hours after the last wounded left, 3,000 German and Ottoman infantry attacked the 3rd Light Horse Brigade at Es Salt. As the wounded were safe, Chauvel ordered Hodgson to withdraw further.
The 2nd and 3rd Light Horse Brigades left small groups to fire intermittently until dawn. The rest of the force marched down the track in the dark. The evacuation of Es Salt was completed by 2:30 AM, but the columns were stretched out for miles.
Rearguards
At daylight, German and Ottoman forces pushed through Es Salt and attacked the 1st Light Horse Brigade rearguard. Enemy guns shelled them, and aircraft bombed the retreating columns.
Bridgeheads Defended
By 10:30 AM on May 4, the mounted brigades were out of the hills and moving towards the Ghoraniyeh crossing. Chaytor's force covered them, repelling all attacks.
The rearguard was closely followed by Ottoman units. German aircraft bombed the columns. The 4th Light Horse Brigade was heavily pushed back but withdrew in good order. Reinforcements helped hold the line.
Attacks continued throughout the day, but Chaytor's force held firm. The New Zealand Mounted Rifles Brigade withdrew across the Jordan River.
Infantry Retirement
The 60th (London) Division broke off its fight at Shunet Nimrin and withdrew across the Jordan River. Two Ottoman or German aircraft attacked them but were shot down. The dead infantrymen were removed for burial.
Allenby decided to keep the bridgeheads at Ghoraniyeh and Makhadet Hajlah. A new bridgehead was also established at El Auja. All troops not needed to hold these bridgeheads were withdrawn west of the river.
By the evening, Chaytor's force had retired, and the battle ended. All of Chauvel's force had withdrawn safely to the west bank of the Jordan River by the morning of May 5.
Casualties
The British forces captured nearly 1,000 German and Ottoman prisoners. However, they suffered 1,649 casualties themselves, including 137 missing. Most of these (1,116) were from the 60th (London) Division. The Ottoman forces lost 831 casualties.
What Happened Next
The British had planned a larger advance towards Damascus. However, the delay caused by these battles meant Ottoman forces could threaten Feisal's Arab forces.
The Second Transjordan attack showed how determined the Ottoman defenders were. It also highlighted the difficulties for mounted units in the rough terrain. Despite the tactical defeat, the British losses were not too heavy.
A key result was that one-third of the total German and Ottoman forces were now stationed east of the Jordan. This convinced the Ottoman command that the British would focus their attacks there. This left their western flank weaker, giving Allenby an opportunity to attack on the Mediterranean coast later in September 1918.
Lieutenant Colonel Erich Böhme, a German officer, was awarded a high honor for his leadership. The Es Salt operation was a very close call for the British forces. The 4th Light Horse Brigade's ability to withdraw in such dangerous circumstances showed the experience and leadership of the troops. If they had been lost, a large part of the Australian Imperial Force could have been captured.
After these operations, the Desert Mounted Corps spent a long, hot, and dusty summer in the Jordan Valley. British troops were replaced by Indian Army troops before the Battle of Megiddo.
Beni Sakr Tribe's Role
The Beni Sakhr tribe did not show up to help. The envoys who offered support only represented a small part of the tribe. When they returned, they found that all their fighting men had gone south to join the Hejazis.


