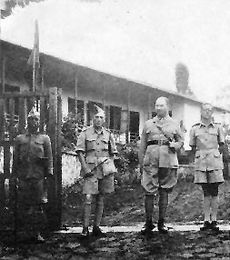
Siege of Saïo facts for kids
Quick facts for kids Siege of Saïo |
|||||||||
|---|---|---|---|---|---|---|---|---|---|
| Part of the East African Campaign of World War II | |||||||||
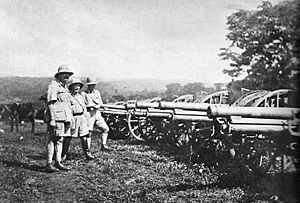 Belgian officers with captured Italian artillery, following the battle |
|||||||||
|
|||||||||
| Belligerents | |||||||||
|
|
|||||||||
| Commanders and leaders | |||||||||
| Strength | |||||||||
| Belgium: c. 3,000 troops 2,000 porters British Empire: 1 battalion Ethiopian Empire: Unknown number of resistance fighters South Africa: 3 aircraft |
7,000–8,000 troops Unknown number of aircraft |
||||||||
| Casualties and losses | |||||||||
| Belgium: 462 dead |
c. 1,200 dead 6,454 captured |
||||||||
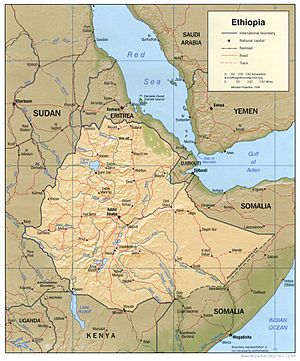
The Siege of Saïo was an important battle during the East African Campaign of World War II. It happened in 1941 at the town of Saïo in south-western Ethiopia. Soldiers from Belgium and its colony, the Belgian Congo, along with British forces and local Ethiopian fighters, surrounded the Italian fort there. The siege lasted for several months. In the end, the Allied forces attacked the Italian soldiers, forcing them to give up.
In early 1941, British and Belgian colonial troops attacked Italian East Africa from Anglo-Egyptian Sudan. By the end of March, they had taken the town of Gambela. They then started to trap Italian forces who were gathering on a high plateau in the mountain town of Saïo. These Italian forces were led by General Carlo De Simone and later by General Pietro Gazzera. The British troops left the next month to start another attack in Western Ethiopia. The Belgians then moved towards Saïo. The Italians pushed them back, and the Belgians had to stay near a small river. In May, there was little fighting because heavy rain made the ground muddy. This made it hard for the Belgians to get supplies from Sudan, causing a food shortage.
In early June, more supplies arrived by river. The Belgians then surrounded the Italian supply base at Mogi. Regular patrols, along with attacks from Ethiopian resistance fighters and raids by the South African Air Force, put more pressure on the Italian soldiers. At the end of June, General Auguste Gilliaert took command of the Belgian force. The British told him to attack when he saw a good chance. On July 3, he attacked the base of Saïo Mountain. That afternoon, General Gazzera asked for peace. On July 6, the Belgians officially accepted the surrender of Gazzera, eight other Italian generals, and over 6,000 Italian soldiers.
Why the Battle Happened
Italian East Africa
On May 9, 1936, the Italian leader Benito Mussolini announced the creation of a new colony called Africa Orientale Italiana (AOI). This colony was made up of Ethiopia, which Italy had just taken over after the Second Italo-Ethiopian War, and Italy's older colonies of Italian Eritrea and Italian Somaliland.
On June 10, 1940, Mussolini declared war on Britain and France. This meant that Italian soldiers in Italian East Africa could threaten British and French colonies nearby. It also made it dangerous for Allied ships to travel through the Red Sea and the Suez Canal, which were important supply routes.
Italian Army in East Africa
Amedeo, Duke of Aosta was in charge of Italian East Africa starting in November 1937. He was the Viceroy and Governor-General. By June 1940, he commanded about 290,000 Italian and local soldiers, sailors, and air force members. By August, this number grew to over 371,000 troops. The Italian army in Ethiopia was led by General Pietro Gazzera.
The Italian forces included two infantry divisions from Italy, special mountain troops called Alpini, and motorized infantry called Bersaglieri. They also had many battalions of Blackshirts and other smaller units. About 70% of the Italian soldiers were local African troops called Askari. The Eritrean battalions and the Royal Corps of Somali Colonial Troops were considered some of the best Italian units in the region.
British Plans for Ethiopia
In August 1939, Field Marshall Archibald Wavell, a top British commander, ordered a secret plan. The goal was to encourage a rebellion in the western Ethiopian province of Gojjam. Italy had never fully controlled this area since the war ended in 1936. In September, Colonel Daniel Sandford arrived to lead this project.
A special group called Mission 101 was created to work with the Arbegnoch (Ethiopian resistance fighters). In June 1940, Haile Selassie, the Emperor of Ethiopia, arrived in Egypt and then Sudan. He met with General William Platt to plan how to take back Ethiopia. In July, the British recognized Selassie as the emperor. In August, Mission 101 went into Gojjam to gather information.
The British wanted to cut off Italian garrisons (military bases) along the main road to prevent them from attacking the Arbegnoch. The British Royal Air Force (RAF) helped by bombing Italian positions and dropping leaflets. They also supplied Mission 101, which boosted the morale of the Ethiopians.
Belgian Plans for the War
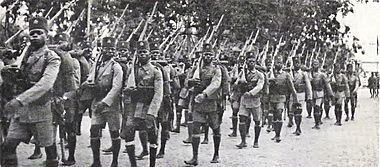
After the Battle of Belgium in May 1940, the main Belgian military force left was the Force Publique (Public Force). This was the colonial army of the Belgian Congo in Central Africa. It became the largest part of the Free Belgian Forces. This army had 15,000 local soldiers and Belgian officers. It was well-trained and spread out across the colony.
At first, the Allies were not sure if Germany would attack Portuguese Angola or if Vichy France (a French government that worked with Germany) would cause trouble in French Equatorial Africa. Because of this, the Force Publique was kept for defense. However, some Belgian soldiers wanted to fight. A group of soldiers in Stanleyville even protested because they felt they were not doing enough. The Governor-General, Pierre Ryckmans, had to send an officer to calm them down.
Ryckmans and Lieutenant General Paul Ermens talked with South African and British military leaders about sending troops to Italian East Africa. There were two main issues: Italian territory was very far away, and Belgium was not officially at war with Italy. The Belgian government in exile (the Belgian government that had fled to Britain) was careful about declaring war on Italy. This changed when Italian planes based in Belgium attacked Britain, and an Italian submarine sank a Belgian cargo ship. Belgium finally declared war on Italy on November 23, 1940. Two days later, Ryckmans announced that the Congo was also at war with Italy.
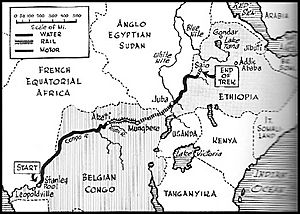
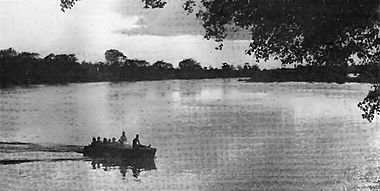
After the Battle of Gabon, the Free French Forces took control of Equatorial Africa. Also, Germany became more involved in the Balkan Campaign. This made it less likely that Germany would intervene in Portugal. So, the Force Publique and the Belgian government decided to send an expedition to fight in Italian East Africa. They planned with the British. In February 1941, after a lot of preparation, the first group of 8,000 soldiers and porters (people who carry supplies) left the Congo for Ethiopia. They traveled by barges, train, lorry, and boat to reach Ethiopia.
East African Campaign Begins
When Italy declared war on France and Britain on June 10, 1940, the East African Campaign began. British Empire forces fought against the Italian East African Armed Forces. After several battles in 1940, British colonial troops from Anglo-Egyptian Sudan invaded Italian territory. By March 1941, the Italian forces started to retreat under increasing pressure. On March 8, the first battalion of the Belgian-Congolese expeditionary force marched towards the Italian-held town of Asosa.
Three days later, the expeditionary force attacked Asosa with troops from the King's African Rifles (KAR). This forced the Italian soldiers to retreat to Gidami. Next, the Belgians and Congolese attacked the town of Gambela from the west. Two companies (groups of soldiers) from the 2/6 KAR, led by Captain J. W. E. Mackenzie, went around the town to cut off its connection to the Italian headquarters at Saïo. The Belgians were worried that the Italians might attack the weakly defended Sudanese border. By taking Gambela, they could force General Gazzera's forces in western Ethiopia to defend themselves. On March 22, the KAR companies attacked, but they pulled back when the planned Belgian attack did not happen. However, the Italians were surprised by the flanking move and retreated to Saïo.
The Siege of Saïo
On March 25, the Belgian-Congolese battalion and the two KAR companies took Gambela. The 1,000 Belgians and Congolese were tired from their long journey from the Congo. They also suffered from illness and lacked artillery (large guns). So, they could not attack further. Instead, they tried to trap the Italian forces around Saïo from the west. Meanwhile, British troops under General Alan Cunningham were fighting in Somalia and eastern Ethiopia. The Arbegnoch (Ethiopian resistance fighters) also threatened the Italian positions. In April, Italian forces burned the tall grass around the Saïo Plateau. This cleared the area so they could see and shoot better. That same month, the 2/6th KAR troops moved to the Dabus River to join their main unit and trap the Italian soldiers in Mendi.
Fighting at Bortai Brook
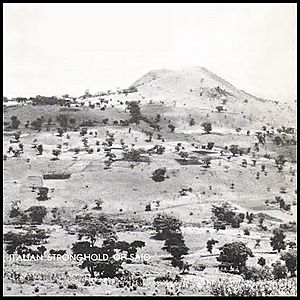
The Italians placed mines along the 40-mile (64 km) road from Saïo to Gambela. This road led up to the Saïo Plateau, which was 4,000 feet (1,200 m) higher than the surrounding area. The Belgians slowly advanced but met Italian soldiers at the Bortai Brook, which crossed the road. The Belgians received more strength with the arrival of a mortar company and another battalion. They now had 1,600 soldiers and 600 porters (people who carry supplies). But they were still not strong enough to take the plateau. Since the Italians were getting more soldiers who were retreating from the east, the Belgians decided to keep attacking to hide their small numbers.
Three days of cold, rainy weather came before the attack. On April 15, Lieutenant Colonel Edmond van der Meersch led an attack at the brook. A Belgian lieutenant scouting in the area between the two armies was ambushed and killed. A Belgian sergeant caught three Italian officers at gunpoint. But he lowered his weapon when they said they were English, thinking the KAR might have sent a group to meet them. He was then shot by snipers hidden in the bushes. A battle followed, and four Congolese soldiers were killed. Three Italians and about 40 Eritrean Askari (local soldiers fighting for Italy) were killed, and about 70 Askari were wounded.
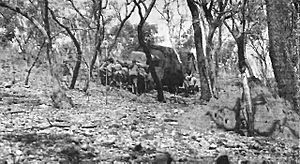
During the quiet period that followed, the Belgians studied Italian tactics. The Italians would place pairs of snipers and artillery spotters in trees. Infantry squads guarded the bases of these trees. Belgian patrols usually avoided the Italian artillery attacks, even though they would continue for up to an hour after the Belgians left. On April 21, the Italians launched a large counterattack. After two hours of bombing, Eritrean troops with automatic weapons and hand grenades, helped by Galla snipers, broke through the Belgian lines on both sides. Van der Meerch's battalion took the hardest hit, and the Belgians retreated behind two hills. The Italians then took these hills.
Belgian Supply Problems
By May, the number of Belgian soldiers had grown to 2,500, led by Lieutenant Colonel Leopold Dronkers-Martens. The rainy season had begun, turning the main road from Sudan into mud. This cut off their communication and supplies. The Baro and Sobat rivers were still too low for supply boats from the White Nile to pass. The nearby Gambela airfield was too small for transport planes to land. The only way to get supplies was by airdrop (dropping supplies from planes), which forced the Belgians and Congolese to cut their food rations in half. Several porters tried to bring food on foot 40 miles (64 km) from Sudan, but they died from tiredness and not enough food. Some officers even used the camouflage nets from their trucks to catch fish in the Baro River. There were also many outbreaks of Beriberi (a disease caused by lack of vitamins). The Italians, who were in a fertile area and had good supplies, did not have these problems. The Belgians were also attacked regularly from the air.
New Belgian Attacks
The Belgian-Congolese situation was difficult until early June. Then, the Baro and Sobat rivers rose enough for more soldiers from the Congo to reach them. They decided to try and cut off the Italian supply line between Saïo and Mogi, another town on the plateau. To hold the line near Bortai Brook, the Belgians could only spare about 250 men for an attack. They hoped that cutting off the Italians would allow the British, who were stuck at Gidami, to move south and surround Saïo. On June 9, the Belgian force attacked Mogi. Their side was protected by a new battalion that had arrived from the Congo. The Italian soldiers in Mogi, about 300 of them, fought off the attack. The Belgians believed that taking the town would cost too many lives. So, they instead strengthened their positions around Mogi and sent patrols to ambush the road that supplied Saïo.
At the main front, Lieutenant Colonel Dronkers-Martens told his troops to increase their patrols on the Saïo Plateau. This was to make the Italians think they were facing a larger army. They used "shoot-and-scoot" tactics, firing quickly and then moving. This made the Italians believe they were facing many different firing points. General Gazzera tripled the number of soldiers at Mogi. The Italians became less active as the Belgians grew bolder. Eventually, the South African Air Force (SAAF) sent three Hawker Hart biplanes to regularly bomb the Saïo fortress and shoot at the roads around it. In the east, British forces kept pushing forward. This forced Gazzera to leave his headquarters in Jimma in mid-June and retreat to Saïo. The 2/6th KAR secured Gidami and moved southeast to cut the Saïo–Yubdo road. By the end of the month, the British had driven the Italians from the western side of the Didessa River. The Italian 23rd and 26th Colonial divisions were ordered to retreat through Yubdo to make their final stand at Saïo. Heavy rain, attacks by the Arbegnoch, and raids from the SAAF added to their problems.
Final Attack and Italian Surrender
Major General Auguste Gilliaert arrived from the Congo before the end of June. On June 27, Lieutenant General William Platt, who was advancing with British forces from Sudan, ordered the Belgians to attack the Italian positions if they saw a chance. Gilliaert immediately started preparing for an attack. The plans for taking Mogi were dropped, and the Belgians focused all their efforts on Saïo. All but 50 of the soldiers surrounding Mogi were moved to Saïo.
Gilliaert said, "I believed our chances of success depended on constantly keeping up aggressive activity along Bortai Brook against Mogi and using Kitchener's idea that you can try anything against an enemy who refuses to move."
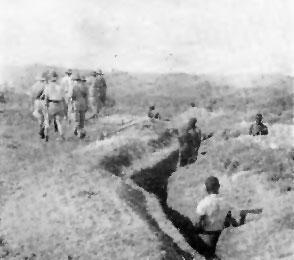
General Gazzera thought the British were closer than they actually were. He ordered the bridge over the Indina River, 40 miles (64 km) east of Saïo, to be blown up. This trapped his forces. Even though they were still outnumbered, the Belgians decided to continue their attack. On July 2, they forced their way across Bortai Brook. At dawn the next day, the Belgian advance posts started firing on Saïo. Half an hour later, the Belgian artillery began to fire. The Italians fired back heavily. A Belgian battalion moved towards Italian machine gun nests on the two hills that had been taken in April. The reserve battalion protected their left side. Gilliaert sent the third battalion, led by Van der Meersch, to the right side along a goat path that patrols had mapped two weeks earlier. Two artillery batteries gave them covering fire. The Belgians captured the hills. The Italians, being attacked on their left side by Van der Meersch's troops, could not get back to their strongholds on top of Saïo mountain. With the Saïo-Gambela road under artillery fire, they retreated to the plains on their right. Meanwhile, the 2/6th KAR attacked the Saïo-Yubdo road, and continued successfully throughout the next day.
The Italians thought they were facing three Belgian divisions with South African reinforcements. They also only had about two months of supplies left. General Gazzera sent a radio message to the Allies in Addis Abeba, saying he wanted to talk about surrendering to the Belgians. The Belgians were getting ready for another attack when, at 1:40 PM, two staff cars with white flags drove down the mountain. Inside were eight Italian generals, a Catholic priest, and Gazzera's chief of staff. Gilliaert met them near Bortai Brook, close to Gambela. They asked for all fighting south of the Blue Nile to stop and for their army to be given the honours of war (a respectful surrender). Gilliaert accepted. On July 6, he drove into Saïo to officially accept the surrender of the Italian forces.
After the Battle
Losses
The Belgian-Congolese force lost 462 men during the conflict. About 80% of these deaths were due to disease. It was believed that the Italians lost three times as many soldiers. A total of 6,454 Italian troops were captured, including General Gazzera, eight other generals, and 3,500 Askari (local soldiers). The Belgians also captured 20 artillery pieces, 200 machine guns, 250 trucks, and 500 mules. Even though the Belgian-Congolese force only had about 3,000 soldiers and 2,000 porters, they had to manage 15,000 prisoners in the former Galla-Sidamo Governorate after the campaign.
Remembering the Battle
In 1943, a three-sided pyramid was built in Faradje, Belgian Congo. It was built to remember the brave actions of the Congolese soldiers in Ethiopia. Each side of the pyramid had the name of a place where a battle took place, including Saïo. Many places throughout the country, which is now the Democratic Republic of the Congo, are named after this important battle.
See also
- List of Belgian military equipment of World War II
- List of British military equipment of World War II
- List of Second Italo-Ethiopian War weapons of Ethiopia
- List of Italian Army equipment in World War II
 | Jewel Prestage |
 | Ella Baker |
 | Fannie Lou Hamer |


