First Battle of Passchendaele facts for kids
Quick facts for kids First Battle of Passchendaele |
|||||||
|---|---|---|---|---|---|---|---|
| Part of the Third Battle of Ypres of the First World War | |||||||
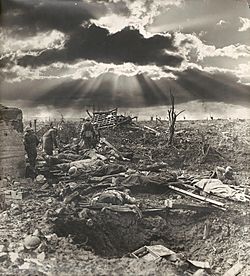 A composite depicting the morning after the First Battle of Passchendaele |
|||||||
|
|||||||
| Belligerents | |||||||
|
|||||||
| Commanders and leaders | |||||||
| Strength | |||||||
| 5 British 3 Australian 1 New Zealand divisions |
|||||||
| Casualties and losses | |||||||
| 13,000 | 11–20 October: 12,000 | ||||||
| German casualties are taken from Der Weltkrieg volume XIII (1942) which used figures calculated in ten-day periods. | |||||||
The First Battle of Passchendaele happened on 12 October 1917. It was part of the Third Battle of Ypres during the First World War. This battle took place in the Ypres Salient in Belgium, on the Western Front. The fighting was just west of the village of Passchendaele.
British forces aimed to capture the high ground (ridges) south and east of Ypres. This was part of a bigger plan made by the Allies in 1916 and 1917. Passchendaele was on the last ridge east of Ypres. It was important because it was near Roulers, a key railway hub for German supplies.
After a dry September, heavy rains started on 3 October. By 9 October, many British artillery guns were stuck in the mud. They were also damaged by German attacks. The remaining guns were hard to move forward. Generals Herbert Plumer and Douglas Haig thought their troops had made a big advance. However, most of the land gained was lost to German counter-attacks later that day.
The British attack on 12 October started much further away from the village than planned. Airplanes spotted the true positions too late to change the attack plan. The main attack was led by the Anzac Corps. They were supported by the Fifth Army to the north. On Passchendaele Ridge, the attack was pushed back by German forces. Some ground that was captured was quickly taken back by German counter-attacks. British attacks were then put on hold. They waited for better weather and for supply routes to be fixed.
The battle was a success for the German defense. Both sides suffered many losses. Two German divisions had to be sent to Flanders to replace their "extraordinarily high" casualties. The weather was the worst of the campaign. British casualties in October 1917 were among the highest of the war.
Contents
Why the Battle Happened: Background
New Fighting Methods in 1917
| Date | Rain mm |
°F | |
|---|---|---|---|
| 10 | 2.5 | 48 | dull |
| 11 | 4.9 | 50 | dull |
| 12 | 7.9 | 55 | dull |
In July 1917, Field Marshal Douglas Haig started the Third Battle of Ypres. The goal was to push forward from the Ypres Salient. The British had some early successes. For example, at the Battle of Messines, they captured important ridges.
However, later attacks, like the Battle of Langemarck, made only small gains. The Fifth Army struggled to advance in August. So, Haig sent more artillery to the higher ground in the south-east. This area included the Gheluvelt plateau and Passchendaele Ridge. The Second Army, led by General Herbert Plumer, took over this area. They improved a tactic called "bite-and-hold."
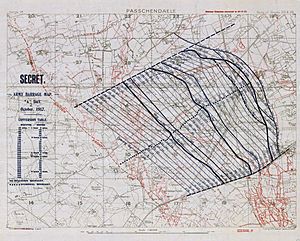
This "bite-and-hold" method involved attacking with smaller groups of soldiers on narrower fronts. They would advance a short distance, then stop and dig in. A moving wall of artillery fire, called a "creeping barrage," would protect them. More artillery would fire behind the objectives to stop German counter-attacks. British soldiers also had better communication with their artillery and air support.
These methods worked well in battles like the Battle of the Menin Road Ridge (20 September). They advanced about 4,000 yards in two weeks. The Germans tried different tactics, but they all failed against these new British methods.
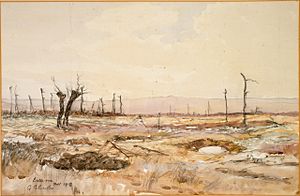
The ground west of Passchendaele Ridge was very wet. Three months of shelling had blocked the natural drainage. On 4 October, it started raining again. The battlefield turned into a deep mud pit. This made movement very difficult.
On 7 October, Haig canceled an afternoon attack because of the rain. The final plans for the 12 October attack were made on 9 October. General Plumer received wrong information. He thought a good starting line had been secured. This wrong information was passed to Haig. The decision was made to continue the attack. The goals were to gain higher ground for the winter and to help the French. It also aimed to keep German troops busy in Flanders.
Getting Ready for Battle: Prelude
British Preparations
British commanders were encouraged by high German losses and low German morale. Haig wanted to quickly restart the attack and capture Passchendaele Ridge. The Battle of Poelcappelle on 9 October was costly for both sides. Most of the land captured near Passchendaele was lost to German counter-attacks.
News of this German success was slow to reach British commanders. Communication was very bad due to the rain and mud. On 9 October, Plumer wrongly told Haig that the II Anzac Corps had reached its first goal. This made it seem like a good starting point for the 12 October attack.
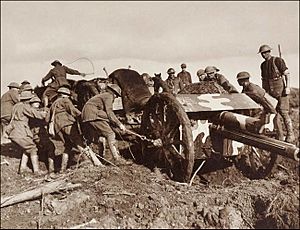
Many British guns were stuck in the mud. Others ran out of ammunition. German artillery fire became much stronger. British heavy artillery could barely fire from 9 to 12 October. This was because they were trying to move their guns forward.
The 3rd Australian Division and the New Zealand Division took over positions on the night of 10/11 October. Scouts found that the 49th (West Riding) Division had not advanced far. Their way was blocked by new barbed wire around the German Flandern I position. The New Zealand Division had to quickly prepare. They had little information from the previous division. Some wounded soldiers were still stuck in no-man's-land when the attack began.
Many field guns needed for the attack were still stuck in the mud. Other guns were placed on makeshift platforms. But these platforms were unstable, and the guns fired slowly or sank. A German bombardment hit on 11 October. The British shelled German defenses but had little effect. The Commander of Royal Artillery for the New Zealand Division said he couldn't guarantee enough artillery support.
Plumer found out that the front line had barely moved. The main reason for the failure on 9 October was thick, uncut barbed wire. This wire was in front of German pillboxes at Bellevue. The New Zealand commander, Major-General Andrew Russell, said accurate information came too late. He couldn't ask for a delay or change the plan.
The actual distance to the final goal was 2,000–2,500 yards, not the planned 1,500 yards. The starting line for the 3rd Australian Division's artillery was moved back. But infantry still had to advance 500 yards just to reach it. Wooden tracks were extended to the front line. This helped soldiers move up on the night of 11 October. However, heavy rain and strong winds began at 5:25 a.m. on 12 October and lasted all day.
British Attack Plan
The II Anzac Corps and Second Army headquarters had wrong information about the advance on 9 October. The goals for 12 October required an advance of 2,000–2,500 yards. This was much further than the intended 1,000–1,500 yards. The I Anzac Corps would protect the southern flank. They would advance across the Keiberg Spur and dig in at the first and second objective lines.
The main attack was by the Second Army. The 3rd Australian Division and the New Zealand Division of the II Anzac Corps would attack on a 3,000-yard front. The 3rd Australian Division would attack Passchendaele Ridge and the village. The New Zealand Division would capture the Bellevue Spur. The first goal was about 1,200 yards forward, beyond the Bellevue pillboxes. The second goal was 880 yards further, at the Wallemolen Spur. This was the starting line for the attack on Passchendaele village. The final goal was 400 yards beyond the village.
The Fifth Army would protect the northern side of the main attack. They were short on fresh troops. In the XVIII Corps area, two brigades would advance about 2,000 yards. In the XIV Corps area, three brigades would advance beyond Poelcappelle. They would get close to Houthoulst Forest, near the French First Army.
In the New Zealand Division, each attacking brigade had machine-gun support. The division also had many 18-pounder field guns and 4.5-inch howitzers. The artillery was supposed to move forward after the final goal was taken. They would then shell German areas beyond Passchendaele village.
German Preparations
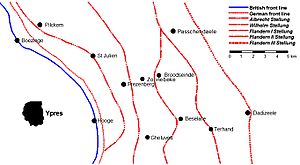
By mid-1917, the area east of Ypres had six German defensive lines. These included the Albrecht, Wilhelm, Flandern I, Flandern II, and Flandern III positions. The Belgian villages of Zonnebeke and Passchendaele were between these lines.
After their success on 9 October, the Germans brought in fresh divisions. But the speed of British attacks worried German commanders. The 18th Division took over the Poelcappelle area. They had many heavy machine-guns and smaller MG 08/15 machine-guns.
German commander Ludendorff had made changes to their defense. Outposts in front of the main defense line were to hold strong enough to stop British advances. These outposts would retreat to the main line when attacked. They would signal for artillery fire with rockets. The German artillery would fire in front of their main line. The goal was to stop the British infantry before they reached it. Troops in the front line were to try and defeat the attack without calling for reserve divisions. This was to limit their own casualties.
Crown Prince Rupprecht, a German commander, doubted Ludendorff's new tactics. He thought German artillery should focus on British infantry, not just counter-battery fire. A French attack was expected, so fewer reinforcements could be sent to the 4th Army. This meant a fighting retreat was the only option against British attacks. Rupprecht noted that German troops in Flanders were getting weaker. All attempts to stop British artillery had failed. He thought a bigger retreat was needed to force the British to move their artillery.
On the night of 11/12 October, the Germans launched "Operation Moonlight." They bombarded a strip of land with gas. However, strong winds scattered the gas, and it had little effect on Allied troops.
The Battle Unfolds
Second Army Attacks
The two Anzac Corps of the Second Army led the main attack. Rain fell all night on 11/12 October. The Germans were alert all night, firing flares. They bombarded the New Zealand front line at 5:00 a.m., hitting their trench mortar teams.
The 12th Brigade of the 4th Australian Division advanced on time at 5:25 a.m. They captured the Keiberg cutting. But they suffered many casualties. The 9th Brigade of the 3rd Australian Division reached its first goal. However, as they moved to the second goal, German artillery hit them hard. The 10th Brigade (3rd Australian Division) also suffered many losses from machine-guns in pillboxes.
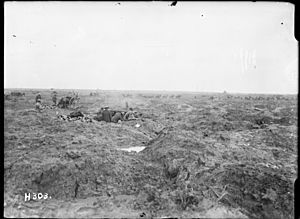
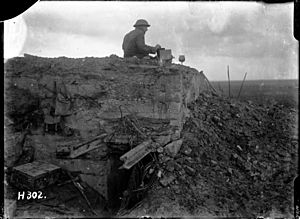
The New Zealand advance was blocked by uncut barbed wire. The "creeping barrage" (moving wall of artillery fire) was very weak. Many guns were stuck in mud or destroyed. Howitzer shells sank harmlessly into the wet ground around the Bellevue pillboxes. German machine-guns fired heavily from the pillboxes.
The New Zealand Division captured the cemetery at Wallemolen. They reached Wolf Copse. But their advance stopped on a rise near the Ravebeek creek. North of the Gravenstafel–Metcheele road, they gained some ground. But they were stopped by barbed wire 25–50 yards deep and heavy machine-gun fire. Soldiers tried to cut the wire, but many were killed. Further south, the New Zealand Division captured two pillboxes. An advance up the Ravebeek creek slope quickly failed. By 8:00 a.m., surviving New Zealand soldiers were ordered to dig in.
The Australians' advance towards the second goal began at 8:25 a.m. But the 10th Brigade had too many casualties to move forward. They dug in and waited for help. A small group from the 10th Brigade reached a pillbox near Crest Farm. Its German defenders surrendered. This group even advanced into Passchendaele village. But German troops quickly regrouped and took back the pillbox.
The 12th Brigade crossed the Keiberg spur but suffered many losses. They fought off two German counter-attacks in the afternoon. An attempt was made to use reserve troops to go around the Bellevue pillboxes. This was combined with a new New Zealand attack around 3:00 p.m.
However, this attack was canceled. The 9th (Scottish) Division to the north and the 3rd Australian Division to the south were forced back by machine-gun fire from Bellevue. The artillery bombardment still happened. It hit some New Zealand positions but also scattered two German groups preparing a counter-attack. By 3:30 p.m., the 10th Brigade had fallen back to its starting line. The 9th Brigade was exposed and also fell back. They suffered many casualties from artillery, machine-gun, and sniper fire.
German reinforcements quickly reoccupied the areas left by the Australians and New Zealanders. They captured 56 unwounded and many wounded Australians. By evening, most of the New Zealand Division pulled back to a line on the lower slopes of the Wallemolen spur.
Fifth Army Attacks
The Fifth Army protected the northern side of the main attack. The XVIII Corps attacked from north of Goudberg to north of the Lekkerboterbeek stream. The 26th Brigade of the 9th (Scottish) Division was to advance 2,000 yards. The 55th Brigade of the 18th (Eastern) Division attacked over ground soaked by rain. A German plane had scouted the area. So, the starting line for the 55th Brigade was changed to avoid German artillery fire.
XVIII Corps
The 9th (Scottish) Division faced problems from rain and mud. Supply routes were bad, guns got stuck, and ammunition was short. On the night of 11 October, heavy rain fell. German gas and high explosive shells hit the British forming-up areas. The wide attack front left many gaps in the line. The 26th Brigade advanced behind a weak artillery barrage. They also had support from 16 Vickers machine-guns.
The creeping barrage started at 5:35 a.m. It was described as "thin and ragged." Advancing troops lost direction. Communication broke down. Carrier pigeons were hindered by high winds. Messenger dog handlers were hit. On the right, the infantry captured Adler Farm and reached the green line. In the center, attackers had to dig in after only a 100-yard advance. Some small groups reached the final objective.
On the left, the ground was even worse. Infantry couldn't keep up with the barrage. They captured a pillbox and moved forward. Some troops accidentally crossed the Lekkerboterbeek. They advanced 80 yards and linked up with the 18th (Eastern) Division. Except on the right, the attack was stopped by Germans only 100 yards from the start line. Some British soldiers drowned in shell-holes. The new front line ran from the New Zealand Division's position to Oxford Houses, then back to the old front line.
The barrage for the 55th Brigade of the 18th (Eastern) Division began at 5:20 a.m. Infantry advanced in "snake formation." Their field artillery also suffered, with many guns sinking into the mud. A German counter-barrage began within a minute. German machine-gunners fired at shell-hole edges, hitting soldiers hiding inside. The German barrage was worst on the right side. Mud clogged all weapons. By 11:00 a.m., a British trench-mortar battery and some machine-guns had to stop firing due to wet ammunition. At noon, German counter-attacks began. They tried to exploit a gap between British divisions. Survivors of the British attack held defensive positions in shell-holes.
XIV Corps
The XIV Corps held the northern side of the Fifth Army. They also attacked to get closer to Houthoulst Forest. On the night of 11 October, tape was laid out for troops to form up beyond the front line. This was to avoid a possible German counter-barrage. Scouts went further forward to ambush German patrols. The 3rd Guards Brigade moved up through heavy rain and a German gas attack. This caused many casualties.
The artillery barrage started on time at 5:25 a.m. The German counter-barrage was slow and mostly fell behind the attacking waves. The XIV Corps divisions had better artillery and machine-gun support than those further south. The creeping barrage moved very slowly, 100 yards in ten minutes.
The 12th Brigade (4th Division) attacked with two battalions leading. They aimed for a first objective about 200 yards forward. Then they would pivot to a final objective 300 yards further. The ground was soaked by overnight rain. The right-hand battalion was stopped at Requette Farm by strong German resistance and heavy machine-gun fire. They lost contact with the neighboring division. The left-hand battalion faced less opposition. By 6:20 a.m., they had crossed the Poelcappelle–le Cinq Chemins road. They captured Memling and Senegal farms and made contact with the 17th (Northern) Division.
After Requette Farm was captured, more German machine-gun fire came from the Brewery and Helles House. This stopped the attack on the right flank. Requette Farm was lost to a German counter-attack around noon. Attempts to retake the farm were given up as dark fell. The brigade formed a defensive flank to keep contact with the 18th (Eastern) Division. The new front line curved back through Besace Farm to west of Helles House.
The 51st Brigade of the 17th (Northern) Division was to advance 1,600 yards. They aimed to meet the 4th Division's left flank and the Guards Division's right flank. Beyond the railway, the 51st Brigade moved slightly south. They avoided a German strongpoint that caused many casualties. South of the railway, they overran several German strongpoints and pillboxes. The infantry kept up with the very slow-moving barrage. The brigade reached its first objective by 8:00 a.m. The final objective was reached at 11:00 a.m. On the right, a defensive flank was set up to link with the 4th Division. By noon, the advance was complete. They took 218 German prisoners. No German counter-attack followed, only some rifle fire.
In cold, wet weather, the 3rd Guards Brigade made a short advance. They took the higher ground on the edge of Houthoulst Forest. Contact with the 17th (Northern) Division on the right was lost. Two platoons had to dig in near the Angle Point pillbox under machine-gun fire. After dark, the Guards and 17th (Northern) Division closed the gap. They captured blockhouses at Angle Point and Aden House. The next day, conditions were so bad that the attacking brigade was replaced. The fresh troops patrolled the southern edge of Houthoulst Forest. They faced little organized German resistance, mostly sniping.
Air Operations
During the battle, 41 British pilots flew low-altitude attacks. They shot at German troops and bombed targets. British planes also flew 27 patrols to check on troop positions and German counter-attacks. They made 124 calls to artillery to hit German machine-gun nests, troops, and transport. British observers also called for artillery to destroy or neutralize 63 German artillery batteries.
The British flew four bombing raids on German camps and railway stations. They also did eight reconnaissance flights beyond the battlefront. There were 12 dogfights with German aircraft. British squadrons lost 14 aircraft. Five crew members were wounded.
Aftermath: What Happened Next
Casualties and Remembrance
German commander Ludendorff said German casualties were "extraordinarily high" from 2 to 21 October. Hindenburg, another German leader, worried greatly about the wet season. German historians recorded 12,000 casualties, including 2,000 missing, for 11–20 October. They did not give a separate number for 12 October.
The 4th Australian Division had about 1,000 casualties. The 3rd Australian Division had about 3,199 casualties. From 9 to 12 October, the German 195th Division lost 3,395 soldiers.
New Zealand suffered 2,735 casualties. Of these, 845 men were killed or fatally wounded and left in no man's land. In 2007, historian Glyn Harper wrote that 846 New Zealanders were killed. Another 2,000 were wounded, and 138 died from their wounds later. The 4th Division lost 3,569 soldiers from 4 to 12 October. In 2014, historian Perry recorded more than 6,250 casualties in the II Anzac Corps. There were 1,000 losses in the I Anzac Corps. The Fifth Army had 9,950 casualties.
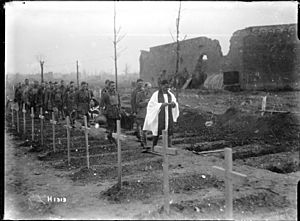
The New Zealand memorial at Tyne Cot remembers New Zealanders killed in this battle who have no known grave. The Buttes New Zealand Memorial holds the remains of New Zealand troops. In 1997, Christopher Pugsley wrote that 12 October 1917 was New Zealand's "blackest day." In 2007, Glyn Harper added that "more New Zealanders were killed or maimed in these few short hours than on any other day in the nation's history."
Victoria Cross Heroes
Two soldiers earned the Victoria Cross, a very brave award:
- Private Albert Halton of the 1st Battalion, King's Own (Royal Lancaster Regiment).
- Captain Clarence Jeffries of the 34th Australian Battalion.
Later Operations
On 22 October, the 18th (Eastern) Division attacked the east end of Poelcappelle. The XIV Corps attacked to the north. This attack aimed to push forward the Fifth Army's left side. It also protected against a German counter-attack on the Canadian Corps. The Canadian Corps was preparing for the Second Battle of Passchendaele (26 October – 10 November 1917).
The artillery of the Second and Fifth armies fired a bombardment. This was to make the Germans think a general attack was coming. Poelcappelle was captured. But the attack between the 34th and 35th divisions was pushed back. German counter-attacks pushed back the 35th Division in the center. However, the French captured all their objectives.
British troops struggled to advance in the mud and shell-damaged ground. They lost the ability to quickly go around German pillboxes. The infantry of the 35th Division reached the edge of Houthoulst Forest. But they were pushed back in some places. German counter-attacks after 22 October also faced the same difficulties and failed. The German 4th Army was prevented from moving troops away from the Fifth Army. This also stopped them from focusing their artillery on the Canadians.
See also
- Second Battle of Passchendaele


