Stalemate in Southern Palestine facts for kids
Quick facts for kids Stalemate in Southern Palestine |
|||||||
|---|---|---|---|---|---|---|---|
| Part of the Middle Eastern theatre of World War I | |||||||
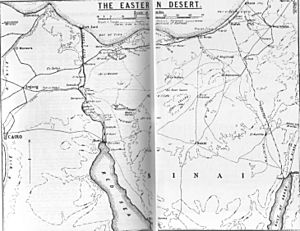
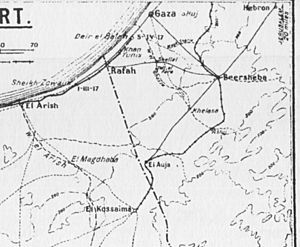
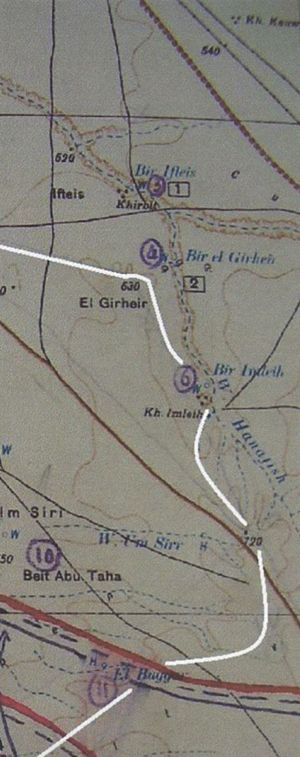
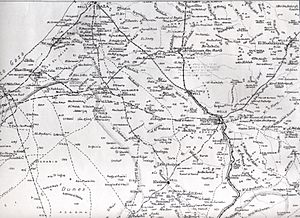 British Army map of the Gaza and Beersheba areas |
|||||||
|
|||||||
| Belligerents | |||||||
| Commanders and leaders | |||||||
|
|
|||||||
| Units involved | |||||||
|
Egyptian Expeditionary Force
|
Fourth Army
Yildirim Army Group
|
||||||
The Stalemate in Southern Palestine was a six-month period during World War I. It was a time when two armies, the British Egyptian Expeditionary Force (EEF) and the Ottoman Army, faced each other. Neither side could make the other retreat. This standoff happened along a line from Gaza to Beersheba.
The stalemate started in April 1917. This was after the EEF lost the Second Battle of Gaza to the Ottoman Army. It lasted until October 31, 1917. That's when the EEF launched a new attack, starting with the Battle of Beersheba.
Before this stalemate, the Ottoman Army had been pushed out of the Sinai Peninsula. This happened because the EEF won several battles. These included the Battle of Romani in August 1916, the Battle of Magdhaba in December, and the Battle of Rafa in January 1917. After these wins, the EEF tried twice to capture Gaza. But they failed in the First Battle of Gaza and the Second Battle of Gaza. These defeats stopped the EEF's advance into southern Palestine. This led to the long stalemate.
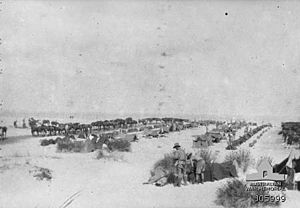
During these six months, the EEF held positions near the Negev Desert. Both sides fought in trenches, similar to the Western Front. They also had mounted patrols on the open eastern side. Both armies used this time to reorganize, train, and get ready for bigger battles. This preparation later helped the EEF capture Jerusalem in December 1917.
Contents
- British Army Faces Challenges at Gaza
- Ottoman and German Forces Get Stronger
- British Expeditionary Force (EEF) Situation
- Daily Life in the Desert
- EEF Operations: April to June
- EEF Gets More Troops
- New Commander: General Allenby
- EEF Reorganization and Deployment
- Ottoman Yildirim Army Group Activated
- EEF Operations: July to October
- Ottoman Armies Reorganized
- End of the Stalemate
- See also
British Army Faces Challenges at Gaza
After the British lost the first battle for Gaza in March 1917, some commanders were replaced. General Archibald Murray, who led the Egyptian Expeditionary Force (EEF), also lost his command in June. He was sent back to England.
The EEF was lucky the Ottoman forces did not attack strongly after the Second Battle of Gaza. If they had, the EEF might have been pushed back even further. The British army had to quickly secure their positions. They also needed to reorganize and get more soldiers. Their infantry divisions had lost many men.
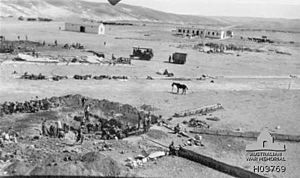
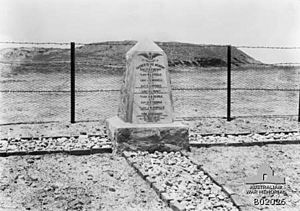
The British army had nearly 4,000 casualties in the first Gaza battle. They had over 6,000 casualties in the second battle. These wounded soldiers needed care. The dead had to be buried. The EEF also extended its railway line. This helped bring supplies closer to the front.
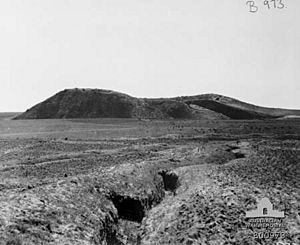
Both sides built many trenches. These were like the trenches on the Western Front in Europe. They were very strong, especially where the armies were close. These defensive lines stretched about 30 miles (48 km). They went from the Mediterranean Sea to Beersheba.
Ottoman and German Forces Get Stronger
After the Second Battle of Gaza, the Ottoman Fourth Army had many soldiers, animals, and weapons. Their main goals were to push the EEF back to the Suez Canal. They also wanted to take back Baghdad and Mesopotamia. But they had problems with supplies. Their railway line from Turkey was not finished.
Despite these issues, the Ottoman Army felt much stronger after their two wins at Gaza. They received more soldiers and were reorganized. German commanders helped lead these forces. They built very strong defenses from Gaza to Beersheba. These defenses included outposts that could support each other. It made a direct attack very difficult.
New Ottoman troops were trained in modern combat methods. These methods were learned on the Western Front. They practiced combined-arms training. This meant different types of units, like infantry and artillery, worked together. They also added more machine guns to their infantry units. This greatly increased their firepower. Special assault detachments, like German Stormtroopers, were also formed.
The main Ottoman training center was at Tel esh Sheria. This was halfway between Gaza and Beersheba. German and Austrian instructors taught courses there. They focused on machine gun use and artillery tactics.
British Expeditionary Force (EEF) Situation
The EEF had lost many soldiers in the Gaza battles. They needed a much larger force to defeat the strong Ottoman positions.
The EEF built strong defenses from Gaza to Shellal. From there, a lightly dug line went to El Gamli and then south to Tel el Fara. The western part of the line was heavily trenched and wired. The Desert Column was in charge of patrolling the open eastern area. They also bothered Ottoman forces whenever they could.
The Wadi Ghazza was a major feature on the eastern side. It was hard to cross except at a few points. The wadi had steep banks, making crossings difficult. During the stalemate, more crossings were built.
High points like Tel el Jemmi and Tel el Fara offered great views. These were used as lookout posts. From these spots, the British could see for miles.
The EEF's front line had many small forts called redoubts. These were protected by wire fences. A support line of trenches was built behind the main line. If a redoubt was lost, it had to be taken back right away.
The Desert Column was responsible for the open eastern side. This area stretched towards Beersheba. Commanders were told to be aggressive. They needed to use their horses to quickly get to the enemy's side. This was the main goal of any operation.
Reconnaissance aircraft took photos from April onwards. These photos helped update maps. They showed changes to Ottoman defenses. This information was quickly sent to commanders.
Daily Life in the Desert
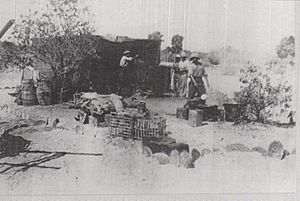
Life in the desert was very tough for soldiers on both sides. They camped in the open during summer. Food was often scarce. Many suffered from sandfly fever. Hot desert winds, called khamsin, blew constantly. These winds created huge clouds of dust. One officer reported a temperature of 120 degrees Fahrenheit (49 degrees Celsius) inside a tent.
EEF rations were often boring and poor quality. Soldiers often ate "iron rations" from tins. This was usually Bully beef and army biscuits. Sometimes they had stew. The only relief for EEF troops was rest periods on the Mediterranean coast.
Ottoman soldiers also faced low morale. This was due to supply problems. They had shortages of food and water during the hot summer. Health services were poor. Many soldiers deserted.
Dust Challenges
The hot, southerly Khamsin winds could blow for days. They were like blasts from a furnace. Tents were blown down. Sand and fine dust piled up, sometimes blocking railway lines.
The fine dust around Gaza was especially bad. In a sandstorm, it felt like hot needles on the skin. It filled eyes, ears, noses, and mouths. Soldiers breathed, ate, and slept in dust. The dust stuck to sweaty skin.
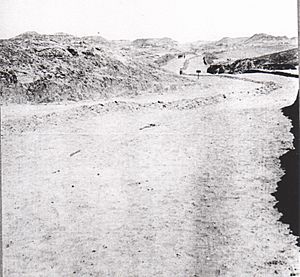
Constant traffic behind the front lines made the roads very dusty. This dust rose in white clouds. Because these clouds showed troop movements, no attacks were made during the day. To manage the dust, traffic was limited to certain roads. These roads were swept clean.
Septic Sores and Health
Septic sores were common in the EEF during summer 1917. These were painful skin infections. They often started from small cuts. Poor diet, lack of vegetables, and unclean water contributed to them. Flies were a major problem. They spread germs and made minor cuts infected. Bandages got dirty quickly because of the dust. The sores cleared up when the troops reached areas with oranges later in the year.
Keeping Clean
Soldiers spent daylight hours hunting for fleas and lice. This was a regular part of their lives. Steam disinfecting plants were set up to clean clothes. While clothes were baked to kill bugs, men could wash themselves. This was often their first chance to wash in weeks. They usually had a limited amount of water for washing themselves and their clothes.
Water Supply
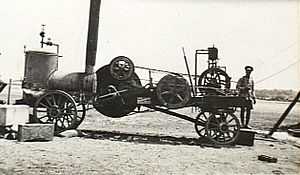
The EEF's area had many pools of good water in the wadis. Large troughs were built in the Wadi Ghazza for horses and camels. Wells at places like Khan Yunis provided a lot of water. Pumping stations and deep wells were also built.
Pipelines were laid to bring water to different areas. The pipeline from El-Qantarah supplied water all the way to Rafa. This helped establish training and staging areas.
Medical Support
Daily "Sick Parades" were held by medical officers. They gave out pills and dressings for minor issues. Famous "Number Nine" pills were given for many problems. Hospital staff treated wounds and performed emergency surgery. Field hospitals had tents for patients. They lay on mattresses or stretchers.
EEF Operations: April to June
During these months, a war of attrition took place. This meant small attacks on trenches and air raids. Mounted units also patrolled the open eastern side.
Trench Warfare
Many raids were carried out on enemy trenches. Most activities happened at night because of the intense heat during the day. During the day, the heat caused a "mirage," making rifle fire difficult. Both sides often stopped fighting during the hottest hours. At night, trenches were raided. Repairs were made, barbed wire was strung, and gun positions were built.
British troops attacked Ottoman trenches on Umbrella Hill in May. In June, British soldiers attacked an Ottoman post on the Mediterranean shore. They took prisoners and caused many casualties without losing any men. These raids helped the British gain control of the "No Man's Land" area between the trenches.
Mounted Patrols
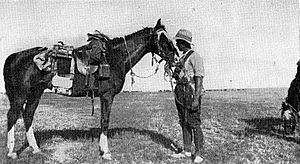
EEF mounted patrols explored areas towards Hareira and Beersheba. These patrols happened day and night. They often led to small fights and surprise attacks. Ottoman cavalry frequently attacked these patrols. The area became known as "the racecourse."
The Anzac and Imperial Mounted Divisions took turns holding the front line. They provided night patrols at important points. They also defended various positions. If a strong enemy attack was reported, brigades would move quickly to investigate.
Day patrols often started early in the morning. They rode over dusty land. Aerial bombing was a constant danger. Night patrols went out after dark. They listened for enemy movements near Ottoman positions. They also checked for water sources and examined trenches.
Long Reconnaissances to Beersheba
Every two weeks, large mounted forces went on long reconnaissance missions towards Beersheba. These were important for learning about the land. They also helped plan future attacks. It was thought that these regular missions would make the Ottoman defenders less alert when the real attack came.
These major operations lasted about 36 hours. They started in the afternoon and continued through the night and next day. Commanders would explore the ground. Ottoman guns often fired at them. The local people were often hostile and fired on the EEF.
During these long missions, engineers surveyed the area. They improved Wadi Ghazza crossings and developed water supplies. They also repaired damaged wells at Khalasa and Asluj. This was important for the planned main attack.
These missions were very hard on the horses. They often covered 70 miles (110 km) or more. They had no water for many hours. This made the horses lose condition. They needed a week or more to recover.
Railway Raids
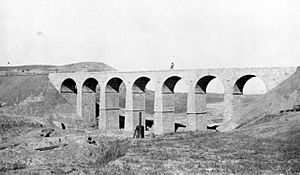
British forces conducted raids to destroy Ottoman railway lines. One raid in May destroyed wells near Kossaima and El Auja. Another large raid in May blew up about 15 miles (24 km) of railway line. They also damaged stone bridges and viaducts between Asluj and Hafir el Auja. These raids were very successful.
Strategic Marches to El Buqqar
British patrols often found Ottoman units occupying certain posts at night. These units would withdraw before EEF patrols arrived in the morning. The British tried to ambush and capture these units. But heavy fog sometimes stopped their plans.
In June, a large water cistern at Kh Khasif was blown up. British forces encountered Ottoman cavalry nearby. They pushed them back to a strong Ottoman line. Strategic marches were made to El Buqqar to surprise Ottoman patrols. But these ambushes were not successful.
Aerial Bombing Raids
As ground fighting slowed, air raids increased. Many raids happened at night under bright moonlight. Pilots could see tents and roads clearly from the air.
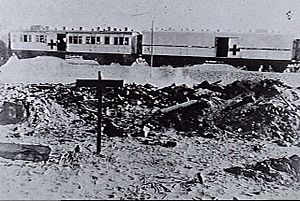
The British took precautions against air attacks. Mounted units used open formations. Tents were camouflaged. Hospitals were marked with red lamps, but they were not always safe.
German Air Raids
German aircraft bombed British hospitals at Deir el Belah in May. These hospitals were clearly marked with Red Cross symbols. The attacks killed and wounded several patients and medical staff. Another air raid on Kantara tried to blow up British supply lines.
EEF Air Raids
British aircraft retaliated with their own bombing raids. They bombed Ottoman camps and airfields. In June, eight EEF aircraft bombed the Ottoman Fourth Army headquarters in Jerusalem. Some aircraft had to make forced landings on their way back.
Long-distance air raids were also carried out. Three aircraft flew over 150 miles (240 km) to bomb the railway station at Ma'an. They destroyed supplies and damaged buildings. They also bombed an Ottoman camp, causing a stampede.
Air Battles Begin
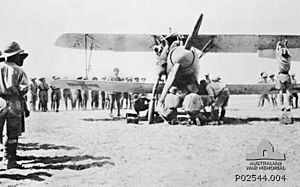
In 1916, air patrols were usually peaceful. But by April 1917, the air war became more intense. German aircraft were technically better. Many EEF aircraft were shot down in May.
British reconnaissance patrols needed escort aircraft to protect them. These escorts grew to squadron size. They attacked enemy aircraft in the air or on the ground. Air battles became more common.
EEF Gets More Troops
After the Gaza battles, the British army needed many more soldiers. General Murray told the War Cabinet he could not invade Palestine without them. He was promised enough reinforcements to have six infantry and three mounted divisions.
French and Italian troops also arrived in May and June. These forces were attached to the EEF for political reasons. The 60th (London) Division and two mounted brigades were transferred from Salonika. The 75th Division was formed in Egypt.
Rest and Relaxation
Tired troops were given leave to Cairo and rest camps. Soldiers enjoyed lounging, sleeping in tents, and going to concerts. They also played sports like tug-of-war, boxing, rugby, and soccer. Horse and camel racing were popular.
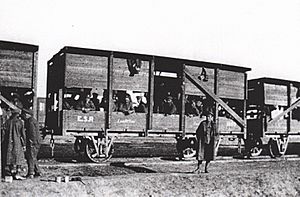
Soldiers could go to places like Port Said, Cairo, and Alexandria. They traveled by train. They enjoyed showers, good food, and sleeping in real beds.
New Commander: General Allenby
On June 11, General Murray was replaced. General Sir Edmund Allenby was given command of the EEF. There had been a lack of confidence in Murray. The two failed Gaza battles made him unpopular.
Allenby was a strong commander. He had served in Africa and France. He had just won a major victory at Arras in France. Before he left London, Prime Minister Lloyd George asked Allenby to capture Jerusalem. He wanted it as a "Christmas present" for the British nation. Allenby arrived in Egypt on June 27. He took command on June 28. He immediately began preparing for a new type of warfare.
EEF Reorganization and Deployment
After Murray's recall, the Desert Column was reorganized. It now had three mounted divisions instead of two. This was possible because new mounted brigades arrived. The three mounted divisions were the Anzac Mounted Division, the Australian Mounted Division, and the Yeomanry Mounted Division.
Deployment of Three Mounted Divisions
While infantry fought in trenches, the three mounted divisions rotated. They worked in three different areas on the open eastern side. One division aggressively patrolled towards Hareira and Beersheba. A second division trained in reserve. The third division rested on the Mediterranean coast.
Divisions rotated every four weeks. This helped maintain the health and morale of the troops. The local people in the occupied territory were often indifferent or hostile.
Tel el Fara and Abasan el Kebir
Units moved to places like Tel el Fara and Abasan el Kebir. At Tel el Fara, the routine was to be ready for attack before dawn. Horses were watered daily. They were groomed and fed three times a day. Manure was buried to control flies.
At Abasan el Kebir, soldiers lived in semi-permanent bivouacs. These were dug pits covered with mats. They offered some protection from air raids. Training was conducted here. This included shooting, tactics, and anti-gas methods. Cricket and boxing competitions were also held.
Tel el Marakeb Rest Camp
At Tel el Marakeb, on the Mediterranean coast, men could swim and enjoy concerts. The Australian Mounted Division surfed, played sports, and swam their horses. They also had foot races and mounted competitions. Semi-permanent bivouacs were built here.
Commanders inspected units at Tel el Marakeb. Soldiers kept their equipment clean and polished. Hotchkiss gun training was also done here.
Ottoman Yildirim Army Group Activated
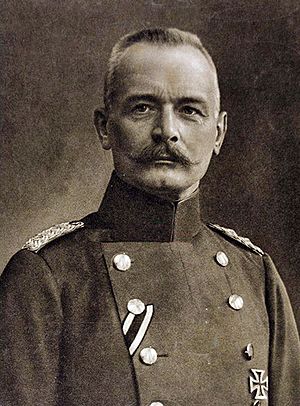
In June 1917, Enver Pasha activated the Yildirim Army Group. This group was led by German General Erich von Falkenhayn. It was strengthened with extra Ottoman units. By July, the Ottoman force defending the Gaza to Beersheba line had grown. It had many rifles, machine guns, and artillery pieces.
EEF Operations: July to October
Trench Warfare Continues
Both sides continued to raid trench lines in July. The British attacked Umbrella Hill. They captured prisoners and weapons. This was followed by heavy Ottoman shelling.
Mounted Operations and Reconnaissance
Constant patrolling continued in the hot August weather. Allenby, Chauvel, and Chetwode made many mounted reconnaissance missions. These regular missions helped trick the Ottoman command. They made them feel too safe before the real attack.
British patrols reached the Gaza to Beersheba road. They attacked Ottoman cavalry. They also captured a strong Ottoman post near Irgeig. Armored cars pursued retreating enemy soldiers.
British forces tried to blow up a section of the railway near Irgeig. But they were attacked by Ottoman patrols. They had to retreat before they could light the explosives.
Reconnaissance missions were carried out towards various locations. These included Bir Ifteis, Ras Ghannam, and Ruweihi. Wireless communication worked very well during these missions.
Allenby himself conducted a personal reconnaissance south of Beersheba. This was covered by the Australian Mounted Division. Scouts also surveyed the Wadi Sufi. They faced heavy fire from Ottoman positions.
Buqqar Ridge Attack
General Erich von Falkenhayn planned a two-phase attack. It started with a reconnaissance in force from Beersheba on October 27. This was followed by a larger attack on October 31.
The reconnaissance in force involved 3,000 Ottoman infantry, 1,200 cavalry, and twelve guns. They attacked the EEF outpost line. British defenders on Point 630 held their ground. But the yeomanry defending Point 720 were overrun by Ottoman cavalry. They suffered casualties before reinforcements arrived.
Aerial Attacks and Dogfights
German aircraft tried to blow up the EEF's railway line and water pipeline in August. But British guards stopped these attempts. British aircraft retaliated with air raids on Ottoman camps.
Air battles continued to intensify. German aircraft shot down several British planes in July. British aircraft started flying with escorts. These escorts protected reconnaissance planes and attacked enemy aircraft.
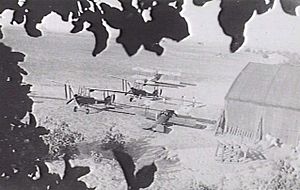
Newly arrived Bristol Fighters gave the British air force more power. They started dominating the air war in October. They shot down several German Albatros scouts.
Ottoman Armies Reorganized
Within the Yildirim Army group, Ottoman forces in Palestine were reorganized. The Fourth Army headquarters became the new Ottoman Eighth Army. The Seventh Army was also formed. These changes did not alter the tactical positions of the Ottoman corps defending the Gaza to Beersheba line.
End of the Stalemate
After making careful preparations, the Southern Palestine Offensive began on October 31. This led to the EEF's victory at the Battle of Beersheba. This battle marked the end of the long stalemate.
See also


