Battle of Navarino facts for kids
Quick facts for kids Battle of Navarino |
|||||||
|---|---|---|---|---|---|---|---|
| Part of the Greek War of Independence | |||||||
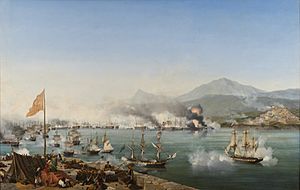 The Naval Battle of Navarino, Ambroise Louis Garneray |
|||||||
|
|||||||
| Belligerents | |||||||
| Commanders and leaders | |||||||
| Strength | |||||||
| 10 ships of the line 10 frigates 2 schooners 4 sloops 1 cutter 1,252 guns 8,000 crewmen |
3 ships of the line 17 frigates 30 corvettes 5 schooners 28 brigs 5-6 fireships 2,158 guns 20,000 crewmen |
||||||
| Casualties and losses | |||||||
| 181 killed 480 wounded |
4,000 killed or wounded 4,000 captured 55 ships lost |
||||||
The Battle of Navarino was a huge naval battle fought on October 20, 1827. It happened during the Greek War of Independence (1821–1829) in Navarino Bay, which is on the west coast of Greece. In this battle, a combined fleet from Britain, France, and Russia completely defeated the forces of the Ottoman and Egyptian empires. This victory was a major turning point, making it much more likely that Greece would become an independent country.
This battle was special because it was the last big naval fight in history where only sailing ships were used. Even though most ships were anchored, the Allied forces won because they had better guns and their crews were more skilled.
The three powerful European countries (Britain, France, and Russia) got involved in the Greek conflict for different reasons. Russia wanted to expand its influence as the Ottoman Empire was getting weaker. This worried other European countries, who feared Russia would become too powerful. However, many people in Britain and Russia strongly supported the Greeks, who shared their Christian faith. To prevent Russia from acting alone, Britain and France signed a treaty with Russia. They agreed to work together to help Greece gain some freedom, while still trying to keep the Ottoman Empire from falling apart completely.
The countries signed the Treaty of London (1827). This treaty said the Ottoman government had to give the Greeks some self-rule. To make this happen, they sent their navies to the Mediterranean Sea. The Battle of Navarino happened almost by accident. The Allied commander, Admiral Edward Codrington, tried to force the Ottoman commander to follow their instructions. The destruction of the Ottoman fleet saved the new Greek Republic from being crushed. But Greece still needed more help, including another war by Russia and French troops in Greece, to finally become fully independent.
Why the Battle Happened
Greek Fight for Freedom
The Ottoman Turks had taken over Greece in the 1400s. In 1821, Greek people started a revolt to free themselves from hundreds of years of Ottoman rule. The fighting went on for several years. By 1825, neither side could win completely. The Greeks couldn't kick the Ottomans out, and the Ottomans couldn't completely stop the rebellion.
However, in 1825, the Ottoman Sultan got help from Muhammad Ali Pasha, the powerful ruler of Egypt. Muhammad Ali was technically under the Sultan, but he acted like his own ruler. He sent his well-trained army and navy to fight the Greeks. In return, the Sultan promised to give Muhammad Ali's son, Ibrahim, control of the Peloponnese region of Greece. In February 1825, Ibrahim led 16,000 soldiers into the Peloponnese. He quickly took over the western part but couldn't capture the eastern part, where the Greek government was located.
The Greek rebels kept fighting. They hired experienced British officers, Sir Richard Church for the army and Lord Cochrane for the navy. But by 1827, the Greek forces were much weaker than the Ottomans and Egyptians. It looked like the Greeks would have to give up. At this difficult time, three powerful countries—Great Britain, France, and Russia—decided to step in and help.
How the Great Powers Got Involved
At first, Britain and Austria tried to stop other countries from getting involved in the Greek conflict. They wanted to give the Ottomans time to defeat the rebellion. But the Ottomans couldn't stop the revolt.
Things changed in December 1825 when Tsar Alexander of Russia died. His younger brother, Nicholas I, became the new Tsar. Nicholas was more determined and nationalistic. Britain then decided that working together with other powers was the best way to stop Russia from expanding too much on its own.
So, Britain, France, and Russia signed the Treaty of London on July 6, 1827. This treaty demanded an immediate ceasefire between the fighting sides. It also offered for the Allied countries to help negotiate a final peace. The treaty said that Greece should have some self-rule but still be part of the Ottoman Empire.
A secret part of the treaty said that if the Ottomans didn't agree to the ceasefire within a month, each country would send a representative to Nafplion, the Greek capital. This would mean they officially recognized the Greek rebel government. This part also allowed the Allied naval commanders in the Mediterranean to "take all measures" (including military action) to make the Ottomans follow the demands. However, it also said that the commanders should not take sides in the conflict.
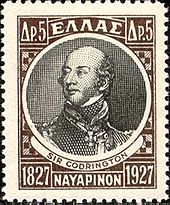
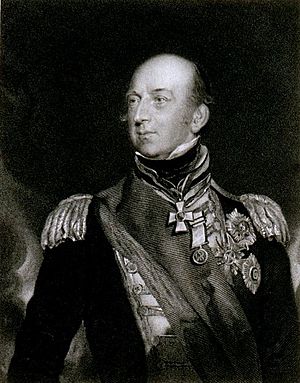
On August 20, 1827, Vice-Admiral Sir Edward Codrington, the British naval commander, received his orders. Codrington was a brave sailor and a hero from the Battle of Trafalgar. But he was not a diplomat. He was impulsive and supported the Greek cause.
Ships in the Battle
It's a bit hard to know the exact number of ships in the Ottoman/Egyptian fleet. The numbers below are mostly from Admiral Codrington's report.
Allied Ships
Here are the ships that fought for the British, French, and Russian forces.
| British squadron (Vice Admiral Edward Codrington) | ||||||||||
|---|---|---|---|---|---|---|---|---|---|---|
| Ship | Type | Guns | Navy | Commander | Casualties | Notes | ||||
| Killed | Wounded | Total | ||||||||
| Asia | Second-rate | 84 | Captain Edward Curzon ; commander Robert Lambert Baynes | 18 | 67 | 85 | Flagship of the British squadron, flagship of the Allied fleet | |||
| Genoa | Third-rate | 76 | Captain Walter Bathurst ; commander Richard Dickenson | 26 | 33 | 59 | ||||
| Albion | Third-rate | 74 | Captain John Acworth Ommanney ; commander John Norman Campbell | 10 | 50 | 60 | ||||
| Glasgow | Fifth-rate | 50 | Captain Hon. James Ashley Maude | 0 | 2 | 2 | ||||
| Cambrian | Fifth-rate | 48 | Captain Gawen William Hamilton, C.B. | 1 | 1 | 2 | ||||
| Dartmouth | Fifth-rate | 42 | Captain Thomas Fellowes, C.B. | 6 | 8 | 14 | ||||
| Talbot | Sixth-rate | 28 | Captain Hon. Frederick Spencer | 6 | 17 | 23 | ||||
| HMS Rose | Sloop | 18 | Commander Lewis Davies | 3 | 15 | 18 | ||||
| HMS Brisk | Brig-sloop | 10 | Commander Hon. William Anson | 1 | 2 | 3 | ||||
| HMS Musquito | Brig-sloop | 10 | Commander George Bohun Martin | 2 | 4 | 6 | ||||
| HMS Philomel | Brig-sloop | 10 | Commander Henry Chetwynd-Talbot | 1 | 7 | 8 | ||||
| HMS Hind | Cutter | 10 | ||||||||
| French squadron (Rear Admiral Henri de Rigny) | ||||||||||
|---|---|---|---|---|---|---|---|---|---|---|
| Ship | Type | Guns | Navy | Commander | Casualties | Notes | ||||
| Killed | Wounded | Total | ||||||||
| Breslaw | Second-rate | 84 | Captain Botherel de La Bretonnière | 1 | 14 | 15 | ||||
| Scipion | Third-rate | 80 | Captain Pierre Bernard Milius | 2 | 36 | 38 | ||||
| Trident | Third-rate | 74 | Captain Morice | 0 | 7 | 7 | ||||
| Sirène | First-rank frigate | 60 | Contre-amiral Henri de Rigny, Captain Robert | 2 | 42 | 44 | Flagship of the French squadron. | |||
| Armide | Second-rank frigate | 44 | Captain Hugon | 14 | 29 | 43 | ||||
| Alcyone | Schooner | 10 to 16 | Captain Turpin | 1 | 9 | 10 | ||||
| Daphné | Schooner | 6 | Captain Frézier | 1 | 5 | 6 | ||||
Ottoman Ships
Here are the ships that fought for the Ottoman Empire and Egypt.
| Imperial squadron (Amir Tahir) | ||||||||||
|---|---|---|---|---|---|---|---|---|---|---|
| Ship | Type | Guns | Navy | Commander | Casualties | Notes | ||||
| Killed | Wounded | Total | ||||||||
| Ghiuh Rewan | Third-rate | 84 | ~650 | Flagship, commander-in-chief | ||||||
| Fahti Bahri | Third-rate | 74 | Flagship | |||||||
| Burj Zafer | Third-rate | 70 | ~400 | |||||||
| Fevz Nusrat | Double-decked frigate | 64 | ||||||||
| Ka'íd Zafer | Double-decked frigate | 64 | ||||||||
| Keywan Bahri | Double-decked frigate | 48 | ||||||||
| Feyz Mi' 'raj | Double-decked frigate | 48 | ||||||||
| Mejra Zafer | Double-decked frigate | 48 | ||||||||
| Guerrière | Double-decked frigate | 60 | Flagship Moharrem Bey | |||||||
| Ihsanya | Double-decked frigate | 64 | Flagship Hassen Bey | |||||||
| Surya | Double-decked frigate | 56 | ||||||||
| Leone | Double-decked frigate | 60 | ||||||||
| 8 single-deck frigates, 30 corvettes, 5 schooners, 28 brigs, and 5-6 fireships. The corvettes and brigs carried 1,134 guns. | ||||||||||
The Ottoman fleet also included:
- Capitan Bey Squadron (Alexandria): 2 ships of the line, 5 frigates, 12 corvettes
- Moharram Bey Squadron (Alexandria): 4 frigates, 11 corvettes, 21 brigs, 5 schooners, and 5 or 6 fireships
- Tunis Squadron: 2 frigates, 1 brig
- Tahir Pasha Squadron (Admiral commanding) (Constantinople): 1 ship of the line, 6 frigates, 7 corvettes, 6 brigs
The Battle Begins
Setting the Scene
Admiral Codrington's orders were to make both sides agree to a ceasefire. He also had to stop Ottoman supplies and troops from reaching Greece. He was only supposed to use force if there was no other choice.
On August 29, the Ottomans officially said no to the Treaty of London. This led to Allied representatives being sent to Nafplion, the Greek capital. On September 2, the Greek government accepted the ceasefire. This meant Codrington could focus on getting the Ottomans to agree.
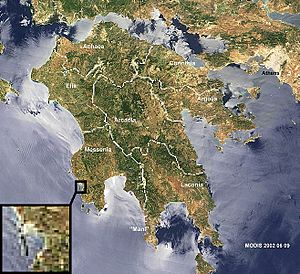
Navarino Bay is a large, natural harbor on the west coast of Greece. It's about 5 km long and 3 km wide. A long, narrow island called Sphacteria protects the bay from the open sea. There are two entrances to the bay. The northern one is very narrow and shallow, so big ships can't use it. The southern entrance is much wider and was guarded by the Ottoman New Navarino fortress (Pylos). During the Greek revolt, the Ottoman navy used this bay as its main base.
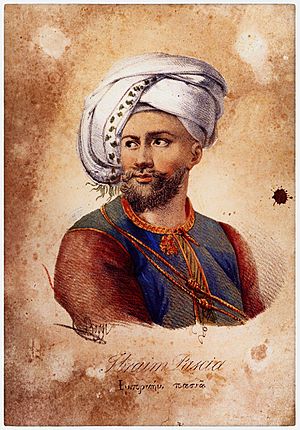
A large Ottoman–Egyptian fleet arrived at Navarino on September 8. They had been warned by the British and French to stay away from Greece. Codrington arrived with his squadron on September 12. After talks with Ibrahim Pasha, the Ottoman commander, Codrington received promises that they would stop fighting on land and sea. Codrington then went to a nearby British island, leaving a ship to watch the Ottoman fleet.
But the Ottomans soon broke their promises. Ibrahim was angry that he had to stop fighting, while the Greeks seemed to be allowed to continue. Greek forces, led by British officers, were attacking Ottoman areas. Codrington tried to make the British officers working for the Greeks stop, but it didn't work very well.
Ibrahim decided to act. On October 1, he sent a naval squadron to help the Ottoman troops in Patras. Codrington's ships stopped them. Ibrahim tried again on October 3/4, leading the squadron himself. He got past the British ship in the dark, but strong winds stopped him from entering the gulf. This gave Codrington time to catch up. Codrington fired warning shots, and Ibrahim turned back.
Meanwhile, Ibrahim's forces continued to burn villages and fields on land. The fires were visible from the Allied ships. A British group reported that the people of Messinia were starving.
On October 13, Codrington was joined by French and Russian squadrons. On October 18, after trying to talk to Ibrahim Pasha again, Codrington and his allies made a big decision. They would enter Navarino Bay and anchor their ships right next to the Ottoman fleet. They felt they couldn't keep blocking the bay all winter, and the people of Greece needed protection. This was a very risky move, but Codrington said they didn't plan to fight. They just wanted to show their strength and make the Ottomans follow the ceasefire and stop harming civilians.
Comparing the Fleets
The Allied navies still used sailing ships made of wood, with muzzle-loading cannons. It was similar technology to battles fought years before. However, British warships had improved. They used stronger guns, like 24- or 32-pounders. Most Allied crews had a lot of fighting experience from previous wars.
Overall, the Allies had 22 ships and 1,258 guns. The Ottomans had 78 ships with 2,180 guns. But the Allies had a big advantage. They had 10 ships of the line (the biggest warships) compared to the Ottomans' three. Most of the Ottoman fleet were smaller ships, which weren't as powerful against the Allied heavy ships. Also, the Ottoman guns were often older and smaller. Many Ottoman crews were forced to join the navy, and some were even chained to their posts.
The Egyptian part of the Ottoman fleet was the largest and best-equipped. They had been trained by French officers. But these French officers left the Egyptian fleet the day before the battle to avoid fighting against their own country. This meant the Egyptians lost experienced leaders.
The Ottomans' most dangerous weapon was their fireships. These were ships filled with flammable materials, meant to be set on fire and sent into enemy fleets. The Greeks had used them very effectively against the Ottomans. The Ottomans placed fireships at the ends of their formation.
The Ottomans also had cannons on the shore at the entrance to the bay. These could have stopped the Allied ships from entering, but Codrington was confident they wouldn't fire first.
How the Fleets Lined Up
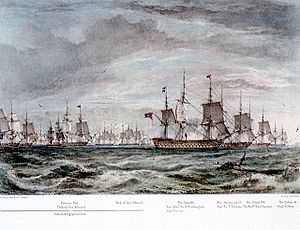
The Ottoman-Egyptian fleet was anchored in a horseshoe shape, in three lines. The biggest ships were in the front line. Smaller ships were behind them, meant to fire through the gaps and be protected. Fireships were at the ends of the horseshoe.
The Allied plan was to anchor inside the Ottoman horseshoe. Codrington's squadron would face the middle of the Ottoman line. The French and Russian squadrons would face the Ottoman left and right sides. The French were placed to face the Egyptian fleet, as they thought the Egyptians might not want to fight their French trainers. This plan was very risky because it meant the Allies could be surrounded. But the Allied commanders were very confident in their ships' power.
The Fight Begins
At 1:30 p.m. on October 20, 1827, Codrington signaled the Allied fleet to "PREPARE FOR ACTION." Crews were ready at their guns, but they were ordered to fire only if attacked. At 2:00 p.m., Allied warships, led by Codrington's Asia, began entering the bay. There was no resistance from the Ottoman shore cannons. Codrington received a message from Ibrahim Pasha, telling him to leave. Codrington refused, saying he was there to give orders, not take them. He warned that if the Ottomans fired, their fleet would be destroyed.
As Codrington's ship anchored, he ordered a band to play music to show he meant peace. By 2:15 p.m., the British ships were in place. Meanwhile, Ottoman trumpets sounded, and their crews got ready for battle.
Then, fighting broke out at the entrance to the bay. Codrington said the Ottomans started it. Here's how it happened:
Captain Thomas Fellowes on the frigate Dartmouth was watching a group of Ottoman fireships. He saw an Ottoman crew preparing a fireship and sent a boat to tell them to stop. The Ottomans fired at the boat and lit the fireship. Fellowes sent another boat to tow the fireship away, but the Ottomans fired again, hurting his men. Fellowes then fired his muskets to protect his crew. At this point, the French flagship Sirène entered the bay and fired its muskets to help Dartmouth. An Ottoman ship then attacked Sirène with its cannons. This started a chain reaction, and soon, the whole battle was on.
The battle began before all Allied ships were in position. This actually helped some Allied ships, as they could move more freely. But most ships fought while anchored. It was a close-quarters fight where ships blasted each other. The Allies won because of their stronger guns and better gunnery.
Here are some key moments:
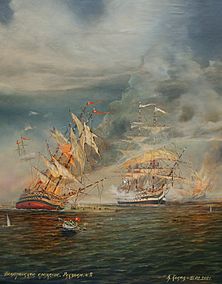
- The French ship Scipion (80 guns) was immediately attacked by Egyptian frigates, shore cannons, and a fireship. The fireship nearly destroyed Scipion, catching its sails on fire. But the crew fought the fire and kept firing their guns. Another French ship, Trident (74), helped pull the fireship away.
- Rigny's Sirène fought a long battle with the 64-gun frigate Ihsania, which eventually blew up. Sirène was badly damaged. Sirène, with help from Trident and Scipion, then attacked the Navarino fort and silenced its cannons.
- The French ship Breslaw (84) moved to help the British Albion (74) and Russian Azov (80), which were under heavy attack. Breslaw's help saved Albion from being destroyed. Breslaw then played a big part in sinking the Ottoman admiral's flagship, Ghiuh Rewan (84), and several other frigates.
- Codrington's Asia (84) was anchored between two Ottoman flagships. One Ottoman commander said he wouldn't attack, allowing Asia to focus its fire on the other Ottoman flagship, Fahti Bahri, which was quickly destroyed. When Codrington sent an interpreter to talk to the other Ottoman commander, the interpreter was shot and killed. That Ottoman ship then opened fire but was quickly destroyed by Asia and Azov. Asia itself took heavy damage from smaller Ottoman ships.
- The Russian squadron, led by Van Heiden, was in the most exposed position. The fighting there was very intense. The Azov sank or damaged three large frigates and a smaller ship, but it was hit 153 times.
- Smaller British and French ships were crucial in stopping fireship attacks. Only one fireship caused problems early on. These smaller ships showed great bravery and suffered many casualties.
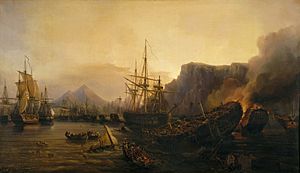
By about 4 p.m., all three Ottoman ships of the line and most of their large frigates were destroyed. The remaining smaller Ottoman ships were no match for the Allied ships. Codrington tried twice to order a ceasefire, but the smoke was too thick, or his signals were ignored. Within two hours, almost the entire Ottoman fleet was destroyed. Many Ottoman ships were sunk, or their crews set them on fire to prevent them from being captured.
This led to many Ottoman and Egyptian casualties, as men were trapped in burning or exploding ships. Some were even chained to their posts. About 3,000 Ottomans were killed, and 1,109 were wounded. Out of 78 Ottoman-Egyptian ships, only eight were still able to sail.
The Allies had 181 killed and 480 wounded. Several Allied ships were badly damaged, especially the Russian ships Azov, Gangut, and Iezekiil. The three British ships of the line had to be sent back to the United Kingdom for repairs. No Allied ship was sunk.
As the fighting stopped at dusk, news of the victory spread quickly across Greece. Church bells rang, and people celebrated for days. Huge bonfires were lit on mountains. The Greeks knew their new country was saved.
What Happened Next
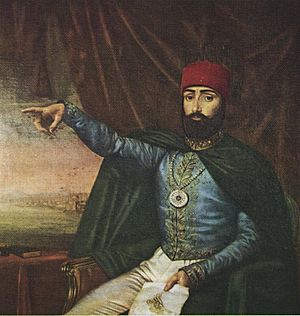
Even after the battle, the Ottoman Sultan still had about 40,000 soldiers in Greece, protected by strong forts. Greece's full freedom was not yet guaranteed.
Russia declared war on the Ottomans in April 1828, starting the Russo-Turkish War (1828–1829). A large Russian army defeated Ottoman forces and laid siege to key Ottoman forts.
In August 1828, Muhammad Ali agreed to pull his forces out of Greece. Ibrahim Pasha at first refused, but he left after French troops landed in Navarino Bay in late August. The French then cleared out the remaining Ottoman forces in Greece by the end of 1828. In the following months, Greek forces quickly took back control of central Greece.
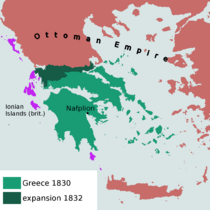
In September 1829, with the Russian army close to his palace, the Ottoman Sultan had to give in. By the Treaty of Adrianople, he accepted many Russian demands, including Greek self-rule. However, this was too late to keep Greece under Ottoman control. The Greeks, encouraged by their victories, demanded full independence. Finally, in 1830, the Allied powers agreed to Greek independence. Later, the Sultan was forced to sign the Treaty of Constantinople (1832), officially recognizing the new Kingdom of Greece as an independent country.
Remembering the Battle
There are several memorials to the battle around Navarino Bay. In the main square of Pylos, called Three Admirals' Square (Greek: Πλατεία Τριών Ναυάρχων), there is a marble monument with images of Codrington, Van Heiden, and Rigny.
Memorials for the soldiers who died from each of the three Allied countries are on islands in the bay: Helonaki islet (British), Pylos islet (French), and Sphacteria island (Russian). The Russian memorial is a small wooden chapel. There is also a memorial to Santarosa, a supporter of Greece who died in an earlier battle.
The battle is celebrated every year on October 20 in Pylos. Representatives from Russia, France, and Britain attend the ceremonies. The battle also gave its name to several ships, like the Russian corvette Navarin and the French ship of the line Navarin.
Some bronze from the sunken Ottoman ships was used to make a bell for a church in Slovenia in 1834. The bell has an inscription by a poet, saying it was made from bronze found after the Battle of Navarino.


