Military history of Australia during the Second Boer War facts for kids
The military history of Australia during the Boer War tells the story of how Australians fought in a big war in South Africa. This happened when Australia was still made up of six separate British colonies. These colonies later joined together to form the Commonwealth of Australia. Before the war, each colony had its own small army. But by the end of the war, these armies had combined to create the Australian Army.
The Second Boer War was a conflict between the British Empire and two small republics in southern Africa, called the Boer republics. It lasted from October 1899 to May 1902. To support the British Empire, colonies like Canada, New Zealand, and the six Australian colonies sent soldiers. Over 16,000 Australians officially joined the fight, making it the largest contribution from the Empire. Another 7,000 Australians joined other groups. About 60 Australian women also went to serve as nurses.
Contents
Why the War Started
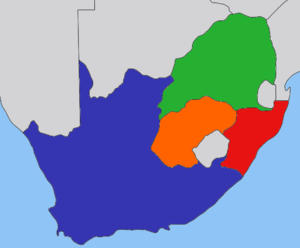
Great Britain first took control of southern Africa during the Napoleonic Wars. Before that, the Dutch East India Company had started a settlement there in 1652. This brought southern Africa into the Dutch Empire. When France took over the Netherlands in 1795, Britain saw a chance to take control of the Cape of Good Hope. This area was very important for sea routes to India and the Far East.
Britain won the Battle of Muizenberg and set up the Cape Colony. Even though it was briefly returned to the Dutch, Britain took it back permanently in 1806 after the Battle of Blaauwberg.
Many Dutch settlers in southern Africa, known as Boers, were unhappy with British rule. They moved north in what was called the Great Trek. There, they created their own republics: the South African Republic (also known as Transvaal), Natal, and the Orange Free State.
The British Empire kept expanding, which bothered the Boers. Britain took over most of Natal in 1843. Later, they even annexed the Transvaal in 1877. This led to the First Boer War in 1880. The British lost badly at the Battle of Majuba Hill and had to sign a treaty. This treaty gave the South African Republic self-government, but Britain still had some power over it.
In 1886, gold was found in the South African Republic. Many British prospectors, called uitlanders (foreigners) by the Boers, rushed in. This caused more problems with the Boers. Britain wanted to protect its citizens and gain control over the gold and diamond mines. They demanded voting rights for the uitlanders, which the Boers refused.
When talks failed, Britain sent an ultimatum. The Boer President, Paul Kruger, then gave Britain 48 hours to remove its troops. When Britain did not, the South African Republic and the Orange Free State declared war. They launched attacks into British territory.
War Begins
The Boer army was mostly made up of farmers who rode horses and used German-made Mauser rifles. These rifles were better than the British ones at the time. The Boers were also skilled horsemen, which gave them an advantage. British forces were mostly infantry (soldiers who fight on foot).
The Boers knew they couldn't win big battles against the larger British army. So, they used hit-and-run tactics, known as guerrilla warfare. They would attack quickly, then disappear, picking off soldiers and cutting off supply lines.
The war started with the Battle of Kraaipan in October 1899. Boer commandos attacked a British base and cut railway and telegraph lines. Even though the British won some early battles, the Boers continued to advance. They laid siege to British towns like Ladysmith, Mafeking, and Kimberley.
At Ladysmith, the British commander, Sir George Stuart White, tried to attack the Boer gun positions but failed. A long siege then began.
Australians Arrive
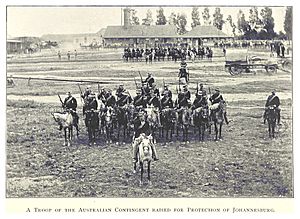
Australians joined the Second Boer War in several ways. Some were part of the official groups sent by each of the six colonies. Others were already in South Africa, working as gold miners, and joined British units. Some Australians even went on their own to fight. After Australia became a single country in 1901, the colonial groups were reorganized into new Commonwealth groups.
A few Australians were against the war and supported the Boers. We know some, like Arthur Alfred Lynch, fought on the Boer side.
Britain first asked for troops from New South Wales. The New South Wales Lancers had been training in England and were quickly sent to South Africa in November 1899. They were among the first Australians to arrive.
The Lancers were soon involved in patrols and fights. They helped in the Battle of Modder River, where they tried to help relieve the siege of Kimberley. The British won, but with many losses.
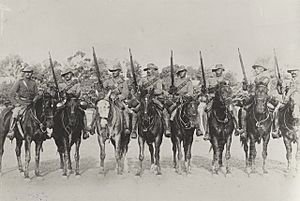
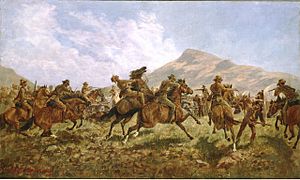
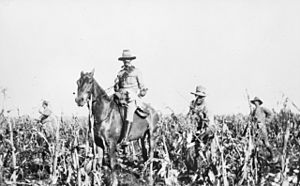
Britain valued the Australian soldiers. The climate and land in South Africa were similar to Australia. Most Australian soldiers were trained as mounted infantry (soldiers who ride horses but fight on foot). They were good at moving quickly across the open land, which the Boers also did. Many Australians came from rural areas and were skilled horsemen and bushmen, unlike many British soldiers from cities.
The Australian involvement happened in different stages. The first groups arrived in late 1899. The Western Australian group was the first to arrive directly from Australia. Other groups from South Australia, Tasmania, and Victoria arrived in November. For practical reasons, these were grouped as the '1st Australian Regiment'. The 1st Queensland Mounted Infantry and the 1st Australian Horse from New South Wales also arrived.
No Australian units were involved in "Black Week" in December 1899, when Britain suffered three big defeats.
Aboriginal Soldiers
For a long time, people thought about 50 Aboriginal trackers went to South Africa to help the British. This idea came from a few old documents. However, recent research by Peter Bakker suggests this story is a myth. He found that only a few Aboriginal men served in the war, and they were regular soldiers, not trackers.
Of the ten Aboriginal men identified by 2020, only one did not return home. These men were valued for their skills with horses, rifles, and their knowledge of the bush.
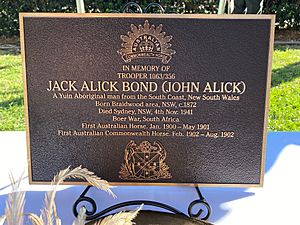
One Aboriginal man, Jack Alick Bond from New South Wales, served twice in the war. He even received his Queen's South Africa medal in person from a royal visitor in Sydney in 1901. Jack Bond had worked as a police tracker before joining the army. Other Aboriginal men who served included Robert Charles Searle, William Charles Westbury, Arthur Wellington, and William Stubbings.
British Fight Back
At the start of 1900, more Australian groups arrived in South Africa. The British had suffered more defeats, but many reinforcements were coming from Britain and the Empire. New South Wales and Victorian units arrived in February and March.
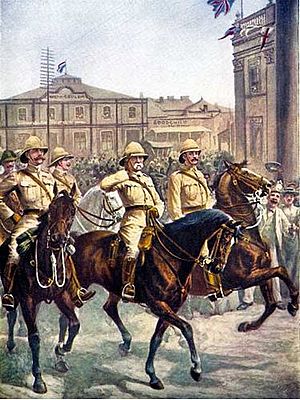
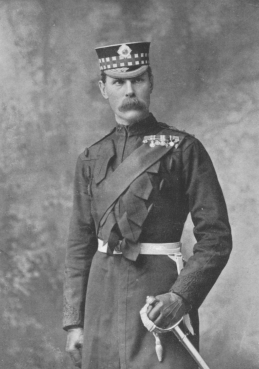
Lord Roberts took command of the British forces. He led a huge army of over 180,000 men. His plan was to push north and capture Boer cities. Along the way, they found British forces under siege at Ladysmith and Kimberley. Lord Roberts split his army to help them.
The British finally relieved Kimberley, and the Boers were chased and fought at the Battle of Paardeberg in February 1900. Australian units, including the New South Wales Mounted Rifles, took part. They even captured a Boer general, Piet Cronjé, which greatly lowered Boer spirits. The British also ended the siege of Ladysmith and entered Bloemfontein. They continued towards Pretoria.
More Australian units, called Bushmen contingents, arrived in April. These soldiers were good horsemen and shooters, similar to the Boers. They were funded by public donations or wealthy citizens. These units were also mounted infantry, skilled in bushcraft.
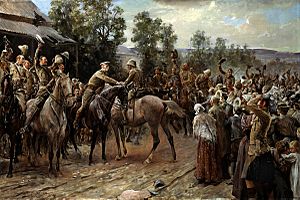
By May, over 3,000 Australians were fighting. They helped relieve Mafeking, which caused big celebrations in London. More Australian units arrived, funded by the British government, because they were so impressed with the Australians.
Many British and Empire soldiers got sick with typhoid fever. But they soon continued their campaign. Lord Roberts' forces captured Johannesburg and then Pretoria, the capital of the Transvaal Republic, in June. New South Wales Mounted Rifles were among the first into Pretoria.
Heavy fighting continued at the Battle of Diamond Hill to stop the Boers from taking Pretoria back. Australians from New South Wales and Western Australia fought in this battle.
Boer leaders retreated into eastern Transvaal. Lord Roberts wanted to capture them to end the war. The British fought a large Boer force at the Battle of Bergendal in August. This was the last big battle of the war. The Boers were defeated and scattered.
President Kruger of the Transvaal Republic escaped to Switzerland with help from the Queen of the Netherlands. With major cities under British control, Lord Roberts declared the war over in September 1900. He announced that all Boer territory was now British.
Guerrilla Fighting
Even though they lost their capitals, the Boers did not give up. They started a new phase of guerrilla warfare. Small groups of Boer commandos attacked British supply lines, ambushed units, and raided important targets.
One major attack was at Sanna's Post in March 1900. A Boer commander, Christiaan de Wet, led 2,000 commandos in an attack on Bloemfontein's water system. They also ambushed a British convoy, capturing many soldiers and supplies.
To keep fighting, the Boers needed food and supplies. In August 1900, Koos de la Rey led 3,000 Boers to attack a British post at Brakfontein on the Elands River. This post was defended by only 300 Australians and 201 Rhodesian Volunteers. The Boers offered to let the Australians go if they surrendered their supplies, but the Australian commander refused.
The Boers heavily shelled the Australian position for two days. The defenders suffered casualties but held their ground. After 11 days, the Boers gave up and left. The Australians and Rhodesians had successfully defended the outpost. The Boer commander, Koos de la Rey, said that the Australians were "more formidable opponents" and "far more dangerous than any other British troops."
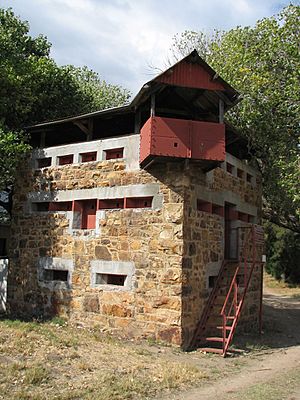
In response, the British changed their tactics. They built strong forts called blockhouses along supply lines. They also used a "scorched earth" policy, burning farms and crops. They put Boer families in concentration camps. These actions made the war very expensive and made some Australians feel sympathy for the Boers.
Australia Becomes a Nation
The Commonwealth of Australia was formed on January 1, 1901, when the six colonies joined together. This meant that defence became the responsibility of the new federal government. This led to the creation of the Department of Defence and, two months later, the Australian Army.
All the existing military units from the colonies became part of the Australian Army. For practical reasons, and to not disrupt the war, units continued to use their old uniforms and equipment. The main change was that soldiers replaced their old colonial hat badges with the new Rising Sun Badges, the symbol of the Australian Army.
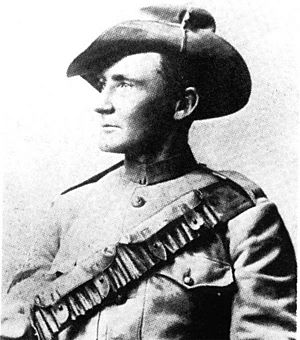
After 1901, eight Australian Commonwealth Horse battalions of the new Australian Army were sent to South Africa. However, they saw little fighting because the war was ending. Some Australians also joined local South African units after their official service ended. These units were part of the British Army. One such unit, the Bushveldt Carbineers, became well-known because Harry "Breaker" Morant and Peter Handcock served in it. Their trial and execution were very controversial at the time.
End of the War
By early 1901, British forces controlled most Boer territory. The Boers continued small raids, but their ability to fight big battles was gone. Many Boers returned to their homes, hoping for support from locals.
By mid-1901, most of the heavy fighting was over. British mounted units would ride at night to attack Boer farms or camps. For example, the New South Wales Mounted Rifles traveled almost 3,000 km in a few months, fighting in many small battles. Other Australian actions happened at Sunnyside, Slingersfontein, and Pink Hill.
By 1902, British and colonial forces focused on stopping the remaining Boers from moving around. The "scorched earth" tactics were making the Boers weak from hunger and disease. The British used "sweeper columns" of mounted soldiers to search for Boer fighters.
The British tactics worked. By March 1902, most Boer resistance had ended. The British offered peace terms, but the Boer leader Louis Botha first rejected them. However, suffering from disease and starvation, the last Boers surrendered in May.
On May 31, 1902, Boer and British officials met to discuss peace terms. They signed the Treaty of Vereeniging. The Boer republics agreed to stop fighting, give up their independence, and promise loyalty to the British Crown. In return, they received a general pardon, no death penalties, and their languages (Dutch and Afrikaans) could be used in schools and courts.
Later, in 1909, the British colonies and former Boer republics in southern Africa joined to form the Union of South Africa, a new British dominion.
What Happened Next
Australian soldiers were seen as very effective by the British. They were good at fast-moving warfare, similar to the Boers, because of their backgrounds.
However, Australians also suffered losses. For example, in June 1901, the 5th Victorian Mounted Rifles lost many men in a surprise attack. In January 1902, the 5th Queensland Imperial Bushmen also had heavy casualties at the Battle of Onverwacht.
In total, 16,175 Australians officially served in South Africa. Perhaps another 10,000 joined British units. About 251 Australians were killed in action, 267 died from disease, and 43 went missing. Another 735 were wounded. The Boer War had the third-highest number of deaths for Australians in military history, after the two World Wars.
Five Australians were awarded the Victoria Cross, the highest award for bravery. These heroes were Neville Howse, John Hutton Bisdee, Guy Wylly, Frederick William Bell, and Leslie Cecil Maygar.
Australian Units in the Boer War
KIA = Killed in action (died in battle) DFD = Died from disease
New South Wales Units
| Name | Type | Strength | Service period | Casualties | Notes |
|---|---|---|---|---|---|
| New South Wales Lancers | Cavalry | 112 (+58) | Nov 1899–Dec 1900 | 2 KIA, 3 DFD | |
| New South Wales Army Medical Corps | Medical | 86 | Dec 1899 – Dec 1900 | 2 DFD | Neville Howse won the VC |
| 'A' Squadron NSW Mounted Rifles | Mounted Infantry | 104 | Dec 1899 – Dec 1900 | 3 KIA | |
| New South Wales Mounted Infantry | Mounted Infantry | 126 | Dec 1899 – Dec 1900 | 7 KIA | |
| First Australian Horse | Cavalry | 143 | Dec 1899 – Mar 1901 | 3 KIA, 7 DFD | |
| 'A' Bty. New South Wales Artillery | Artillery | 175 (+44) | Feb 1900 – Aug 1901 | 1 KIA, 2 DFD | |
| First New South Wales Mounted Rifles | Mounted Infantry | 405 | Feb 1900 – Mar 1901 | 10 KIA, 13 DFD | |
| New South Wales Citizens' Bushmen | Mounted Infantry | 525 | Apr 1900 – Apr 1901 | 17 KIA, 13 DFD | |
| New South Wales Imperial Bushmen | Mounted Infantry | 762 | May 1900 – May 1901 | 13 KIA, 9 DFD | |
| Second New South Wales Mounted Rifles | Mounted Infantry | 1050 | Apr 1901 – Apr 1902 | 30 KIA | |
| Third New South Wales Imperial Bushmen | Mounted Infantry | 1000 | May 1901 – May 1902 | 4 KIA, 18 DFD | |
| Third New South Wales Mounted Rifles | Mounted Infantry | 1017 | Apr 1901 – April 1902 | 7 KIA, 32 DFD |
Queensland Units
| Name | Type | Strength | Service period | Casualties | Notes |
|---|---|---|---|---|---|
| 1st Queensland Mounted Infantry | Mounted Infantry | 262 | Dec 1899 – Dec 1900 | 4 KIA, 5 DFD | |
| 2nd Queensland Mounted Infantry | Mounted Infantry | 144 | Mar 1900 – Mar 1901 | 0 | |
| Queensland Citizen Bushmen | Mounted Infantry | 316 | Apr 1900 – Apr 1901 | 3 KIA, 5 DFD | |
| Queensland Imperial Bushmen | Mounted Infantry | 387 | Jun 1900 – Jun 1901 | 8 KIA, 5DFD | |
| 5th Queensland Imperial Bushmen | Mounted Infantry | 529 | Apr 1900 – Mar 1902 | 26 KIA, 4 DFD | |
| 6th Queensland Imperial Bushmen | Mounted Infantry | 404 | May 1901 – Apr 1902 | 7 KIA, 5 DFD |
South Australia Units
| Name | Type | Strength | Service period | Casualties | Notes |
|---|---|---|---|---|---|
| 1st South Australian Mounted Rifles | Mounted Infantry | 127 | Nov 1899 – Oct 1900 | 2 KIA, 3 DFD | |
| 2nd South Australian Mounted Rifles | Mounted Infantry | 119 | Mar 1900 – Mar 1901 | 0 KIA, 4 DFD | |
| South Australian Nurses | Nurses | 9 | Mar 1900 – Mar 1902 | 0 | |
| South Australian Citizens' Bushmen | Mounted Infantry | 99 | Apr 1900 – Apr 1901 | 3 KIA, 0 DFD | |
| South Australian Imperial Bushmen | Mounted Infantry | 234 | Jun 1900 – Jun 1901 | 6 KIA, 3 DFD | |
| 5th South Australian Imperial Bushmen | Mounted Infantry | 316 | Mar 1901 – Mar 1902 | 9 KIA, 10 DFD | |
| 6th South Australian Imperial Bushmen | Mounted Infantry | 136 | May 1901 – Mar 1902 | 3 KIA, 3 DFD |
Tasmania Units
| Name | Type | Strength | Service period | Casualties | Notes |
|---|---|---|---|---|---|
| Tasmanian Mounted Infantry | Mounted Infantry | 84 (+47) | Nov 1899 – Nov 1900 | 4 KIA, 5 DFD | |
| Tasmanian Citizen Bushmen | Mounted Infantry | 52 | Apr 1900 – Apr 1901 | 1 KIA, 0 DFD | |
| 1st Tasmanian Imperial Bushmen | Mounted Infantry | 122 | Jun 1900 – Jun 1901 | 4 KIA, 2 DFD | Trooper John Hutton Bisdee and Lieutenant Guy Wylly both won the VC |
| 2nd Tasmanian Imperial Bushmen | Mounted Infantry | 253 | May 1901 – May 1902 | 2 KIA, 4DFD |
Victoria Units
| Name | Type | Strength | Service period | Casualties | Notes |
|---|---|---|---|---|---|
| 1st Victorian Mounted Rifles | Mounted Infantry | 250 | Nov 1899 – Oct 1900 | 9 KIA, 7 DFD | |
| 2nd Victorian Mounted Rifles | Mounted Infantry | 265 | Feb 1900 – Dec 1900 | 2 KIA, 7 DFD | |
| Victorian Citizen Bushmen | Mounted Infantry | 251 | Apr 1900 – Apr 1901 | 8 KIA, 7 DFD | |
| Victorian Nurses | Nurses | 10 | Apr 1900 – Mar 1901 | 1 DFD | |
| Victorian Imperial Bushmen | Mounted Infantry | 631 | May 1900 – Jun 1901 | 8 KIA, 6 DFD | |
| 5th Victorian Mounted Rifles | Mounted Infantry | 1018 | Mar 1901 – Mar 1902 | 36 KIA, 13 DFD | Lt Leslie Maygar won the VC |
Western Australia Units
| Name | Type | Strength | Service period | Casualties | Notes |
|---|---|---|---|---|---|
| 1st Western Australian Mounted Infantry | Mounted Infantry | 130 | Nov 1899 – Oct 1900 | 5 KIA, 1 DFD | |
| 2nd Western Australian Mounted Infantry | Mounted Infantry | 103 | Mar – Nov 1900 | 0 | |
| Western Australian Citizen Bushmen' | Mounted Infantry | 116 | Apr 1900 – Apr 1901 | 2 KIA, 2 DFD | |
| Western Australian Nurses | Nurses | 11 | Apr 1900–1901 | 0 | |
| 4th Western Australian Mounted Infantry | Mounted Infantry | 132 | Jun 1900 – Jun 1901 | 3 KIA, 0 DFD | |
| 5th Western Australian Mounted Infantry | Mounted Infantry | 221 | Apr 1901 – Apr 1902 | 6 KIA, 3 DFD | |
| 6th Western Australian Mounted Infantry | Mounted Infantry | 228 | May 1901 – Apr 1902 | 10 KIA, 4 DFD | Lieutenant Frederick William Bell won the VC |
Commonwealth of Australia Units
| Name | Type | Strength | Service period | Casualties | Notes |
|---|---|---|---|---|---|
| 1st Australian Commonwealth Horse | Mounted Infantry | 560 | Mar–May 1902 | 0 KIA, 8 DFD | |
| 2nd Australian Commonwealth Horse | Mounted Infantry | 553 | Mar–May 1902 | 0 KIA, 1 DFD | |
| Commonwealth Army Medical Corps | Medical | 183 | Mar – May 1902 | 0 | |
| 3rd Australian Commonwealth Horse | Mounted Infantry | 615 | Apr 1902 | 0 KIA, 9 DFD | Did not see action |
| 4th Australian Commonwealth Horse | Mounted Infantry | 492 | Mar – Apr 1902 | 0 KIA, 2 DFD | Did not see action |
| 5th Australian Commonwealth Horse | Mounted Infantry | 487 | – | 0 | Arrived after war ended |
| 6th Australian Commonwealth Horse | Mounted Infantry | 489 | – | 0 KIA, 4 DFD | Arrived after war ended |
| 7th Australian Commonwealth Horse | Mounted Infantry | 490 | – | 0 KIA, 4 DFD | Arrived after war ended |
| 8th Australian Commonwealth Horse | Mounted Infantry | 485 | – | 0 KIA, 3 DFD | Arrived after war ended |
Australians also fought in other units that were not official Australian military groups:
- Australian Regiment
- Australian Mounted Infantry Brigade
- Australian Commonwealth Regiment
- Bushveldt Carbineers
- Canadian Scouts
- 3rd Bushmen Regiment
- 4th Imperial Bushmen
- Composite Bushmen Regiment
- Cameron’s Scouts
- Doyle’s Australian Scouts
- Hasler’s Scouts
Important Dates for Australians in the Boer War
| 1899 |
|
| 1900 |
|
| 1901 |
|
| 1902 |
|
See also
- Military history of Australia
- Australian Army battle honours of the Second Boer War


