Siege of Berwick (1333) facts for kids
Quick facts for kids Siege of Berwick |
|||||||||
|---|---|---|---|---|---|---|---|---|---|
| Part of the Second War of Scottish Independence | |||||||||
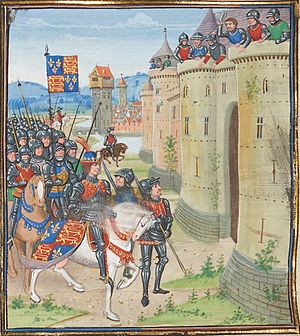 A medieval depiction of Edward III at the siege of Berwick |
|||||||||
|
|||||||||
| Belligerents | |||||||||
| Commanders and leaders | |||||||||
| Strength | |||||||||
| Up to 20,000 | Less than 10,000 | ||||||||
| Casualties and losses | |||||||||
| Unknown. Surviving garrison capitulated and were allowed to leave | Very few | ||||||||
The siege of Berwick was a four-month battle in 1333. It ended with the English army, led by King Edward III, capturing the Scottish town of Berwick-upon-Tweed. This siege was a key event in the Second War of Scottish Independence.
The year before, Edward Balliol had claimed the Scottish throne. King Edward III of England secretly supported him. Balliol was soon forced out of Scotland by a popular uprising. Edward III used this as a reason for war and invaded Scotland. His main target was Berwick, a very important border town.
An English force started the siege in March. King Edward III and his main army joined them in May. A large Scottish army then marched to help Berwick. The Scots tried to get into a good position but failed. Knowing Berwick was about to surrender, they had to attack the English. This led to the Battle of Halidon Hill on July 19. The Scots suffered a huge defeat. Berwick surrendered the very next day. Balliol was made king of Scotland again. But he had to give a large part of his land to Edward III. He also had to promise loyalty to Edward for the rest of Scotland.
Contents
Why the Siege Happened
The First War and Its End
The First War of Scottish Independence began in 1296. Edward I of England attacked and took Berwick. This started 30 years of fighting. In 1328, a peace treaty was signed. It was called the Treaty of Northampton. Many English people disliked this treaty. They called it "the cowards' peace."
Some Scottish nobles refused to support the new Scottish king, Robert the Bruce. They had lost their lands and titles. These "disinherited" nobles joined forces with Edward Balliol. Balliol was the son of a former Scottish king, John I of Scotland.
Edward Balliol's Claim
Robert the Bruce died in 1329. His heir, David II of Scotland, was only five years old. In 1331, Edward Balliol and the disinherited Scots planned to invade Scotland. King Edward III of England knew about this plan. He officially said he was against it. But secretly, he was happy for trouble to start in Scotland.
Balliol's forces sailed from England in July 1332. The Scots knew they were coming. But their leader, Thomas Randolph, 1st Earl of Moray, died just before the invasion.
Balliol's small army of 2,000 men met a much larger Scottish army. This was at the Battle of Dupplin Moor. Balliol's forces won a huge victory. Many Scottish nobles died. Balliol was crowned king of Scotland in September 1332. He quickly gave Edward III Scottish lands, including Berwick.
But Balliol had little support in Scotland. Within six months, his power collapsed. He was attacked by David II's supporters at the Battle of Annan. Balliol fled to England, asking Edward III for help.
Preparing for Battle
Berwick's Importance
Berwick is on the North Sea coast, right on the border between England and Scotland. It was a key route for trade and invasions. In the Middle Ages, it was Scotland's most successful trading town. Taxes on wool passing through Berwick were a huge source of income for the Scottish king.
Because of its wealth and location, Berwick was often attacked. It had been sold to Scotland by Richard I of England long ago. Edward I captured it in 1296. Then, Robert the Bruce took it back in 1318. King Edward II of England tried to recapture it in 1319. But he gave up when a Scottish army attacked England instead.
Building Defenses
By early 1333, Edward III openly supported Balliol. He was getting ready for war. The English Parliament discussed the situation. Edward III said he would talk to the Pope and the King of France. But England began preparing for war, claiming Scotland was planning to invade.
In Scotland, Archibald Douglas was in charge for the young King David II. He gathered weapons and supplies. He also prepared Berwick's defenses. Patrick V, Earl of March, who was in charge of Berwick Castle, spent a lot of money on its defenses. Sir Alexander Seton became the Governor of Berwick town.
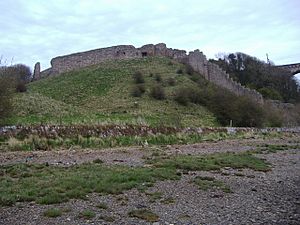
After being attacked in 1296, Berwick's old wooden walls were replaced with stone. The Scots improved these walls in 1318. The walls were about 2 miles (3.2 km) long. They were up to 40 inches (1 meter) thick and 22 feet (6.7 meters) high. Towers up to 60 feet (18 meters) tall protected them. The River Tweed protected the south-west wall. Berwick Castle was separate from the town, with its own moat. Berwick was well-defended and had plenty of supplies. It was ready for a long siege.
The Siege Begins
English Attack
Balliol and the disinherited Scottish lords crossed the border on March 10. They burned and looted as they went. They reached Berwick in late March and surrounded it by land. Edward III's navy had already cut off the town by sea. Balliol and his nobles swore they would not leave until Berwick fell.
Edward III arrived with the main English army on May 9. He left his wife, Queen Philippa, at Bamburgh Castle. Balliol had been at Berwick for six weeks. His men had dug trenches and cut off the town's water supply. They also burned the land around Berwick. This stopped supplies from reaching the town. It also helped feed the English army.
The English army included soldiers from different parts of England and Wales. Craftsmen came with the army to build siege engines. Thirty-seven masons prepared nearly 700 stone missiles. These were brought by sea from Hull. Edward III arranged for supplies to be brought by sea through Tweedmouth.
Douglas had gathered a large Scottish army north of the border. But he did not act quickly. He seemed to spend time gathering more troops. Minor raids into England were not enough to make the English leave the siege. But these raids gave Edward III a reason to invade Scotland fully.
Bombardment and Truce
When Edward III arrived, the attack on Berwick began. It was led by John Crabb. Crabb had defended Berwick from the English in 1319. He was captured by them in 1332. Now, he used his knowledge of Berwick's defenses to help England.
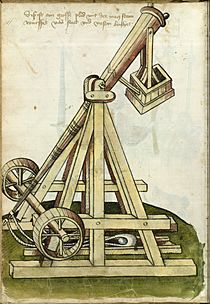
Catapults and trebuchets were used. The English also used early forms of firearms. Historians believe Berwick was likely the first town in Britain to be attacked by cannon.
In late June, the defenders tried to burn English ships. They sent burning brushwood soaked in tar into the water. But instead, much of the town caught fire. William Seton, the governor's son, died fighting an English sea attack. By the end of June, the town was ruined. The defenders were exhausted.
Sir Alexander Seton asked Edward for a short break from the fighting. He especially wanted a break from the huge stones thrown by the two English trebuchets. Edward agreed, but only if Seton promised to surrender by July 11. Seton's son, Thomas, and eleven others were taken as hostages.
The Scottish Relief Force
Douglas's Plan
Douglas now faced a difficult choice. He had to help Berwick, or it would fall. He had spent a long time gathering his army. Now, he had to use it. The English army had less than 10,000 men. The Scots outnumbered them by about two to one.
Douglas entered England on July 11, the last day of Seton's truce. He marched to Tweedmouth and destroyed it. This was done in full view of the English army. But Edward III did not move.
Sir William Keith, with Sir Alexander Gray and Sir William Prenderguest, led about 200 Scottish cavalry. They fought their way into the town. Douglas thought this meant Berwick was "relieved" according to the truce. He sent messages to Edward III, telling him to leave. He threatened to destroy England if Edward did not. Edward III dared the Scots to do their worst.
The defenders of Berwick argued that Keith's 200 horsemen counted as relief. So, they did not have to surrender. But Edward III disagreed. He said they had to be relieved directly from Scotland. Keith's men had come from the direction of England. Edward III said the truce was broken. Berwick had not surrendered or been relieved.
A gallows was built outside the town walls. Thomas Seton, the governor's son and highest-ranking hostage, was hanged. His parents watched. Edward III said that if the town did not surrender, two more hostages would be hanged each day.
A New Truce and Battle
Keith took command of the town from Seton. On July 15, he made a new truce. He promised to surrender if Berwick was not relieved by sunset on July 19. The terms were clear. Berwick would return to English rule. But its people could leave safely with their belongings. The soldiers would also get free passage.
Relief meant one of three things:
- 200 Scottish soldiers fighting their way into Berwick.
- The Scottish army forcing its way across a specific part of the River Tweed.
- The English army being defeated in a battle on Scottish soil.
After this new treaty, Keith was allowed to leave Berwick. He went to tell Douglas the terms. Then, he returned safely to Berwick.
Douglas had marched south to Bamburgh. Edward III's wife, Queen Philippa, was staying there. Douglas hoped this would make Edward III stop the siege. In 1319, Edward III's father had stopped a siege of Berwick when the Scots attacked York.
But Edward III ignored the threat to Bamburgh. The Scots did not have time to build siege equipment to take the castle. The Scots destroyed the countryside. Still, Edward III did not move. He placed his army on Halidon Hill. This was a small hill about 600 feet (180 meters) high. It was 2 miles (3.2 km) north-west of Berwick. From here, he could see the town and control the Tweed crossing. He could also attack any Scottish force trying to enter Berwick.
After hearing Keith's news, Douglas felt he had to fight. The Scottish army crossed the Tweed west of the English position. They reached Duns, 15 miles (24 km) from Berwick, on July 18. The next day, they approached Halidon Hill from the north-west. They were ready to fight on ground chosen by Edward III. Edward III had to face the Scottish army. He also had to guard against an attack from the Berwick garrison. Some reports say a large part of the English army stayed to guard Berwick.
To attack the English, the Scots had to go downhill. Then, they had to cross a marshy area. Finally, they had to climb the northern slope of Halidon Hill. The Battle of Dupplin Moor had shown how deadly English arrows were. It would have been safer to retreat. But that would mean losing Berwick.
The armies' scouts met around midday on July 19. Douglas ordered an attack. The Lanercost Chronicle reported:
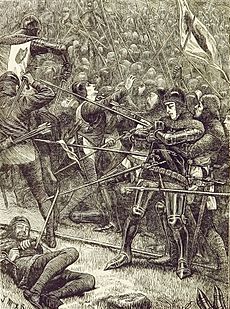
... the Scots who marched in the front were so wounded in the face and blinded by the multitude of English arrows that they could not help themselves, and soon began to turn their faces away from the blows of the arrows and fall.
Many Scots died. The lower part of the hill was covered with dead and wounded. The survivors kept moving up the hill. Arrows flew "as thick as motes in a sun beam." Then, they met the English spears.
The Scottish army broke apart. Camp followers ran away with the horses. English knights chased the fleeing Scots. Thousands of Scots died, including Douglas and five earls. Scots who surrendered were killed on Edward's orders. Some drowned trying to escape into the sea. English casualties were very low, with only 7 to 14 reported deaths. About a hundred Scottish prisoners were beheaded the next morning, July 20.
This was the day Berwick's second truce ended. The town and castle surrendered under the agreed terms.
What Happened Next
After Berwick surrendered, Edward III made Henry Percy its new leader. Sir Thomas Grey was his deputy. Edward III then left for the south.
On June 19, 1334, Balliol officially promised loyalty to Edward for Scotland. He also formally gave England eight counties in south-east Scotland. Balliol ruled a smaller Scottish kingdom from Perth. He tried to stop the remaining resistance. Seton, the former governor of Berwick, also promised loyalty to Balliol.
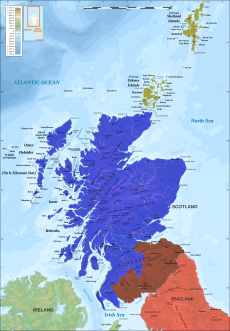
Balliol was removed from power again in 1334. He was restored in 1335. But he was finally removed in 1336 by those loyal to David II. Berwick remained under English control until 1461. Then, Henry VI of England gave it back to the Scots. However, Berwick remained a disputed area for many years. It was finally captured by Richard III of England for England in 1482.
Learn More


