British cavalry during the First World War facts for kids
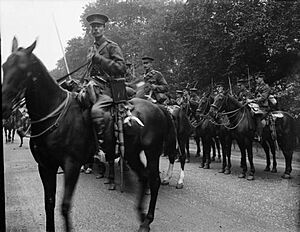
The British cavalry were among the first British Army units to fight in World War I. Imagine, Captain Hornby of the 4th (Royal Irish) Dragoon Guards is said to have been the first British soldier to kill a German soldier, using his sword! And Corporal Edward Thomas from the same group fired the first British shot early on August 22, 1914, near Casteau, Belgium.
The first big fight for British soldiers in Western Europe since the Battle of Waterloo (99 years earlier!) was the Battle of Mons. In the first year of the war in France, nine cavalry brigades were created for three British cavalry divisions. Other groups served in six brigades of two British Indian Army cavalry divisions. These divisions fought on the Western Front. Three regiments also fought in the Mesopotamia campaign. This was the only other place where British cavalry served in World War I.
The British cavalry learned a lot from their experiences in the Second Boer War about 15 years earlier. Back then, one commander preferred using unofficial groups over professional cavalry. Because of this, cavalry tactics changed. They focused on fighting on foot with rifles and using machine guns and artillery for cover. This helped support their charges.
Many cavalry officers held important leadership roles in the British Army during the war. Both officers who led the British Expeditionary Force on the Western Front were cavalrymen. The first leader of the British Cavalry Division later led the Egyptian Expeditionary Force in the Palestine Campaign. Another cavalryman became the main leader of the entire army. On the Western Front, five out of ten officers who commanded the five British armies were from the cavalry. Ten more led large groups called corps, and 27 were in charge of divisions.
Eight cavalrymen earned the Victoria Cross, Britain's highest award for bravery. Three of these awards were given in the very first month of the war. Almost all 32 British regular army cavalry regiments fought in the war, either on the Western Front or in Mesopotamia. Over 5,600 cavalrymen died, including several high-ranking officers.
Why Cavalry Changed: The Boer War Lessons
Traditionally, cavalry had several jobs in war. They would scout ahead to find out where the enemy was, how strong they were, and what they were doing. They also stopped the enemy from getting the same information. Other jobs included raiding enemy lands to damage their supplies and economy, while trying to avoid big fights. In battle, cavalry were expected to charge and break up enemy foot soldiers or other cavalry. Being part of a cavalry charge was very prestigious. Officers would try to join one whenever they could. For example, Winston Churchill joined a charge during the Battle of Omdurman.
Since 1880, British cavalrymen only had short rifles called carbines and swords. Some also carried a lance. It wasn't until 1903 that cavalry got the same rifles as the rest of the army. A shorter version of the standard rifle, the "Lee-Enfield Cavalry Carbine Mark I," was introduced in 1896.
Before World War I, the usual cavalry group in the British Army was a brigade. But a larger division had been formed twice before. The second time was during the Second Boer War (1899–1901) in South Africa. This was the last major conflict for the British Army before World War I.
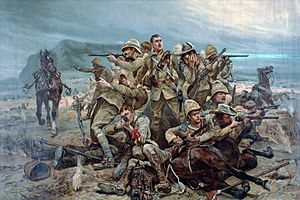
During the Boer War, about 7,000 mounted soldiers, not the 5,000 regular cavalry, led the way in developing new tactics. These mounted groups were better armed and more effective. This was because they were trained to use the right weapons and tactics for that war. The regular cavalry regiments were thought to be so unsuited that General Redvers Henry Buller left his six cavalry regiments behind. He trusted the unofficial mounted forces to do patrols instead.
The Boer fighters taught the British Army important lessons. In one fight, 150 Boers held off a British cavalry division, even with artillery support. At another battle, 74 men stopped the entire British Army. Their tactics were so good that they forced the British cavalry to leave their swords and lances behind for a while. They had to focus on shooting their rifles. This showed the British Army how valuable a full-sized rifle was compared to a carbine. Soon, cavalry began practicing fighting on foot and spreading out.
Their change in tactics was clear during the charge at Klip Drift. While trying to help the siege of Kimberley, the cavalry used their horses and rifles to get behind the Boers. They didn't use swords or lances. This charge was later called "an ideal cavalry operation, but not a cavalry charge as the term is generally understood." It was the last time a full British cavalry division made a mounted charge.
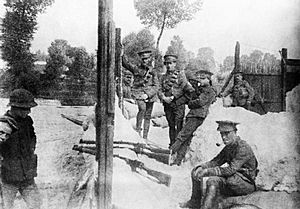
After the Boer War, some important people, like Lord Roberts and Sir Arthur Conan Doyle, even suggested getting rid of the cavalry. Between 1900 and 1903, the cavalry's share of the army budget was cut. Recruiting for cavalry was stopped for a year. In 1903, Lord Roberts appointed Robert Baden-Powell as Inspector General of Cavalry. Baden-Powell quickly suggested a new plan. Instead of charging an enemy, cavalry should get off their horses and fight with rifles.
For cavalry to survive, British cavalry tactics had to change. The focus was now on fighting on foot with rifles. Cavalry charges were supported by covering fire from their own machine guns and Royal Horse Artillery (RHA) guns. To help with this change, cavalrymen now had to practice with their rifles or swords for two hours a day. This made them as good as infantry soldiers with rifles. In 1908, one regiment, the 14th Hussars, had 354 expert shooters!
These changes helped shape the cavalry's role in the British Expeditionary Force (BEF). The BEF had one cavalry division with two brigades of horse artillery. All were trained for mounted charges but also carried rifles. This was something no other major power did. Cavalry regiments had Maxim Machine Guns, which were replaced by Vickers Machine Guns from 1912. The fact that cavalrymen carried entrenching tools on their packhorses showed how much their tactics had changed since the Boer Wars.
How Cavalry Was Organized
In 1914, before World War I began, there were just over 15,000 cavalrymen in 31 British Army cavalry regiments. This included three Household Cavalry regiments and 28 regular cavalry regiments. These regular regiments were made up of different types: seven dragoon guards, three dragoon, 12 hussar, and six lancer regiments. In the British Army, "cavalry" only referred to these regular army units. Other mounted groups, like the 55 yeomanry regiments, were part of the reserve force.
About 6,000 cavalrymen were serving overseas in places like British India, South Africa, and Egypt. The 12 regiments in Great Britain were put into four cavalry brigades, with three regiments per brigade. These were meant to be part of the cavalry division for the BEF. After war was declared in August 1914, the cavalry joined the BEF in France. A fifth independent cavalry brigade was also formed from three regiments that were in England. British cavalry brigades were larger than French and German ones, which only had two regiments.
To help scout for the six infantry divisions, two regiments, the 15th Hussars and the 19th Hussars, were split up. One small group (a squadron) was sent to each infantry division. Also in August 1914, a 32nd regiment, the Household Cavalry Composite Regiment, was formed. It was made up of three squadrons from each of the Household Cavalry regiments. This group didn't last long; it was disbanded on November 11, 1914, and its soldiers went back to their original regiments.
Early in the war, 24 reserve cavalry regiments were created to train new recruits. Only four of them actually fought: the 6th, 8th, 9th, and 10th Reserve Cavalry Regiments. They all saw action during the 1916 Easter Rising in Dublin. The 6th Reserve Cavalry Regiment was the largest unit available to the Dublin commander at the time.
Important Cavalry Leaders
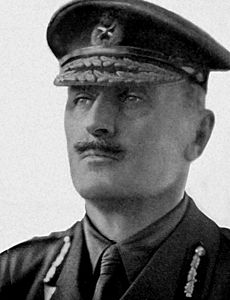
Cavalry officers held many top positions in the British Army. Five out of the ten officers who commanded the five armies on the Western Front were cavalrymen. The two main commanders of the BEF during World War I, John French and Douglas Haig, both came from cavalry regiments. William Robertson, from the 3rd Dragoon Guards, started as a regular soldier and rose to become a field marshal. He was a key staff officer for the BEF before becoming the overall army chief in December 1915.
Edmund Allenby, from the 6th (Inniskilling) Dragoons, began the war leading the Cavalry Division. He went on to command larger groups like the Cavalry Corps, then armies, and finally the Egyptian Expeditionary Force. He was replaced as commander of the Third Army by Julian Byng, from the 10th Hussars. Hubert Gough of the 16th Lancers started as a brigade commander and later led the Fifth Army. Many other cavalry officers commanded corps and divisions throughout the war.
Cavalry Divisions and Brigades
The original cavalry division had a headquarters of 96 people. It also included 6,872 cavalrymen in four brigades, 1,682 artillerymen with guns, engineers, and medical teams. In total, it had 9,269 men, 9,518 horses, and many vehicles and guns. It was a big force when mounted. But when they had to fight on foot, a cavalry division was only as strong as two weaker infantry brigades. It had fewer artillery guns than an infantry division. However, it had more artillery than cavalry divisions from other countries.
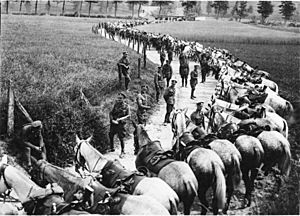
By September 1914, the original cavalry division was called the 1st Cavalry Division. Soon, the 2nd Cavalry Division and the 3rd Cavalry Division were formed. By the end of 1914, six more British cavalry regiments from India arrived in France. They served in two cavalry divisions that were part of the British Indian Army. These were later renumbered as the 4th and 5th Cavalry Divisions. To avoid confusion, these Indian brigades were often known by their names, like the Mhow Cavalry Brigade. The three British and two Indian cavalry divisions were then grouped under the British Cavalry Corps and the Indian Cavalry Corps.
By the end of 1915, British cavalry regiments sometimes had to fight on foot in the front lines. So, a plan was made for a "Dismounted Cavalry Division." Each of the three British cavalry divisions formed a dismounted cavalry brigade. These brigades then formed dismounted cavalry battalions. Each cavalry regiment formed one dismounted company and a machine gun group for their battalion. However, this dismounted division was smaller than an infantry division.
Another division with British cavalry regiments was formed in 1916. This was the Imperial Cavalry Division, which fought in the Mesopotamia Campaign. Like all Indian divisions, it had one British regiment per brigade.
By April 1915, the British Army had nine cavalry brigades in three cavalry divisions. A cavalry brigade headquarters had officers and men, controlling three cavalry regiments, a battery of six guns, and a signals group. When fighting on foot, one in four men had to hold the horses. So, a brigade's rifle power was only equal to one infantry battalion. By this time, only three British cavalry regiments were not on the Western Front. They stayed in India for security duties. When two of these regiments left for Mesopotamia in 1915, only one, the 21st Lancers, remained. However, they did fight on the North West Frontier and earned one of the eight Victoria Crosses awarded to British cavalrymen during the war.
In March 1916, the two cavalry corps were disbanded. The five divisions were then assigned to the five British armies. A small corps staff was kept in case a new corps was needed, which happened later that year. At the same time, Hubert Gough was put in charge of training cavalry divisions. The cavalry divisions went through training, reorganization, and got new equipment. A big change was that the regiments' machine guns were taken away and put into new "brigade machine gun squadrons." Each of these squadrons had 12 groups, and each group had two machine guns. The division also received a Light Armoured Car Battery with six Rolls-Royce Armoured Cars. The training included how to cross trench systems, fight enemies in trenches, and use machine guns and bayonets.
The Cavalry Regiment
In 1914, a British cavalry regiment had 26 officers and 523 other soldiers. The main leader was a lieutenant colonel, with a major as the second in command. Other officers handled things like administration, supplies, signals, and medical care. The other soldiers included warrant officers, non-commissioned officers, skilled workers, trumpeters, and privates. Regiments in India were slightly larger.
About 48 men were part of the regimental headquarters. Another 27 men, armed with two Vickers Machine Guns, were in the machine gun section. In 1909, it was suggested that each regiment should have six machine guns, but this was turned down because of money. The remaining 474 men were in the regiment's three squadrons, with four troops per squadron. Each squadron had about 158 men, led by a major and a captain. Each troop had one officer and about 30 other soldiers. Regiments in India had four squadrons.
To care for the horses, the regiment had a veterinary officer, a farrier (who shod horses), and saddlers. Each squadron had two saddlers, and each troop had a shoeing smith. The regiment had 528 riding horses, 74 draft horses, six pack horses, and many carts and bicycles.
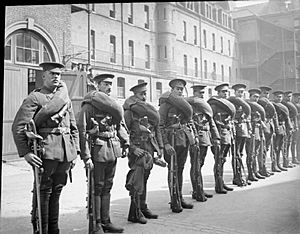
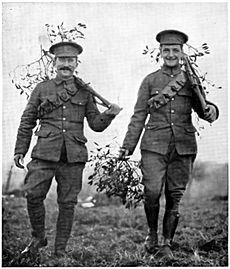
British cavalry used a 1908 pattern sword. Lancers also had a 9.1-foot lance with a steel head. Cavalrymen were also armed with Lee–Enfield rifles. This was different from French and German cavalry, who only had shorter-range carbines. As the war went on, cavalrymen received brodie helmets, hand grenades, trench mortars, and Hotchkiss light machine guns. Replacing the Vickers Guns with the Hotchkiss, with one per troop, greatly increased the cavalry's shooting power. Like the infantry, cavalrymen wore khaki uniforms and service dress caps. Instead of infantry webbing, they carried their ammunition in a bandolier.
Other countries' cavalry looked very different. French cuirassiers looked like they belonged in the Napoleonic Wars, still wearing blue and red uniforms with metal chest plates and plumed helmets. German cavalry also had distinct uniforms, like the Polish-style helmets of the uhlans or the frogged jackets of the hussars.
Cavalry Losses
Even though the trench warfare on the Western Front was mostly fought by artillery and infantry, the cavalry still suffered. They had 5,674 soldiers killed and 14,630 other casualties. To compare, one infantry regiment, the Northumberland Fusiliers, had 16,000 casualties. Unlike the huge losses in infantry, only 10 cavalry regiments lost more than 200 soldiers. The 3rd Dragoon Guards had the most killed, with 333 dead. The 7th Hussars had 80 dead, and the 21st Lancers, which stayed in India, had 81 dead. The dead included one major general and 11 brigadier generals. Only 28 of the 1,161 lieutenant colonels killed in the war were from the cavalry. Some of these had taken command of infantry battalions.
After the War: Changes to Cavalry
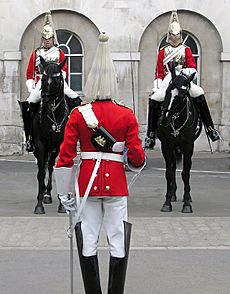
The British Army tried to learn from World War I and change its tactics. In the 1920s and 1930s, the army tried to create a small, modern, professional army that used machines. This led to the Experimental Mechanized Force. The army also became smaller, and several famous cavalry regiments were combined. For example, the 1st and 2nd Life Guards became the Life Guards. Sixteen other cavalry regiments were combined into eight new ones.
Even though British cavalry became very mechanized by 1939, there was still a 1st Cavalry Division that fought in the Syria–Lebanon Campaign during World War II. Eventually, all cavalry regiments became mechanized and joined the Household Cavalry and the Royal Armoured Corps. Today, only one regiment, the Household Cavalry Mounted Regiment, still uses horses. This regiment was formed from the Life Guards and the Blues and Royals.
British Cavalry Units in World War I
| Regiment | Brigade | Division | Notes |
|---|---|---|---|
| 1st Life Guards | 7th Cavalry Brigade | 3rd Cavalry Division | |
| 2nd Life Guards | 7th Cavalry Brigade | 3rd Cavalry Division | |
| Royal Horse Guards | 7th Cavalry Brigade 8th Cavalry Brigade |
3rd Cavalry Division | |
| Household Cavalry Composite Regiment | 4th Cavalry Brigade | 2nd Cavalry Division | |
| 1st (King's) Dragoon Guards | 8th (Lucknow) Cavalry Brigade | 1st Indian Cavalry Division | |
| 2nd Dragoon Guards (Queen's Bays) | 1st Cavalry Brigade | 1st Cavalry Division | |
| 3rd (Prince Of Wales's) Dragoon Guards | 6th Cavalry Brigade | 3rd Cavalry Division | |
| 4th (Royal Irish) Dragoon Guards | 2nd Cavalry Brigade | 1st Cavalry Division | |
| 5th (Princess Charlotte of Wales's) Dragoon Guards | 1st Cavalry Brigade | 1st Cavalry Division | |
| 6th Dragoon Guards (Carabiniers) | 4th Cavalry Brigade | 2nd Cavalry Division | |
| 7th (Princess Royal's) Dragoon Guards | 9th (Secunderabad) Cavalry Brigade 7th Cavalry Brigade |
2nd Indian Cavalry Division 3rd Cavalry Division |
|
| 1st (Royal) Dragoons | 6th Cavalry Brigade | 3rd Cavalry Division | |
| 2nd Dragoons (Royal Scots Greys) | 5th Cavalry Brigade | 2nd Cavalry Division | |
| 3rd (King's Own) Hussars | 4th Cavalry Brigade | 2nd Cavalry Division | |
| 4th (Queen's Own) Hussars | 3rd Cavalry Brigade | 2nd Cavalry Division | |
| 5th (Royal Irish) Lancers | 3rd Cavalry Brigade | 2nd Cavalry Division | |
| 6th (Inniskilling) Dragoons | 5th (Mhow) Cavalry Brigade 7th Cavalry Brigade |
1st Indian Cavalry Division 2nd Indian Cavalry Division 3rd Cavalry Division |
|
| 7th (Queen's Own) Hussars | 11th Indian Cavalry Brigade | Mesopotamia Cavalry Division | |
| 8th (King's Royal Irish) Hussars | 3rd (Ambala) Cavalry Brigade 9th Cavalry Brigade |
2nd Indian Cavalry Division 1st Cavalry Division |
|
| 9th (Queen's Royal) Lancers | 2nd Cavalry Brigade | 1st Cavalry Division | |
| 10th (Prince Of Wales's Own Royal) Hussars | 6th Cavalry Brigade 8th Cavalry Brigade |
3rd Cavalry Division | |
| 11th (Prince Albert's Own) Hussars | 1st Cavalry Brigade | 1st Cavalry Division | |
| 12th (Prince Of Wales's Royal) Lancers | 5th Cavalry Brigade | 2nd Cavalry Division | |
| 13th Hussars | 7th (Meerut) Cavalry Brigade | 2nd Indian Cavalry Division Mesopotamia Cavalry Division |
|
| 14th (King's) Hussars | 6th Indian Cavalry Brigade | 6th (Poona) Division Mesopotamia Cavalry Division |
|
| 15th (The King's) Hussars | 9th Cavalry Brigade | 1st Cavalry Division | |
| 16th (Queen's) Lancers | 3rd Cavalry Brigade | 2nd Cavalry Division | |
| 17th (Duke Of Cambridge's Own) Lancers | 2nd (Sialkot) Cavalry Brigade 7th Cavalry Brigade |
1st Indian Cavalry Division 3rd Cavalry Division |
|
| 18th (Queen Mary's Own) Hussars | 2nd Cavalry Brigade | 1st Cavalry Division | |
| 19th (Queen Alexandra's Own Royal) Hussars | 9th Cavalry Brigade | 1st Cavalry Division | |
| 20th Hussars | 5th Cavalry Brigade | 2nd Cavalry Division | |
| 21st (Empress of India's) Lancers | 1st (Risalpur) Cavalry Brigade | 1st (Peshawar) Division |
- Other units that served with British cavalry brigades, divisions, and corps during the war
| Regiment — Battery | Brigade | Division | Notes |
|---|---|---|---|
| 1/1st Queen's Own Oxfordshire Hussars | 2nd Cavalry Brigade 4th Cavalry Brigade |
1st Cavalry Division 2nd Cavalry Division |
|
| 1/1st North Somerset Yeomanry | 6th Cavalry Brigade | 3rd Cavalry Division | |
| 1/1st Leicestershire Yeomanry | 7th Cavalry Brigade | 3rd Cavalry Division | |
| 1/1st Essex Yeomanry | 8th Cavalry Brigade | 3rd Cavalry Division | |
| 1/1st Bedfordshire Yeomanry | 9th Cavalry Brigade | 1st Cavalry Division | |
| 2nd Lancers (Gardner's Horse) | 5th (Mhow) Cavalry Brigade | 2nd Indian Cavalry Division 5th Cavalry Division |
|
| 3rd Skinner's Horse | 7th (Meerut) Cavalry Brigade | 2nd Indian Cavalry Division 5th Cavalry Division |
|
| 6th King Edward's Own Cavalry | 2nd (Sialkot) Cavalry Brigade | 1st Indian Cavalry Division 4th Cavalry Division |
|
| 9th Hodson's Horse | 3rd (Ambala) Cavalry Brigade | 1st Indian Cavalry Division 4th Cavalry Division |
|
| 18th King George's Own Lancers | 7th (Meerut) Cavalry Brigade | 2nd Indian Cavalry Division 5th Cavalry Division |
|
| 19th Lancers (Fane's Horse) | 2nd (Sialkot) Cavalry Brigade | 1st Indian Cavalry Division 4th Cavalry Division |
|
| 20th Deccan Horse | 9th (Secunderabad) Cavalry Brigade | 2nd Indian Cavalry Division 5th Cavalry Division |
|
| 29th Lancers (Deccan Horse) | 8th (Lucknow) Cavalry Brigade | 1st Indian Cavalry Division 4th Cavalry Division |
|
| 30th Lancers (Gordon's Horse) | 3rd (Ambala) Cavalry Brigade | 1st Indian Cavalry Division 4th Cavalry Division |
|
| 34th Prince Albert Victor's Own Poona Horse | 9th (Secunderabad) Cavalry Brigade | 2nd Indian Cavalry Division 5th Cavalry Division |
|
| 36th Jacob's Horse | 8th (Lucknow) Cavalry Brigade | 1st Indian Cavalry Division 4th Cavalry Division |
|
| 38th King George's Own Central India Horse | 5th (Mhow) Cavalry Brigade | 2nd Indian Cavalry Division 5th Cavalry Division |
|
| Royal Canadian Dragoons | Canadian Cavalry Brigade | 5th Cavalry Division | |
| Lord Strathcona's Horse | Canadian Cavalry Brigade | 5th Cavalry Division | |
| Fort Garry Horse | Canadian Cavalry Brigade | 5th Cavalry Division | |
| A Battery Royal Horse Artillery | 3rd (Ambala) Cavalry Brigade I Indian Brigade, Royal Horse Artillery |
1st Indian Cavalry Division 4th Cavalry Division |
|
| C Battery Royal Horse Artillery | IV Brigade, Royal Horse Artillery | 3rd Cavalry Division | |
| D Battery Royal Horse Artillery | 3rd Cavalry Brigade III Brigade, Royal Horse Artillery |
1st Cavalry Division 2nd Cavalry Division |
|
| E Battery Royal Horse Artillery | 5th Cavalry Brigade III Brigade, Royal Horse Artillery |
1st Cavalry Division 2nd Cavalry Division |
|
| G Battery Royal Horse Artillery | IV Brigade, Royal Horse Artillery | 3rd Cavalry Division | |
| H Battery Royal Horse Artillery | 2nd Cavalry Brigade VII Brigade, Royal Horse Artillery |
1st Cavalry Division 4th Cavalry Division |
|
| I Battery Royal Horse Artillery | VII Brigade, Royal Horse Artillery | 1st Cavalry Division | |
| J Battery Royal Horse Artillery | 4th Cavalry Brigade III Brigade, Royal Horse Artillery |
1st Cavalry Division | |
| K Battery Royal Horse Artillery | IV Brigade, Royal Horse Artillery | 3rd Cavalry Division | |
| L Battery Royal Horse Artillery | 1st Cavalry Brigade | 1st Cavalry Division | |
| N Battery Royal Horse Artillery | 9th (Secunderabad) Cavalry Brigade II Indian Brigade, Royal Horse Artillery |
2nd Indian Cavalry Division 5th Cavalry Division |
|
| Q Battery Royal Horse Artillery | 2nd (Sialkot) Cavalry Brigade I Indian Brigade, Royal Horse Artillery |
1st Indian Cavalry Division 4th Cavalry Division |
|
| U Battery Royal Horse Artillery | 8th (Lucknow) Cavalry Brigade I Indian Brigade, Royal Horse Artillery |
1st Indian Cavalry Division 4th Cavalry Division |
|
| V Battery Royal Horse Artillery | 7th (Meerut) Cavalry Brigade II Indian Brigade, Royal Horse Artillery |
2nd Indian Cavalry Division 5th Cavalry Division |
|
| X Battery Royal Horse Artillery | II Indian Brigade, Royal Horse Artillery | 2nd Indian Cavalry Division 5th Cavalry Division |
|
| Y Battery Royal Horse Artillery | 5th (Mhow) Cavalry Brigade | 2nd Indian Cavalry Division 5th Cavalry Division |
|
| 1/1st Warwickshire Battery Royal Horse Artillery | 9th Cavalry Brigade | 1st Cavalry Division | |
| Royal Canadian Horse Artillery | Canadian Cavalry Brigade | 2nd Indian Cavalry Division 5th Cavalry Division |
See also
- British yeomanry during the First World War
- Second line yeomanry regiments of the British Army
- British First World War cavalry generals


