Battles of Narvik facts for kids
The Battles of Narvik were important fights during World War II. They happened from April 9 to June 8, 1940, in and around the town of Narvik in northern Norway. Narvik was key because it had an ice-free harbor. This harbor was used to ship iron ore from Kiruna in Sweden. Both sides, the Allies and Germany, wanted this iron. It was vital for making weapons and war machines.
The battles involved two main parts:
- Naval battles in the Ofotfjord (the water leading to Narvik). These were between the British Royal Navy and the German Kriegsmarine (navy).
- Land battles in the mountains around Narvik. Here, soldiers from Norway, France, the UK, and Poland fought against German mountain troops, German sailors whose ships were sunk, and German paratroopers.
Even though the Germans lost at sea and were pushed back on land, they eventually won control of Narvik. This happened because the Allies had to leave Norway in June 1940. They needed their troops elsewhere, especially for the Battle of France.
Before the German invasion, British forces thought about landing at Narvik. They wanted to help Finland in the Winter War. This plan also aimed to control the Swedish iron mines. It could also open the Baltic Sea for the Allies.
Contents
German Invasion of Norway
Quick facts for kids Naval battle preceding the first naval battle of Narvik |
|||||||
|---|---|---|---|---|---|---|---|
| Part of the Second World War | |||||||
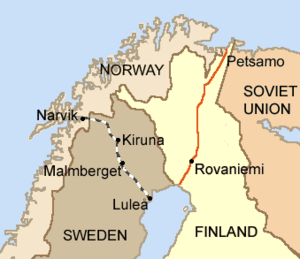 Lapland 1940 Iron ore dug at Kiruna and Malmberget, was railed to Luleå and Narvik (borders 1920–1940). |
|||||||
|
|||||||
| Belligerents | |||||||
| Commanders and leaders | |||||||
| Strength | |||||||
| 2 coastal defence ships | 10 destroyers | ||||||
| Casualties and losses | |||||||
| 2 coastal defence ships sunk 343 dead |
One cargo ship scuttled (no fatalities) | ||||||
On March 1, 1940, Adolf Hitler ordered the invasion of Norway. This plan was called Operation Weserübung. It was meant to stop a planned British and French takeover of Norway. Most of the German navy, the Kriegsmarine, was involved. German ships were divided into five groups. Each group was to capture a main Norwegian port.
Group I left Bremerhaven on April 6. It had 10 German destroyers. These ships carried about 200 soldiers each. In total, 1,900 mountain troops were on board. These troops were from the 3rd Mountain Division. General Eduard Dietl led them. Two large German warships, Scharnhorst and Gneisenau, escorted the destroyers for part of the way.
German Ships Arrive
In the early morning of April 9, the German destroyers reached the Ofotfjorden. This fjord leads to Narvik. It was foggy and snowing heavily. In the fjord, they captured three Norwegian patrol boats. One boat, Kelt, managed to send a warning message. It alerted the Norwegian commander about the incoming ships.
Some German destroyers landed their soldiers. They aimed to capture a Norwegian supply base. Other ships landed troops to attack nearby forts. But these forts did not exist. One destroyer, Diether von Roeder, stayed in the fjord. Its job was to make sure Germany controlled the sea. Another ship, Erich Giese, was delayed by engine problems.
Norwegian Defense
Narvik's main defense came from two old Norwegian ships. These were the coastal defense ships Eidsvold and her sister ship Norge. After being warned, both ships got ready for battle. Their guns were loaded, and crews put on life preservers. Around 4:15 AM, the Germans saw Eidsvold. Eidsvold signaled the lead German destroyer. When the Germans did not reply, a warning shot was fired.
The Germans had orders to take Norway peacefully if possible. So, the German flagship Wilhelm Heidkamp stopped. It signaled that an officer would come to talk. A small boat took a German officer, Gerlach, to Eidsvold. Gerlach tried to convince Captain Odd Isaachsen Willoch to surrender. He said the Germans came as friends. Willoch asked for time to talk to his commander, Captain Per Askim on Norge. The Germans refused. But Willoch's radio officer had already told Askim what was happening. Askim's order was clear: Willoch and Eidsvold were to open fire. Willoch replied, "I am attacking."
The German destroyer Wilhelm Heidkamp was now very close to Eidsvold. It aimed its torpedo launchers at the Norwegian ship. Gerlach tried one last time to get Willoch to surrender. Willoch refused. As Gerlach left Eidsvold, he fired a red flare. This meant the Norwegians would fight. Captain Willoch shouted, "Man the guns. We're going to fight, boys!" Eidsvold turned towards the German destroyer. It sped up, getting even closer. But before its guns could fire, the Germans launched four torpedoes. Two torpedoes hit Eidsvold. The ship's ammunition exploded, and Eidsvold broke in half. It sank in minutes. 175 Norwegian sailors died in the freezing water. Only eight survived.
Deeper in the fjord, Norge heard the explosions. But nothing could be seen until two German destroyers appeared. Captain Per Askim of Norge ordered his crew to fire at 4:45 AM. They fired their large guns and smaller guns at the German destroyer Bernd von Arnim. The range was about 800 meters. But because of the bad weather, their aiming was off. The shots either fell short or went over the target.
The German destroyers waited until they were right next to the pier. Then they fired back. Bernd von Armin used its guns and machine guns. But the weather also made it hard for the Germans. The destroyer also fired three sets of torpedoes. The first two missed. But the last set hit Norge in the middle. Norge sank in less than a minute. 90 crew members were saved, but 101 died. The sinking of Norge ended Norwegian resistance in the port.
Narvik Falls
Most Norwegian soldiers in Narvik woke up to gunfire. They were not ready for the German attack. Many were surrounded and disarmed as they tried to get to their defense spots. Colonel Konrad Sundlo, the commander of the Narvik area, is often blamed for the quick surrender. He quickly left the area after the naval battle. He then started talking with the Germans. After Narvik was lost, Norwegian General Carl Gustav Fleischer sent a message. It said that Colonel Sundlo had started talks for a ceasefire. He also pulled his troops back. The Germans then took the city.
After the war, Sundlo was accused of treason for surrendering Narvik. But these charges were dropped. Instead, he was found guilty of not preparing Narvik's defense well enough. He was also found guilty of working with the Germans during the occupation.
Ships in the Harbor
On the morning of the German attack, many ships were in Narvik harbor. There were four Norwegian cargo ships. There were also four neutral ships from the Netherlands and Sweden. The British had five cargo ships in the harbor. The Germans had 11 merchant ships there. One German ship, the Jan Wellem, was a former whale factory ship. It was supposed to refuel the German warships. Another German tanker, Kattegat, was sunk by a Norwegian ship on April 9. A third tanker, Skagerrak, was sunk by a British ship on April 14.
The German destroyers were very low on fuel. Only Jan Wellem made it to Narvik. Refueling was slow and difficult. Only two destroyers could refuel at a time, taking seven or eight hours. By 4:00 AM on April 10, Jan Wellem had refueled three destroyers. It was working on two more.
Meanwhile, British forces had tried to fight the German navy. On April 8, the British destroyer HMS Glowworm fought the German cruiser Admiral Hipper. Glowworm was lost, but it rammed and damaged Hipper. On the morning of April 9, the British warship HMS Renown exchanged fire with the German battleships Scharnhorst and Gneisenau. These German ships were protecting the destroyers. Renown damaged Gneisenau's fire control system. Renown was also hit twice but only slightly damaged. The German battleships then left quickly. The German destroyers had completed their main job: landing the invasion force.
| First naval battle of Narvik | |||||||
|---|---|---|---|---|---|---|---|
| Part of the Second World War | |||||||
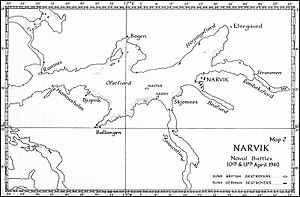 A map of the Narvik area |
|||||||
|
|||||||
| Belligerents | |||||||
| Commanders and leaders | |||||||
| Strength | |||||||
| 5 destroyers | 10 destroyers | ||||||
| Casualties and losses | |||||||
| 2 destroyers sunk 1 destroyer heavily damaged |
2 destroyers sunk 1 ammunition supply ship sunk 6 cargo ships sunk 4 destroyers damaged 163 casualties |
||||||
The day after the German invasion, the British Royal Navy saw a chance to defeat the German navy. Five British destroyers, led by Commodore Bernard Warburton-Lee, entered the fjord early in the morning. The German destroyers Hermann Künne and Hans Lüdemann were refueling when the British attacked at 4:30 AM. The German guard ship, Diether von Roeder, had left its post to refuel.
British Surprise Attack
The British ships surprised the Germans at the harbor entrance. They sank two German destroyers, Wilhelm Heidkamp and Anton Schmitt. Commodore Bonte, the German commander, was killed on Wilhelm Heidkamp. The British also badly damaged Diether von Roeder and lightly damaged two other German ships. They also fired at German troops on shore. But the British ships did not have soldiers to land, so they turned to leave. Before leaving, HMS Hostile fired torpedoes at the merchant ships in the harbor. In total, eleven merchant ships were sunk during this British attack.
German Counter-Attack
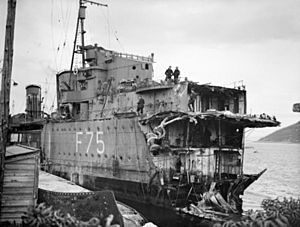
As the British ships left, three more German destroyers appeared. They were led by Commander Erich Bey. Then two more German destroyers joined the fight. In the battle that followed, two British destroyers were lost. HMS Hardy, the lead ship, was beached and caught fire. HMS Hunter was hit by a torpedo and sank. A third ship, HMS Hotspur, was also badly damaged. Hotspur and the other British destroyers left the battle. They damaged Georg Thiele as they went.
The German destroyers were low on fuel and ammunition. They did not chase the British ships. The British ships then sank a German ammunition supply ship, Rauenfels, as they left the fjord. Soon, British reinforcements blocked the German naval forces. These included the cruiser HMS Penelope. During the night of April 11–12, two German destroyers, Erich Koellner and Wolfgang Zenker, ran aground in Narvik harbor. Wolfgang Zenker damaged its propellers. Erich Koellner was badly damaged. The Germans planned to use it as a fixed defense battery.
As the British destroyers left the Vestfjorden, two German submarines fired torpedoes at them. But the German torpedoes had problems. They either did not explode or exploded too early.
Both the German commander, Commodore Friedrich Bonte, and the British commander, Captain Bernard Warburton-Lee, were killed in this battle. Warburton-Lee received a special medal, the Victoria Cross, after his death.
| Second naval battle of Narvik | |||||||
|---|---|---|---|---|---|---|---|
| Part of the Second World War | |||||||
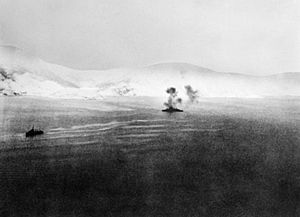 Warspite engaging shore batteries during the Second Battle of Narvik. |
|||||||
|
|||||||
| Belligerents | |||||||
| Commanders and leaders | |||||||
| Strength | |||||||
| 1 battleship 9 destroyers 1 aircraft carrier a small number of aircraft |
8 destroyers 2 U-boats |
||||||
| Casualties and losses | |||||||
| 3 destroyers damaged 28 killed 55 wounded |
8 destroyers sunk or scuttled 1 U-boat sunk 128 killed 67 wounded |
||||||
The Royal Navy felt it was very important to defeat the Germans at Narvik. So, Vice Admiral William Whitworth was sent with the battleship HMS Warspite. He also had nine destroyers and planes from the aircraft carrier HMS Furious. These forces arrived in the Ofotfjord on April 13. They found the eight remaining German destroyers almost stuck. They had very little fuel and ammunition.
U-boat Sunk
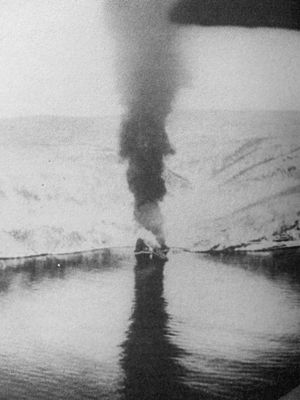
Before the battle, Warspite launched its special plane, a Fairey Swordfish. This plane bombed and sank a German U-boat, U-64. The U-boat was anchored in the Herjangsfjord. Most of the crew survived and were rescued by German mountain troops. This was the first time a U-boat was sunk by a plane launched from a battleship.
Battle in the Fjord
In the battle that followed, three German destroyers were sunk by Warspite and its escort ships. The other five German destroyers were sunk by their own crews. This happened when they ran out of fuel and ammunition. First, Erich Koellner tried to surprise the Allied forces. But Warspite's plane spotted it. Then, British destroyers and the battleship attacked it with torpedoes and shells. The commander of Erich Koellner and his surviving crew were captured by Norwegian forces.
Then, four more German destroyers fought the British ships. They only lightly damaged HMS Bedouin. British planes from Furious tried to attack the German destroyers but failed. Two British planes were lost. One German destroyer, Wolfgang Zenker, tried to torpedo Warspite.
Finally, when the German destroyers had little ammunition left, they retreated. Except for Hermann Künne, which did not get the order. HMS Eskimo chased Hermann Künne. Hermann Künne was not hit by shells. But it was sunk by its own crew in the Herjangsfjord. The crew tried to sink it with depth charges. Eskimo then launched a torpedo that hit Hermann Künne, setting it on fire. It is not clear if the German depth charges or the British torpedo caused the final explosion.
Eskimo was then ambushed by two other German destroyers. Eskimo lost its front part but survived. Two German destroyers, Diether von Roeder and Erich Giese, had engine problems. They fired at the British ships while still docked. They damaged HMS Punjabi and HMS Cossack. But both were sunk before they could do more harm. This was the last German counter-attack.
Shore defenses were also badly damaged by Warspite's guns. On the Allied side, HMS Eskimo was damaged. It stayed in Norway until May 31, 1940. German submarines again had torpedo problems. Two U-boats fired at the departing Warspite on April 14, but their torpedoes failed.
The remaining German destroyers retreated into Rombaksfjord. They were sunk by their crews soon after. The only German ship that survived in the port area was the submarine U-51.
The Germans lost over 1,000 men, one U-boat, and eight destroyers. With losses from the first battle, this was half of Germany's destroyer fleet.
German reports said that British artillery and machine guns fired at German sailors from Erich Giese who were in the water.
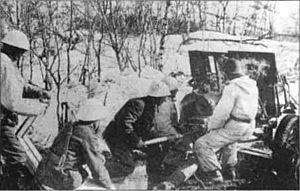
About 2,600 German survivors formed a new infantry unit. They were called the Gebirgsmarine. They fought with the German mountain troops in the land battle. These sailors were not used to fighting in mountains. But they used two large anti-aircraft guns and 11 smaller anti-aircraft guns. These guns were saved from the sunken ships. They also used rifles and machine guns captured from a Norwegian army base.
After the naval battles, Narvik and its area stayed in German hands. No Allied ground forces were available to land there yet. Naval operations then mostly involved ships firing at targets on shore. Narvik was not the main goal for the Allies at this point.
Polish destroyers also took part in these operations. One Polish ship, Grom, was sunk by German aircraft on May 4, 1940. 59 sailors were lost.
Land Battle
| Battle of Narvik | |||||||
|---|---|---|---|---|---|---|---|
| Part of the Second World War | |||||||
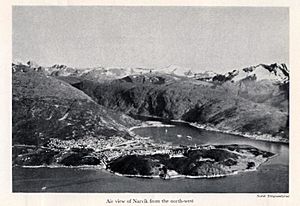 Narvik during the Second World War |
|||||||
|
|||||||
| Belligerents | |||||||
| Commanders and leaders | |||||||
| Strength | |||||||
Two battalions of 13th Demi-Brigade of the Foreign Legion 342e CACC (15 Hotchkiss H35 tanks) Total: 24,500 men |
|
||||||
During the Norwegian Campaign, Narvik and its area saw a lot of fighting. It started on April 9 between Germans and Norwegians. Later, Allied and German forces fought. The Norwegian 6th Division and an Allied group were involved until June 9, 1940. Unlike southern Norway, the Allied troops in Narvik eventually outnumbered the Norwegians. Soldiers from five countries fought here. From May 5–10, the fighting in Narvik was the only active land war in World War II.
Forces Involved
At first, the German commander, Eduard Dietl, was in a tough spot. His 2,000 troops were outnumbered. But after the German destroyers were sunk, about 2,600 German sailors joined the land battle. Another 290 German specialists came through Sweden, pretending to be health workers. In the last few weeks, the Germans also got about 1,000 paratroopers. This brought the total German forces to around 5,600.
The Norwegian force, led by General Carl Gustav Fleischer, grew to 8,000–10,000 men. The total number of Allied troops in and around Narvik reached 24,500 men.
Early Challenges
The German invasion started with the advantage of surprise. Norwegian troops in northern Norway had been training for neutrality. But from April 9–25, the Norwegians faced three big problems. First, the commander protecting Narvik refused to fight the Germans. Second, about 200 Norwegian soldiers blocking the railway to Sweden were surprised and captured. Third, a Norwegian battalion sent to hold Gratangsbotn was attacked in camp. They suffered many losses and were effectively out of the fight.
German paratroopers were sent by sea from Denmark to Oslo. They fought with the German army. They advanced north to take the port of Bodø. This was to help the mountain troops at Narvik.
Because of Norwegian pressure and supply problems, the Germans left Gratangsbotn. They pulled back from the hill Lapphaugen and the valley Gratangsdalen. This was after the Battle of Gratangen. In early May, the Norwegians started moving south towards Narvik. When it was clear the Allies would attack Narvik in mid-May, the Norwegians changed direction. They moved towards Bjørnfjell.
The British arrived first and set up their headquarters in Harstad on April 14. In the next few days, three battalions were placed in different areas. Later, they were placed south of Ofotfjord.
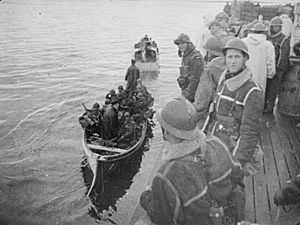
On April 28, a French force joined the British. This force, led by General Antoine Béthouart, included mountain troops. Three battalions of French Alpine troops and two battalions of the French Foreign Legion were sent. They were placed both north and south of the Ofotfjord. Later, the north became the main French area of operation. Four Polish battalions arrived on May 9. They were first north of the Ofotfjord. Later, they moved to the area south of the fjord. In early June, they formed the Polish Independent Highland Brigade.
The Allies had trouble deciding how to retake Narvik. There was no single commander for all the Allied troops. The Norwegians and Allies had separate commanders. Cooperation was not always smooth. Even within the British forces, the Army and Navy commanders had problems working together. Lord Cork wanted a quick attack from the sea. Major-General Mackesy wanted a careful attack from both sides of the Ofotfjord. Because of this, on April 21, Lord Cork was given overall command of all Allied forces.
In the second week of May, the Norwegian advances against the Germans were the most important movements. French alpine troops also moved up the Laberg valley, helped by Norwegian ski troops. In the south, the Allies did not have much success. In the north of the Ofotfjord, they made no progress. The Norwegians continued their successful mountain fighting. In mid-May, the Allies took the lead and won important victories. Both Paris and London were getting impatient with the slow progress at Narvik. The French commander, Béthouart, pushed for more action.
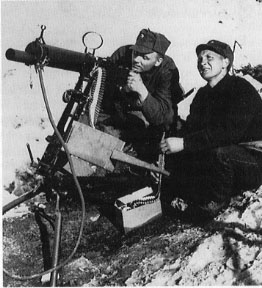
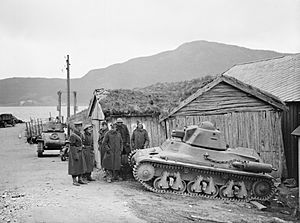
The careful approach on land was stopped. An amphibious attack was launched around midnight on May 12. This attack was aimed at Bjerkvik. British warships in Herjangsfjord fired shells first. Then, landing craft brought French Foreign Legionnaires ashore. They were supported by five French Hotchkiss H39 light tanks. They successfully attacked Bjerkvik and the Elvegårdsmoen army camp. They advanced northeast and south. The plan also included Polish troops moving towards Bjerkvik from land. But difficult terrain delayed them. They did not arrive before Bjerkvik was taken. French and Norwegian troops were also supposed to advance from the north. But problems between their commanders left a gap. The Germans escaped through this gap. Despite this, the Allies had a clear path north of Narvik. They planned to attack across Rombaksfjord.
It was thought in London that a larger command center would be needed for the growing number of troops. On May 11, Lieutenant-General Claude Auchinleck arrived in Narvik. On May 13, he took command of all Allied land and air forces. These forces were called the North-Western Expeditionary Force. The Allies knew that keeping Narvik would depend on holding Bodø to the south. Bodø was on the German advance route from Trondheim. So, Auchinleck moved all British troops to focus on Bodø. He appointed French Brigadier-General Béthouart to command the French and Polish troops. These troops would work with Norwegian forces in the Narvik area.
The attack was delayed again while the Allies waited for air support from Bardufoss. At 11:40 PM on May 27, British ships started firing from the north. Two French and one Norwegian battalions were transported across the Rombaksfjord. They would advance on Narvik from the north. In the south, the Polish battalions would move towards Ankenes and inner Beisfjord. The landing boats could carry 290 men. These troops could not get reinforcements for 45 minutes. These first troops got a foothold by the time the rest of the French and Norwegians landed. The French moved west towards the city and east along the railway. The Norwegians moved towards Taraldsvik mountain and then down towards the city. The German commander decided to leave before 7:00 AM. He retreated along Beisfjord. This was the first major Allied victory on land.
Operation Alphabet: Allied Withdrawal
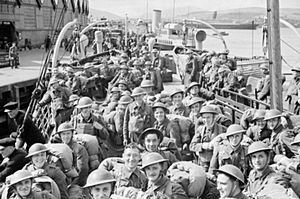
It seemed like the Germans would have to surrender soon. They were pushed from the north by Norwegians, from the west by French, and from the southwest by Poles. It looked like Bjørnfjell would be the Germans' last stand. But events elsewhere in Europe saved them. London had secretly decided to leave Norway on May 24. This became clear in the following days. On the night of May 24/25, Lord Cork received orders to retreat. But they had to do it secretly so the Germans would not interfere. The Allied commanders agreed that an attack on Narvik would hide the retreat. It would also allow them to destroy the iron ore harbor.
The Norwegian government and commanders were told in early June. They were shocked and upset. The Norwegians still hoped to defeat the Germans alone. As late as June 5, one Norwegian brigade was ordered to attack. The Norwegian government also thought about creating a neutral, but free, Northern Norway. This plan did not work. On June 7, the King and government were evacuated to Britain. All Allied troops left Narvik between June 4 and 8.
Three Polish passenger ships helped with the evacuation. One ship, Chrobry, was sunk by German bombers on May 14–15. On June 8, General Dietl retook Narvik. On June 10, the last Norwegian forces in Norway surrendered.
On June 7, the British aircraft carrier HMS Glorious took on board 10 Gloster Gladiators and eight Hawker Hurricanes from the Royal Air Force (RAF). These planes were flown from land bases to save them from being destroyed during the evacuation. Glorious left a larger group of ships to travel alone. The next day, while sailing back to Scapa Flow, the carrier and its escort destroyers were attacked. The German battlecruisers Scharnhorst and Gneisenau intercepted them. The carrier and its escorts were sunk. More than 1,500 men were lost. Scharnhorst was badly damaged by a torpedo from HMS Acasta. Both German ships were also hit by several shells. The damage to the German ships was enough to make them retreat to Trondheim. This allowed the rest of the Allied evacuation ships to pass safely later that day.
Aftermath of the Battles
The British had plans to land in Narvik before the German invasion. Troops and supplies were loaded onto ships. But they were quickly unloaded when German ships were seen. The British thought the German ships were trying to escape into the Atlantic. This confusion affected the troops for weeks. Men and equipment were sent to Norway separately. Orders changed while ships were on their way. The Allies were confused by the many fjords and bays. They could not decide where to start. British, French, and Polish units often replaced each other. This added to the lack of local knowledge.
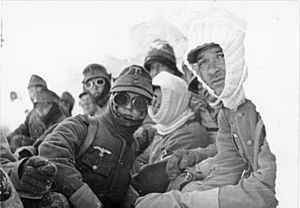
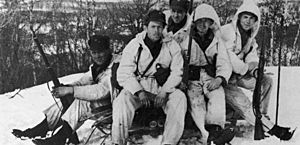
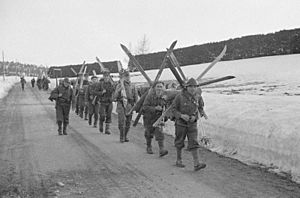
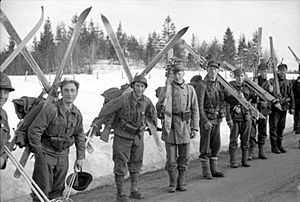
The cold and snow were a common enemy for all troops. Most of the Allies were not ready for it. Only the Norwegians had skis and knew how to use them. The British tried skis, but their troops were untrained. Supplies were also scarce. German sailors faced the same problems. Even among the German mountain troops and French mountain specialists, few units had skis. The Polish mountain brigade had no mountain training.
Most troops had not fought in battle before. The German mountain troops had fought in Poland. Some paratroopers had fought in the Netherlands. Some French Foreign Legionnaires came from fighting in North Africa. Most Polish officers and many soldiers had fought in Poland. Some had even fought in the Spanish Civil War. They were very motivated.
The Allies had control of the sea and air until the very end. But they did not use this advantage fully. The Germans lost the naval battle. But they achieved their main goal: successfully invading and occupying Norway. Around Narvik, German naval losses were high. They lost 10 destroyers, which was half of their entire destroyer force. They also lost one submarine and several support ships. In return, they sank one aircraft carrier and four Allied destroyers. They also damaged several others.
The German destroyers were designed with not enough fuel and ammunition storage. This made it impossible for them to retreat quickly. The British forces won a clear naval victory locally. But they were not ready to follow it up with a land operation. This allowed the Germans to strengthen their hold in Norway. It made the later Allied counter-invasion harder.
After the War
In 1964, a war museum opened in Narvik. Since 2016, the collections have been shown in the Narvik War Museum. It is located inside the Narvik War and Peace Centre.
Parts of the German destroyer Georg Thiele can still be seen above the water in Rombaksbotn. The shipwrecks at Narvik are popular diving spots. But some areas are off-limits because they still have unexploded ammunition. Three German destroyers were raised in 1964. They were moved to clear the shipping lane. The destroyers Anton Schmitt, Diether von Roeder, and Wilhelm Heidkamp rest in 12 meters of water there. They are open for diving. Other wrecks are also available. But most are protected as historic sites, and diving to them is not allowed.
Medals and Awards
At least 1,200 French, British, and Polish soldiers received the Norwegian War Cross. This was for their part in the battle. Among Norwegians who fought, only the top two military leaders received this medal. Norwegian media has complained about this limited award.
All German forces (8,577 military personnel) who fought in the Battles of Narvik received the Narvik Shield.
See also
- List of Norwegian military equipment of World War II
- List of British military equipment of World War II
- List of French military equipment of World War II
- List of German military equipment of World War II


